本篇文章给大家介绍一下使用workerman实现即时聊天的方法。有一定的参考价值,有需要的朋友可以参考一下,希望对大家有所帮助。 相关推荐:《workerman教程》 开发文档:http://doc2.wo
相关推荐:《workerman教程》
开发文档:http://doc2.workerman.net/
下载服务器端安装文件:

有windows版和linux版两个版本,我下载的linux版,在windows上也可以运行。
打开后有这些文件:
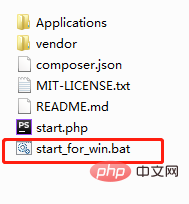
把这个文件放在服务器上或者项目中都可以,需要运行的就是最后一个start_for_win.bat文件。

运行成功。
修改start_gateway.php文件:
<?php
/**
 * This file is part of workerman.
 *
 * Licensed under The MIT License
 * For full copyright and license information, please see the MIT-LICENSE.txt
 * Redistributions of files must retain the above copyright notice.
 *
 * @author walkor<walkor@workerman.net>
 * @copyright walkor<walkor@workerman.net>
 * @link http://www.workerman.net/
 * @license http://www.opensource.org/licenses/mit-license.php MIT License
 */
use \Workerman\Worker;
use \Workerman\WebServer;
use \GatewayWorker\Gateway;
use \GatewayWorker\BusinessWorker;
use \Workerman\Autoloader;

// 自动加载类
require_once __DIR__ . '/../../vendor/autoload.php';

// gateway 进程,这里使用Text协议,可以用telnet测试
$gateway = new Gateway("websocket://0.0.0.0:8282");
// gateway名称,status方便查看
$gateway->name = 'YourAppGateway';
// gateway进程数
$gateway->count = 4;
// 本机ip,分布式部署时使用内网ip
$gateway->lanIp = '127.0.0.1';
// 内部通讯起始端口,假如$gateway->count=4,起始端口为4000
// 则一般会使用4000 4001 4002 4003 4个端口作为内部通讯端口
$gateway->startPort = 2900;
// 服务注册地址
$gateway->registerAddress = '127.0.0.1:1238';

// 心跳间隔
$gateway->pingInterval = 60;
// 心跳数据
$gateway->pingData = '{"type":"ping"}';

/*
// 当客户端连接上来时,设置连接的onWebSocketConnect,即在websocket握手时的回调
$gateway->onConnect = function($connection)
{
    $connection->onWebSocketConnect = function($connection , $http_header)
    {
        // 可以在这里判断连接来源是否合法,不合法就关掉连接
        // $_SERVER['HTTP_ORIGIN']标识来自哪个站点的页面发起的websocket链接
        if($_SERVER['HTTP_ORIGIN'] != 'http://kedou.workerman.net')
        {
            $connection->close();
        }
        // onWebSocketConnect 里面$_GET $_SERVER是可用的
        // var_dump($_GET, $_SERVER);
    };
};
*/

// 如果不是在根目录启动,则运行runAll方法
if(!defined('GLOBAL_START'))
{
    Worker::runAll();
}
第24行,把tcp协议改为websocket协议;
第38行和40行,设置服务器向客户端发送的心跳时间,检测客户端是否连接,未连接将会断开。
下面的内容都是默认注释掉的,根据自己的需要打开或者修改。
再次运行start_for_win.bat文件:
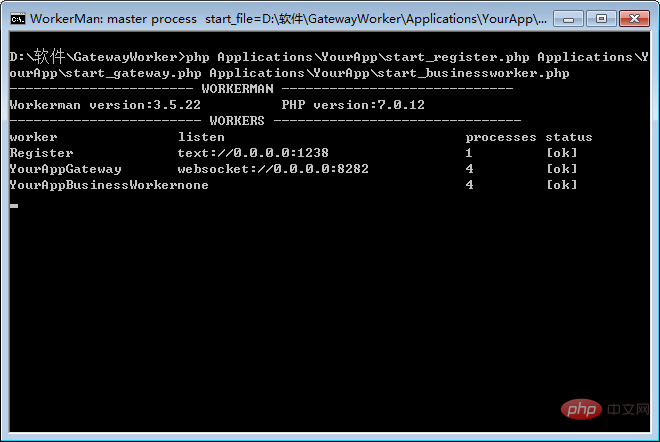
协议就变为websocket协议了,现在就可以做项目内的操作了。
还需要再下载一个文件:https://github.com/walkor/GatewayClient
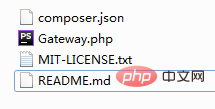
把这几个文件放进thinkphp的extend文件夹下(我用的是thinkphp5.0版本):
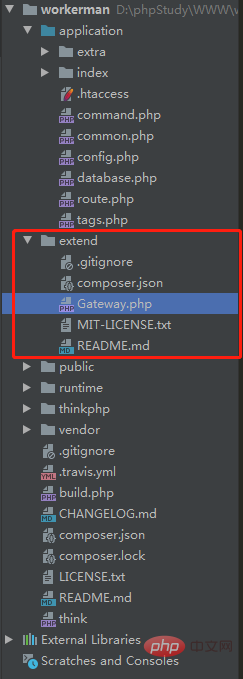
在Gateway.php的文件中方法几乎都写好了。
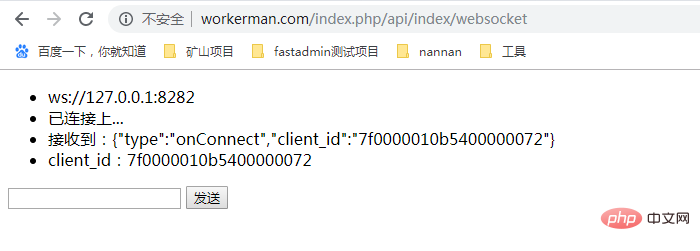
写了一个简单的前端页面:
<!DOCTYPE html>
<html>
    <head>
        <meta charset="UTF-8">
        <meta name="viewport" content="width=device-width, initial-scale=1.0">
        <meta http-equiv="X-UA-Compatible" content="ie=edge">
        <title></title>
    </head>
    <body>
        <ul id="msgUl">
            <li>ws://127.0.0.1:8282</li>
        </ul>
        <input type="" name="" id="sendValue" value="" />
        <button type="button" id="sendButton">发送</button>

        <div style="margin-top: 100px">
            {volist name="msg" id="vo" empty="这里没有数据" key ='s'}
                    <br/>
                <span>{$vo.user_name}:</span>
                <span>{$vo.msg}</span>
                <span>{$vo.createtime}</span>
                    <br/>
              {/volist}
        </div>

        <script src="http://www.zhihuapinpai.com/static/index/js/jquery-1.11.3.min.js"></script>
        <script>
            // var ws = new WebSocket("ws://123.56.216.232:8282");
            var ws = new WebSocket("ws://127.0.0.1:8282");

            ws.onopen = function() {
                $('#msgUl').append('<li>已连接上...</li>')
                sendValue();
            };

            ws.onmessage = function(evt) {
                $('#msgUl').append('<li>接收到:' + evt.data + '</li>')
                var obj = JSON.parse(evt.data);
                if (obj.type == 'onConnect') {
                    // 连接成功
                    $('#msgUl').append('<li>client_id:' + obj.client_id + '</li>')
                    $.ajax({
                        type:"POST",
                        url:"/index.php/api/Index/user_bind",
                        data:{
                            client_id:obj.client_id
                        },
                        dataType: "html",
                        success: function(data){
                            console.log('成功')
                        }
                    });
                } else if (obj.type == 'ping') {
                    // 心跳检测 不做任何处理
                } else if (obj.type == 'chatGroup') {
                    // 群组聊天
                    $('#msgUl').append('<li>接收到:' + evt.data + '</li>')
                }
            };

            ws.onclose = function() {
                // console.log('连接已关闭...');
                $('#msgUl').append('<li>连接已关闭...</li>')
            };

            function sendValue() {
                $('#sendButton').click(function() {
                    var thisValue = $('#sendValue').val();
                    if (thisValue) {
                        ws.send(thisValue);
                        $('#msgUl').append('<li>发送数据:' + thisValue + '</li>')
                        $.get("/index.php/api/Index/send_msg/msg/"+thisValue,function (data,status) {
                            console.log('成功:'+thisValue)
                        });
                    }
                })
            }
        </script>
    </body>
</html>
第42—52行把client_id传到后台,与用户表中用户进行绑定。
后台代码:
<?php
namespace app\api\controller;
use think\Controller;
use GatewayClient\Gateway;
use think\Db;


class Index extends Controller
{

    public function websocket(){
        $where=[];
        $user_id=1;
        $where['from_id|to_id']=$user_id;
        $msg=Db::name('msg')->where($where)->select();
        foreach ($msg as $key=>$val){
            $msg[$key]['createtime']=date('Y-m-d H:i:s',$val['createtime']);
            $msg[$key]['user_name']=Db::name('user')->where(['id'=>$val['from_id']])->value('name');
        }
        $this->assign('msg',$msg);
        return view();
    }

    //绑定用户
    public function user_bind($user_id=1){
        //$user_id=1; //发送人用户id
        $client_id = input('post.client_id');
//        $user=Db::name('user')->where(['id'=>$user_id])->find();
        Gateway::bindUid($client_id, 1);
        return $client_id;
    }

    //发送信息
    public function send_msg(){
        $msg=input('msg');
        if($msg){
            $data=[
              'msg'=>$msg,
              'from_id'=>1,
              'to_id'=>2,
              'createtime'=>time()
            ];
            Db::name('msg')->insert($data);
            Gateway::sendToUid(1,$msg);
            Gateway::sendToUid(2,$msg);
        }
        return 'success';
    }

}
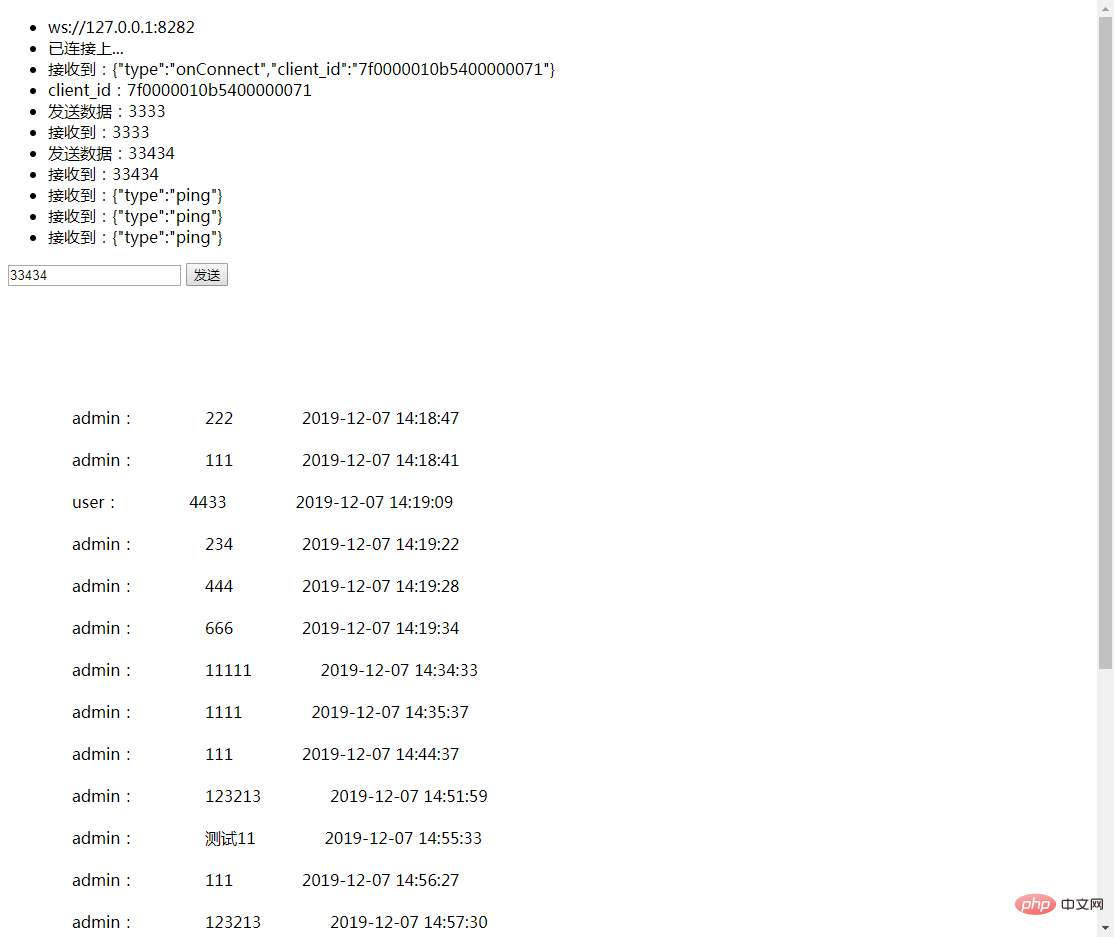
发送消息存入数据库,页面显示即可。
更多计算机编程相关知识,请访问:编程视频!!
以上就是谈谈利用workerman实现即时聊天功能的方法的详细内容,更多请关注自由互联其它相关文章!
