使用antd table中显示一张图片,代码如下: const columns = [ { title: "姓名", dataIndex: "name", width: 100 , // table列定宽 可不设 fixed: "left" // 固定列的位置 }, { title: "联系电话", width: 150, dataIndex:
使用antd table中显示一张图片,代码如下:
const columns = [ {
 title: "姓名",
 dataIndex: "name",
 width: 100 , // table列定宽 可不设
  fixed: "left" // 固定列的位置
 },
 {
 title: "联系电话",
 width: 150,
 dataIndex: "phone"
 },
 {
 title:"显示一张图片",
 width:150,
 dataIndex:"img",
 render:(text)=> <img src={text}/>
 },
 {
 title:"显示多张图片",
 width:400,
 dataIndex:"imgs",
 render: text => {
 // text是后端传的多个url,需要逗号分隔再显示图片
  if (text) {
  return (
   <div style={{ display: "flex" }}>
   {text.split(",").map((items, index) => {
    return (
    <div
     key={index}
     className="common-img-list"
     style={{
     width: "100px",
     height: "100px",
     marginLeft: "4px",
     overflow: "hidden"
     }}
    >
     <img
     style={{ width: "100%" }}
     src={items}
     onClick={() => {
      InitImageViwer(); // 点击放大图片
     }}
     />
    </div>
    );
   })}
   </div>
  );
  }
 },
]

// 点击放大图片预览
function InitImageViwer(
 box = 'common-img-list', // 注意class不要忘记了
 option = {},
 callBack
) {
 setTimeout(() => {
 const viewList = []
 const el = document.querySelectorAll(`.${box}`)
 if (el.length) {
  el.forEach((z, x) => {
  viewList[x] = new ImageViewer(z, option)
  })
  callBack && callBack(viewList)
 }
 }, 1000)
}

// table 使用 scroll 表格滚动
<Table columns={columns} scroll={{ x: 1500, y: 500 }} />
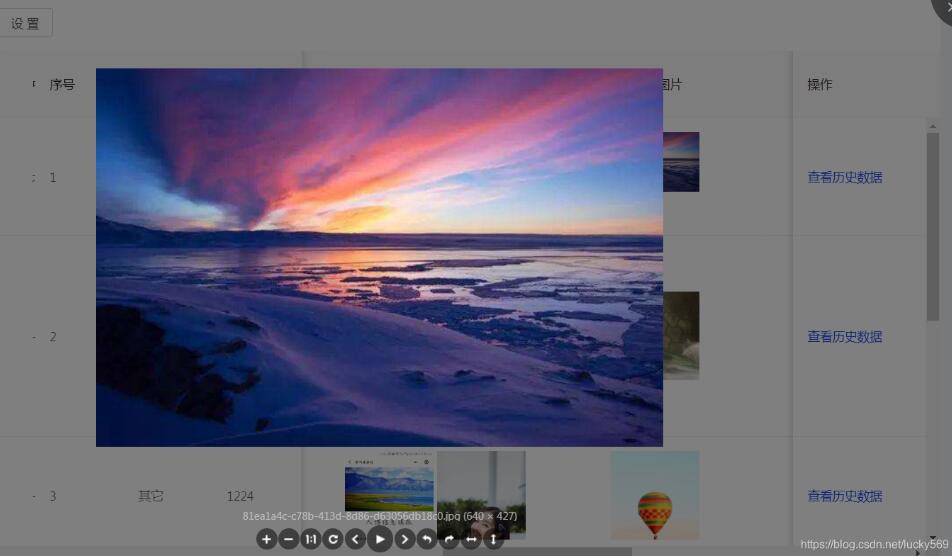
实现效果图:

点击图片放大预览效果:

补充知识:React中antd框架下upload多个图片简单上传
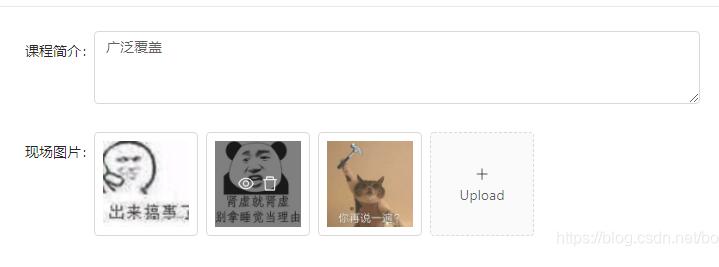
antd的上传组件也是挺好康的,预览、删除也特别方便。适合表单上传。
查询资料多个上传处理 不明确,我就在下面name为file的input隐藏域内储存多个图片上传
这行代码是限制多个图片上传的总数,这里目前是不能超过6张图片,到达六张图片后,点击上传的按钮将会消失。
{this.props.tAccessory >= 6 ? null : uploadButton}
点击眼睛会弹出modl框扩大显示图片。

全文代码如下,稍加修改即可使用。
import React from 'react';
import { Form, Input,Upload,Icon,Modal} from 'antd';
import { connect } from 'dva';
const FormItem = Form.Item;
const { TextArea } = Input;
function getBase64(file) {
 return new Promise((resolve, reject) => {
 const reader = new FileReader();
 reader.readAsDataURL(file);
 reader.onload = () => resolve(reader.result);
 reader.onerror = error => reject(error);
 });
}
class AddMa extends React.Component {
 state = {
 value: '',
 previewVisible: false,
 previewImage: '',
 fileList:[],
 };
 onChange = ({ target: { value } }) => {
 this.setState({ value });
 };
//场地图片
 handleCancel = () => this.setState({ previewVisible: false });
 handlePreview = async file => {
 if (!file.url && !file.preview) {
  file.preview = await getBase64(file.originFileObj);
 }
 this.setState({
  previewImage: file.url || file.preview,
  previewVisible: true,
 });
 console.log(file);
 };
 handleChange = ({ fileList }) => this.setState({ fileList:fileList });
 beforeUpload=(file)=>{
  this.setState(({
  fileList: [this.state.fileList, file],
  }));
 return false;
 }
 render() {
 const { previewVisible, previewImage, fileList,value} = this.state;
 const uploadButton = (
  <div>
  <Icon type="plus" />
  <div className="ant-upload-text">Upload</div>
  </div>
 );
 const { getFieldDecorator } = this.props.form;
 const formItemLayout = {
  labelCol: { span: 8 },
  wrapperCol: { span: 10 },
 };
 const props={fileList};
 return (
  <div>
  <Form>
   <FormItem{...formItemLayout} label="现场图片">
   {getFieldDecorator('fileList',{initialValue:this.props.tAccessory,valuePropName: 'file'})
   (
    <div >
    <Upload name="file" {...props}
      listType="picture-card"
      onPreview={this.handlePreview}
      onChange={this.handleChange}
      fileList={fileList}
      accept=".jpg,.png,.gif,.jpeg"
      beforeUpload={this.beforeUpload}
    >
     {this.props.tAccessory >= 6 ? null : uploadButton}
    </Upload>
    <Modal visible={previewVisible} footer={null} onCancel={this.handleCancel}>
     <img alt="example" style={{ width: '100%' }} src={previewImage} />
    </Modal>
    </div>
   )}</FormItem>

  //这里是多个上传获取到的PhotoList
   <FormItem{...formItemLayout} >
   {getFieldDecorator('file',{initialValue:this.props.tAccessory,valuePropName: 'file'})
   (
    <input type="hidden" name="img" multiple="multiple" />
   )}</FormItem>
  </Form>
  </div>
 );
 }
}

function mapStateToProps(state) {
 const {csIntro,arPicture,tCsInfo,modelResult,tAccessory} = state.cusy;
 return {csIntro,arPicture,tCsInfo,modelResult,tAccessory};
}

export default connect(mapStateToProps)(Form.create()(AddMa));
以上这篇react antd表格中渲染一张或多张图片的实例就是小编分享给大家的全部内容了,希望能给大家一个参考,也希望大家多多支持易盾网络。
