本文实例为大家分享了vue使用swiper实现左右滑动切换图片的具体代码,供大家参考,具体内容如下 使用npm 安装vue-awesome-swiper npm install vue-awesome-swiper --save 在main.js中引用 import VueAwesome
本文实例为大家分享了vue使用swiper实现左右滑动切换图片的具体代码,供大家参考,具体内容如下
使用npm 安装vue-awesome-swiper
npm install vue-awesome-swiper --save
在main.js中引用
import VueAwesomeSwiper from 'vue-awesome-swiper'
Vue.user(VueAwesomeSwiper)
import 'swiper/dist/css/swiper.css'
在组件中使用
<template>
 <div>
  <label class="timeline">{{ time }}</label>
  <div id="star-pic-vue">
   <template v-if="data">
    <img
     e
     v-for="(item, index) in images"
     :src="item.url"
     :key="index"
     id="contract_url"
     @click="enlargePic(index)"
    />
    <template v-if="isDialogShow"> </template>
    <el-dialog
     :visible.sync="centerDialogVisible"
     width="100%"
     modal
     close-on-click-modal
     custom-class="dialog"
    >
     <swiper :options="swiperOption" ref="mySwiper" style="height: 100%;">
      <swiper-slide v-for="(img, index) in images" :key="index">
       <div class="swiper-zoom-container">
        <img :src="img.url" alt="" />
       </div>
      </swiper-slide>
     </swiper>
    </el-dialog>
   </template>
  </div>
 </div>
</template>

<script>
import { swiper, swiperSlide } from "vue-awesome-swiper";
export default {
 name: "PictureComponent",
 props: ["data", "maxShow", "time"],
 data() {
  return {
   centerDialogVisible: false,
   showPic: "",
   isDialogShow: false,
   activeIndex: 1,
   startX: 0,
   swiperOption: {
    width: window.innerWidth,
    zoom: true,
    initialSlide: 0
   }
  };
 },
 computed: {
  images() {
   if (this.data instanceof Array && this.data.length > 2) {
    var value = this.data;
    return value.splice(0, this.maxShow);
   } else {
    return this.data;
   }
  }
 },
 components: {
  swiper,
  swiperSlide
 },
 methods: {
  // 放大图片
  enlargePic(i) {
   this.activeIndex = i;
   this.isDialogShow = true;
   // 使用$refs,如果ref是定位在有v-if、v-for、v-show中的DOM节点,
   // 返回来的只能是undefined,因为在mounted阶段他们根本不存在
   this.$nextTick(() => {
    var swiper = this.$refs.mySwiper.swiper;
    swiper.activeIndex = i;
   });
   this.centerDialogVisible = true;
  }
 }
};
</script>

<style lang="scss">
.timeline {
 display: block;
 margin: 10px 20px 5px;
}
#star-pic-vue .el-dialog__wrapper {
 position: fixed;
 top: 0;
 right: 0;
 bottom: 0;
 left: 0;
 overflow: auto;
 margin: 0;
 background: #171717;
}
#star-pic-vue {
 width: 100%;
 height: auto;
 display: flex;
 flex-wrap: wrap;
 justify-content: stretch;
 padding: 3px 13px;
 img {
  width: 82px;
  height: 80px;
  margin: 4px 0px 0px;
  padding-right: 2px;
 }
 .dialog {
  img {
   width: 100%;
   height: 100%;
   margin: 0;
  }
 }
 .el-carousel__item h3 {
  color: #475669;
  font-size: 18px;
  opacity: 0.75;
  line-height: 300px;
  margin: 0;
  height: 100%;
  width: 100%;
 }
 .el-dialog__header {
  display: none;
 }
 .el-dialog__body {
  padding: 0 !important;
  margin: 0 !important;
  height: 460px;
  background: #171717;
 }
 .el-carousel {
  height: 100%;
 }
 .el-carousel__container {
  height: 410px;
 }
 .el-carousel__indicators--outside {
  margin-top: 20px;
 }
}
</style>
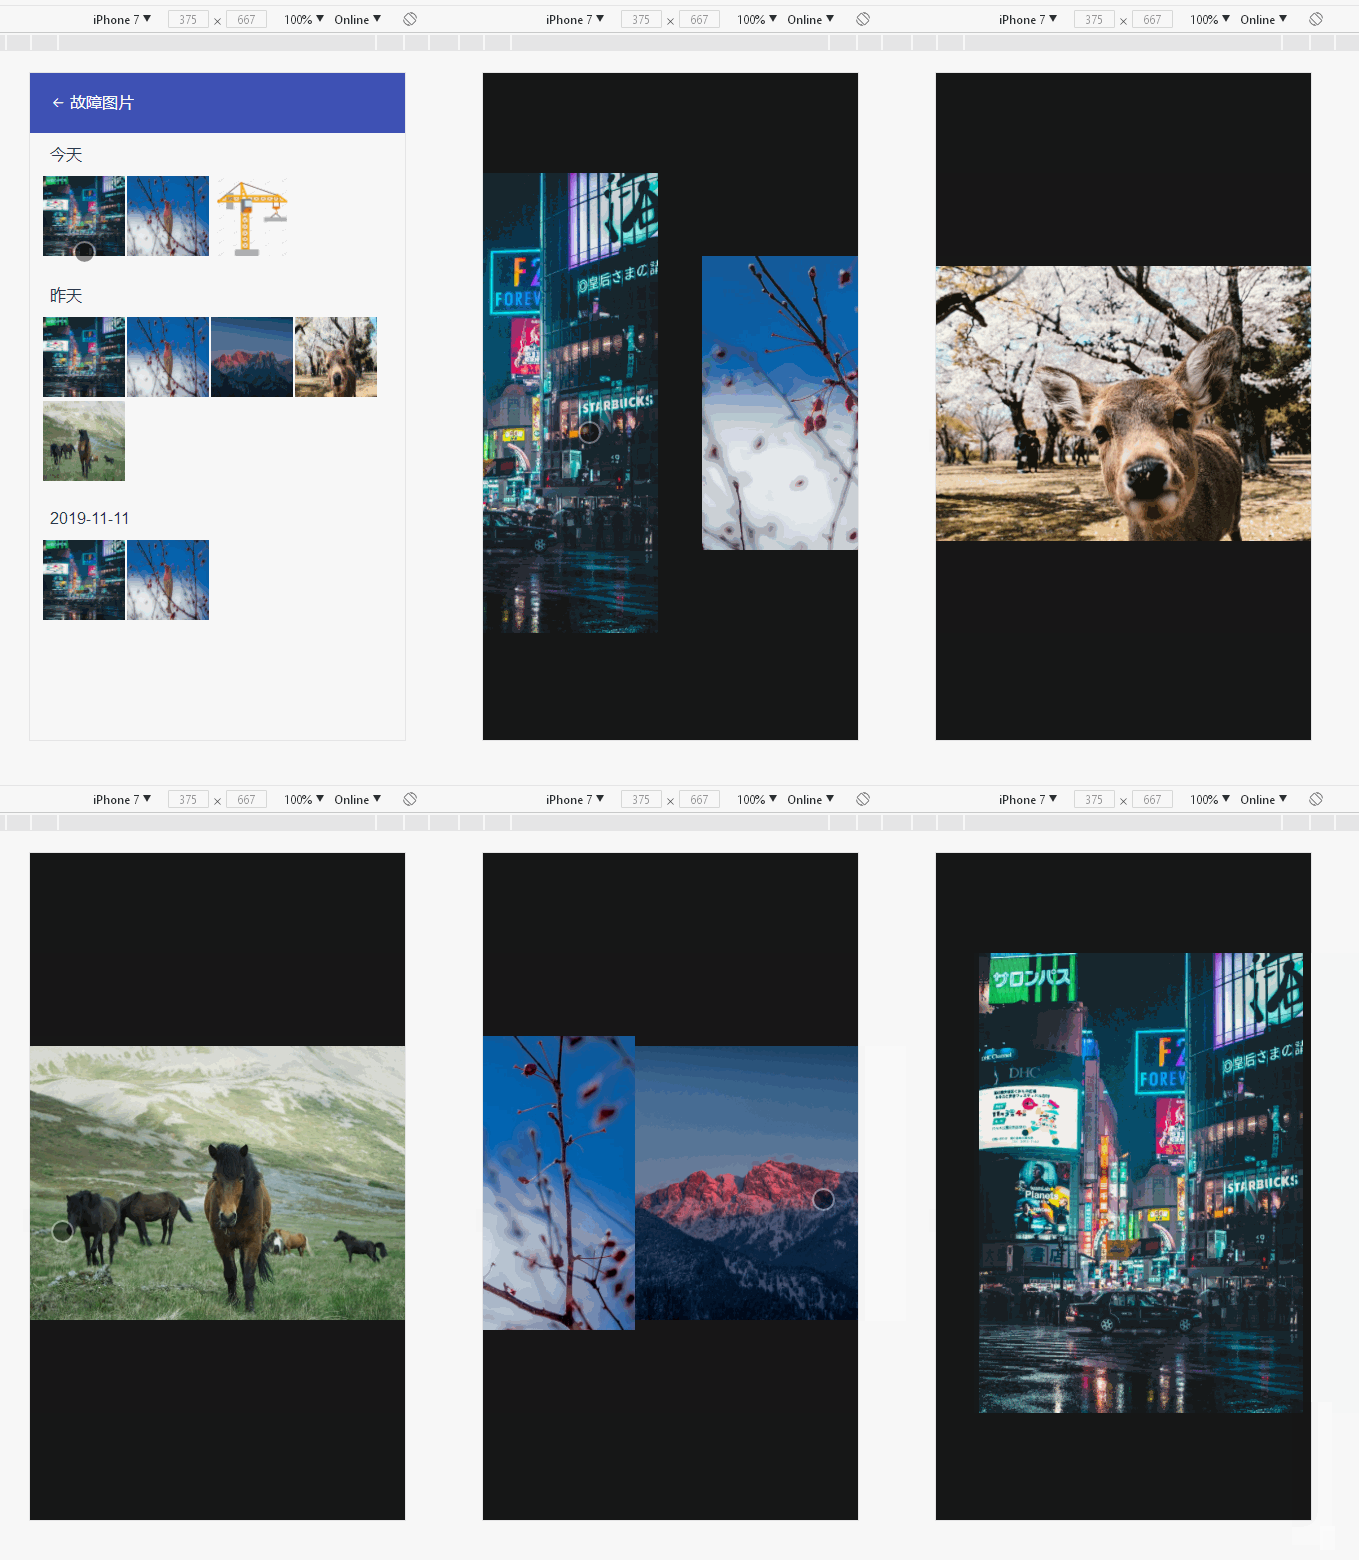
效果

$refs定位不到的主要原因是因为v-if、v-for、v-show这些语句如果依赖父组件传来的参数的话,该该参数是在mounted()阶段子还没获取得到~~~~!!!!
如果想要真正地在DOM加载完成后拿到数据,就需要调用VUE的全局api : this.$nextTick(() => {})
以上就是本文的全部内容,希望对大家的学习有所帮助,也希望大家多多支持易盾网络。
