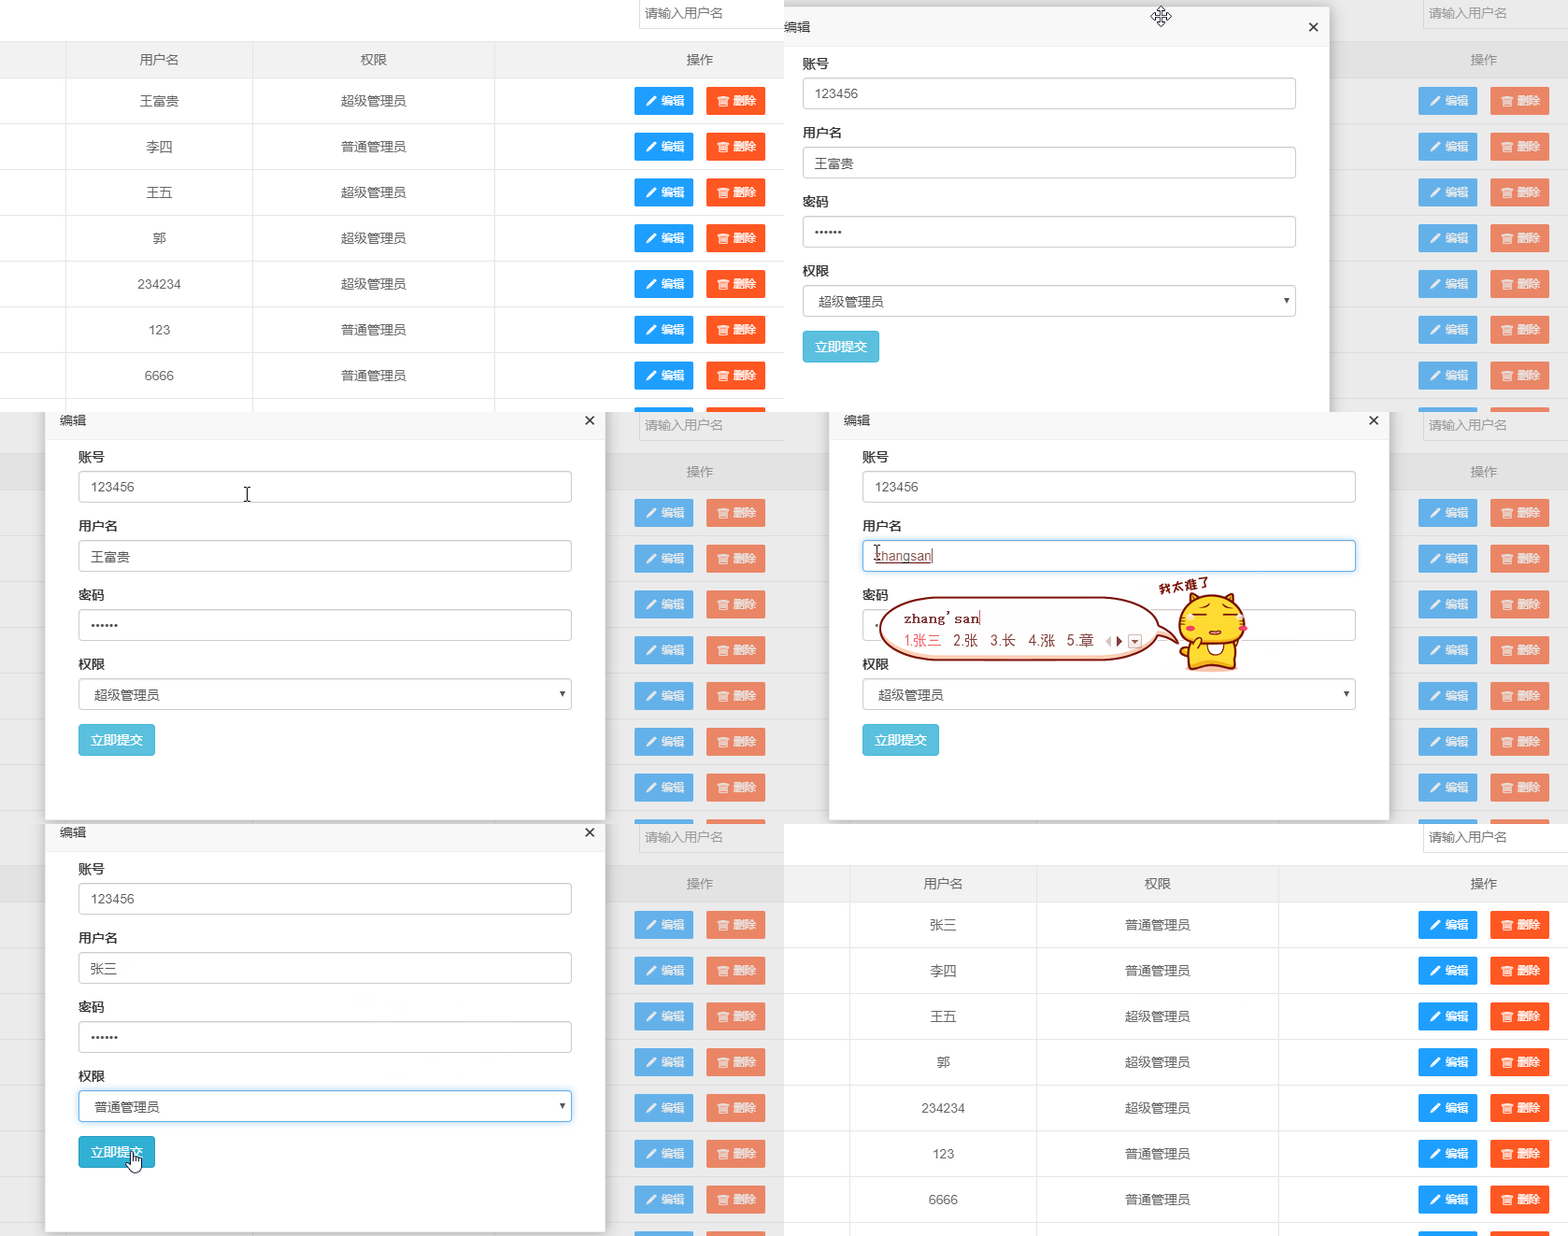
1. 实现效果 2.实现原理 在父组件中点击编辑按钮,将当前点击对象的id传给子组件,子组件根据id修改相应的内容 父组件中代码: //放置编辑按钮的位置button type="button" class="layui-btn l
1. 实现效果

2.实现原理
在父组件中点击编辑按钮,将当前点击对象的id传给子组件,子组件根据id修改相应的内容
父组件中代码:
//放置编辑按钮的位置
<button type="button" class="layui-btn layui-btn-normal layui-btn-sm" v-on:click="edit(manage.id)"><i class="layui-icon"></i>编辑</button>
// 在methods中设计edit()方法
//需要先引入编辑组件
import EditManage from './EditManage'
edit(id){
this.$layer.iframe({
type:2,
title:"编辑",
area:['600px','450px'],
shade:true,
offset:'auto',
content:{
content:EditManage,//传递的编辑组件主线
parent:this,
data:{
info:{id:id}// 传递的要编辑内容的id值
}
}
})
},
子组件EditManage代码
<template>
 <div class="editmanage container">
  <form class="form" v-on:submit="editManage">
   <div class="form-group">
    <label>账号</label>
    <input type="text" required placeholder="账号" autocomplete="off" class="form-control" v-model="manage.account">
   </div>
   <div class="form-group">
    <label>用户名</label>
    <input type="text" required placeholder="用户名" autocomplete="off" class="form-control" v-model="manage.username">
   </div>
   <div class="form-group">
    <label >密码</label>
    <input type="password" required placeholder="密码" autocomplete="off" class="form-control" v-model="manage.password">
   </div>

   <div class="form-group">
    <label >权限</label>
    <select name="authority" class="form-control" v-model="manage.authority">
     <option value="超级管理员" >超级管理员</option>
     <option value="普通管理员" >普通管理员</option>
    </select>
   </div>
   <button type="submit" class="btn btn-info">立即提交</button>
  </form>
 </div>
</template>

<script>
 export default {
  name: 'addmanage',
  data () {
   return {
    manage:{},
    form:{}
   }
  },
  props:{
  //接收父组件传来的id值
   info:{
    type:Object,
    default:()=>{
     return {}
    }
   },
   layerid:{
    type:String,
    default:""
   },
   lydata:{
    type:Object,
    default:()=>{
     return {}
    }
   }
  },
  methods:{
  //用来显示对应id的编辑内容,在created中调用
   fetchManage(id){
    this.$http.get('http://localhost:3000/manage/'+id)
     .then(function (response) {
      this.manage=response.body;
     })
   },
   editManage(e){
    if(!this.manage.account||!this.manage.username||!this.manage.password||!this.manage.authority){
     this.$layer.msg("请添加对应信息!")
    }else{
     let updateManage={
      account:this.manage.account,
      username:this.manage.username,
      password:this.manage.password,
      authority:this.manage.authority
     };   this.$http.put("http://localhost:3000/manage/"+this.info.id,updateManage)
      .then(function (response) {
      //关闭父组件中的编辑弹框
       this.$layer.close(this.layerid);
       //弹出提示信息,默认时间为3秒
       this.$layer.msg("修改管理员信息成功!");


      });
     e.preventDefault()
    }
    e.preventDefault()
   }
  },
  created(){
  // this.info.id父组件传给子组件的id值
   this.fetchManage(this.info.id);

  }
 }
</script>

<style scoped>
 .editmanage{
  margin:8px 20px 20px 20px;
 }
</style>
到此这篇关于Vue项目结合Vue-layer实现弹框式编辑功能(实例代码)的文章就介绍到这了,更多相关Vue弹框式编辑内容请搜索易盾网络以前的文章或继续浏览下面的相关文章希望大家以后多多支持易盾网络!
