本文实例为大家分享了js实现自动播放匀速轮播图的具体代码,供大家参考,具体内容如下 函数封装: ( 匀速运动函数) function animate(obj,target,step,speed){ clearInterval(obj.timer); var absStep
本文实例为大家分享了js实现自动播放匀速轮播图的具体代码,供大家参考,具体内容如下
函数封装: ( 匀速运动函数)
function animate(obj,target,step,speed){
  clearInterval(obj.timer);
 var absStep = Math.abs(step);
 step = target > obj.offsetLeft ? absStep : -absStep;
 obj.timer = setInterval(function(){
  var distance = Math.abs(target - obj.offsetLeft);
  obj.style.left = obj.offsetLeft + step + 'px';
  if(distance < absStep){
  clearInterval(obj.timer);
  obj.style.left = target + 'px';
  }
 },speed);
 }
对象可以动态生成属性,用对象的timer,避免了全局变量的使用,
实现步骤:
1.动态生成ol导航条,并将导航条放入all中使其成为孩子节点
2.根据ul中图片数量动态生成li标签,使li成为ol的子节点,
3.给第0个li标签加上颜色(添加属性current)
4.用设置的属性的值去操作图片使图片移动,达到鼠标放上去移动到该图片效果,排它原理实现样式效果
5.深度克隆ul中的第一张图片并将图片放在ul的末尾
6.加入自动播放函数使其自动播放,设置两个变量key,squre,key的值用来计算图片的序号,squre用来计算当前li的序号
7.自动播放函数中排他原理设置当前li标签样式
8.在设置onmouseover和onmouseout事件鼠标放在盒子上暂停,鼠标离开盒子,继续运动
9.在鼠标放在li标签时让key等于当前图片的index属性值 ,并把key的值赋给squre。
实现细节:
1.动态给ul克隆出第0张图片补到末尾,以实现自动轮播是无缝的效果,
2.克隆分深克隆和浅克隆,深克隆克隆带标签内的所有内容,
3.浅克隆只克隆外部标签,深克隆参数为true
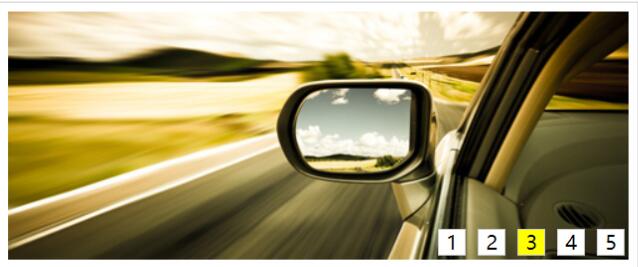
效果:

代码:
<!DOCTYPE html PUBLIC "-//W3C//DTD XHTML 1.0 Transitional//EN" "http://www.w3.org/TR/xhtml1/DTD/xhtml1-transitional.dtd">
<html xmlns="http://www.w3.org/1999/xhtml">
<head>
<meta http-equiv="Content-Type" content="text/html; charset=utf-8" />
<title>匀速轮播动画</title>
<style type="text/css">
 *{ padding:0; margin:0; list-style:none; border:0;}
 .all{
 width:500px;
 height:200px;
 padding:7px;
 border:1px solid #ccc;
 margin:100px auto;
 position:relative;
 }
 .screen{
 width:500px;
 height:200px;
 overflow:hidden;
 position:relative;
 }

 .screen li{
 width:500px;
 height:200px;
 overflow:hidden;
 float:left;
 }
 .screen ul{
 position:absolute;
 left:0;
 top:0px;
 width:3000px;
 }
 .all ol{
 position:absolute;
 right:10px;
 bottom:10px;
 line-height:20px;
 text-align:center;
 }
 .all ol li{
 float:left;
 width:20px;
 height:20px;
 background:#fff;
 border:1px solid #ccc;
 margin-left:10px;
 cursor:pointer;
 }
 .all ol li.current{
 background:yellow;
 }
</style>
<script src="js/匀速运动.js"></script>
<script>
 function $(id){
  return document.getElementById(id);
 }
 window.onload = function(){
  var ul = $('ul');
  var all = $('all');
  var imgs = ul.getElementsByTagName('img');
  var ol = document.createElement('ol');
  all.appendChild(ol);
  for(var i=0;i<imgs.length;i++){
   var li = document.createElement('li');
   li.innerHTML = i+1;
   li.setAttribute('index',i);
   ol.appendChild(li);
  }
  ol.childNodes[0].className = 'current';

  var olLis = ol.children;
  for(var i=0;i<olLis.length;i++){
   olLis[i].onmouseover = function(){
    for(var j=0;j<olLis.length;j++){
     olLis[j].className = '';
    }
    this.className = 'current';
    var index = -500*this.getAttribute('index');
    animate(ul,index,20,10);
    key=this.getAttribute('index');
    squre = key;
   }
  }

 ul.appendChild(ul.children[0].cloneNode(true));

  var timer=null;
  var key=0;
  var squre = 0;
  timer=setInterval(autoPlay, 1000);
   function autoPlay(){
   key++; //记录图片
   squre++;//记录导航条
   if(key>olLis.length){
    key=1;
    ul.style.left = 0 + 'px';
   }
   if(squre>=olLis.length){
    squre = 0;
   }
   animate(ul,-500*key,20,10);
   for(var i=0;i<olLis.length;i++){
    olLis[i].className = '';
   }
   olLis[squre].className = 'current';
   }
   all.onmouseover = function(){
   clearInterval(timer);
   }
   all.onmouseout = function(){
  timer=setInterval(autoPlay, 1000);
   }
 }
</script>
</head>
<body>
<div class="all" id='all'>
 <div class="screen">
  <ul id="ul">
   <li><img src="images/taobao/1.jpg" width="500" height="200" /></li>
   <li><img src="images/taobao/2.jpg" width="500" height="200" /></li>
   <li><img src="images/taobao/3.jpg" width="500" height="200" /></li>
   <li><img src="images/taobao/4.jpg" width="500" height="200" /></li>
   <li><img src="images/taobao/5.jpg" width="500" height="200" /></li>
  </ul>
 </div>

</div>
</body>
</html>
以上就是本文的全部内容,希望对大家的学习有所帮助,也希望大家多多支持易盾网络。
