零、概述 我利用flask搭建了一个简易的共享服务器,分享给大家 一、python代码 import osimport timefrom flask import Flask,render_template,url_for,redirect,send_from_directory# 共享文件夹的根目录rootdir = r
零、概述
我利用flask搭建了一个简易的共享服务器,分享给大家
一、python代码
import os
import time
from flask import Flask,render_template,url_for,redirect,send_from_directory
# 共享文件夹的根目录
rootdir = r'C:\Users\Administrator\Downloads\zlkt'

app = Flask(__name__)

@app.route('/doc/')
@app.route('/doc/<subdir>/')
def document(subdir=''):
    if subdir == '':
        # 名字为空,切换到根目录
        os.chdir(rootdir)
    else:
        fullname = rootdir + os.sep + subdir
        #  如果是文件,则下载
        if os.path.isfile(fullname):
            return redirect(url_for('downloader', fullname=fullname))
        #  如果是目录,切换到该目录下面
        else:
            os.chdir(fullname)
    current_dir = os.getcwd()
    current_list = os.listdir(current_dir)
    contents = []
    for i in sorted(current_list):
        fullpath = current_dir + os.sep + i
        # 如果是目录,在后面添加一个sep
        if os.path.isdir(fullpath):
            extra = os.sep
        else:
            extra = ''
        content = {}
        content['filename'] = i + extra
        content['mtime'] = time.strftime('%Y-%m-%d %H:%M:%S', time.localtime(os.stat(fullpath).st_mtime))
        content['size'] = str(round(os.path.getsize(fullpath) / 1024)) + 'k'
        contents.append(content)
    return render_template('test.html', contents=contents, subdir=subdir, ossep=os.sep)

@app.route('/download/<fullname>')
def downloader(fullname):
    filename = fullname.split(os.sep)[-1]
    dirpath = fullname[:-len(filename)]
    return send_from_directory(dirpath, filename, as_attachment=True)

if __name__ == '__main__':
    app.run()
二、html代码
<!DOCTYPE html>
<html lang="en">
<head>
    <meta charset="UTF-8">
    <title>文档管理</title>
    <link rel="stylesheet" href="https://cdn.jsdelivr.net/npm/bootstrap@3.3.7/dist/css/bootstrap.min.css" rel="external nofollow"
       integrity="sha384-BVYiiSIFeK1dGmJRAkycuHAHRg32OmUcww7on3RYdg4Va+PmSTsz/K68vbdEjh4u"
       crossorigin="anonymous">
    <link rel="stylesheet" href="https://cdn.jsdelivr.net/npm/bootstrap@3.3.7/dist/css/bootstrap-theme.min.css" rel="external nofollow"
       integrity="sha384-rHyoN1iRsVXV4nD0JutlnGaslCJuC7uwjduW9SVrLvRYooPp2bWYgmgJQIXwl/Sp"
       crossorigin="anonymous">
    <script src="http://img.558idc.com/uploadfile/allimg/210402/202K42962-0.jpg"
       integrity="sha384-Tc5IQib027qvyjSMfHjOMaLkfuWVxZxUPnCJA7l2mCWNIpG9mGCD8wGNIcPD7Txa"
       crossorigin="anonymous"></script>
    <style type="text/css">
         .big-border {
        background: #fff;
        width: 1400px;
        margin: 0 auto;
        padding: 10px;
        }

        body {
            background: #f3f3f3;
        }

        .page-title {
            text-align: center;
        }
    </style>
</head>
<body>
  <div class="big-border">
    <h3 class="page-title">文档管理</h3>
    <hr>
    <h4>当前目录 {{ossep+subdir}}</h4>
    <hr>
    <table width="600px">
      <thead>
        <tr>
          <th>文件或目录名</th>
          <th>修改时间</th>
          <th>大小</th>
        </tr>
      </thead>
      <tbody>
        {% if subdir %}
        <tr>
          <td><a href="../" rel="external nofollow" >..{{ossep}}</a></td>
          <td></td>
          <td></td>
        </tr>
        {% endif %}
        {% for i in contents %}
        <tr>
          <td><a href="{{ url_for('document', subdir=subdir+i.filename) }}" rel="external nofollow" >{{ i.filename }}</a></td>
          <td>{{ i.mtime }}</td>
          <td>{{ i.size }}</td>
          </tr>
        {% endfor %}
      </tbody>
    </table>
    <hr>
  </div>
</body>
</html>
三、使用
1. 更改python代码中的rootdir,这里需要填你所共享的文件夹
2. render_template('test.html', ...),我将html命名为test.html,所以这里就是render_template('test.html', ...),你如果命名了其它名字,这里记得改一下
四、最后效果
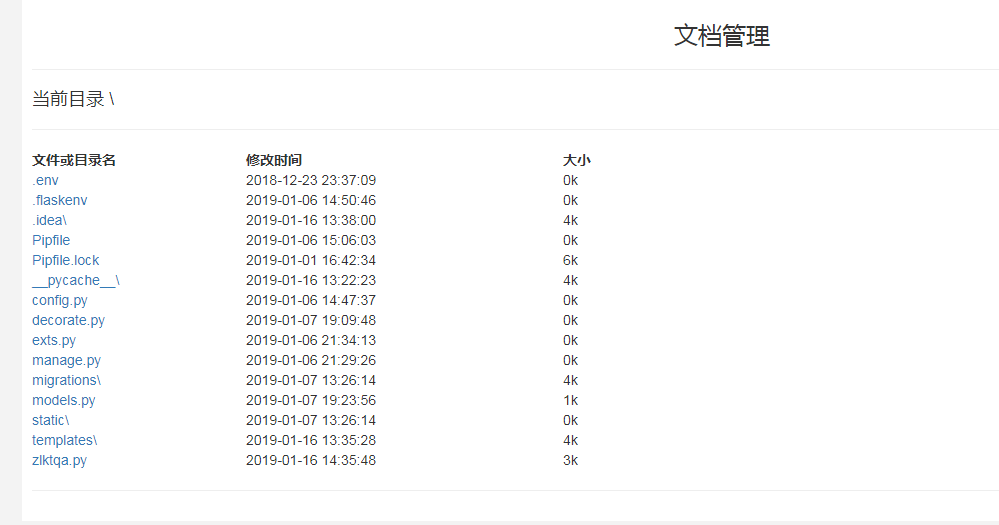
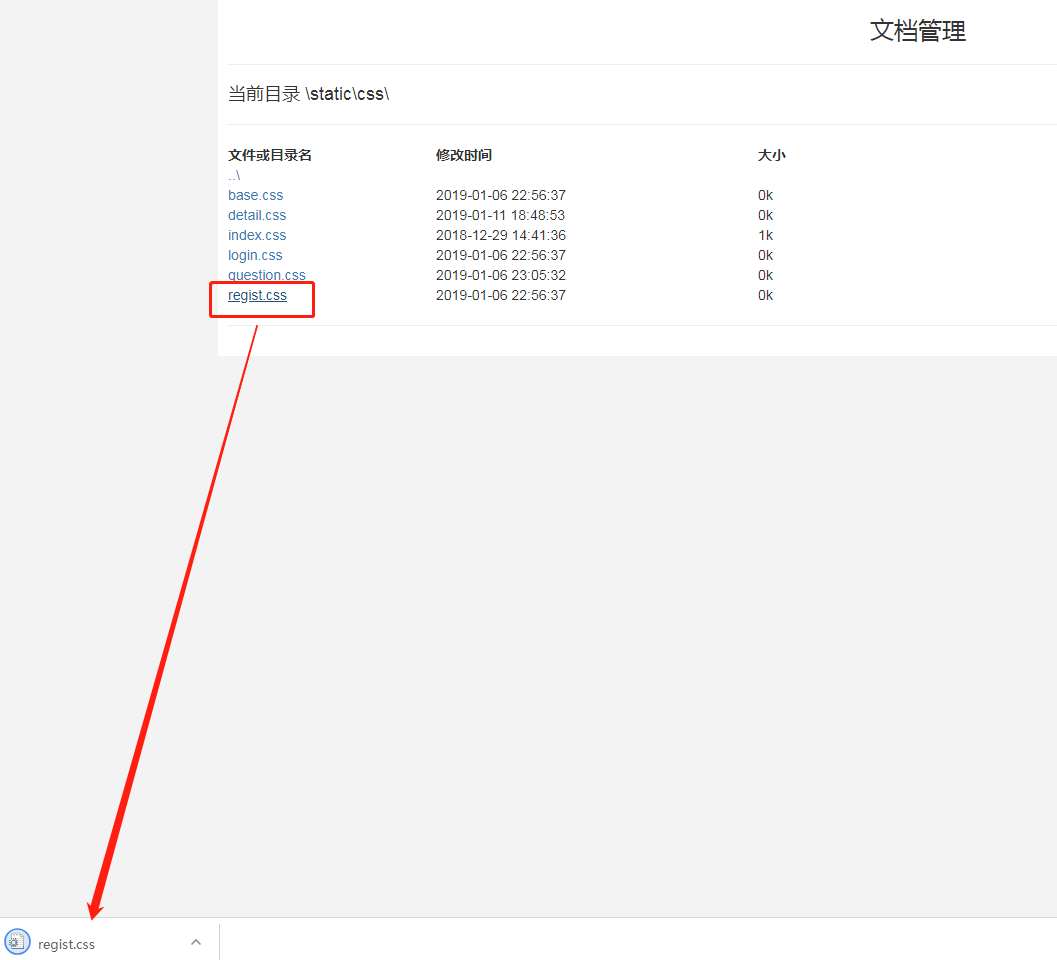
运行脚本之后,用浏览器打开 http://127.0.0.1:5000/doc/,显示效果如下图


最后欢迎大家使用,和我交流。
以上就是Python 利用flask搭建一个共享服务器的步骤的详细内容,更多关于flask搭建服务器的资料请关注易盾网络其它相关文章!
