本文实例为大家分享了java实现登录验证码功能的具体代码,供大家参考,具体内容如下 登录验证码 登录验证是大多数登录系统都会用到的一个功能,它的验证方式也是有很多种,例如
本文实例为大家分享了java实现登录验证码功能的具体代码,供大家参考,具体内容如下
登录验证码
登录验证是大多数登录系统都会用到的一个功能,它的验证方式也是有很多种,例如登录验证码,登录验证条及拼图拖动块等,这里讲讲输入登录验证码的方式来实现的例子。首先,kaptcha这是一个开源的验证码实现库,利用这个库可以非常方便的实现验证码功能。
1.添加依赖
在pom文件下添加kaptcha依赖包
<!-- https://mvnrepository.com/artifact/com.github.axet/kaptcha -->
    <dependency>
      <groupId>com.github.axet</groupId>
      <artifactId>kaptcha</artifactId>
      <version>0.0.9</version>
</dependency>
2.添加配置
新建config包,在该包下创建kaptcha配置类,配置验证码的一些生成属性。
KaptchaConfig.java
/**
 *  @author: yzy
 *  @Date: 2020/6/11 10:41
 *  @Description: 验证码的配置
 */
@Configuration
public class CaptchaConfig {

    @Bean
    public DefaultKaptcha producer() {
        Properties properties = new Properties();
        properties.put("kaptcha.border","no");
        properties.put("kaptcha.textproducer.font.color","black");
        properties.put("kaptcha.textproducer.char.space","5");
        Config config = new Config(properties);
        DefaultKaptcha defaultKaptcha = new DefaultKaptcha();
        defaultKaptcha.setConfig(config);
        return defaultKaptcha;
    }

}
3.生成代码
新建一个控制器,提供系统登录相关的API,在其中添加验证码生成接口。
LoginController.java
/**
 *  @author: yzy
 *  @Date: 2020/6/11 10:58
 *  @Description: 登录控制器
 */
@RestController
public class LoginController {
    @Resource
    private Producer producer;

    /**
     * @Description:  验证码生成接口
     * @Author:       yzy
     * @Date:         2020/6/11 11:00
     * @Param:        response
     * @Param:        request
     * @Return:       void
     * @Exception
     *
     */
    @RequestMapping(value = "/captcha.jpg",method = RequestMethod.GET)
    public void captcha(HttpServletResponse response, HttpServletRequest request) {
        /**
         * Cache-Control指定请求和响应遵循的缓存机制
         * no-store:用于防止重要的信息被无意的发布。在请求消息中发送将使得请求和响应消息都不使用缓存。
         * no-cache:指示请求或响应消息不能缓存
         */
        response.setHeader("Cache-Control","no-store,no-cache");

        // 设置输出流内容格式为图片格式.image/jpeg,图片格式用于生成图片随机码
        response.setContentType("image/jpeg");

        // 生成文字验证码
        String text = producer.createText();

        // 生成图片验证码
        BufferedImage image = producer.createImage(text);

        // 保存验证码到session中
        request.getSession().setAttribute(Constants.KAPTCHA_SESSION_KEY,text);
        ServletOutputStream outputStream = null;
        try {
            outputStream = response.getOutputStream();
            ImageIO.write(image,"jpg",outputStream);
        } catch (IOException e) {
            e.printStackTrace();
        }
        IOUtils.closeQuietly(outputStream);
    }
}
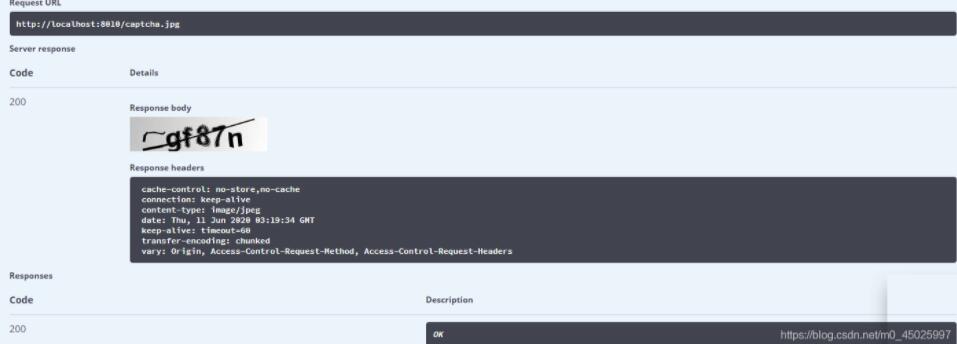
测试接口
编译成功后,访问http://localhost:8010/swagger-ui.html,进入swagger测试页面,测试结果如图:
这样就大功告成了!
以上就是本文的全部内容,希望对大家的学习有所帮助,也希望大家多多支持自由互联。