前言
使用过SpringBoot的都应该知道,一个SpringBoot 项目就是由一个一个 Starter 组成的,一个 Starter 代表该项目的 SpringBoot 启动依赖,除了官方已有的 Starter,我们可以根据自己的需要自定义新的Starter。
一、自定义SpringBoot Starter
自定义Starter,首选需要实现自动化配置,而要实现自动化配置需要满足以下两个条件:
(1)能够自动配置项目所需要的配置信息,也就是自动加载依赖环境;
(2)能够根据项目提供的信息自动生成Bean,并且注册到Bean管理容器中;
要实现自动化配置需要在项目的pom.xml文件中引入如下依赖:
<dependency>
 <groupId>org.springframework.boot</groupId>
 <artifactId>spring-boot-autoconfigure</artifactId>
 <version>2.1.4.RELEASE</version>
</dependency>
根据需要自定义Starter的实现过程大致如下(以我定义的Starter为例):
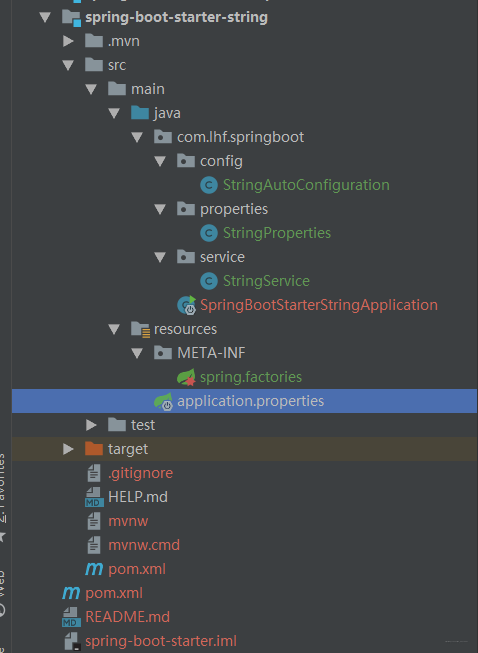
工程目录结构:
1、引入项目的配置依赖
<dependency>
 <groupId>org.springframework.boot</groupId>
 <artifactId>spring-boot-autoconfigure</artifactId>
 <version>2.1.4.RELEASE</version>
</dependency>
2、创建xxxService类,完成相关的操作逻辑
代码:StringService.java
public class StringService {

 private String str1;

 private String str2;

 private String default_str;

 public String getStr1() {
  return str1;
 }

 public void setStr1(String str1) {
  this.str1 = str1;
 }

 public String getStr2() {
  return str2;
 }

 public void setStr2(String str2) {
  this.str2 = str2;
 }

 public String getDefault_str() {
  return default_str;
 }

 public void setDefault_str(String default_str) {
  this.default_str = default_str;
 }

 public String addStr(){
  if(str1 != null){
   if(str2 != null){
    return str1 + "," + str2;
   }
   return str1;
  }
  return default_str;
 }

}
3、 定义xxxProperties类,属性配置类,完成属性配置相关的操作,比如设置属性前缀,用于在application.properties中配置
代码:StringProperties.java
//指定项目在属性文件中配置的前缀为str,即可以在属性文件中通过 str.str1=springboot,就可以改变属性类字段 str1 的值了
@SuppressWarnings("ConfigurationProperties")
@ConfigurationProperties(prefix = "str")
public class StringProperties {

 public static final String DEFAULT_STR1 = "I know, you need me";

 public static final String DEFAULT_STR2 = "but I also need you";

 private String str1 = DEFAULT_STR1;

 private String str2 = DEFAULT_STR2;

 public String getStr1() {
  return str1;
 }

 public void setStr1(String str1) {
  this.str1 = str1;
 }

 public String getStr2() {
  return str2;
 }

 public void setStr2(String str2) {
  this.str2 = str2;
 }
}
4、定义xxxConfigurationProperties类,自动配置类,用于完成Bean创建等工作
代码:StringAutoConfiguration.java
// 定义 java 配置类
@Configuration
//引入StringService
@ConditionalOnClass({StringService.class})
// 将 application.properties 的相关的属性字段与该类一一对应,并生成 Bean
@EnableConfigurationProperties(StringProperties.class)
public class StringAutoConfiguration {

 // 注入属性类
 @Autowired
 private StringProperties stringProperties;

 @Bean
 // 当容器没有这个 Bean 的时候才创建这个 Bean
 @ConditionalOnMissingBean(StringService.class)
 public StringService helloworldService() {
  StringService stringService = new StringService();
  stringService.setStr1(stringProperties.getStr1());
  stringService.setStr2(stringProperties.getStr2());
  return stringService;
 }

}
5、在resources下创建目录META-INF,在 META-INF 目录下创建 spring.factories,在SpringBoot启动时会根据此文件来加载项目的自动化配置类
代码:spring.factories
# Auto Configure
org.springframework.boot.autoconfigure.EnableAutoConfiguration=com.lhf.springboot.config.StringAutoConfiguration
6、到这里自定义Starter就定义完成了,只需在其他项目中引入即可使用。
二、其他项目中使用自定义的Starter
1、在新项目中引入自定义Starter依赖配置
创建一个新的SpringBoot项目,在项目的pom.xml文件中引入自定义SpringBoot Starter的依赖配置如下:
<!--引入自定义Starter-->
<dependency>
 <groupId>com.lhf.springboot</groupId>
 <artifactId>spring-boot-starter-string</artifactId>
 <version>0.0.1-SNAPSHOT</version>
</dependency>
2、编写一个简单的Controller
@RestController
public class StringController {

  @Autowired
 private StringService stringService; //引入自定义Starter中的StringService

 @RequestMapping("/")
  public String addString(){
  return stringService.addStr();
 }
}
3、编写属性配置文件,内容如下:
#配置自定义的属性信息
str.str1=为什么我的眼里常含泪水
str.str2=那是因为我对你爱的深沉
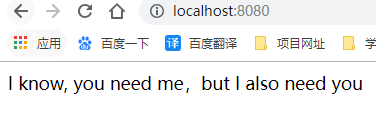
4、启动项目进行访问,效果如图:

结语:
到此这篇关于使用SpringBoot自定义starter的文章就介绍到这了,更多相关SpringBoot自定义starter内容请搜索易盾网络以前的文章或继续浏览下面的相关文章希望大家以后多多支持易盾网络!