介绍:kaptcha 是谷歌开源的非常实用的验证码生成工具 一、导入jar包 !-- kaptcha验证码 --dependencygroupIdcom.github.penggle/groupIdartifactIdkaptcha/artifactIdversion2.3.2/version/dependency 二、编写kaptcha配置
介绍:kaptcha 是谷歌开源的非常实用的验证码生成工具
一、导入jar包
<!-- kaptcha验证码 -->
<dependency>
	<groupId>com.github.penggle</groupId>
	<artifactId>kaptcha</artifactId>
	<version>2.3.2</version>
</dependency>
二、编写kaptcha配置类
package com.zym.config;

import com.google.code.kaptcha.impl.DefaultKaptcha;
import com.google.code.kaptcha.util.Config;
import org.springframework.context.annotation.Bean;
import org.springframework.context.annotation.Configuration;

import java.util.Properties;

@Configuration
public class KaptchaConfig {

  @Bean
  public DefaultKaptcha defaultKaptcha(){
    DefaultKaptcha kaptcha = new DefaultKaptcha();

    Properties properties = new Properties();
    //边框
    properties.setProperty("kaptcha.border", "no");
    //字体颜色
    properties.setProperty("kaptcha.textproducer.font.color", "green");
    //图片宽度
    properties.setProperty("kaptcha.image.width", "120");
    //图片高度
    properties.setProperty("kaptcha.image.height", "30");
    //字体大小
    properties.setProperty("kaptcha.textproducer.font.size", "20");
    //session key
    properties.setProperty("kaptcha.session.key", "kaptcha");
    //验证码长度
    properties.setProperty("kaptcha.textproducer.char.length", "4");
    //字体
    properties.setProperty("kaptcha.textproducer.font.names", "宋体");
    //文字间隔
    properties.setProperty("kaptcha.textproducer.char.space", "10");
    //噪点实现类
    properties.setProperty("kaptcha.noise.impl", "com.google.code.kaptcha.impl.NoNoise");
    //图片样式-阴影
    properties.setProperty("kaptcha.obscurificator.impl", "com.google.code.kaptcha.impl.ShadowGimpy");

    Config config = new Config(properties);
    kaptcha.setConfig(config);
    return kaptcha;
  }
}
三、编写接口
package com.zym.controller;

import com.google.code.kaptcha.impl.DefaultKaptcha;
import org.apache.tomcat.util.http.fileupload.IOUtils;
import org.springframework.beans.factory.annotation.Autowired;
import org.springframework.web.bind.annotation.GetMapping;
import org.springframework.web.bind.annotation.RestController;

import javax.imageio.ImageIO;
import javax.servlet.ServletOutputStream;
import javax.servlet.http.HttpServletRequest;
import javax.servlet.http.HttpServletResponse;
import javax.servlet.http.HttpSession;
import java.awt.image.BufferedImage;
import java.io.IOException;

@RestController
public class KaptchaController {

  @Autowired
  private DefaultKaptcha defaultKaptcha;

  @GetMapping("/kaptcha")
  public void getKaptcha(HttpServletRequest request, HttpServletResponse response) throws IOException {
    //设置响应头
    response.setHeader("Cache-Control", "no-cache");
    response.setHeader("Pragma", "no-cache");
    response.setContentType("image/jpeg");

    String text = defaultKaptcha.createText();
    HttpSession session = request.getSession();
    //将验证码存入session
    session.setAttribute("code", text);
    //创建验证码图片
    BufferedImage image = defaultKaptcha.createImage(text);
    ServletOutputStream os = response.getOutputStream();
    ImageIO.write(image, "jpg", os);
    IOUtils.closeQuietly(os);
  }
}
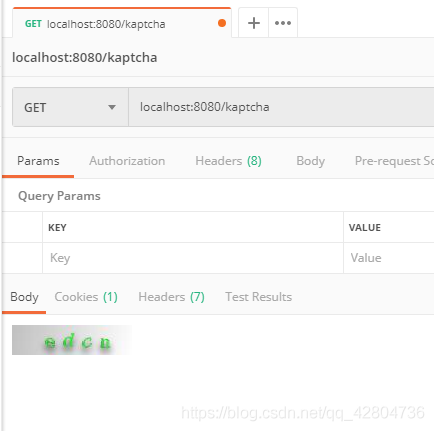
四、测试接口
使用PostMan:
输入url:localhost:8080/kaptcha
成功得到验证码图片,大功告成!
到此这篇关于springboot整合kaptcha生成验证码功能的文章就介绍到这了,更多相关springboot整合kaptcha验证码内容请搜索易盾网络以前的文章或继续浏览下面的相关文章希望大家以后多多支持易盾网络!