Linux下使用cobbler可以快速建立Linux网络安装环境,大大降低了Linux网络安装的技术门槛,那么Linux系统要如何安装Cobbler呢?一起来学习下吧。
cobbler的简介
cobbler是Redhat支持的一个开源项目,用来部署和安装系统。所以对Redhat系列os支持是比较好的。不过对ubuntu支持是非常差的。cobbler里不少设置,只针对redhat有效,同时也由于不同发行版的安装是有差异。cobbler感觉好像和ubuntu关系比较紧张。
cobbler不仅仅是一个pxe服务器,他还可以管理dns(bind),dhcp。一般数据中心里或者生产环境,是不允许dhcp,但是pxe,必须需要dhcp,所以我们需要根据mac地址来分配IP,这样dhcp就不会影响到网络。
1、安装cobbler
提前配置好epel源http://mirrors.ustc.edu.cn/fedora/epel/6/i386/
[[email protected] /]# yum -y install cobbler
[[email protected] /]# service httpd start
Starting httpd: [ OK ]
[[email protected] /]# service cobblerd start
Starting cobbler daemon: [ OK ]
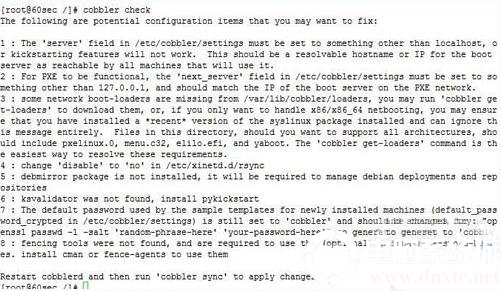
2、执行cobbler check命令检查存的问题,而后逐一按提示解决之

[[email protected] /]# vim /etc/cobbler/settings
next_server: 192.168.83.137
server: 192.168.83.137
manage_tftpd: 0
[[email protected] /]# yum -y install syslinux
[[email protected] /]# chkconfig rsync on
[[email protected] /]# yum -y install pykickstart
[[email protected] /]# openssl passwd -1 -salt ‘openssl rand -hex 4’
Password:
$1$openssl $.oduSwbhLj6jqAwVsLo/H1
[[email protected] /]# vim /etc/cobbler/settings
default_password_crypted: “penssl $.oduSwbhLj6jqAwVsLo/H1”
[[email protected] /]# cd /usr/share/syslinux/
[[email protected] syslinux]# cp -r 。/* /var/lib/cobbler/loaders/
3、安装dhcp服务
[[email protected] /]# yum -y install dhcp
[[email protected] /]# cp /usr/share/doc/dhcp-4.1.1/dhcpd.conf.sample /etc/dhcp/dhcpd.conf
[[email protected] /]# vim /etc/dhcp/dhcpd.conf
option domain-name “60sec.com”;
option domain-name-servers 192.168.83.137;
default-lease-time 43300;
max-lease-time 86500;
subnet 192.168.83.0 netmask 255.255.255.0 {
range 192.168.83.50 192.168.83.100;
option routers 192.168.83.137;
}
next-server 192.168.83.137;
filename=“pxelinux.0”;
[[email protected] /]# service dhcpd start
Starting dhcpd: [ OK ]
4、开启tftp服务
[[email protected] /]# chkconfig tftp on
[[email protected] /]# service xinetd start
Starting xinetd: [ OK ]
5、定义distro,挂载光盘并导入
[[email protected] /]# mount -r /dev/cdrom /media/
[[email protected] /]# cobbler import --name=centos-6.5-x86_64 --path=/media
6、如果有kickstart文件,使用“--kickstart=/path/to/kickstart_file”进行导入,也可使用以下命令检测,
可以使用system-config-kickstart进行制作kickstart文件。cobbler的ks 文件默认都放在/var/lib/cobbler/kickstarts/下面 可以根据不同的需求定制ks文件。
[[email protected] mnt]# ksvalidator centos6.x86_64.cfg
7、设置profile,profile可以理解为按安装需求进行分类。
[[email protected] mnt]# cobbler profile add --name=CenTos-6.5-x86_64-basic --distro=centos-6.5-x86_64 --kickstart=/mnt/centos6.x86_64.cfg
[[email protected] mnt]# cobbler profile list
CenTos-6.5-x86_64-basic
Centos-6.5-x86_64
[[email protected] mnt]# cobbler sync
[[email protected] mnt]# service cobblerd restart
可修改相关信息
[[email protected] mnt]# vim /var/lib/tftpboot/pxelinux.cfg/default
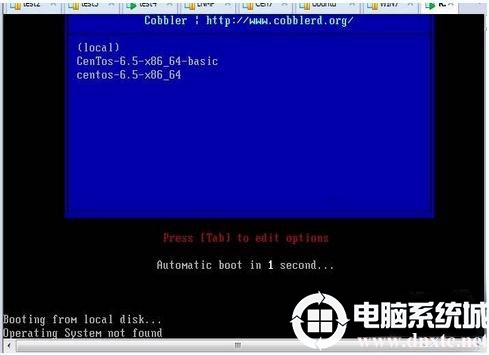
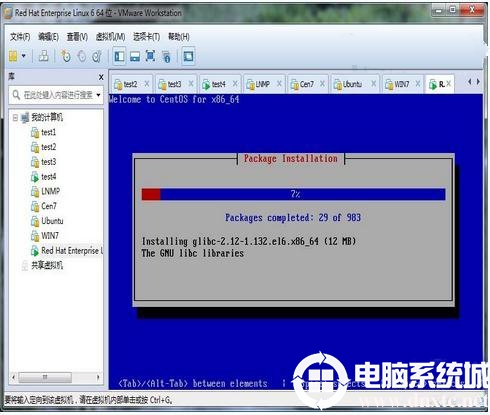
8、重新创建虚拟机测试


上面就是Linux下安装cobbler的具体步骤了,按照上面介绍的步骤就能轻易的安装cobbler,是不是很容易呢?赶紧试试看吧,想了解更多内容可以对自由互联进行关注!
