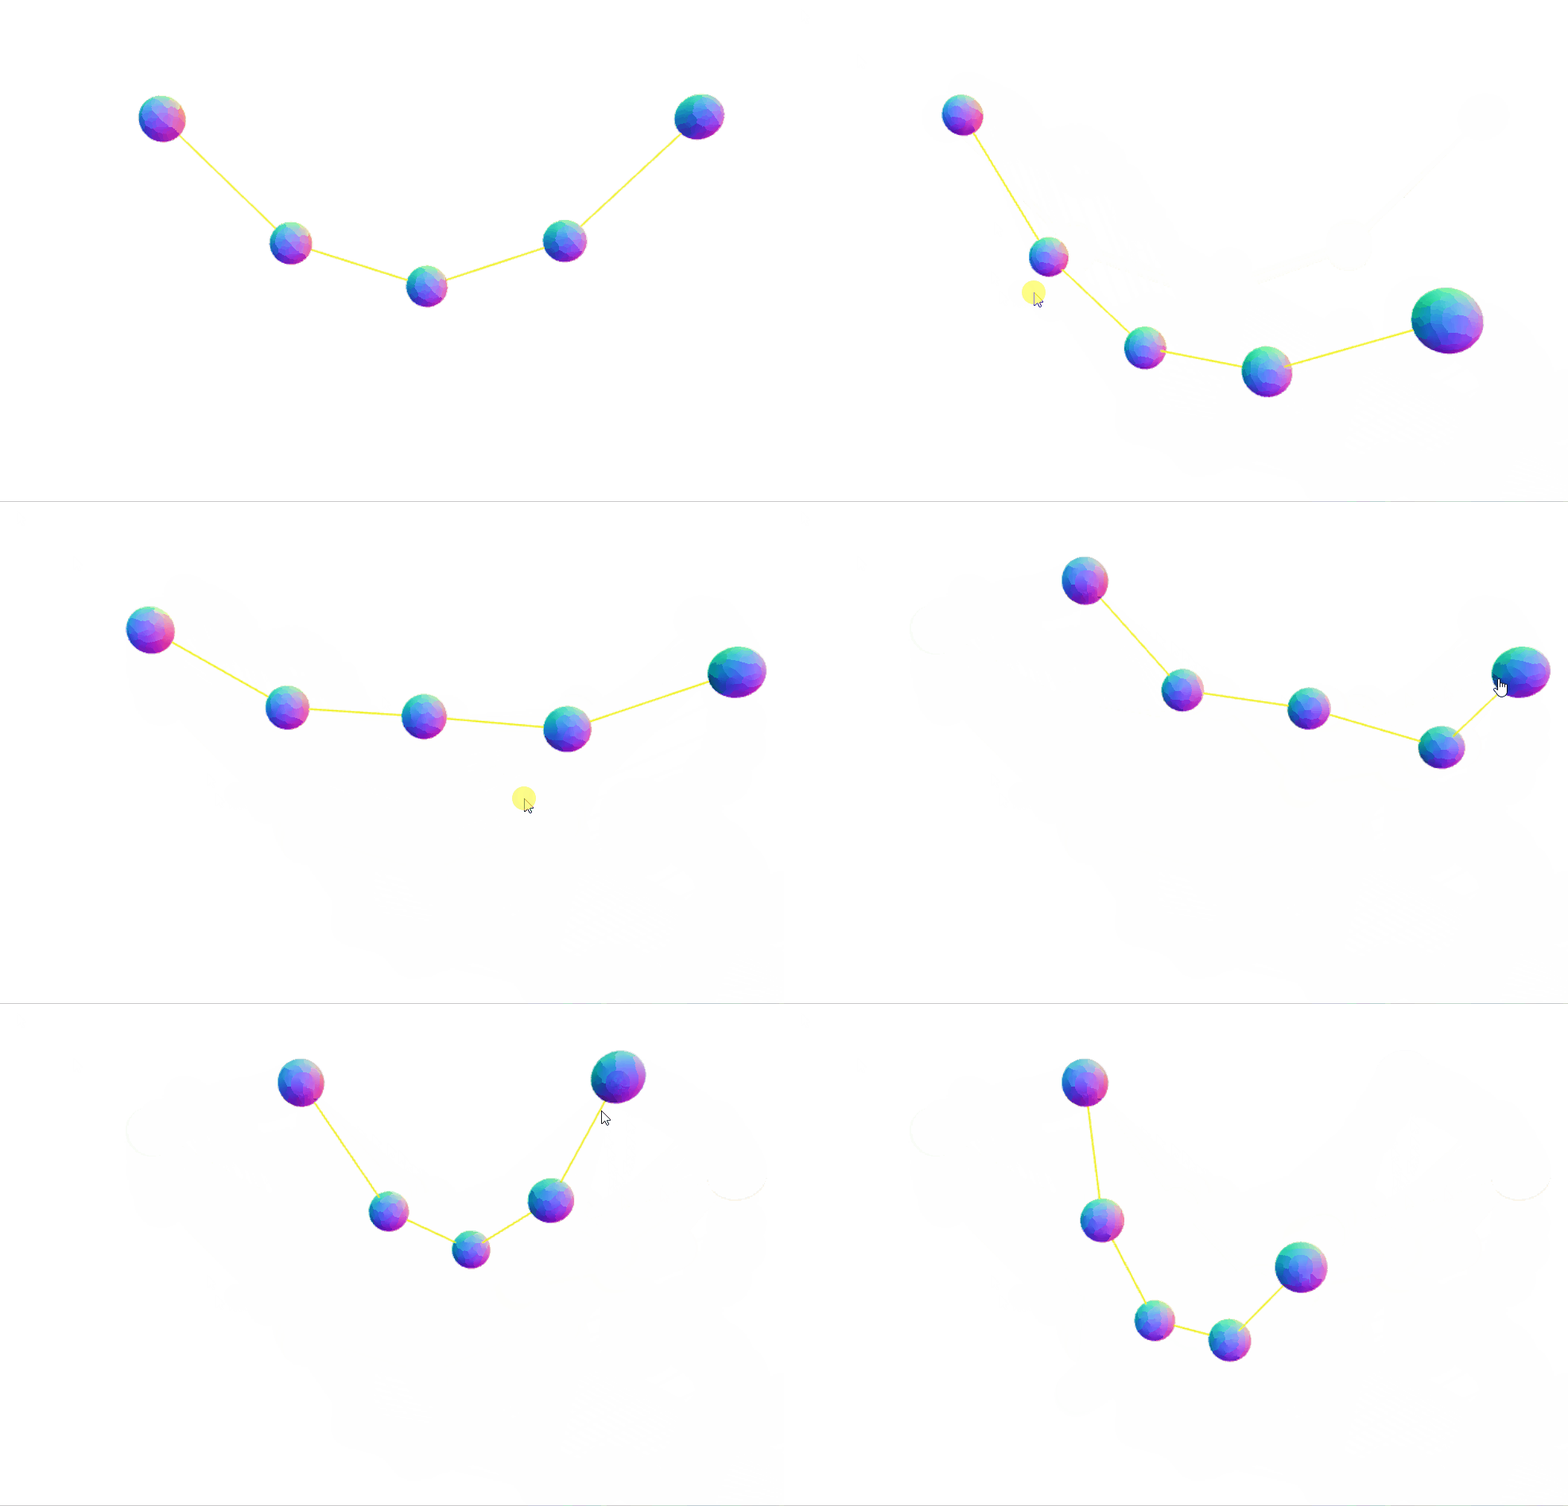
弹簧系统三维可视化 games 101 最后一次作业,弹簧系统三维可视化 主要使用显式 Verlet 方法,并加入阻尼,下面展示可视化图 实现历程 实现弹簧系统可视化需要经历模拟和渲染,模拟和
- games 101 最后一次作业,弹簧系统三维可视化
- 主要使用显式 Verlet 方法,并加入阻尼,下面展示可视化图

实现弹簧系统可视化需要经历模拟和渲染,模拟和渲染实际上是两个不同步骤。
- 模拟:输入物体质量和位置以及收到的力,输出该物体下一时刻的位置
- 渲染:根据物理质量,坐标,外观实时展示物体当前状态
模拟使用到显式 Verlet,根据加速度、前一刻坐标和当前坐标计算下一时刻的位置,数学公式为
\[\begin{equation} x_{t+dt} = x(t) + [x(t)-x(t-dt)] + a(t) \times dt \times dt \end{equation} \]如果不存在阻力,任何小球将一直运行下去,因此需要向其中添加阻尼,加入后公式为
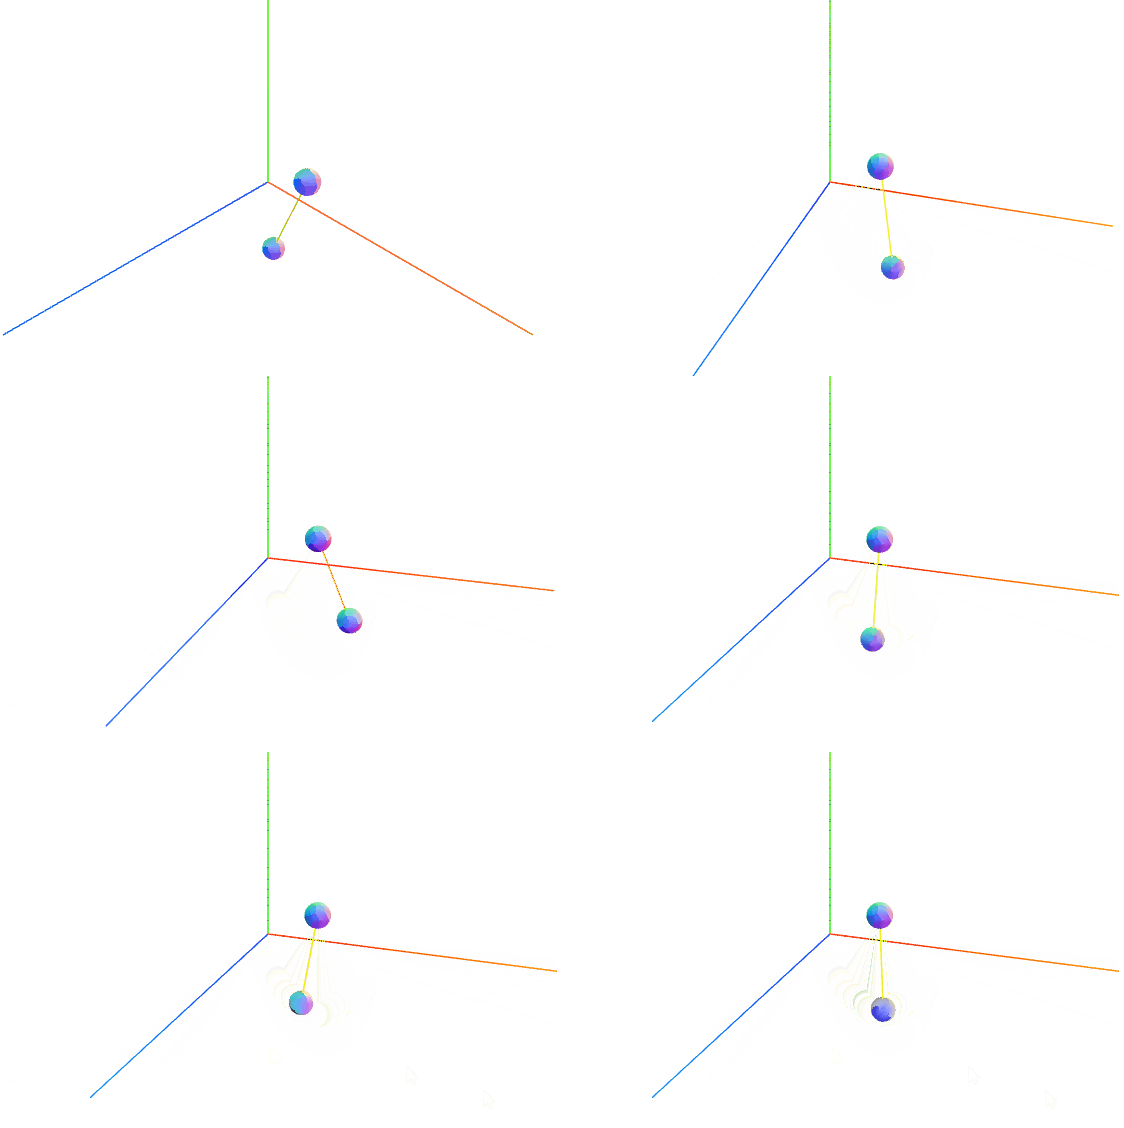
\[\begin{equation} x_{t+dt} = x(t) + (1 - dampingFactor) \times [x(t)-x(t-dt)] + a(t) \times dt \times dt \end{equation} \]为了验证加入阻尼的 Verlet 公式,使用两个小球进行验证

从图中可看出,小球受重力的影响,具有向下的加速度,又因为弹力的作用,会有弹簧拉力将其拉回。
- 模拟:求出合并后的加速度,应用 Verlet 公式,求出小球下一刻的坐标
- 渲染:通过 Threejs 渲染两个小球和弹簧
小球运动的加速度由牛顿第二定律所得
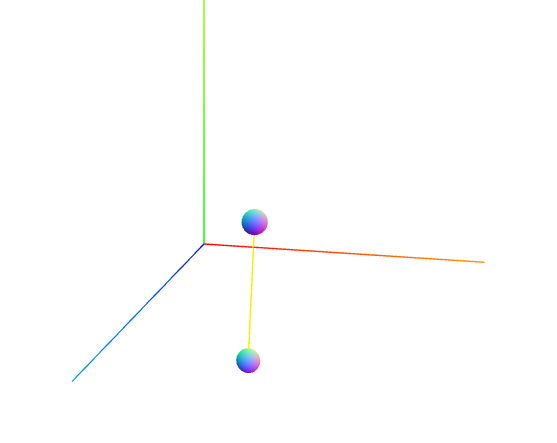
\[F=ma \]因此小球运动速度与自身质量息息相关,若将小球质量增加,弹簧将被拉得更长

将一个弹簧系统完成后,即可开发更多小球和弹簧的模拟仿真。
代码设计程序主要分为两个部分,一个部分为模拟和渲染,另一部分为类设计。程序设计到三个类(class):整个弹簧系统(Rope)、小球(Mass)和弹簧(Spring)。详情如下所示:
弹簧(Spring)类class Spring {
// 弹簧长度
length;
// 弹簧系数
k=1;
// 弹簧相邻小球集合
points;
// 渲染的线对象
line;
constructor(length=2,k=1, points) {
this.length = length;
this.k = k;
this.line=new THREE.Line(new THREE.BufferGeometry(), new THREE.LineBasicMaterial({color: 0xf0f000}))
this.points = points;
this.updateLine();
}
// 更新弹簧位置
updateLine(){
this.line.geometry.setFromPoints(this.points);
}
}
弹簧类中属性的作用
- length 和 k 用来计算弹簧产生的力,该力为一个向量
- points 和 line 用来进行渲染,将弹簧通过 three 展示在屏幕上
class Mass{
    // 质量
    mass=1;
    // 前一时刻的坐标
    positionPre;
    // 当前时刻的坐标
    positionCurr;
    // 下一时刻的坐标
    positionFuture;
    // 渲染的小球对象
    object=new THREE.Mesh(new THREE.SphereBufferGeometry(0.5), new THREE.MeshNormalMaterial());
    constructor(mass, position) {
        this.mass = mass;
        this.positionPre = position;
        this.positionCurr = position;
        this.object.position.set(position.x, position.y, position.z);
    }

    // 根据阻尼系数,时间 delta 和加速度 a 计算下一时刻的坐标
    setPosition(dampingFactor, delta, a){
        let {positionPre, positionCurr, positionFuture, object}=this
        positionFuture = positionCurr.clone().add(positionCurr.clone().sub(positionPre).multiplyScalar(1-dampingFactor))
                .add(a.multiplyScalar(delta^2));
        object.position.set(positionFuture.x, positionFuture.y, positionFuture.z)
        this.positionPre = positionCurr;
        this.positionCurr = positionFuture;
    }
}
小球类中属性的作用
- mass 质量,计算加速度所需条件
- positionPre、positionCurr、positionFuture 不同时刻的坐标
- object 渲染出的小球对象
- setPosition 复现 Verlet 公式
class Rope{
    // 节点数目
    num_nodes=0;
    // 包含的小球集合
    massArray=[];
    // 包含的弹簧集合
    springArray=[];
    constructor(num_nodes) {
        this.num_nodes = num_nodes;
        this.initRope(num_nodes);
    }
    // 根据节点数初始化弹簧
    initRope(num){
        if(num<2){
            alert("节点数量不够");
        }
        const {massArray, springArray} = this;
        for (let i = 0; i < num; i++) {
            const position = new THREE.Vector3(i*3, 1, 0);
            massArray[i] = new Mass(500, position);
        }
        for (let i = 0; i < num - 1; i++) {
            springArray[i] = new Spring(2, 1,[massArray[i].object.position, massArray[i+1].object.position]);
        }
    }
    // 将所有加入虚拟场景中
    addMesh(scene){
        for (let i = 0; i < this.num_nodes; i++) {
            scene.add(this.massArray[i].object);
        }
        for (let i = 0; i < this.num_nodes-1; i++) {
            scene.add(this.springArray[i].line);
        }
    }

    // 首先通过模拟计算弹簧系统各个成分的坐标,然后通过各个类的更新方法更新坐标
    updateRope(delta){
        let i=0;
        for (i = 1; i < this.num_nodes-1; i++) {
            const sphere = this.massArray[i];
            const positionPre = this.massArray[i-1].object.position;
            const positionCurr = this.massArray[i].object.position;
            const positionFuture = this.massArray[i+1].object.position;

            // 计算弹力
            const vector1 = positionCurr.clone().sub(positionPre);
            const springForce1 = vector1.clone().normalize().multiplyScalar(vector1.clone().length()-2).multiplyScalar(-1);

            const vector2 = positionFuture.clone().sub(positionCurr);
            const springForce2 = vector2.clone().normalize().multiplyScalar(vector2.clone().length()-2).multiplyScalar(-1*(-1));

            // 计算重力
            const gravity = new THREE.Vector3(0, -1, 0);
            // 计算合力
            const resultForce = springForce1.clone().add(gravity).add(springForce2);

            const a = resultForce.multiplyScalar(1/sphere.mass);
            const dampingFactor = 0.005;

            sphere.setPosition(dampingFactor, delta, a);
        }

        for (let i = 0; i < this.num_nodes-1; i++) {
            this.springArray[i].updateLine();
        }

    }
}
Rope 类代码量比较多,但实际上仅做了初始化和更新两个操作
- 初始化物体时,创建对应数目的弹簧和小球
- 通过 addMesh 方法将小球和弹簧加入虚拟三维场景中
- 通过 updateRope 方法更新小球和弹簧的位置
- 首先计算一个小球相邻弹簧带给其的弹力
- 再计算小球的重力
- 将小球的两个弹力和重力加起来,注意是向量相加
- 通过牛顿第二定律求出小球的加速度 a
- 更新小球坐标
- 根据小球坐标更新弹簧坐标
import * as THREE from "/lib/three/build/three.module.js"
import {OrbitControls} from "/lib/three/examples/jsm/controls/OrbitControls.js"
import {DragControls} from "/lib/three/examples/jsm/controls/DragControls.js"
import {Rope} from "./springSystemClass.js";

// 创建 Canvas 元素
const canvas = document.createElement("canvas");
const width = canvas.width = 800;
const height = canvas.height = 500;
document.body.appendChild(canvas);

const clock = new THREE.Clock();

// init variable
const scene = new THREE.Scene();
const camera= new THREE.PerspectiveCamera(45, width/height);
const renderer = new THREE.WebGLRenderer({antialias: true, canvas, alpha: 1});
renderer.setSize(width, height);

// scene.add(new THREE.AxesHelper(10));

camera.position.set(10, 10, 10);
camera.lookAt(0, 0, 0);
const orbitControl = new OrbitControls(camera, canvas);

// 创建弹簧系统
const rope = new Rope(5);
rope.addMesh(scene);

let enableSelection = false;
const objects = rope.massArray.map(value => value.object);
const dragControls = new DragControls(objects, camera, canvas);

// 设置拖动事件
dragControls.addEventListener( 'dragstart', function ( event ) {
    orbitControl.enabled = false;
    enableSelection = true;
    console.log(event)

} );

dragControls.addEventListener( 'dragend', function ( event ) {
    orbitControl.enabled = true;
    enableSelection = false;
    console.log(event)
} );

animation();
function animation(){
    renderer.render(scene, camera);
    const delta = clock.getDelta();

    if(!enableSelection) rope.updateRope(delta);

    requestAnimationFrame(animation)
}
该代码是比较常见的 Threejs 渲染代码
其中需要注意的是
- 通过创建 Rope 的实例动态创建弹簧系统
- 通过 dragControls 控制小球
- 使用 animation 方法重复渲染页面
作业8 · XiaXiang/web games101 - 码云 - 开源中国 (gitee.com)
该仓库还有利用 WebGL 实现 Games101 其它作业的代码,由于实验使用,很多代码没有经过美化,望理解
希望读者在看完后能提出意见, 点个赞, 鼓励一下, 我们一起进步. 加油 !!