kubernetes 目录 kubernetes 虚拟机创建三个节点 k8s install 部署hello world 应用 issue 汇总 node 一直处理NotReady状态 重启系统后虚拟机的网络不通 虚拟机创建三个节点 这里略过. 网络模式用的h
- kubernetes
- 虚拟机创建三个节点
- k8s install
- 部署hello world 应用
- issue 汇总
- node 一直处理NotReady状态
- 重启系统后虚拟机的网络不通
虚拟机创建三个节点
这里略过.
- 网络模式用的hostonly
- 系统ubuntu 20.04

set -x
#根据规划设置主机名(在3台机上分别运行)
hostnamectl set-hostname master01
hostnamectl set-hostname node01
hostnamectl set-hostname node02

#关闭防火墙
ufw disable

#关闭swap
swapoff -a && sed -ri 's/.*swap.*/#&/' /etc/fstab

#安装 docker
sudo apt-get install -y docker
sudo apt-get install -y docker.io
docker --version
systemctl start docker

apt-get install -y apt-transport-https
apt-get install -y curl

# kubeadm init 默认会去google拉镜像,所以换了阿里的源,前面docker是系统默认的.
curl https://mirrors.aliyun.com/kubernetes/apt/doc/apt-key.gpg | apt-key add -

cat <<EOF >/etc/apt/sources.list.d/kubernetes.list
deb https://mirrors.aliyun.com/kubernetes/apt/ kubernetes-xenial main
EOF

apt-get update

# master上运行
apt-get install -y kubelet kubeadm kubectl

# node上运行
apt-get install -y kubelet kubeadm
apt-get install -y ethtool
apt-get install -y socat
apt-get install -y conntrack

# check
kubeadm version

# 配置docker cgroupdriver (与kubelet要一致)
cat <<EOF >/etc/docker/daemon.json
{"exec-opts": ["native.cgroupdriver=systemd"]}
EOF

systemctl restart docker

systemctl start kubelet

export KUBECONFIG=/etc/kubernetes/admin.conf
# master 上运行
kubeadm init --image-repository registry.aliyuncs.com/google_containers --pod-network-cidr=10.244.0.0/16

#Your Kubernetes control-plane has initialized successfully!
#
#To start using your cluster, you need to run the following as a regular user:
#
#  mkdir -p $HOME/.kube
#  sudo cp -i /etc/kubernetes/admin.conf $HOME/.kube/config
#  sudo chown $(id -u):$(id -g) $HOME/.kube/config
#
#Alternatively, if you are the root user, you can run:
#
#  export KUBECONFIG=/etc/kubernetes/admin.conf
#
#You should now deploy a pod network to the cluster.
#Run "kubectl apply -f [podnetwork].yaml" with one of the options listed at:
#  https://kubernetes.io/docs/concepts/cluster-administration/addons/
#
#Then you can join any number of worker nodes by running the following on each as root:
#
#kubeadm join 192.168.137.6:6443 --token vzcxza.bhcs335r92677g3i \
#	--discovery-token-ca-cert-hash sha256:72b820c8f2dd7606ddbf6a155fadb57e0f266c15bb39c7f41de61cc605f6f962

# kubeadm init 通过给的 kubeadm join 将node 加入master 节点
kubeadm join 192.168.137.6:6443 --token vzcxza.bhcs335r92677g3i \
	--discovery-token-ca-cert-hash sha256:72b820c8f2dd7606ddbf6a155fadb57e0f266c15bb39c7f41de61cc605f6f962

# K8S在kubeadm init以后查询kubeadm join
# kubeadm token create --print-join-command

set +x
到这1个master节点2个node节点的k8s就搭好了
可以用kubect get xxx 检查状态,(我这里刚搭完还是 notReady 状态,检查后是网络插件没装,遇到的话可以参考后面issue汇总里面)
root@master01:~/k8s# kubectl get nodes -A
NAME       STATUS   ROLES                  AGE     VERSION
master01   Ready    control-plane,master   4d17h   v1.23.5
node01     Ready    <none>                 2d      v1.23.5
node02     Ready    <none>                 2d      v1.23.5
- app :
package main

import (
	"net/http"
	"flag"
	log "github.com/sirupsen/logrus"
	"github.com/gin-gonic/gin"
)

func entry(c *gin.Context) {
	c.String(http.StatusOK, "hello !")
}

func main() {

	flag.Parse()

	var (
	)

	log.Info("hello serv start ...")

	engine := gin.Default()
	engine.GET("/entry", entry)

	engine.Run("0.0.0.0:8868")

}
- dockerfile
FROM golang:1.17.2-stretch

ENV GOPROXY=http://goproxy.io

WORKDIR $GOPATH/src/
ADD ./bin $GOPATH/src/bin
ADD ./source $GOPATH/src/
RUN go env -w GOSUMDB=off

WORKDIR $GOPATH/src/
RUN go build -o /usr/local/bin/engine
CMD ["/usr/local/bin/engine"]
- yml
很久前玩minikube 的镜像: ailumiyana/minikube-hello:latest, 以前就放在docker hub了,app 就是上面的go代码,有需要自取,但这里建议开启docker代理,不然下载很慢或者可能都下不下来
apiVersion: apps/v1
kind: Deployment
metadata:
  name: hello-minikubes
spec:
  selector:
    matchLabels:
      app: myweb
  replicas: 2
  template:
    metadata:
      labels:
        app: myweb
    spec:
      containers:
        - name: hello-minikubes
          image: ailumiyana/minikube-hello:latest
          ports:
            - containerPort: 8868
              protocol: TCP
---
apiVersion: v1
kind: Service
metadata:
  name: myweb
spec:
  type: NodePort
  ports:
    - port: 8868
      targetPort: 8868
      nodePort: 31314
  selector:
    app: myweb
kubectl apply -f hello.yml

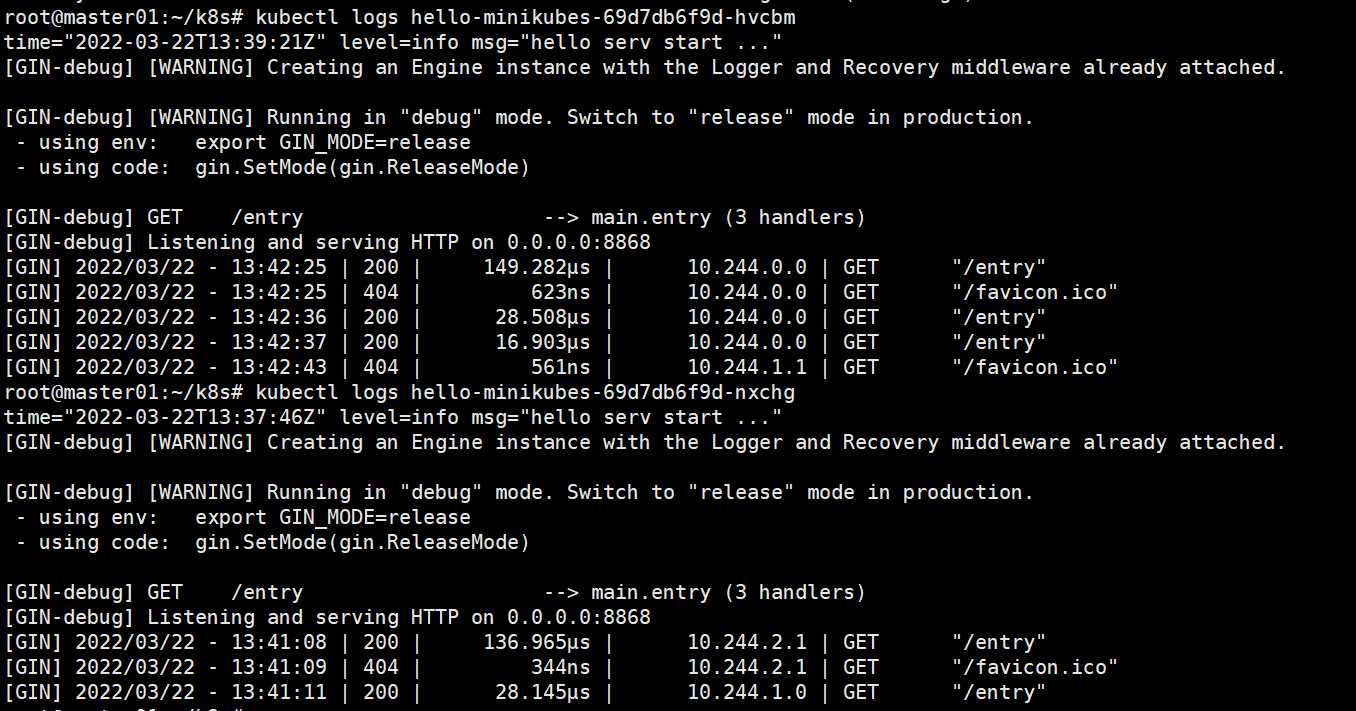
F5几下,检查两个节点,好像都有流量,还不知道什么策略,慢慢研究~

今天先到这~
issue 汇总 node 一直处理NotReady状态- kubectl describe node node01
检查到notready 状态 原因: - untime network not ready: NetworkReady=false reason:NetworkPluginNotReady message:docker: network plugin is not ready: cni config uninitialized
好像是没网络插件,搜索尝试手动添加 flannel 镜像和 cni 配置 后解决
docker pull quay.io/coreos/flannel:v0.11.0-amd64

mkdir -p /etc/cni/net.d/

cat <<EOF> /etc/cni/net.d/10-flannel.conf
{"name":"cbr0","type":"flannel","delegate": {"isDefaultGateway": true}}
EOF

mkdir /usr/share/oci-umount/oci-umount.d -p

mkdir /run/flannel/

cat <<EOF> /run/flannel/subnet.env
FLANNEL_NETWORK=172.100.0.0/16
FLANNEL_SUBNET=172.100.1.0/24
FLANNEL_MTU=1450
FLANNEL_IPMASQ=true
EOF
https://raw.githubusercontent.com/coreos/flannel/v0.11.0/Documentation/kube-flannel.yml
然后这个yml 里面beta版本貌似是过期的,改成v1 后好了
这个也是个坑,最后在网络连接里面,重新关闭开启vmnet1的网络共享后好了.
作者 —— 靑い空゛出处:http://www.cnblogs.com/ailumiyana/
除特别注明外,本站所有文章均为靑い空゛原创,欢迎转载分享,但请注明出处。
