我们在项目中都会遇到项目打包,可以通过assembly对我们的项目进行打包。 1、首先看一下在打包前的项目文件结构。 2、在pom.xml中配置assembly插件 build plugins plugin groupIdorg.springframework
我们在项目中都会遇到项目打包,可以通过assembly对我们的项目进行打包。
1、首先看一下在打包前的项目文件结构。

2、在pom.xml中配置assembly插件
 <build>
 <plugins>
 <plugin>
 <groupId>org.springframework.boot</groupId>
 <artifactId>spring-boot-maven-plugin</artifactId>
 </plugin>
 <plugin>
 <groupId>org.apache.maven.plugins</groupId>
 <artifactId>maven-compiler-plugin</artifactId>
 <configuration>
 <source>1.8</source>
 <target>1.8</target>
 </configuration>
 </plugin>
 <plugin>
 <groupId>org.apache.maven.plugins</groupId>
 <artifactId>maven-assembly-plugin</artifactId>
 <version>2.4</version>
 <configuration>
 <appendAssemblyId>false</appendAssemblyId>
 <descriptors>
 <descriptor>src/main/assembly/assembly.xml</descriptor>
 </descriptors>
 </configuration>
 <executions>
 <execution>
 <id>make-assembly</id>
 <!-- 绑定到package生命周期阶段上 -->
 <phase>package</phase>
 <goals>
 <goal>assembly</goal>
 </goals>
 </execution>
 </executions>
 </plugin>
 </plugins>
 </build>
3、在assembly这个目录下新增assembly.xml这个文件
<assembly>
 <id>assembly</id>
 <formats>
 <!--打包的文件类型-->
 <format>tar.gz</format>
 </formats>

 <includeBaseDirectory>false</includeBaseDirectory>

 <fileSets>
 <fileSet>
 <directory>src/main/assembly/bin</directory>
 <outputDirectory>/bin</outputDirectory>
 <includes>
 <include>*.sh</include>
 </includes>
 <!--打包文件权限-->
 <fileMode>0755</fileMode>
 </fileSet>

 <fileSet>
 <!--原文件目录-->
 <directory>src/main/resources</directory>
 <!--打包的目录-->
 <outputDirectory>/conf</outputDirectory>
 </fileSet>
 <!--将项目文件打包为jar文件-->
 <fileSet>
 <directory>${project.build.directory}</directory>
 <outputDirectory>/lib</outputDirectory>
 <includes>
 <include>*.jar</include>
 </includes>
 </fileSet>

 </fileSets>
 <!--添加 jar的打包-->
 <dependencySets>
 <dependencySet>
 <outputDirectory>lib</outputDirectory>
 </dependencySet>
 </dependencySets>

</assembly>
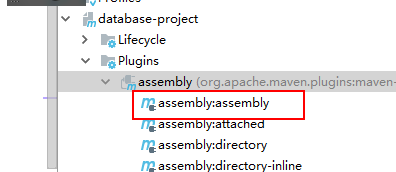
4、点击 assembly:assembly 就能进行打包。
5、查看打好包的文件

5、附上start.sh,stop.sh文件
start.sh文件
#!/usr/bin/env bash

#source $(dirname $0)/../../env.sh
SERVERJAR="database-project-0.0.1-SNAPSHOT.jar"
base_dir=$(dirname $0)
cd ..


if [ "$JAVA_HOME" != "" ]; then
 JAVA="$JAVA_HOME/bin/java"
else
 JAVA=java
fi


JAVA_OPTS="-server -Xms32m -Xmx32m -Xmn24m -Xss256K \
-XX:SurvivorRatio=4 -XX:+UseConcMarkSweepGC -XX:+UseCMSCompactAtFullCollection \
-XX:CMSInitiatingOccupancyFraction=60 -XX:+PrintGCDateStamps \
-XX:+PrintGCDetails -Xloggc:$base_dir/gc.log"

echo -n "Starting server ..."
 PID=$(ps -ef | grep database-project-0.0.1-SNAPSHOT.jar | grep -v grep |awk '{print $2}')
if [ -z "$PID" ]; then
 echo Application is already stopped
else
 echo kill $PID
 kill -9 $PID
fi

echo `pwd`
echo $SERVERJAR
echo $JAVA
echo $JAVA_OPTS
echo $JAVA_DEBUG_OPT

nohup $JAVA $JAVA_OPTS $JAVA_DEBUG_OPT -jar lib/$SERVERJAR > $base_dir/nohup.out &

if [ $? -eq 0 ];then
 # echo -n $! > "$PIDFILE"
 if [ $? -eq 0 ]
 then
 sleep 1
 echo STARTED
 else
 echo FAILED TO WRITE PID
 exit 1
 fi
else
 echo SERVER DID NOT START
 exit 1
fi
stop.sh
#!/usr/bin/env bash


SERVERJAR="database-project-0.0.1-SNAPSHOT.jar"

base_dir=$(dirname $0)

echo -n "Stopping server ..."
 PID=$(ps -ef | grep database-project-0.0.1-SNAPSHOT.jar | grep -v grep |awk '{print $2}')
if [ -z "$PID" ]; then
 echo Application is already stopped
else
 echo kill $PID
 kill -9 $PID
fi
exit 0
文件解压运行start.sh文件
脚本意思可以参考
https://www.jb51.net/article/39506.htm
日志可以参考
https://www.jb51.net/article/152599.htm
启动运行参数可以参考
https://www.jb51.net/article/161958.htm
https://www.jb51.net/article/107058.htm
在启动脚本的的时候可能会 ./start.sh 脚本的时候可能会报错
No such file or directory
这是由于在windows下编写的脚本文件,放到Linux中无法识别格式,编辑start.sh和stop.sh脚本文件,set ff=unix 设置为linux下环境
set ff=unix

查看脚本启动情况
tail -f -n 500 nohup.out

总结
到此这篇关于maven插件assembly使用及springboot启动脚本start.sh和停止脚本 stop.sh的文章就介绍到这了,更多相关maven插件assembly使用springboot启动停止脚本内容请搜索易盾网络以前的文章或继续浏览下面的相关文章希望大家以后多多支持易盾网络!