1.添加Swagger2依赖 dependency groupIdio.springfox/groupId artifactIdspringfox-swagger2/artifactId version2.2.2/version/dependencydependency groupIdio.springfox/groupId artifactIdspringfox-swagger-ui/artifactId version2.2.2/version/depen
1.添加Swagger2依赖
<dependency>
  <groupId>io.springfox</groupId>
  <artifactId>springfox-swagger2</artifactId>
  <version>2.2.2</version>
</dependency>
<dependency>
   <groupId>io.springfox</groupId>
  <artifactId>springfox-swagger-ui</artifactId>
  <version>2.2.2</version>
</dependency>
2配置类
@Configuration
@EnableSwagger2
public class Swagger2 {
  @Bean
  public Docket createRestApi() {
    return new Docket(DocumentationType.SWAGGER_2)
        .apiInfo(apiInfo())
        .select()
        .apis(RequestHandlerSelectors.basePackage("com.bs.swaggertest.controller"))
        .paths(PathSelectors.any())
        .build();
  }
  private ApiInfo apiInfo() {
    return new ApiInfoBuilder()
        .title("微信项目接口对接文档")
        .description("测试环境接口调试")
        .contact("陶海军")
        .version("1.0")
        .build();
  }
}
3.添加文档内容
@RestController
@RequestMapping(value="/users")
public class UserController {
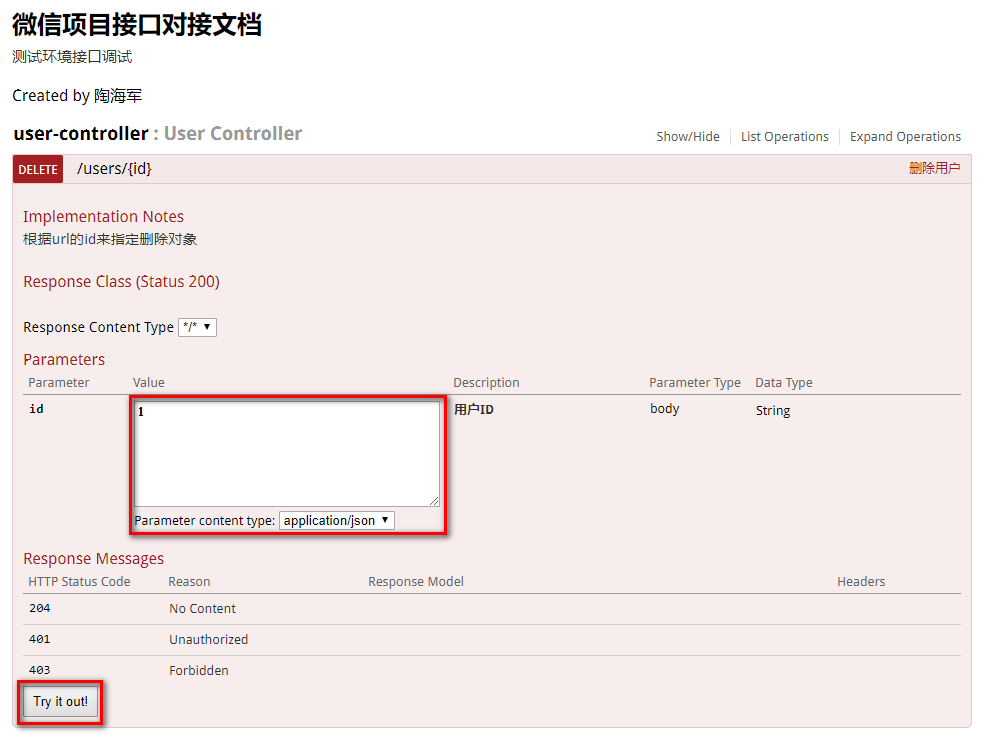
@ApiOperation(value="删除用户", notes="根据url的id来指定删除对象")
@ApiImplicitParam(name = "id", value = "用户ID", required = true, dataType = "String")
@RequestMapping(value="/{id}", method=RequestMethod.DELETE)
public String deleteUser(@PathVariable String id) {
return "success";
}
}
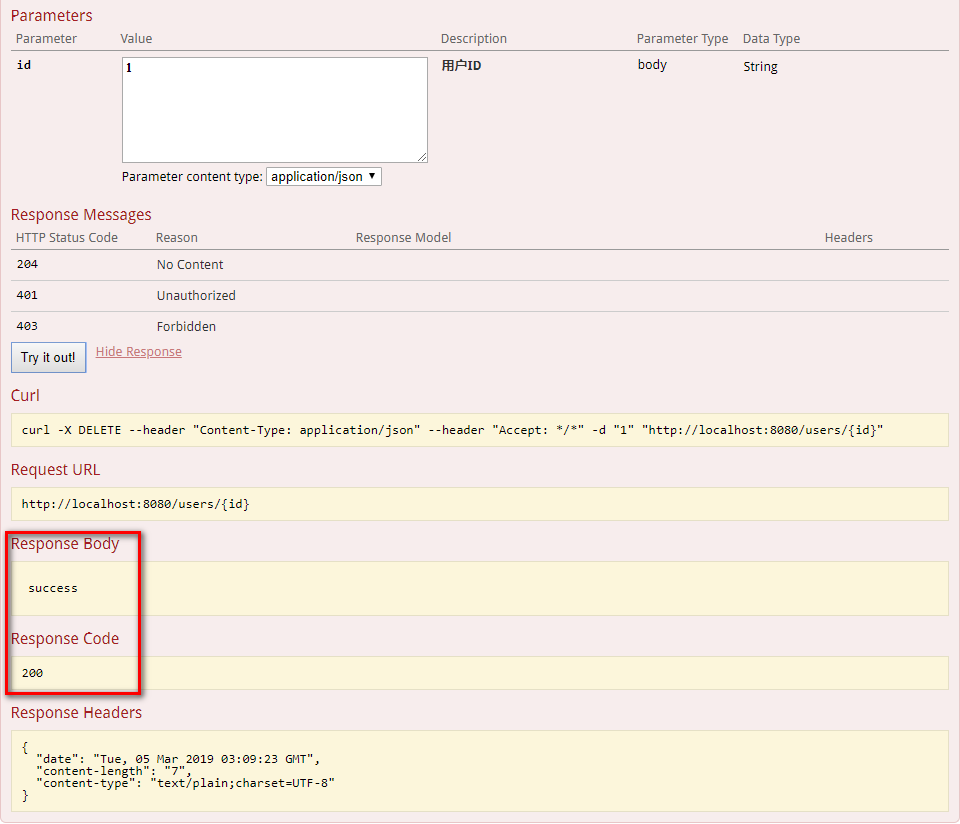
4.测试
http://localhost:8080/swagger-ui.html

以上就是本文的全部内容,希望对大家的学习有所帮助,也希望大家多多支持易盾网络。