drf认证 官网地址: https://www.django-rest-framework.org/api-guide/requests/ 1.drf的执行流程与源码剖析 from rest_framework.views import APIViewclass StudentView(APIView): def get(self,request,*args,**kwargs): pass 说明:图片
官网地址:https://www.django-rest-framework.org/api-guide/requests/
from rest_framework.views import APIView

class StudentView(APIView):
    def get(self,request,*args,**kwargs):
        pass
说明:图片上的settings表示内容可能与配置文件有关;
-
dispatch()函数源码:
# View的入口是dispatch() # APIView的dispatch()源码如下 def dispatch(self, request, *args, **kwargs): """ `.dispatch()` is pretty much the same as Django's regular dispatch, but with extra hooks for startup, finalize, and exception handling. """ self.args = args self.kwargs = kwargs # 为request进行进一步的丰富,详情见下一个代码块 request = self.initialize_request(request, *args, **kwargs) # 将添加后的request复制给原来的request self.request = request self.headers = self.default_response_headers # deprecate? try: self.initial(request, *args, **kwargs) #执行功能件下方详解 # 原来View中执行的函数; if request.method.lower() in self.http_method_names: handler = getattr(self, request.method.lower(), self.http_method_not_allowed) else: handler = self.http_method_not_allowed response = handler(request, *args, **kwargs) except Exception as exc: response = self.handle_exception(exc) self.response = self.finalize_response(request, response, *args, **kwargs) return self.response -
initialize_request源码
def initialize_request(self, request, *args, **kwargs): """ Returns the initial request object. """ parser_context = self.get_parser_context(request) return Request( request, parsers=self.get_parsers(), authenticators=self.get_authenticators(),# 为原生request封装其他参数; negotiator=self.get_content_negotiator(), parser_context=parser_context ) -
get_authenticators源码
def get_authenticators(self): """ Instantiates and returns the list of authenticators that this view can use. """ # 使用列表生成式在实例化对象。 return [auth() for auth in self.authentication_classes] -
initial函数源码;
self.initial(request, *args, **kwargs) def initial(self, request, *args, **kwargs): """ Runs anything that needs to occur prior to calling the method handler. """ self.format_kwarg = self.get_format_suffix(**kwargs) # Perform content negotiation and store the accepted info on the request neg = self.perform_content_negotiation(request) request.accepted_renderer, request.accepted_media_type = neg # Determine the API version, if versioning is in use. version, scheme = self.determine_version(request, *args, **kwargs) request.version, request.versioning_scheme = version, scheme # Ensure that the incoming request is permitted self.perform_authentication(request) #执行权限认证 self.check_permissions(request) self.check_throttles(request) -
perform_authentication源码
def perform_authentication(self, request): """ Perform authentication on the incoming request. Note that if you override this and simply 'pass', then authentication will instead be performed lazily, the first time either `request.user` or `request.auth` is accessed. """ request.user # 执行request下的user -
user源码
@property def user(self): if not hasattr(self, '_user'):#使用反射,判断对象是否包含该属性 with wrap_attributeerrors(): self._authenticate() # 执行私有函数 return self._user -
_authenticate函数;
def _authenticate(self):
    for authenticator in self.authenticators:
        # authenticators=self.get_authenticators(),此处加入的实例化对象
        try:
            user_auth_tuple = authenticator.authenticate(self)
            # 执行该对象的`authenticate`方法,并得到返回值
        except exceptions.APIException:
            self._not_authenticated()
            raise

        if user_auth_tuple is not None:# 返回值不为空
            self._authenticator = authenticator # 将认证对象,赋值给对象
            self.user, self.auth = user_auth_tuple # 将元组的两个元素,传递给对象中的两个变量,可以在视图函数中被调用
            # 两个变量一般为用户和token
            return

    self._not_authenticated()# 不存在返回值,则执行改函数。


'''
即,在此处循环
	[auth() for auth in self.authentication_classes]
这个了列表
'''
def _not_authenticated(self): #走到此处即为匿名用户。 self._authenticator = None # 没有认证函数默认为 None if api_settings.UNAUTHENTICATED_USER: self.user = api_settings.UNAUTHENTICATED_USER() #读取配置文件中的值 else: self.user = None # 否则将值赋值为None if api_settings.UNAUTHENTICATED_TOKEN:# self.auth = api_settings.UNAUTHENTICATED_TOKEN() #默认token else: self.auth = None
说明:通过上述源码流程应该得知,自己定义的认证类,一般需要返回一个元组,包含两个值,通常为用户和token;当没有这两项值的时候,即为未登录的状态,而这两项值被封装到当前request对象中,方便自定义函数中使用。
from django.shortcuts import HttpResponse
from rest_framework.views import APIView
from rest_framework.authentication import BaseAuthentication
from rest_framework import exceptions

def md5(user): #生成token
    import hashlib
    import time
    ctime = str(time.time())
    m = hashlib.md5(bytes(user,encoding='utf-8'))
    m.update(bytes(ctime,encoding='utf-8'))
    return m.hexdigest()


class MyAuthentication(object):
    def authenticate(self, request):
        token = request._request.GET.get('token')
        # 获取用户名和密码,去数据校验
        if not token:
            raise exceptions.AuthenticationFailed('用户认证失败')
        return ("alex", None)

    def authenticate_header(self, val):
        pass

class StudentView(APIView):
    authentication_classes=[MyAuthentication,] #注册使用验证函数
    def get(self,request,*args,**kwargs):
		if request.user and request.auth: #当存在用户与token的时候进行返回
            # 此处可以升级为数据库查询的方式,但是简单使用的方式不常用。
        	return HttpResponse("Hello world")
通过上述的源码进行分析得知:认证类必须要实现authenticate方法,而框架内部封装了认证类,因此我们编写自己的认证类的时候通常继承框架提供的类。
# 内置认证类。
class BaseAuthentication:
    """
    All authentication classes should extend BaseAuthentication.
    """

    def authenticate(self, request):
        """
        Authenticate the request and return a two-tuple of (user, token).
        """
        '''继承该类的话,该方法必须被重写,类似于java中的接口,抽象方法'''
        raise NotImplementedError(".authenticate() must be overridden.")

    def authenticate_header(self, request):
		'''
		不常用。主要用于返回与浏览器结合使用的状态框使用
		'''
        pass
# 自定义认证类,规范

from rest_framework.authentication import BaseAuthentication
from rest_framework import exceptions

from app01 import models

class MyAuthentication(BaseAuthentication):

    def authenticate(self, request):
        # 源码中为原生request进行了封装为_request,也可以不写按照继承关系亦可找到
        token=request._request.GET.get('token')
        token_obj = models.UserToken.objects.filter(token=token).first()
        if not token_obj:
            raise exceptions.AuthenticationFailed('用户认证失败')
        # 在rest framework内部会将整个两个字段赋值给request,以供后续操作使用
        return (token_obj.user, token_obj)


    def authenticate_header(self, request):
        pass
# 视图函数,

import time #导包按照开发规范进行导包。
import hashlib

from django.http.response import JsonResponse
from rest_framework.views import APIView

from app01 import models

def md5(user):
    ctime = str(time.time())
    m = hashlib.md5(bytes(user, encoding='utf-8')) # 使用当前时间戳,为算法加盐
    m.update(bytes(ctime, encoding='utf-8'))
    return m.hexdigest()

class AuthView(APIView):
    """
    用于用户登录认证
    """
    authentication_classes = []
    def post(self,request,*args,**kwargs): #登录功能一般使用post进行操作
        ret = {'code':1000,'msg':None} #初始化返回值
        try:
            user = request._request.POST.get('username')
            pwd = request._request.POST.get('password')
            # 往数据库查询参数
            obj = models.UserInfo.objects.filter(username=user,password=pwd).first()
            if not obj:# 用户不存在
                ret['code'] = 1001
                ret['msg'] = "用户名或密码错误"
            # 为登录用户创建token
            token = md5(user)
            # 存在就更新,不存在就创建
            models.UserToken.objects.update_or_create(user=obj,defaults={'token':token})
            ret['token'] = token
        except Exception as e:
            ret['code'] = 1002
            ret['msg'] = '请求异常'

        return JsonResponse(ret)

class StudentView(APIView):
    def get(self,request,*args,**kwargs):
        if request.user and request.auth:
            return JsonResponse({"msg":"查看成功!!!"})
        return JsonResponse({"msg":"无权查看"})
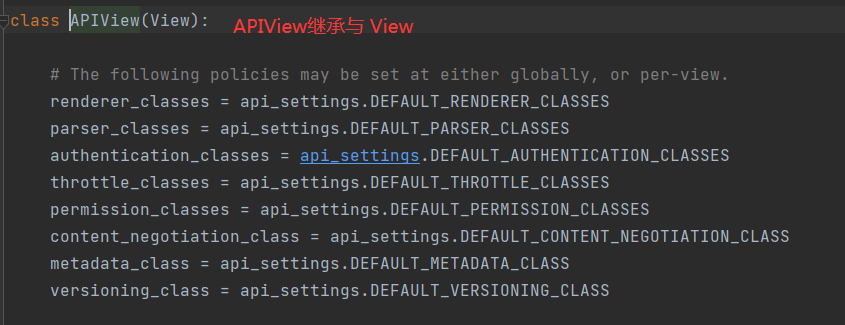
通过最开始的源码,可以进行配置文件的全局使用;
# APIView的部分源码
class APIView(View):

    # The following policies may be set at either globally, or per-view.
    renderer_classes = api_settings.DEFAULT_RENDERER_CLASSES
    parser_classes = api_settings.DEFAULT_PARSER_CLASSES
    authentication_classes = api_settings.DEFAULT_AUTHENTICATION_CLASSES
    throttle_classes = api_settings.DEFAULT_THROTTLE_CLASSES
    permission_classes = api_settings.DEFAULT_PERMISSION_CLASSES
   	content_negotiation_class = api_settings.DEFAULT_CONTENT_NEGOTIATION_CLASS
    metadata_class = api_settings.DEFAULT_METADATA_CLASS
    versioning_class = api_settings.DEFAULT_VERSIONING_CLASS
匿名用户中用到的配置文件中的值。
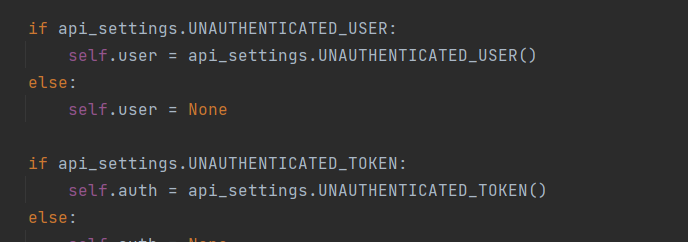
REST_FRAMEWORK={
    "DEFAULT_AUTHENTICATION_CLASSES":['app01.utils.auth.MyAuthentication',],
    "UNAUTHENTICATED_USER":None, # 匿名,request.user = None
    "UNAUTHENTICATED_TOKEN":None,# 直接使用None方便检查
}
-
登录接口:
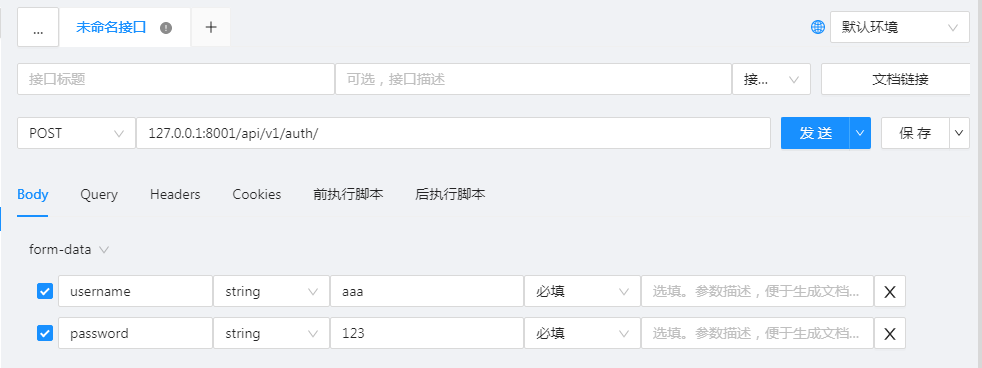

说明:使用
POST请求并没有设置token的参数,但是却没有触发错误;因此可能drf的post请求处理了csrf_token; -
查询接口

因为视图函数返回的是JsonResponse,并不是drf的序列化组件,因此暂时显示未序列化的值。使用
runapi进行查看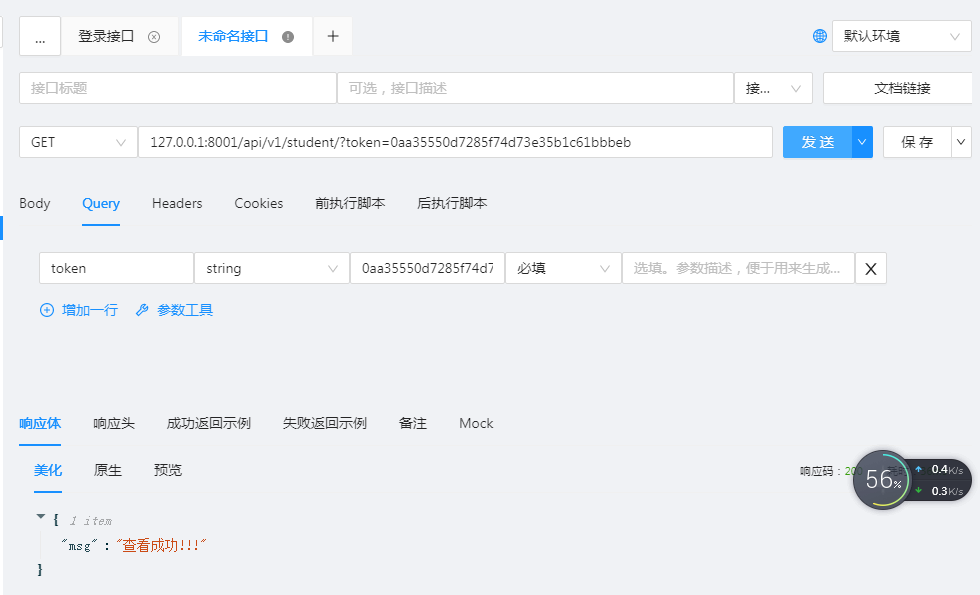
-
认证后期会涉及到JWT,此处不做过多的解释。
继续努力,终成大器;