java代码 package com.oauth.util;import org.springframework.boot.autoconfigure.condition.ConditionalOnProperty;import org.springframework.context.annotation.Bean;import org.springframework.context.annotation.Configuration;import springfox.
java代码
package com.oauth.util;

import org.springframework.boot.autoconfigure.condition.ConditionalOnProperty;
import org.springframework.context.annotation.Bean;
import org.springframework.context.annotation.Configuration;

import springfox.documentation.builders.ApiInfoBuilder;
import springfox.documentation.builders.PathSelectors;
import springfox.documentation.builders.RequestHandlerSelectors;
import springfox.documentation.service.ApiInfo;
import springfox.documentation.service.Contact;
import springfox.documentation.spi.DocumentationType;
import springfox.documentation.spring.web.plugins.Docket;
import springfox.documentation.swagger2.annotations.EnableSwagger2;

@Configuration
@EnableSwagger2
//是否开启swagger
@ConditionalOnProperty(name = "swagger.enable", havingValue = "true")
public class Swagger2 {

	// swagger2的配置文件,这里可以配置swagger2的一些基本的内容,比如扫描的包等等
	@Bean
	public Docket createRestApi() {
		return new Docket(DocumentationType.SWAGGER_2).apiInfo(apiInfo()).select()
				// 为当前包路径
				.apis(RequestHandlerSelectors.basePackage("com.oauth.controller")).paths(PathSelectors.any()).build();
	}

	private ApiInfo apiInfo() {
		return new ApiInfoBuilder()
				// 页面标题
				.title("Swagger2")
				// 创建人信息
				.contact(new Contact("scy", "666", "888"))
				// 版本号
				.version("1.0")
				// 描述
				.description("API 描述").build();
	}
}
yml文件
server:
 port: 8587

spring:
 application:
  name: auth

eureka:
 instance:
  prefer-ip-address: true
 client:
  service-url:
   defaultZone: http://localhost:8090/eureka/

swagger:
 enable: true
swagger:
enable: true 这里是设置是否启动 本地和测试环境为true 正式环境为false
controller
package com.oauth.controller;

import org.springframework.web.bind.annotation.GetMapping;
import org.springframework.web.bind.annotation.RequestMapping;
import org.springframework.web.bind.annotation.RestController;

import io.swagger.annotations.Api;
import io.swagger.annotations.ApiOperation;

@RestController
@RequestMapping("api")
@Api(value = "测试接口", tags = "IndexController")
public class IndexController {

	@ApiOperation(value = "hello")
	@GetMapping("hello")
	public String hello() {
		return "Hello World";
	}

	@ApiOperation(value = "hello2")
	@GetMapping("api/hello")
	public String apiHello() {
		return "Hello World";
	}

}
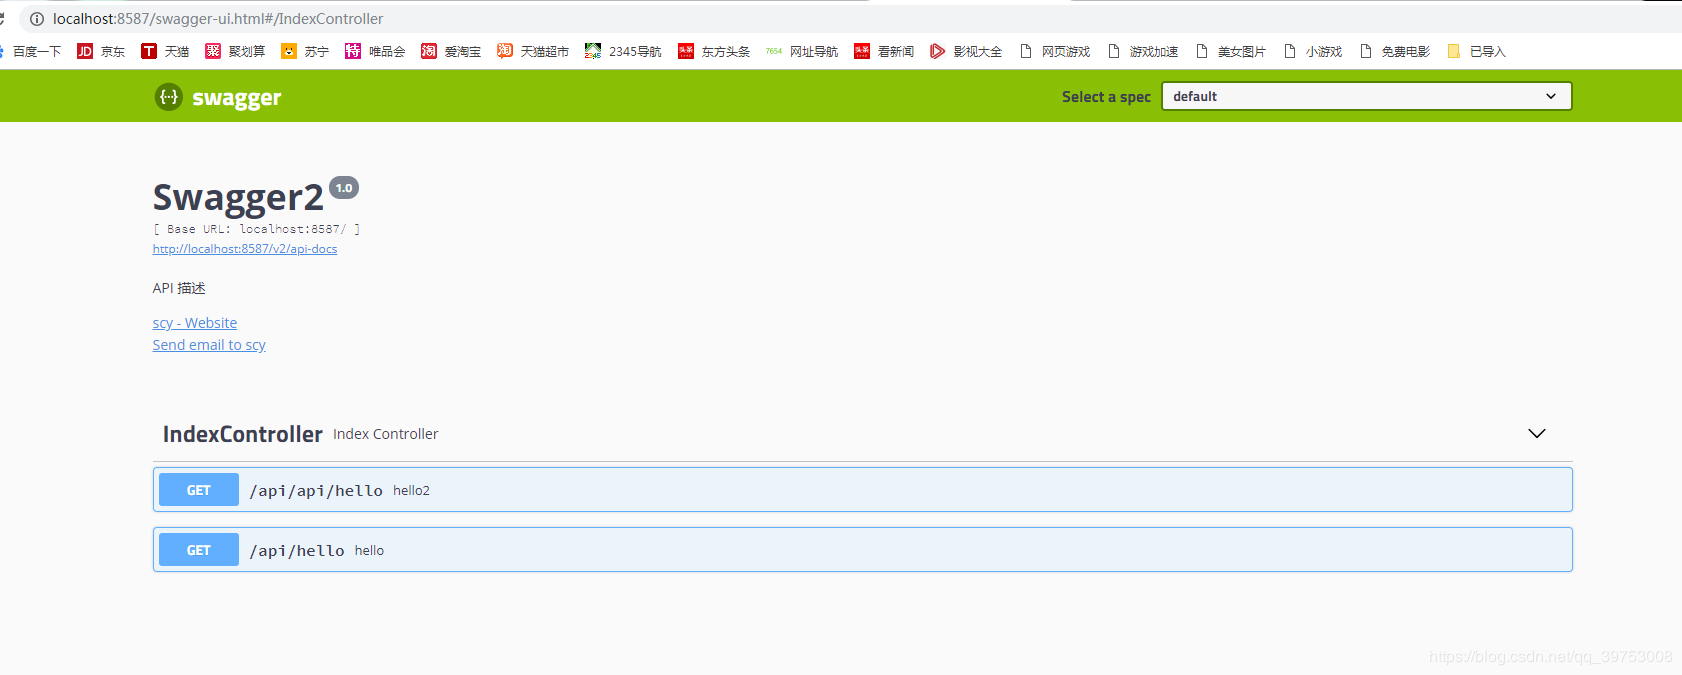
打开swagger页面 localhost:端口号/swagger-ui.html

如果swagger:
enable: false 这里设置为false

总结
到此这篇关于spring boot-2.1.16整合swagger-2.9.2 含yml配置文件的文章就介绍到这了,更多相关spring boot整合swagger内容请搜索易盾网络以前的文章或继续浏览下面的相关文章希望大家以后多多支持易盾网络!
