1.1 添加依赖 可以手动在 SpringBoot 项目添加依赖,也可以在项目创建时选择使用 ActiveMQ 5 自动添加依赖。高版本 SpringBoot (2.0 以上) 在添加 activemq 连接池依赖启动时会报 Error creating bean
1.1 添加依赖
可以手动在 SpringBoot 项目添加依赖,也可以在项目创建时选择使用 ActiveMQ 5 自动添加依赖。高版本 SpringBoot (2.0 以上) 在添加 activemq 连接池依赖启动时会报 Error creating bean with name 'xxx': Unsatisfied dependency expressed through field 'jmsTemplate'; 可以将 activemq 连接池换成 jms 连接池解决。
<dependency>
	<groupId>org.springframework.boot</groupId>
	<artifactId>spring-boot-starter-activemq</artifactId>
</dependency>

<!-- activemq 连接池 -->
<dependency>
  <groupId>org.apache.activemq</groupId>
  <artifactId>activemq-pool</artifactId>
</dependency>

<!-- jms 连接池 -->
<dependency>
  <groupId>org.messaginghub</groupId>
  <artifactId>pooled-jms</artifactId>
</dependency>

1.2 添加配置
spring:
 activemq:
  broker-url: tcp://127.0.0.1:61616
  # 是否是内存模式
  in-memory: false
  pool:
   # 是否用 PooledConnectionFactory 代替普通的 ConnectionFactory
   enabled: true
   # 最大连接数
   max-connections: 10
   # 连接空闲超时
   idle-timeout: 30000
1.3 测试类
/**
 * Created with IntelliJ IDEA.
 *
 * @author Demo_Null
 * @date 2020/8/5
 * @description MQ 测试
 */
@RunWith(SpringJUnit4ClassRunner.class)
@SpringBootTest()
public class MyMQTest {

  @Autowired
  private JmsTemplate jmsTemplate;

  @Test
  public void jms() {
    jmsTemplate.convertAndSend(new ActiveMQQueue("myTest"), "测试消息");
  }
}
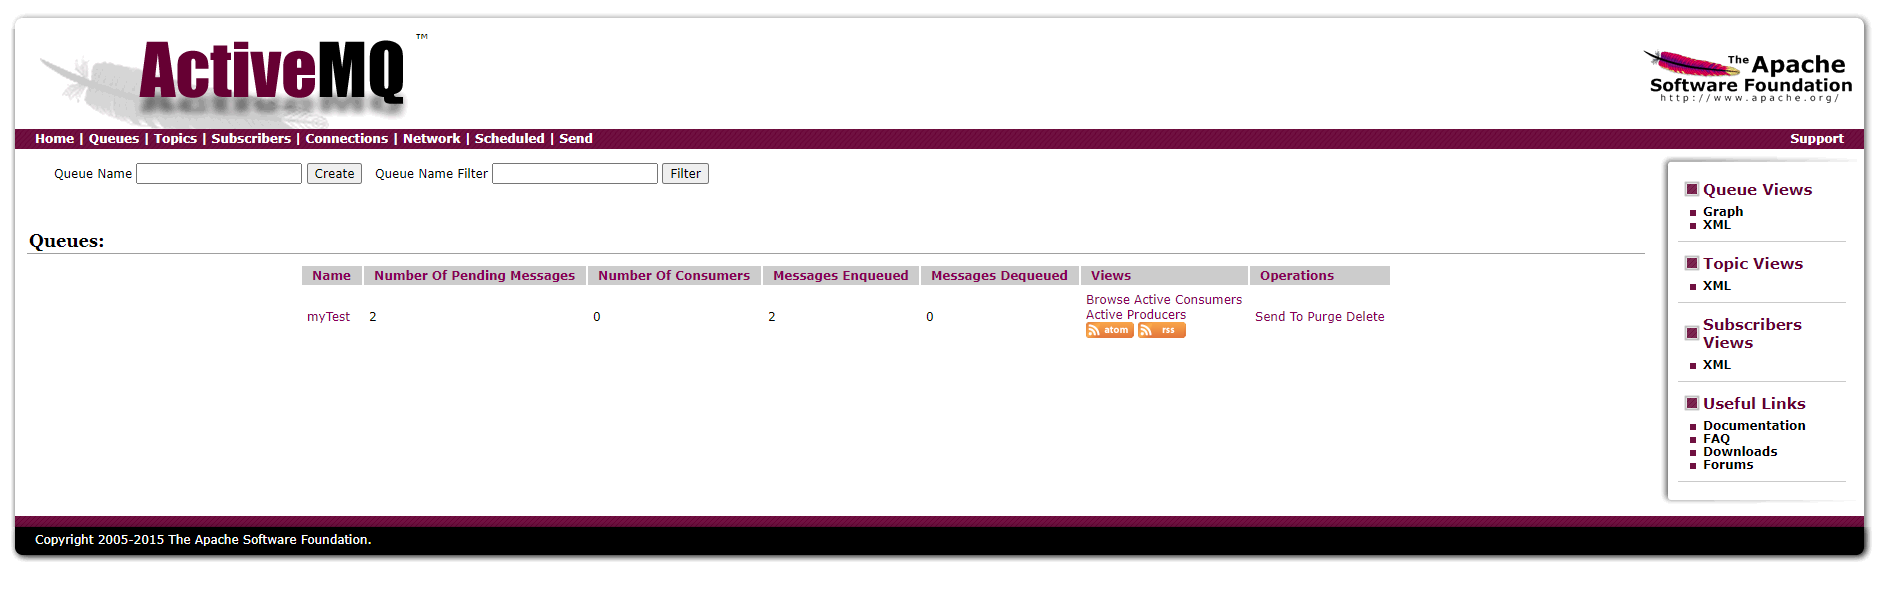
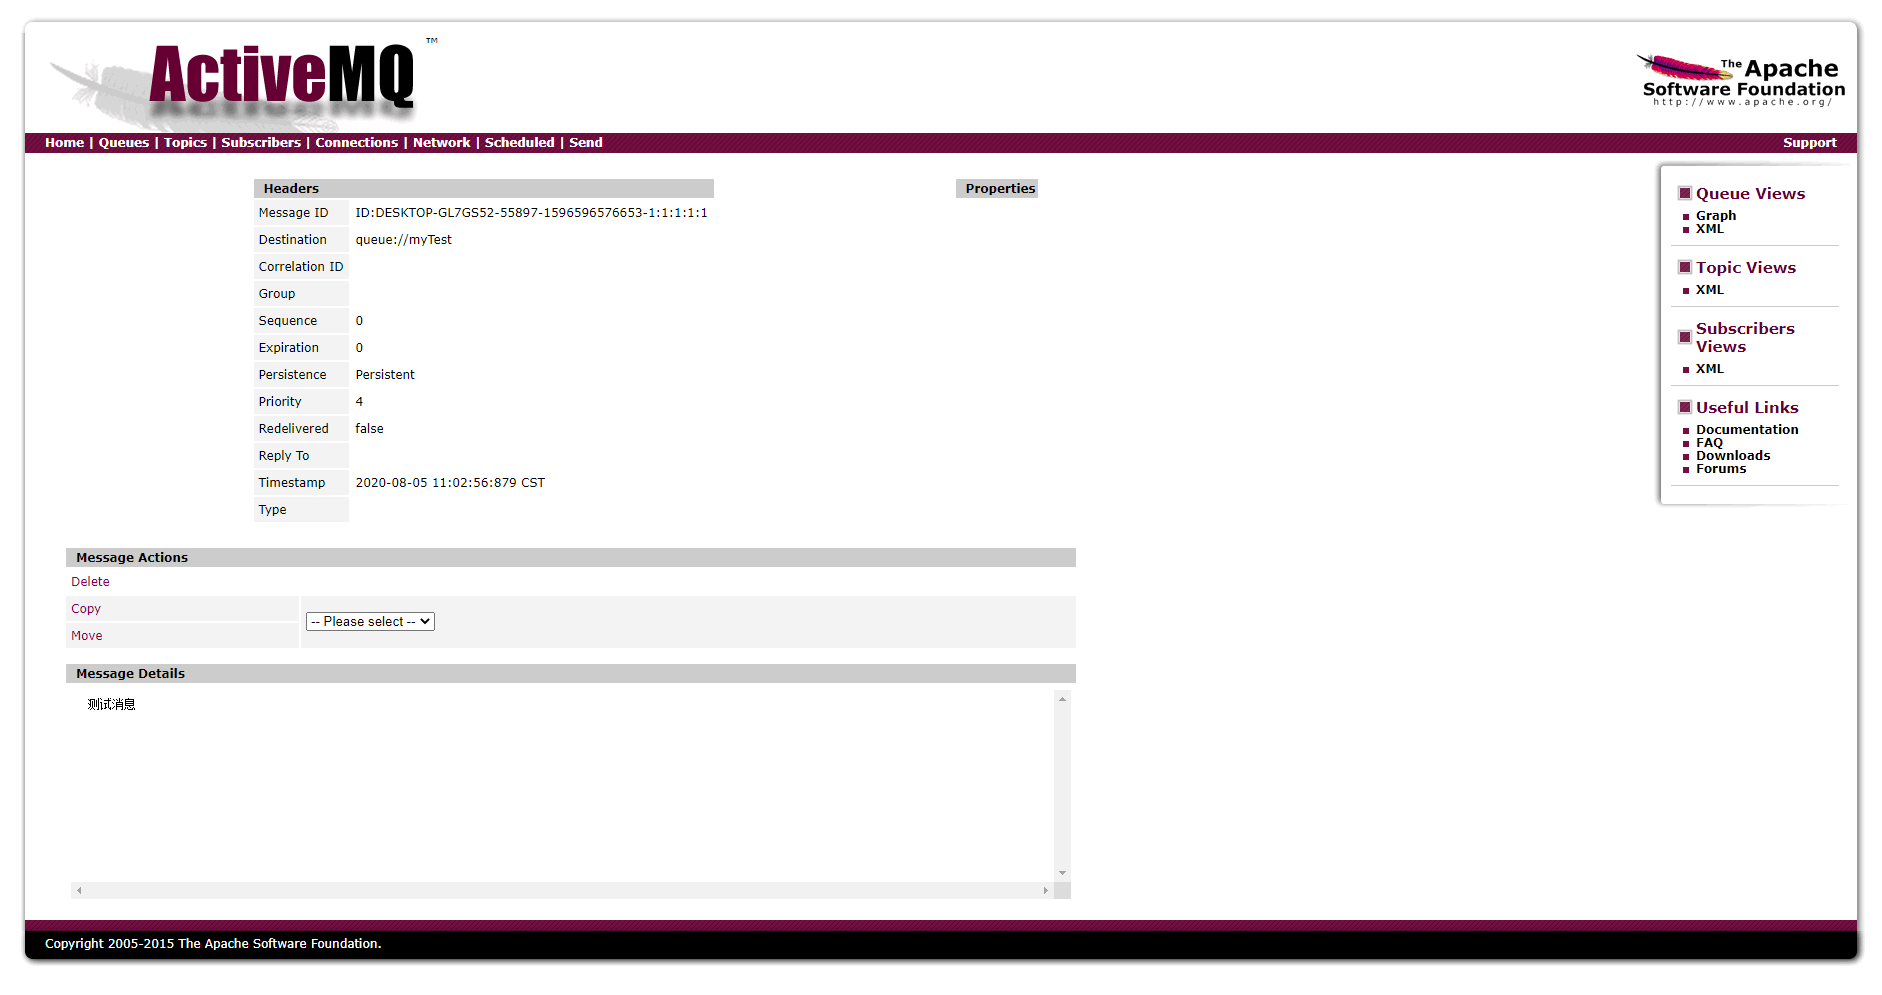
1.4 运行结果

到此这篇关于SpringBoot 整合 JMSTemplate的示例代码的文章就介绍到这了,更多相关SpringBoot 整合 JMSTemplate内容请搜索易盾网络以前的文章或继续浏览下面的相关文章希望大家以后多多支持易盾网络!