很多朋友还不知道ps怎么为圆形填充多个颜色?下面小编给大家带来了ps波浪扭曲矩形分割圆形颜色技巧分享,一起来看看吧。 ps怎么为圆形填充多个颜色?ps波浪扭曲矩形分割圆形颜色技
很多朋友还不知道ps怎么为圆形填充多个颜色?下面小编给大家带来了ps波浪扭曲矩形分割圆形颜色技巧分享,一起来看看吧。
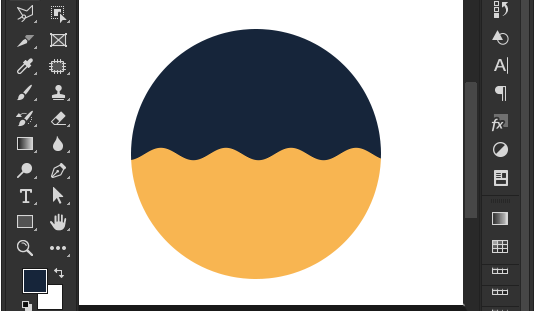
ps怎么为圆形填充多个颜色?ps波浪扭曲矩形分割圆形颜色技巧分享
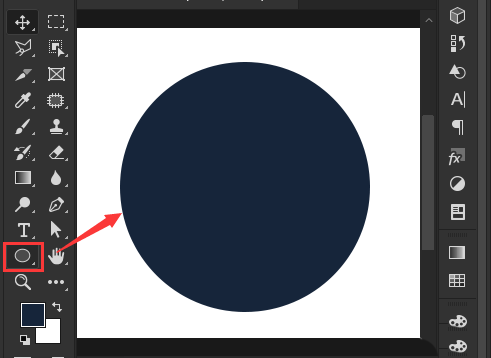
1.点击椭圆工具画一个黑色填充圆形
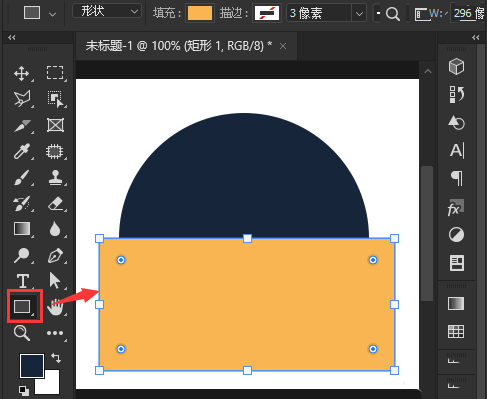
2.随后点击矩形工具画一个黄色填充的长方形
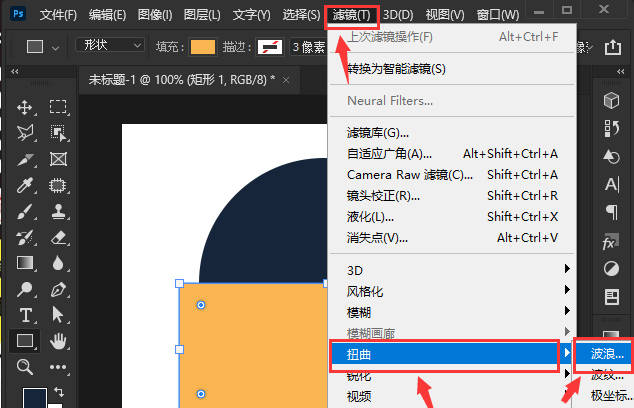
3.鼠标选中矩形,点击滤镜菜单中的波浪扭曲按钮
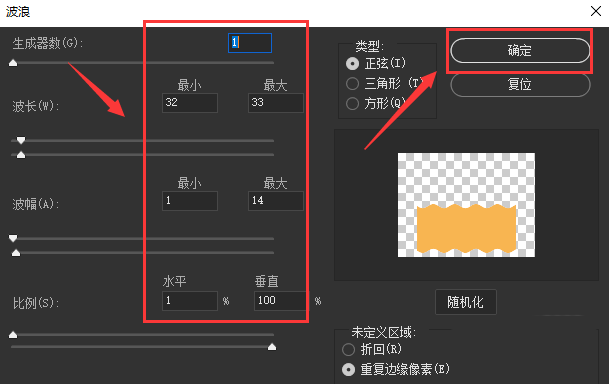
4.如下图所示调整波浪的参数信息,点击确定按钮保存
5.最后打开图层面板,右键矩形图层,点击创建剪贴蒙版按钮即可

以上这篇文章就是ps波浪扭曲矩形分割圆形颜色技巧分享,更多精彩教程请关注自由互联!