这里使用的pycharm,Python3.6.5。Windows下执行DOS命令(也就是cmd打开窗口执行命令),请务必以管理员身份运行哦。
① 安装Python3.6.5
下载地址:https://www.python.org/downloads/windows/。
x86-64表示是64位,x86表示是32位。embeddable zip file表示是解压版; executable installer可执行安装版也就是最常见的.exe;web-based installer是在线安装版本。这里我们通常下载Download Windows x86-64 executable installer这个类型。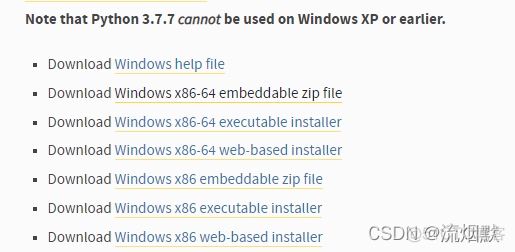
安装python的过程比较傻瓜化,注意三点就行了:
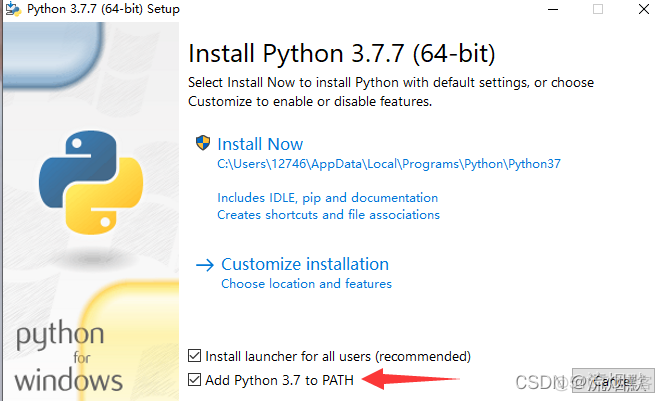
- 要在开始的界面勾选Add python 3.6 to PATH(图片是后来附加);
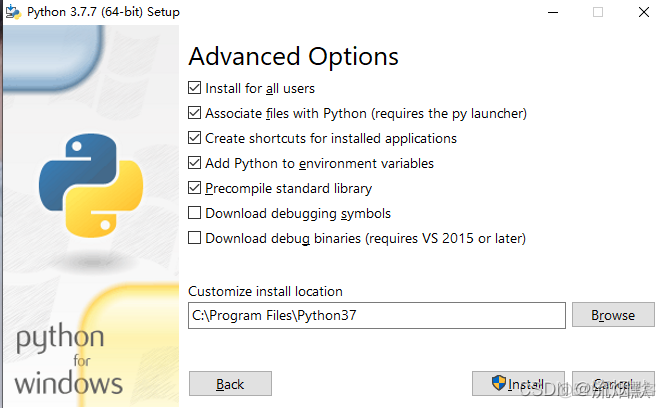
- 要在自定义安装中勾选Install for all users(图片是后来附加);
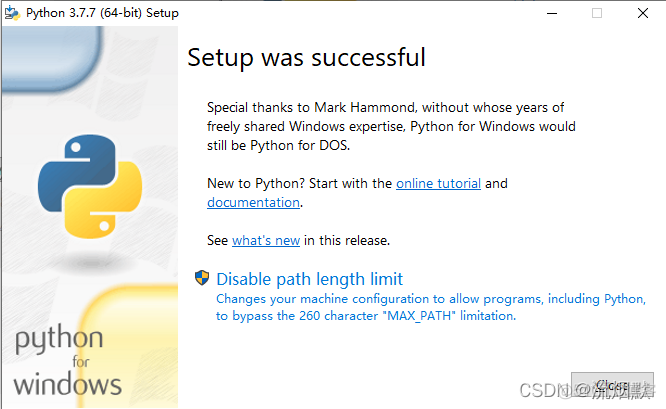
- 在安装成功后结束界面可能会出现Disable path length limit的按钮,有的话点一下就好了,禁用系统的Path长度自动限制,能给我们避免很多的麻烦(图片是后来附加)。
DOS下可以用命令查看版本:
python -V② 安装pycharm并激活
可以去官网下载https://www.jetbrains.com/pycharm/download/#section=windows需要的版本并安装激活,推荐使用专业版本哦。
③ 其他插件安装
查看自己的pip版本:
pip -V更新pip:
python -m pip install --upgrade pip修改pip下载源
pip和很多的包管理工具一样,是从国外源下载的。因此速度会比较慢,甚至会安装不了。可以在使用pip的时候加参数 -i https://pypi.tuna.tsinghua.edu.cn/simple
清华:https://pypi.tuna.tsinghua.edu.cn/simple阿里云:https://mirrors.aliyun.com/pypi/simple/
中国科技大学:https://pypi.mirrors.ustc.edu.cn/simple/
如 pip install django -i https://mirrors.aliyun.com/pypi/simple/
永久修改
- liunx系统
[global]
index-url = https://pypi.tuna.tsinghua.edu.cn/simple
- window系统
在user目录中创建一个pip目录,如:C:\Users\pip,新建文件pip.ini,添加一下内容
[global]index-url = https://pypi.tuna.tsinghua.edu.cn/simple
① 安装django
pip install django# 安装指定版本
pip install django==2.2.6
查看版本:
django-admin --versionPython -m django --version
升级版本:
若你用 pip 安装 Django,你可以使用 --upgrade 或 -U 标志:
# 将会卸载以前的版本哦pip install -U Django
② 安装MySQL驱动
这里python是3.6.5哦,如果是2.X的使用pip install mysql-python
pip install PyMySQL
python3 中django连接mysql使用的包是pymysql, 所以第一步先安装 pymysql。但是安装了并不代表就可以了, 还需要在项目的__init__.py添加如下配置:
import pymysql
pymysql.install_as_MySQLdb()
③ 安装 DjangoUeditor
pip install DjangoUeditor
④ 安装selenium
pip install selenium#查看安装的selenium
pip show selenium
# 指定版本
pip install selenium==2.48.0
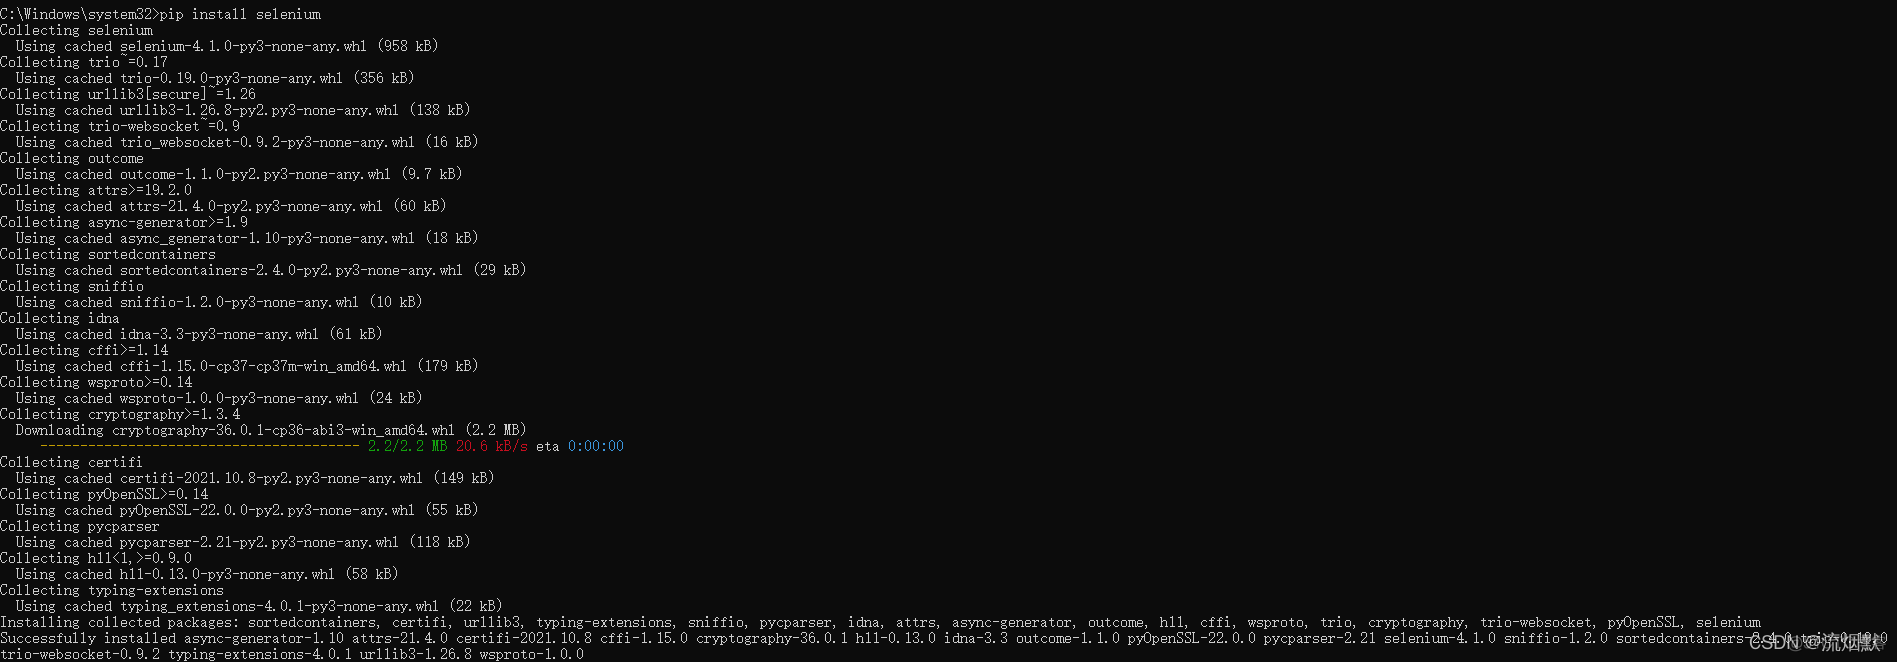
Name: selenium
Version: 4.1.0
Summary:
Home-page: https://www.selenium.dev
Author:
Author-email:
License: Apache 2.0
Location: c:\program files\python37\lib\site-packages
Requires: trio, trio-websocket, urllib3
Required-by:
Windows下selenium+chromedriver进行爬虫
这里习惯使用Chrome浏览器,百度下载默认安装。
下载chromedriver,所有都可以在该地址下载http://chromedriver.storage.googleapis.com/index.html,如下所示这里没有64版本的,下载32版本即可:
这里将chromedriver放在了Python的安装目录:C:\Program Files\Python37,并将chromeDriver目录加入到path中。当然你也可以自定义目录哦。
Python代码使用实例:
# selenium模块浏览器静默状态下运行from selenium import webdriver, common
import time
option = webdriver.ChromeOptions()
option.add_argument('headless')
#这里是重点,增加一个参数即可实现在不打开浏览器的情况下完成系列操作
browser = webdriver.Chrome(chrome_options=option)
url = 'https://www.baidu.com'
browser.get(url)
time.sleep(1)
list= browser.find_elements_by_xpath('//*[@id="janus"]/a[4]')
for i in list:
print(i.text)
time.sleep(3)
browser.close()
Java代码使用实例
//根据谷歌浏览器版本下载 chromedriver.exe 下载地址http://npm.taobao.org/mirrors/chromedriverSystem.setProperty("webdriver.chrome.driver", "C:\\Program Files\\Python37\\chromedriver.exe");
ChromeOptions chromeOptions=new ChromeOptions();
// 静默执行,也就是不弹出浏览器窗口
chromeOptions.setHeadless(true);
WebDriver driver = new ChromeDriver(chromeOptions);
driver.get(detailUrl);
WebDriverWait wait = new WebDriverWait(driver,10);
// 判断
wait.until(new ExpectedCondition<WebElement>(){
public WebElement apply(WebDriver d) {
WebElement bCrumbCont = d.findElement(By.className("b_crumb_cont"));
logger.info(" WebElement bCrumbCont = d.findElement(By.className(\"b_crumb_cont\"));:{}",bCrumbCont);
return bCrumbCont;
}});
Document document = Jsoup.parse(driver.getPageSource());
如果需要每个请求都等待固定时间,可以添加如下代码:
# 等待10sdriver.manage().timeouts().implicitlyWait(10, TimeUnit.SECONDS);
Java使用selenium时需要添加maven依赖:
<!-- https://mvnrepository.com/artifact/org.seleniumhq.selenium/selenium-java --><dependency>
<groupId>org.seleniumhq.selenium</groupId>
<artifactId>selenium-java</artifactId>
<version>3.141.59</version>
</dependency>
如果需要其他功能,可以添加如下依赖:
<dependency><groupId>org.seleniumhq.selenium</groupId>
<artifactId>selenium-api</artifactId>
<version>3.141.59</version>
</dependency>
<!-- add belows for these dependencies version is not 4.0.0 when automatically generated -->
<dependency>
<groupId>org.seleniumhq.selenium</groupId>
<artifactId>selenium-chrome-driver</artifactId>
<version>3.141.59</version>
</dependency>
<dependency>
<groupId>io.github.bonigarcia</groupId>
<artifactId>webdrivermanager</artifactId>
<version>5.0.3</version>
</dependency>
<!-- https://mvnrepository.com/artifact/org.seleniumhq.selenium/selenium-server -->
<dependency>
<groupId>org.seleniumhq.selenium</groupId>
<artifactId>selenium-server</artifactId>
<version>3.141.59</version>
</dependency>
<dependency>
<groupId>org.seleniumhq.selenium</groupId>
<artifactId>selenium-remote-driver</artifactId>
<version>4.0.0</version>
</dependency>
⑤ 安装验证码模块
pip install django-simple-captcha
