今日就快来学习本文3dmax中使用附材质操作过程吧,相信在以后的使用中一定会得心应手的,一起来看看吧! 1、打开3dmax 2、如图,例如:在左视图创建一个“平面” 3、如图,使用快捷
今日就快来学习本文3dmax中使用附材质操作过程吧,相信在以后的使用中一定会得心应手的,一起来看看吧!
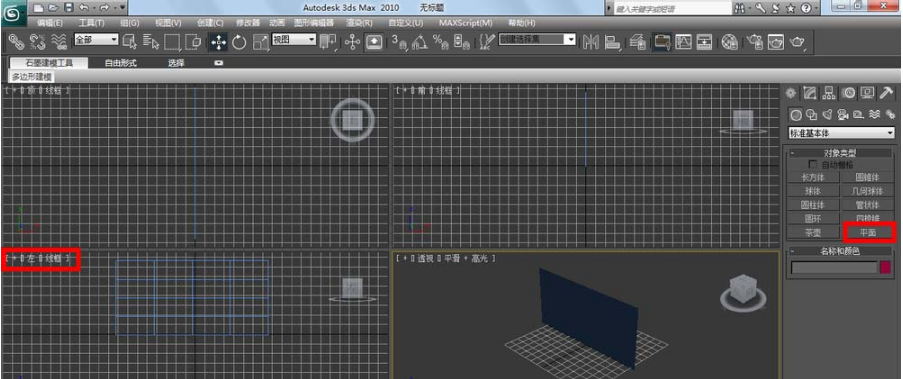
1、打开3dmax
2、如图,例如:在左视图创建一个“平面”
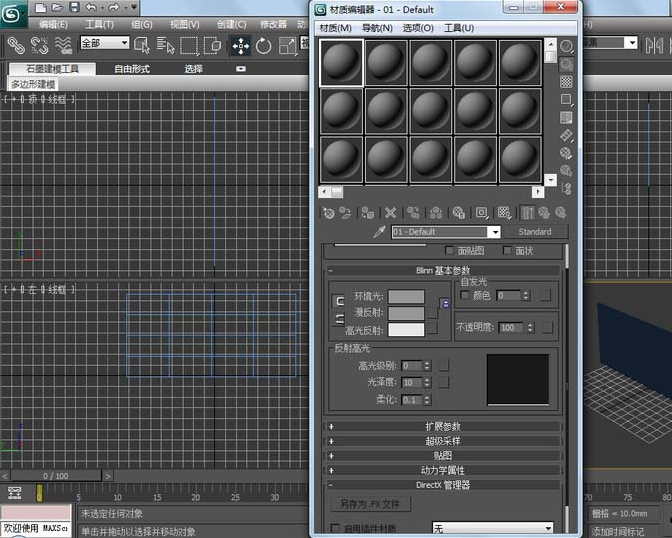
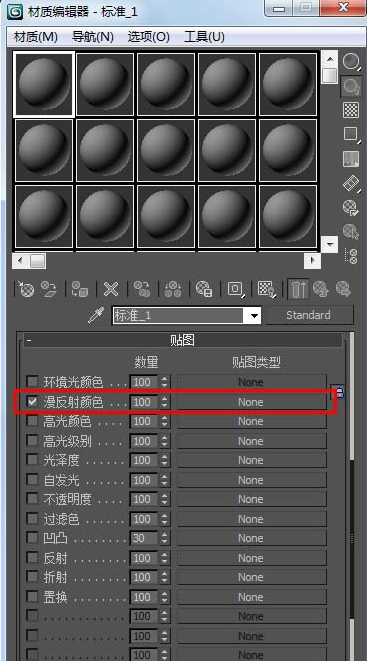
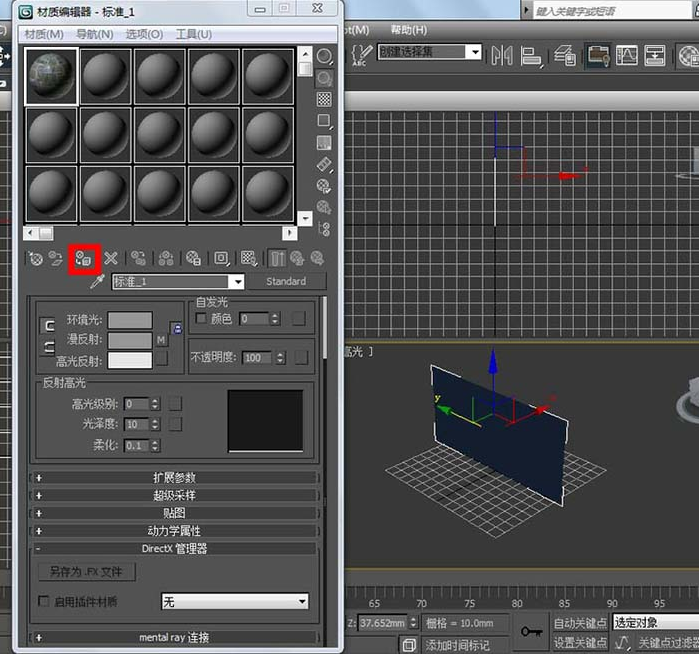
3、如图,使用快捷键“M”,打开“材质编辑器”,选中第一颗材质球
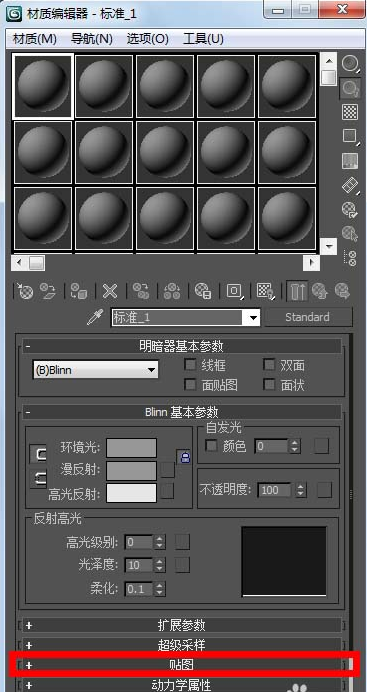
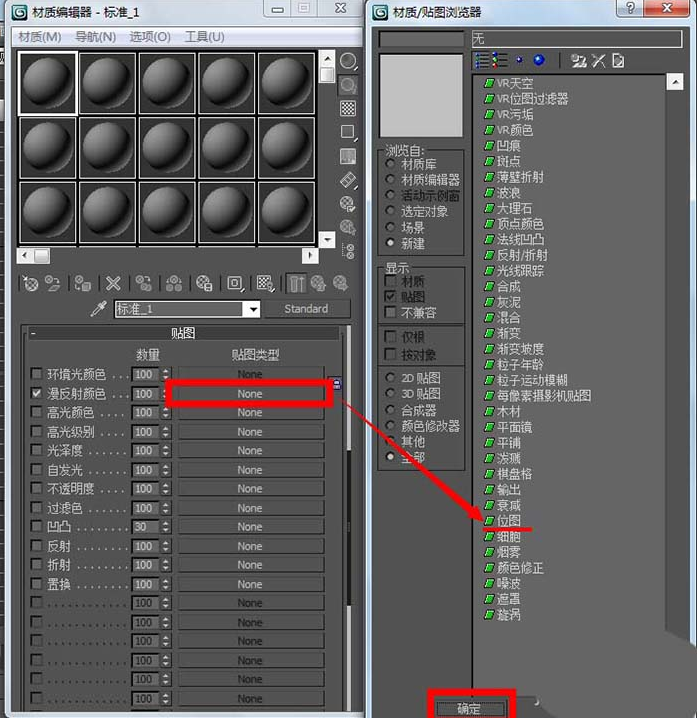
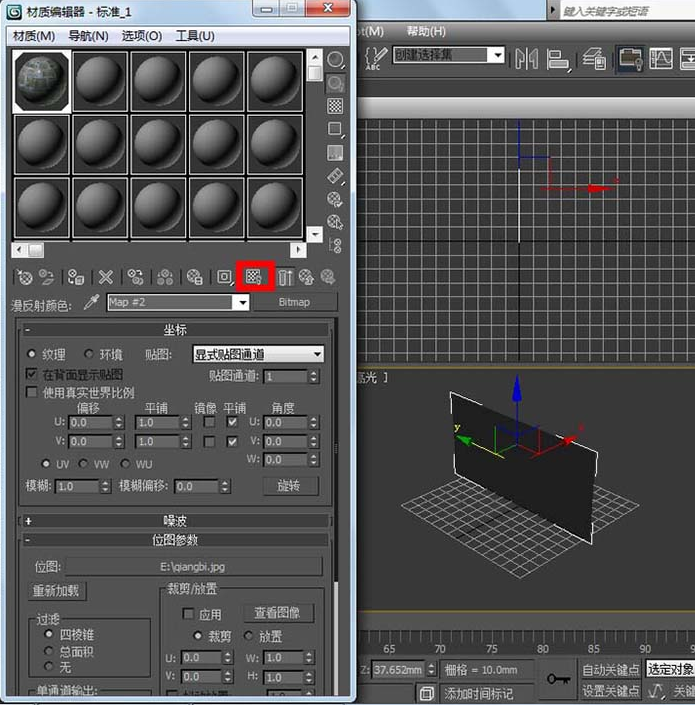
4、如图,找到“贴图”,点击“贴图”—勾选“漫反射颜色”—点击“none”—打开“材质/贴图浏览器”—选择“位图”—点击“确定”—选中一张你要贴图的图片—点击“打开”
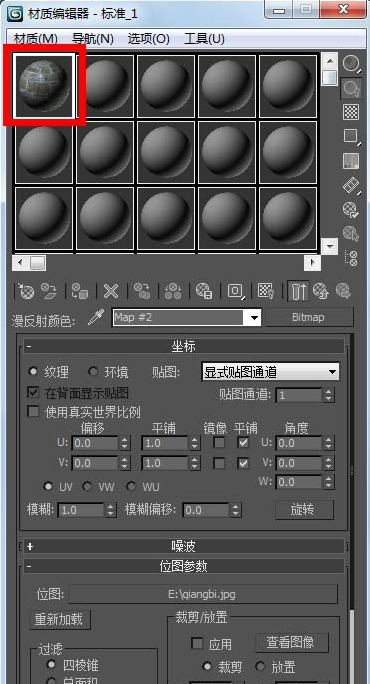
5、如图,给材质球贴图之后,材质球有了图片
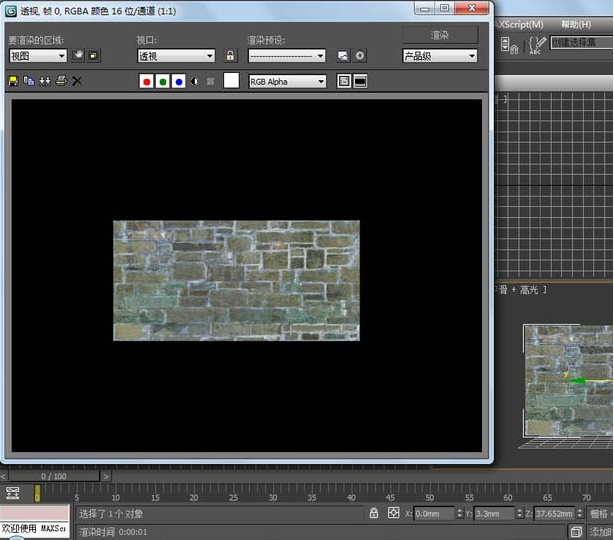
6、图1,点击要要上贴图的物体,图2,点击“将材质指定给选定对象”,图3,点击“在视口中显示表转贴图”
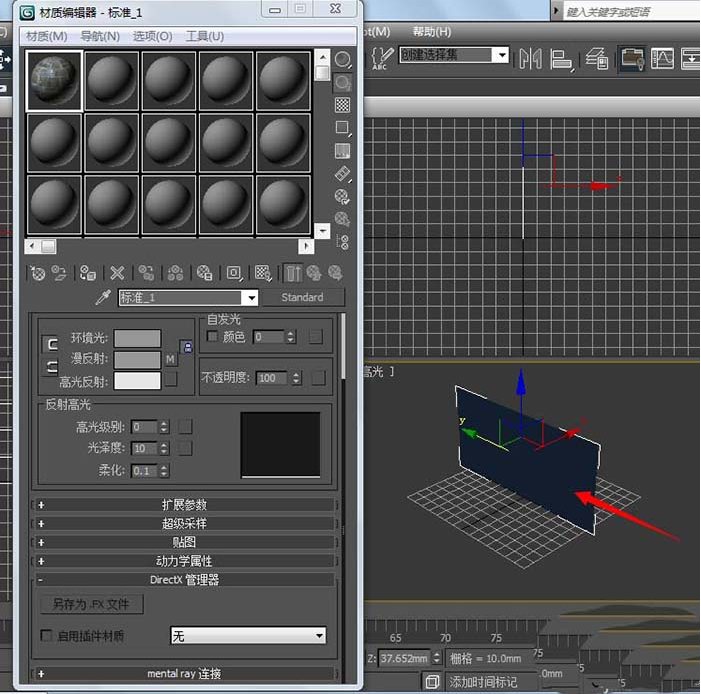
7、如图所示,成功贴图
3dmax相关攻略推荐:
3dmax中找到快速切片位置具体操作步骤
3dmax恢复默认快捷键的操作教程
3dmax关闭视图导航的操作流程
根据上文讲解的,你们是不是都学会了呀!