一、基础配置
系统版本:CentOS Linux release 7.4.1708 (Core),最小化安装包 收集交换机日志:华为S5720、S6720、S127081)设置网卡 [root@localhost ~]# vim /etc/sysconfig/network-scripts/ifcfg-ens33 BOOTPROTO=staticONBOOT=yesIPADDR=10.39.67.235NETMASK=255.255.255.0GATEWAY=10.39.67.1DNS1=114.114.114.114
2)配置aliyun源,由于没有wget命令,所以使用curl.a. 执行命令mv /etc/yum.repos.d/CentOS-Base.repo /etc/yum.repos.d/CentOS-Base.repo.backupcurl -o /etc/yum.repos.d/CentOS-Base.repo http://mirrors.aliyun.com/repo/Centos-7.repo该命表示把Centos-7.repo下载到/etc/yum.repos.d/目录下,如果该目录下有CentOS-Base.repo,则会自动覆盖。b. 缓存清理yum clean cachec. 生成缓存yum makecache
3)关闭防火墙与selinuxsystemctl disable firewalldsystemctl stop firewalldsetenforce 0 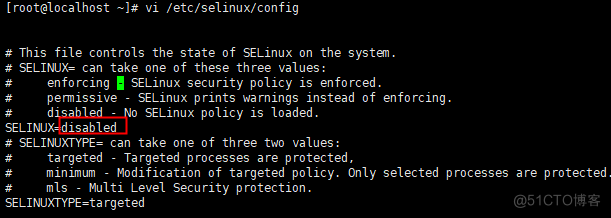
重启系统
二、安装Mysql
1)下载安装5.7的Yum源。wget https://dev.mysql.com/get/mysql57-community-release-el7-11.noarch.rpm rpm -ivh mysql57-community-release-el7-11.noarch.rpm 警告:mysql57-community-release-el7-11.noarch.rpm: 头V3 DSA/SHA1 Signature, 密钥 ID 5072e1f5: NOKEY准备中... ################################# [100%]正在升级/安装...1:mysql57-community-release-el7-11 ################################# [100%]
2)更新生成缓存 yum clean all yum makecache
3)安装mysqlyum install -y mysqlyum install -y mysql-community-server.x86_64
4)配置,默认5.7版本以后,mysql都会在启动的时间生成一个密码。存储在log文件中。我们找到他,以便登陆。systemctl start mysqldsystemctl enable mysqldmore /var/log/mysqld.log  mysql -u root -p #登陆mysql,输入上面查到的密码:&EF0ziwXeDZ3Enter password: Welcome to the MySQL monitor. Commands end with ; or \g.Your MySQL connection id is 11Server version: 8.0.11 MySQL Community Server - GPL
Copyright (c) 2000, 2018, Oracle and/or its affiliates. All rights reserved.
Oracle is a registered trademark of Oracle Corporation and/or itsaffiliates. Other names may be trademarks of their respectiveowners.
Type 'help;' or '\h' for help. Type '\c' to clear the current input statement.
mysql> alter user root@localhost identified by 'Pass@123'; #修改密码,这里密码要复杂一些,否则会报错Query OK, 0 rows affected (0.09 sec)
mysql> flush privileges; #刷新权限。Query OK, 0 rows affected (0.00 sec)
mysql> quitBye
三、安装rsyslog
1)系统已默认安装了 也可以升级一下yum install -y rsyslog
2) rsyslog使用此模块将数据传入MySQL数据库,必须安装yum install -y rsyslog-mysql
3)导入数据库模板
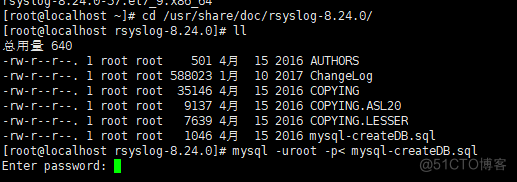 这里输入你已经更改好的数据库密码
4)进入数据库配置新用户授权[root@localhost rsyslog-8.24.0]# mysql -uroot -pEnter password:
mysql> CREATE USER 'rsyslog'@'%' IDENTIFIED BY 'Test123!'; #新用rsyslog数据库用户Query OK, 0 rows affected (0.10 sec)
mysql> flush privileges;Query OK, 0 rows affected (0.00 sec)
mysql> grant all privileges on . to 'rsyslog'@'%' IDENTIFIED BY 'Pass@123'; #给用户授权可以访问所有数据库的权限。Query OK, 0 rows affected, 1 warning (0.00 sec)
mysql> flush privileges; #刷新配置。Query OK, 0 rows affected (0.00 sec)
mysql> quitBye
5)配置rsyslog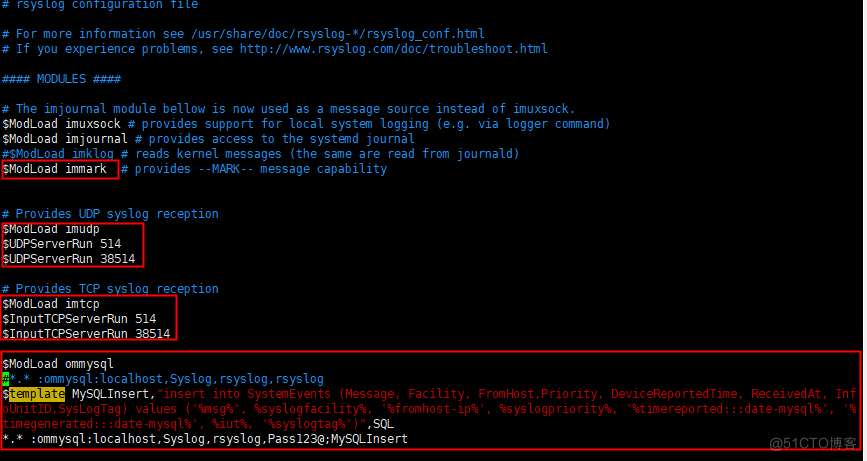 红框内为修改部分内容如下:
MODULES #### #在这个下面添加下面两行。
$ModLoad immark # immark是模块名,支持日志标记
$ModLoad imudp$UDPServerRun 514$UDPServerRun 38514 #华为交换机部分高端默认发送日志端口
$ModLoad imtcp$InputTCPServerRun 514$InputTCPServerRun 38514
$ModLoad ommysql$template MySQLInsert,"insert into SystemEvents (Message, Facility, FromHost,Priority, DeviceReportedTime, ReceivedAt, InfoUnitID,SysLogTag) values ('%msg%', %syslogfacility%, '%fromhost-ip%', %syslogpriority%, '%timereported:::date-mysql%', '%timegenerated:::date-mysql%', %iut%, '%syslogtag%')",SQL. :ommysql:localhost,Syslog,rsyslog,Pass@123;MySQLInsert
6)启动systemctl restart rsyslog #重新启动rsyslog服务。
四、部署HTTPS
1)安装http与phpyum install -y httpd php php-mysql php-gd
2)下载loganalyzer v4.1.6官网地址:http://loganalyzer.adiscon.com/downloads/wget https://download.adiscon.com/loganalyzer/loganalyzer-4.1.6.tar.gz如果下载不下来,就到页面上去下载,再上传到Linux(我就下载不下来),官网下方有老版本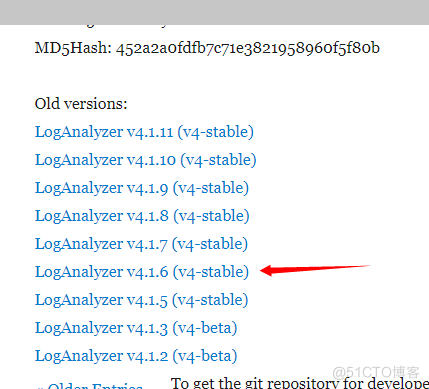 yum install -y lrzsz 直接将本地下载好的软件,拖拽进Linux
3)安装配置tar zxvf loganalyzer-4.1.6.tar.gz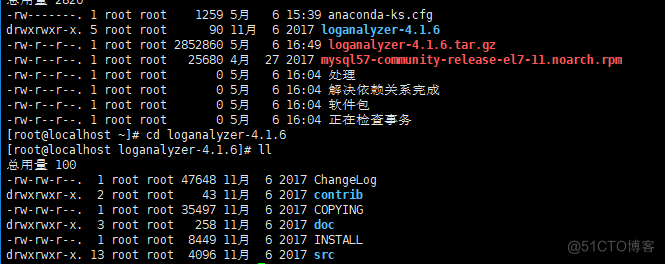 mkdir -p /var/www/html/loganalyzer #创建LogAnalyzer目录。cp -a src/ /var/www/html/loganalyzer/ #复制网站文件。cp -a contrib/ /var/www/html/loganalyzer/
4)编辑HTTP配置文件(注销原有的)vim /etc/httpd/conf/httpd.conf #编辑HTTP配置文件,添加虚拟目录配置。m#在文件里找到</IfModule>字段,在后面添加下列内容。<IfModule dir_module>DirectoryIndex index.html install.php index.phpAlias /loganalyzer /var/www/html/loganalyzer<Directory /var/www/html/loganalyzer>Order allow,denyAllow from all</Directory></IfModule>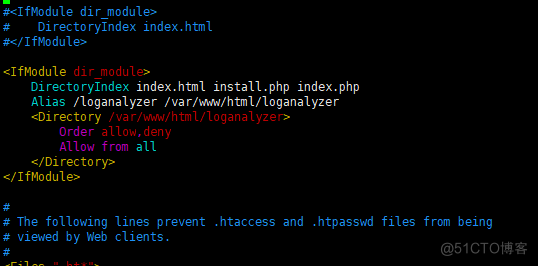
5)添加网站所属目录相应权限(此处不设置后续web设置会没有写的权限)
5)启动
systemctl restart httpd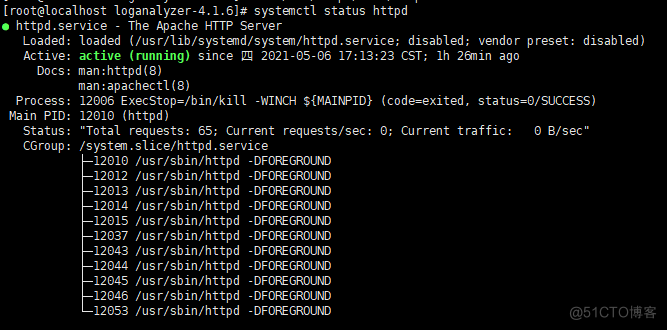
五、配置Loganalyze
1)打开浏览器http://10.39.67.235/loganalyzer/ 如下图: 

2)设置数据库密码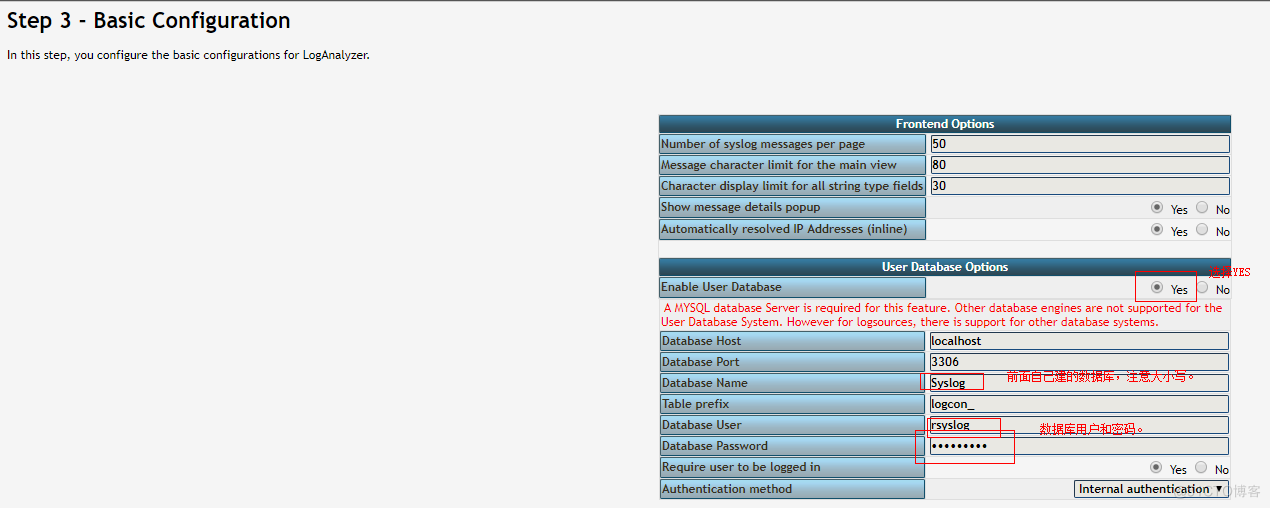

 3)设置账户密码
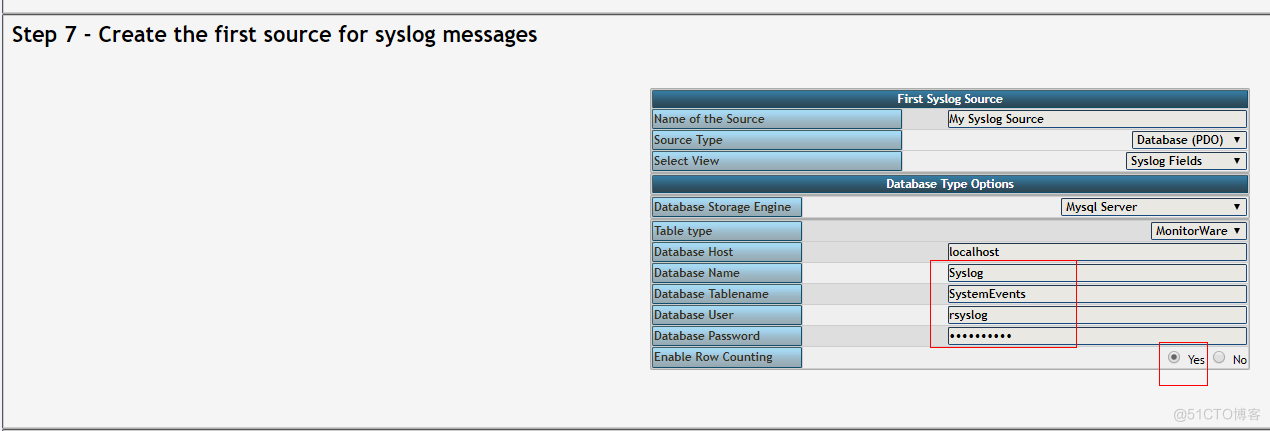
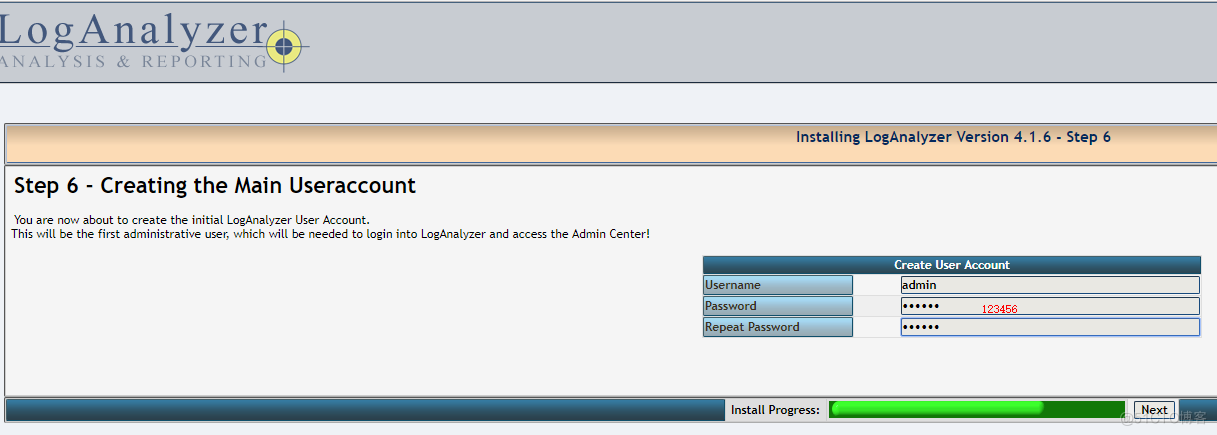 4)填写日志信息的数据库信息,也就是我们导入 sql 文件所创建的 Syslog 数据库,请注意大小写,监控表为 SystemEvents,默认是小写


六、配置华为交换机
info-center loghost 10.39.67.235 info-center source default channel 2 log level debugging info-center loghost source Vlanif100
 现在就可以看到信息了,更多功能自行探索吧!本文有借鉴:https://blog.csdn.net/chenxiangis/article/details/81541523报错处理借鉴:https://www.jianshu.com/p/f4bcb808824d
