一、Heartbeat原理介绍
请点击此处
二、环境准备
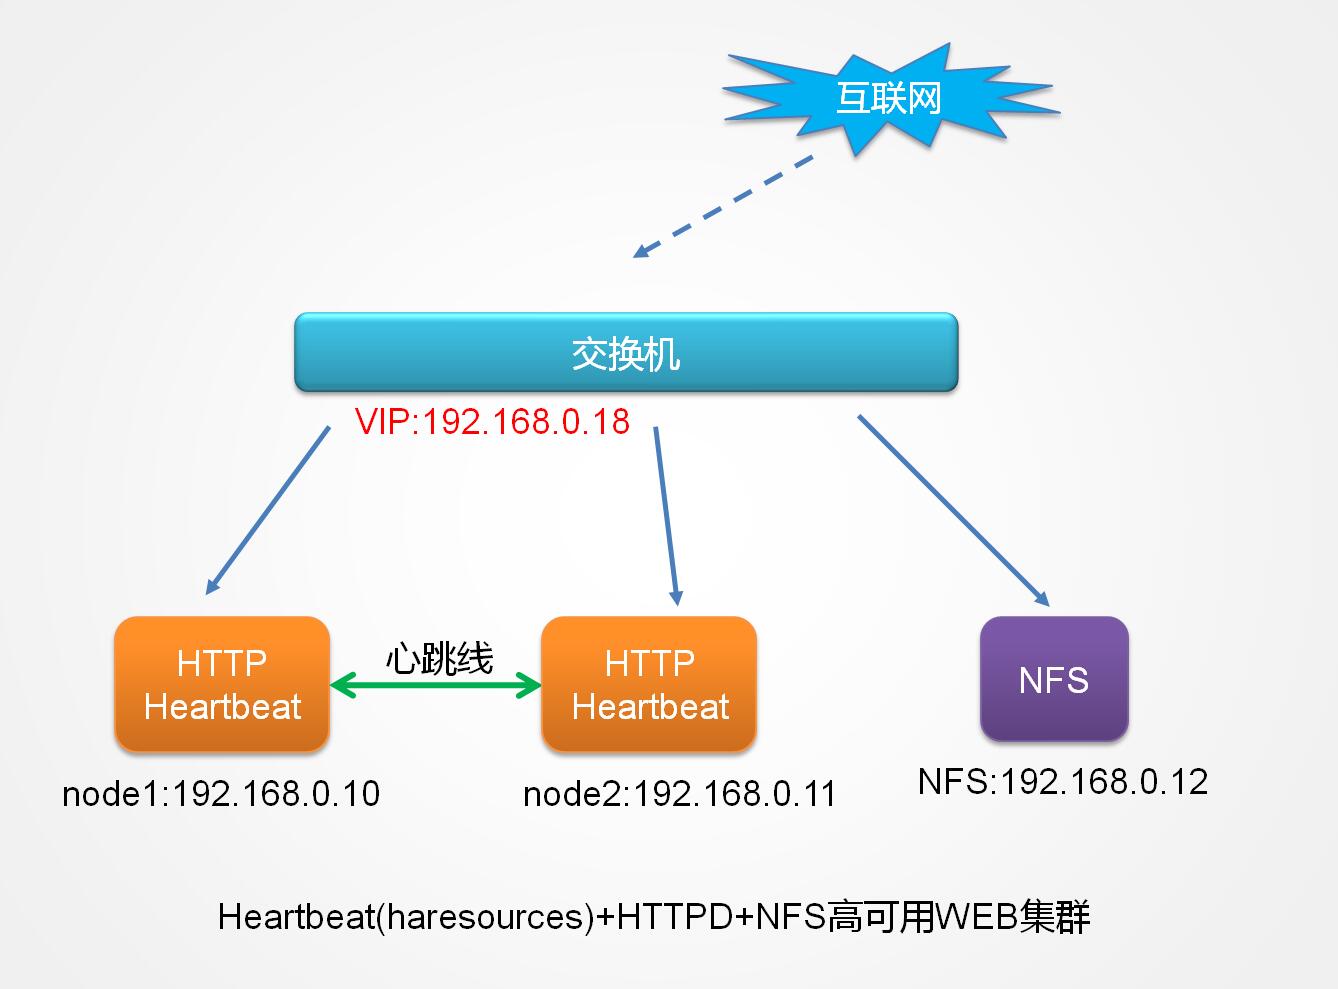
1、拓扑结构图

2、服务器准备
服务器名称IP服务系统node1.wzlinux.comVIP:192.168.0.18
eht0:192.168.0.10
HTTP、HeartbeatCentOS 6.4 32位node2.wzlinux.comVIP:192.168.0.18
eht0:192.168.0.11
HTTP、HeartbeatCentOS 6.4 32位nfs.wzlinux.cometh0:192.168.0.12NFSCentOS 6.4 32位注:请提前关闭防火墙和SELinux,设定好时间同步,因为SELinux会影响web的启动。
3、设定hosts文件
请在两台高可用设备hosts文件添加如下内容
192.168.0.10 node1.wzlinux.com node1 192.168.0.11 node2.wzlinux.com node24、设定双机SSH互信
node1
ssh-keygen -t rsa -P '' ssh-copy-id -i .ssh/id_rsa.pub root@node2.wzlinux.comnode2
ssh-keygen -t rsa -P '' ssh-copy-id -i .ssh/id_rsa.pub root@node1.wzlinux.com5、准备好服务
提前准备好两台高可用服务的WEB服务,准备好NFS服务,并且挂载配置好,这里不再进行演示,如有需求请点击查看文章 NFS配置 ,我简单演示一下nfs的创建。
在nfs服务器上面操作
mkdir /web echo "The Web in the NFS" >/web/index.html #cat /etc/exports /web 192.168.0.0/24(rw,no_root_squash) service nfs start分别在node1和node2上面进行挂载
mount -t nfs 192.168.0.12:/web /vaw/www/html然后分别启动web服务,请一定要关闭SELinux。
分别访问192.168.0.10和192.168.0.11查看,如果都出现The Web in the NFS,证明我们的WEB服务已经搭建好了,下面就是配置Heartbeat的时候了。
三、Heartbeat的安装
1、软件安装
请大家提前安装好epel,然后通过yum进行安装
yum install heartbeat -y2、查看生产的文件
rpm -ql heartbeat/etc/ha.d /etc/ha.d/README.config …… …… /usr/share/doc/heartbeat-3.0.4/README /usr/share/doc/heartbeat-3.0.4/apphbd.cf /usr/share/doc/heartbeat-3.0.4/authkeys #认证文件 /usr/share/doc/heartbeat-3.0.4/ha.cf #主配置文件,心跳 /usr/share/doc/heartbeat-3.0.4/haresources #资源配置文件,CRM /usr/share/heartbeat /usr/share/heartbeat/BasicSanityCheck …… ……四、Heartbeat的配置
我们选用的是heartbeat v1,主要有三个配置文件ha.cf、haresources、authkeys。
这三个文件默认没有在其配置目录,我们需要手动把它们复制进/etc/ha.d目录下面,authkeys需要权限设定为600,这三个配置文件在node1和node2上面一样,配置好一端传输到另一端即可。
cp -p /usr/share/doc/heartbeat-3.0.4/{authkeys,ha.cf,haresources} /etc/ha.d/1、ha.cf主配置文件
# # There are lots of options in this file. All you have to have is a set # of nodes listed {"node ...} one of {serial, bcast, mcast, or ucast}, # and a value for "auto_failback". # # ATTENTION: As the configuration file is read line by line, # THE ORDER OF DIRECTIVE MATTERS! # # In particular, make sure that the udpport, serial baud rate # etc. are set before the heartbeat media are defined! # debug and log file directives go into effect when they # are encountered. # # All will be fine if you keep them ordered as in this example. # # # Note on logging: # If all of debugfile, logfile and logfacility are not defined, # logging is the same as use_logd yes. In other case, they are # respectively effective. if detering the logging to syslog, # logfacility must be "none". # # File to write debug messages to #debugfile /var/log/ha-debug #调试日志文件 # # # File to write other messages to # logfile /var/log/ha-log #系统运行日志文件 # # # Facility to use for syslog()/logger # #logfacility local0 # # # A note on specifying "how long" times below... # # The default time unit is seconds # 10 means ten seconds # # You can also specify them in milliseconds # 1500ms means 1.5 seconds # # # keepalive: how long between heartbeats? # keepalive 2 #心跳频率,2表示2秒;200ms则表示200毫秒,表示多久发生一次心跳 # # deadtime: how long-to-declare-host-dead? # # If you set this too low you will get the problematic # split-brain (or cluster partition) problem. # See the FAQ for how to use warntime to tune deadtime. # deadtime 30 #节点死亡时间,就是过了30秒后还没有收到心跳就认为主节点死亡 # # warntime: how long before issuing "late heartbeat" warning? # See the FAQ for how to use warntime to tune deadtime. # warntime 10 #告警时间,10秒钟没有收到心跳则写一条警告到日志 # # # Very first dead time (initdead) # # On some machines/OSes, etc. the network takes a while to come up # and start working right after you've been rebooted. As a result # we have a separate dead time for when things first come up. # It should be at least twice the normal dead time. # initdead 120 #初始化时间 # # # What UDP port to use for bcast/ucast communication? # udpport 694 #心跳信息传递的udp端口 # # Baud rate for serial ports... # #baud 19200 #串行端口传输速率 # # serial serialportname ... #serial /dev/ttyS0 # Linux #serial /dev/cuaa0 # FreeBSD #serial /dev/cuad0 # FreeBSD 6.x #serial /dev/cua/a # Solaris # # # What interfaces to broadcast heartbeats over? # #bcast eth0 # Linux #bcast eth1 eth2 # Linux #bcast le0 # Solaris #bcast le1 le2 # Solaris # # Set up a multicast heartbeat medium # mcast [dev] [mcast group] [port] [ttl] [loop] # # [dev] device to send/rcv heartbeats on # [mcast group] multicast group to join (class D multicast address # 224.0.0.0 - 239.255.255.255) # [port] udp port to sendto/rcvfrom (set this value to the # same value as "udpport" above) # [ttl] the ttl value for outbound heartbeats. this effects # how far the multicast packet will propagate. (0-255) # Must be greater than zero. # [loop] toggles loopback for outbound multicast heartbeats. # if enabled, an outbound packet will be looped back and # received by the interface it was sent on. (0 or 1) # Set this value to zero. # # mcast eth0 225.0.18.1 694 1 0 #通过eth0多播传输心跳 # # Set up a unicast / udp heartbeat medium # ucast [dev] [peer-ip-addr] # # [dev] device to send/rcv heartbeats on # [peer-ip-addr] IP address of peer to send packets to # #ucast eth0 192.168.1.2 # # # About boolean values... # # Any of the following case-insensitive values will work for true: # true, on, yes, y, 1 # Any of the following case-insensitive values will work for false: # false, off, no, n, 0 # # # # auto_failback: determines whether a resource will # automatically fail back to its "primary" node, or remain # on whatever node is serving it until that node fails, or # an administrator intervenes. # # The possible values for auto_failback are: # on - enable automatic failbacks # off - disable automatic failbacks # legacy - enable automatic failbacks in systems # where all nodes do not yet support # the auto_failback option. # # auto_failback "on" and "off" are backwards compatible with the old # "nice_failback on" setting. # # See the FAQ for information on how to convert # from "legacy" to "on" without a flash cut. # (i.e., using a "rolling upgrade" process) # # The default value for auto_failback is "legacy", which # will issue a warning at startup. So, make sure you put # an auto_failback directive in your ha.cf file. # (note: auto_failback can be any boolean or "legacy") # auto_failback on #当主节点恢复时,资源重新回到主节点 # # # Basic STONITH support # Using this directive assumes that there is one stonith # device in the cluster. Parameters to this device are # read from a configuration file. The format of this line is: # # stonith <stonith_type> <configfile> # # NOTE: it is up to you to maintain this file on each node in the # cluster! # #stonith baytech /etc/ha.d/conf/stonith.baytech # # STONITH support # You can configure multiple stonith devices using this directive. # The format of the line is: # stonith_host <hostfrom> <stonith_type> <params...> # <hostfrom> is the machine the stonith device is attached # to or * to mean it is accessible from any host. # <stonith_type> is the type of stonith device (a list of # supported drives is in /usr/lib/stonith.) # <params...> are driver specific parameters. To see the # format for a particular device, run: # stonith -l -t <stonith_type> # # # Note that if you put your stonith device access information in # here, and you make this file publically readable, you're asking # for a denial of service attack ;-) # # To get a list of supported stonith devices, run # stonith -L # For detailed information on which stonith devices are supported # and their detailed configuration options, run this command: # stonith -h # #stonith_host * baytech 10.0.0.3 mylogin mysecretpassword #stonith_host ken3 rps10 /dev/ttyS1 kathy 0 #stonith_host kathy rps10 /dev/ttyS1 ken3 0 # # Watchdog is the watchdog timer. If our own heart doesn't beat for # a minute, then our machine will reboot. # NOTE: If you are using the software watchdog, you very likely # wish to load the module with the parameter "nowayout=0" or # compile it without CONFIG_WATCHDOG_NOWAYOUT set. Otherwise even # an orderly shutdown of heartbeat will trigger a reboot, which is # very likely NOT what you want. # #watchdog /dev/watchdog # # Tell what machines are in the cluster # node nodename ... -- must match uname -n #node ken3 #node kathy node node1.wzlinux.com #主节点名称,与uname -n显示必须一致 node node2.wzlinux.com #备节点名称,与uname -n显示必须一致 # # Less common options... # # Treats 10.10.10.254 as a psuedo-cluster-member # Used together with ipfail below... # note: don't use a cluster node as ping node # ping 192.168.0.1 #通过ping网关来监测心跳是否正常 # # Treats 10.10.10.254 and 10.10.10.253 as a psuedo-cluster-member # called group1. If either 10.10.10.254 or 10.10.10.253 are up # then group1 is up # Used together with ipfail below... …… ……2、authkeys认证文件
为了安全起见,并不是所有加入集群,加入多播的设备就可以传递心跳,还需要对彼此对方进行身份验证,这个验证文件的权限必须是600,文件内容如下:
# # Authentication file. Must be mode 600 # # # Must have exactly one auth directive at the front. # auth send authentication using this method-id # # Then, list the method and key that go with that method-id # # Available methods: crc sha1, md5. Crc doesn't need/want a key. # # You normally only have one authentication method-id listed in this file # # Put more than one to make a smooth transition when changing auth # methods and/or keys. # # # sha1 is believed to be the "best", md5 next best. # # crc adds no security, except from packet corruption. # Use only on physically secure networks. # auth 2 #1 crc 2 sha1 Om8iO0DPnNMJ7OpQjdxBaQ #3 md5 Hello!sha1后面的字符串可以随便填写,我这里是取得随机数,命令如下为openssl rand -base64 16
3、haresources资源配置文件
这个文件是用来配置资源的,比如VIP,WEB服务,磁盘挂载等等,我们在文件最后添加我们配置的资源。
…… …… #------------------------------------------------------------------- # # Simple case: One service address, default subnet and netmask # No servers that go up and down with the IP address # #just.linux-ha.org 135.9.216.110 # #------------------------------------------------------------------- # # Assuming the adminstrative addresses are on the same subnet... # A little more complex case: One service address, default subnet # and netmask, and you want to start and stop http when you get # the IP address... # #just.linux-ha.org 135.9.216.110 http #------------------------------------------------------------------- # # A little more complex case: Three service addresses, default subnet # and netmask, and you want to start and stop http when you get # the IP address... # #just.linux-ha.org 135.9.216.110 135.9.215.111 135.9.216.112 httpd #------------------------------------------------------------------- # # One service address, with the subnet, interface and bcast addr # explicitly defined. # #just.linux-ha.org 135.9.216.3/28/eth0/135.9.216.12 httpd # #------------------------------------------------------------------- # # An example where a shared filesystem is to be used. # Note that multiple aguments are passed to this script using # the delimiter '::' to separate each argument. # #node1 10.0.0.170 Filesystem::/dev/sda1::/data1::ext2 # # Regarding the node-names in this file: # # They must match the names of the nodes listed in ha.cf, which in turn # must match the `uname -n` of some node in the cluster. So they aren't # virtual in any sense of the word. # node1.wzlinux.com IPaddr::192.168.0.18/24/eth0 httpd Filesystem::192.168.0.12:/web::/var/www/html::nfs其中192.168.0.18是VIP,后面代表磁盘的挂载情况。
五、服务启动及检测
1、服务启动
分别在node1和node2上面执行以下命令
service heartbeat start2、查看启动日志
# cat /var/log
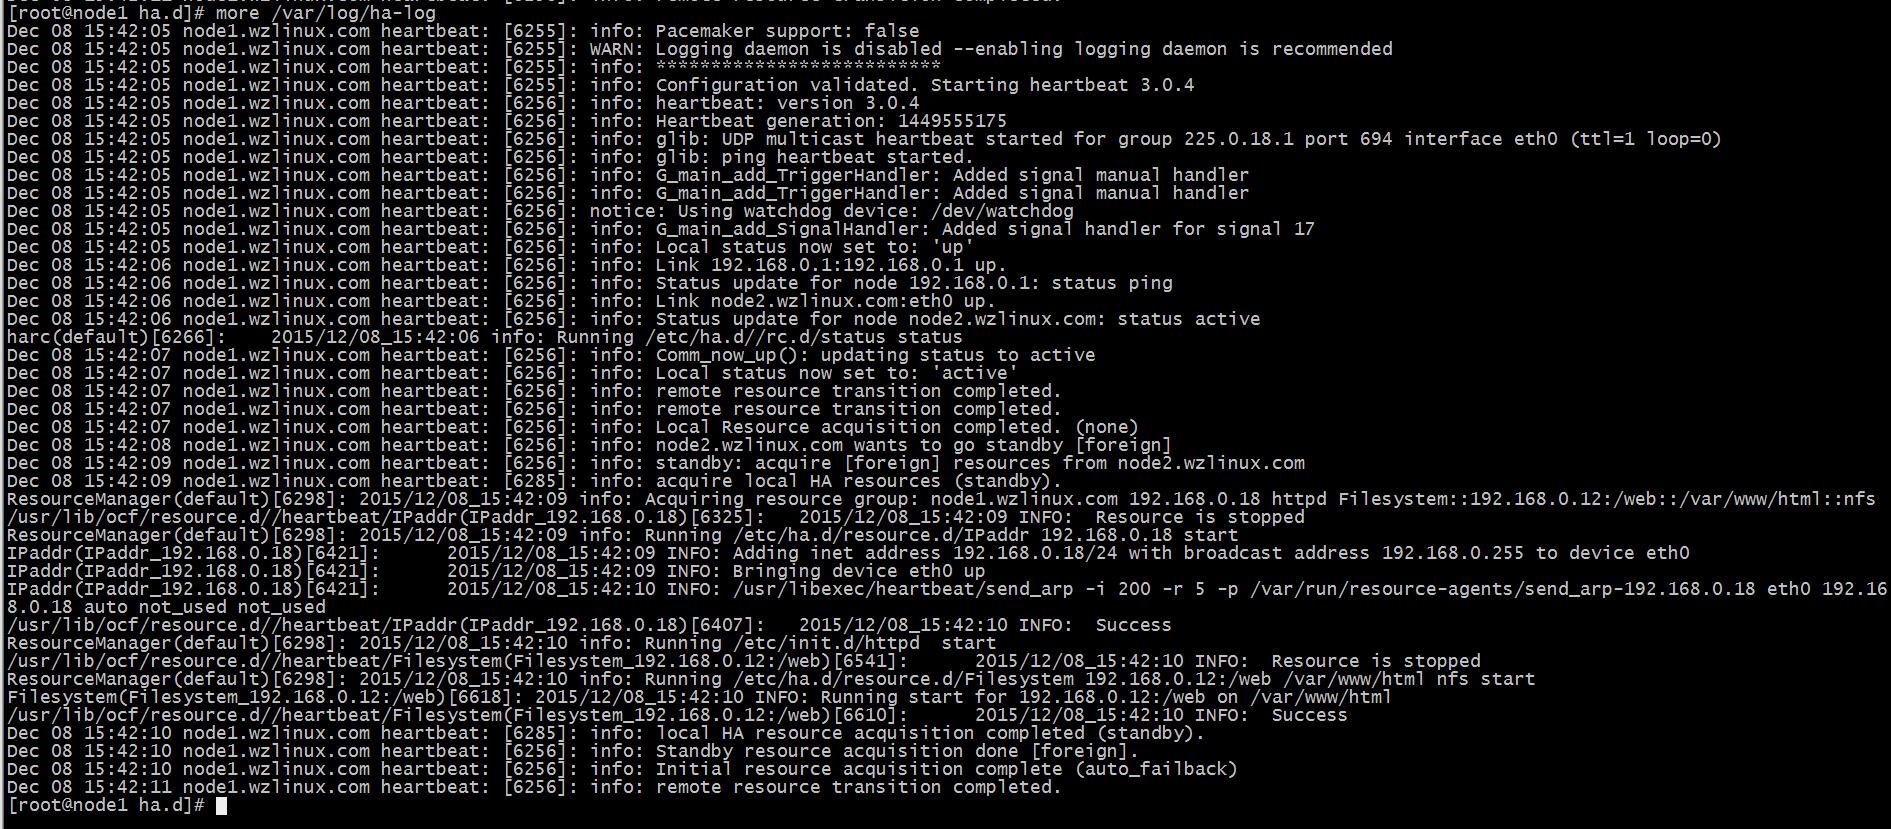
node1

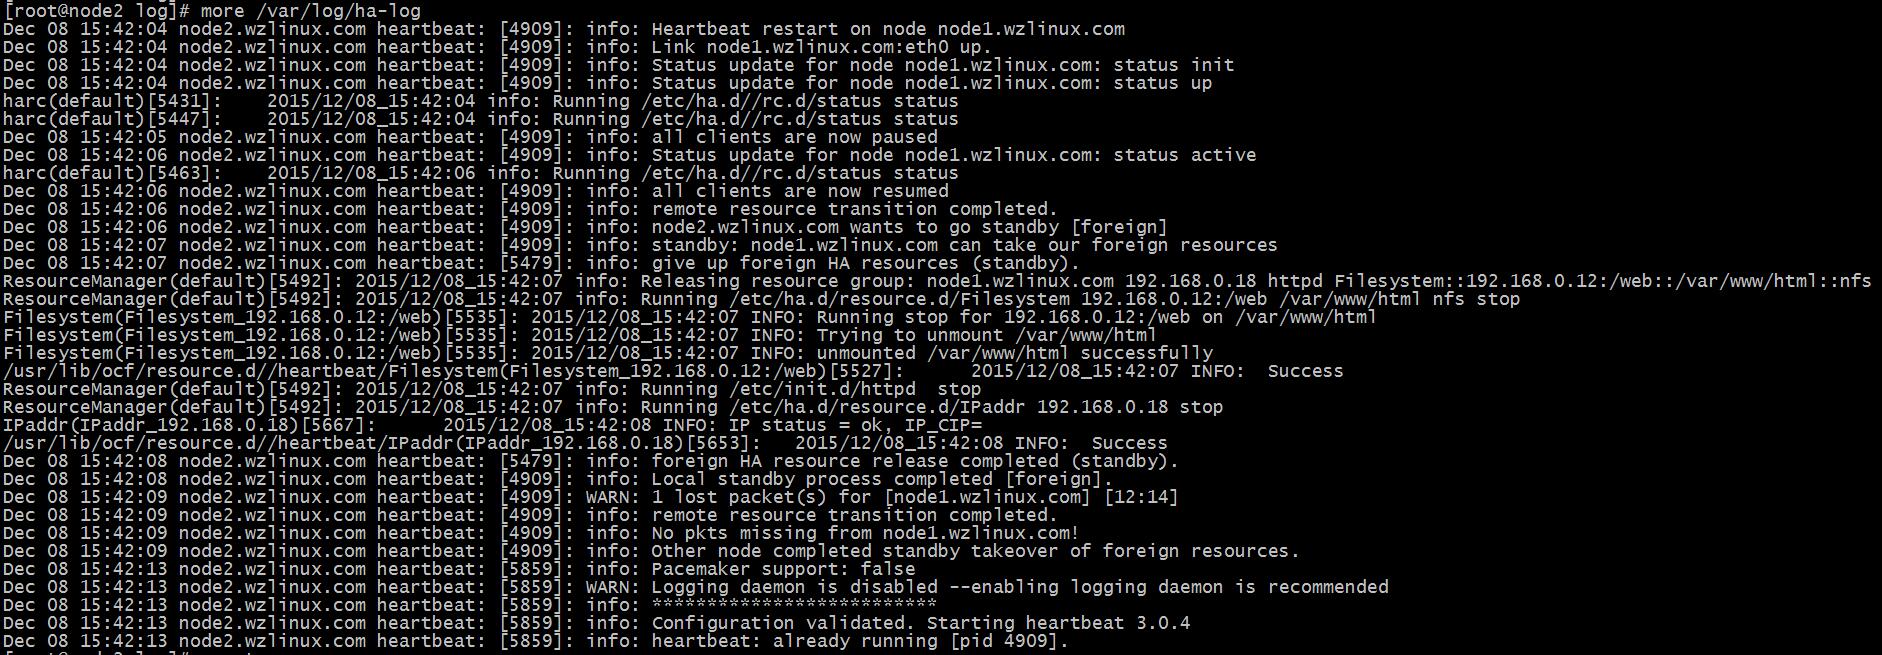
node2

从日志文件我们可以看出详细的启动过程,包括各种资源的启动,心跳的传播,如果显示的内容和我截图的内容差不多,没有什么ERROR的项目输出,就证明我们的服务启动成功了。
3、检验服务的高可用
在node1上面我们可以查看VIP、NFS、Httpd是否全部起来来进一步验证
验证VIP

验证NFS是否挂载成功

验证WEB服务是否启动
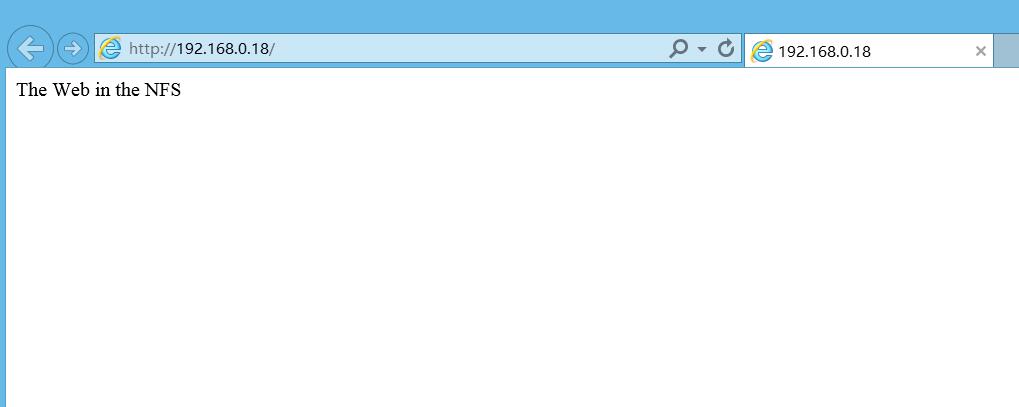
 在客户端浏览器中输入http://192.168.0.18,如显示一下内容证明服务正常运行

接着我们手动把node1调为备节点,看看现实是否变化,如果没有变化证明一切正常。
/usr/share/heartbeat/hb_standby #调整节点为备节点调为备几点之后,客户端并没有发现变化,其实资源都已经转移到node2节点上面运行,我们可以查看日志内容了解转移过程。
node1:

node2

如果想要手动把资源接管回来可以使用命令/usr/share/heartbeat/hb_takeover。
