前言 作为一个资深(自认为)iOS程序猿,会经常用到轮播图,上一次使用UIScrollView实现无限轮播的效果,这一次在Swift语言中,我使用UICollectionView再为大家讲解一次无限轮播的实现原理。
前言
作为一个资深(自认为)iOS程序猿,会经常用到轮播图,上一次使用UIScrollView实现无限轮播的效果,这一次在Swift语言中,我使用UICollectionView再为大家讲解一次无限轮播的实现原理。
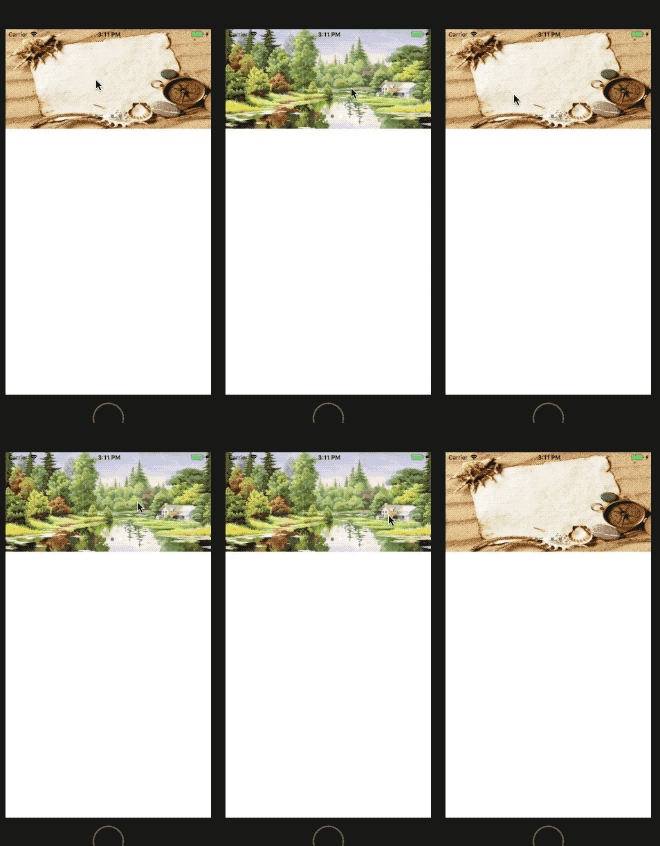
先上图:

UICollectionView-无限轮播.gif
首先需要实现了就是UICollectionView的分页,这个很简单:
collectionView.isPagingEnabled = true
接下来就是原理,在UICollectionView的两端需要先添加两张图片,首段需要添加最后一张图片,而尾端需要添加第一张图片,然后在中间的位置上一次添加各个图片。这个其实是很容易实现的:
 func collectionView(_ collectionView: UICollectionView, cellForItemAt indexPath: IndexPath) -> UICollectionViewCell {
 let cell = collectionView.dequeueReusableCell(withReuseIdentifier: "ImageCollectionViewCell", for: indexPath) as! ImageCollectionViewCell

 /// 给图片赋值(在首尾分别添加两张图片)
 if (indexPath.row == 0) {
  cell.imageName = imageNameList.last
 } else if (indexPath.row == self.imageNameList.count + 1) {
  cell.imageName = imageNameList.first
 } else {
  cell.imageName = imageNameList[indexPath.row - 1]
 }

 return cell
 }
这样在滑动的时候,通过偏移量就可以实现无限轮播的效果了。当滑动停止时判断偏移量,当偏移量为0时(视图上显示的是最后一张图片),这时候就直接调动调整偏移量的方法,把UICollectionView偏移到最后一张图片的位置。滑动到尾端时是同理。
 func scrollViewDidEndDecelerating(_ scrollView: UIScrollView) {
 /// 当UIScrollView滑动到第一位停止时,将UIScrollView的偏移位置改变
 if (scrollView.contentOffset.x == 0) {
  scrollView.contentOffset = CGPoint(x: CGFloat(self.imageNameList.count) * kScreenWidth,y: 0)
  self.pageControl.currentPage = self.imageNameList.count
  /// 当UIScrollView滑动到最后一位停止时,将UIScrollView的偏移位置改变
 } else if (scrollView.contentOffset.x == CGFloat(self.imageNameList.count + 1) * kScreenWidth) {
  scrollView.contentOffset = CGPoint(x: kScreenWidth,y: 0)
  self.pageControl.currentPage = 0
 } else {
  self.pageControl.currentPage = Int(scrollView.contentOffset.x / kScreenWidth) - 1
 }
 }
其实原理很简单,个人认为使用UICollectionView实现无限轮播比起UIScrollView更加实用并且便于维护,接下来我将代码全部列一下:
import UIKit

let kScreenWidth = UIScreen.main.bounds.width

class ViewController: UIViewController {

 lazy var collectionView: UICollectionView = {
 let flowLayout = UICollectionViewFlowLayout()
 flowLayout.minimumLineSpacing = 0
 flowLayout.minimumInteritemSpacing = 0
 flowLayout.scrollDirection = .horizontal
 flowLayout.itemSize = CGSize(width: kScreenWidth, height: 200)

 let collectionView = UICollectionView(frame: CGRect(x: 0, y: 0, width: UIScreen.main.bounds.width, height: 200), collectionViewLayout: flowLayout)

 collectionView.isPagingEnabled = true
 collectionView.showsHorizontalScrollIndicator = false
 collectionView.backgroundColor = UIColor.white
 collectionView.delegate = self
 collectionView.dataSource = self
 self.view.addSubview(collectionView)

 return collectionView
 }()

 lazy var pageControl: UIPageControl = {
 let pageControl = UIPageControl(frame: CGRect(x: 0, y: 150, width: kScreenWidth, height: 50))

 pageControl.numberOfPages = self.imageNameList.count
 pageControl.currentPage = 0

 pageControl.tintColor = UIColor.black
 pageControl.pageIndicatorTintColor = UIColor.gray;

 return pageControl;
 }()

 lazy var imageNameList: [String] = {
 let imageList = ["image0", "image1", "image2", "image3"]

 return imageList
 }()

 override func viewDidLoad() {
 super.viewDidLoad()

 setupController()
 }

 func setupController() {
 /// 设置数据
 collectionView.register(ImageCollectionViewCell.self, forCellWithReuseIdentifier: "ImageCollectionViewCell")

 collectionView.reloadData()
 collectionView.scrollToItem(at: IndexPath(row: 1, section: 0), at: .left, animated: false)

 self.view.addSubview(pageControl)
 }

}

extension ViewController: UICollectionViewDataSource {

 func collectionView(_ collectionView: UICollectionView, numberOfItemsInSection section: Int) -> Int {
 /// 这步只是防止崩溃
 if (imageNameList.count == 0) {
  return 0
 }
 return imageNameList.count + 2
 }

 func collectionView(_ collectionView: UICollectionView, cellForItemAt indexPath: IndexPath) -> UICollectionViewCell {
 let cell = collectionView.dequeueReusableCell(withReuseIdentifier: "ImageCollectionViewCell", for: indexPath) as! ImageCollectionViewCell

 /// 给图片赋值(在首尾分别添加两张图片)
 if (indexPath.row == 0) {
  cell.imageName = imageNameList.last
 } else if (indexPath.row == self.imageNameList.count + 1) {
  cell.imageName = imageNameList.first
 } else {
  cell.imageName = imageNameList[indexPath.row - 1]
 }

 return cell
 }

}

extension ViewController: UICollectionViewDelegate {

 func scrollViewDidEndDecelerating(_ scrollView: UIScrollView) {
 /// 当UIScrollView滑动到第一位停止时,将UIScrollView的偏移位置改变
 if (scrollView.contentOffset.x == 0) {
  scrollView.contentOffset = CGPoint(x: CGFloat(self.imageNameList.count) * kScreenWidth,y: 0)
  self.pageControl.currentPage = self.imageNameList.count
  /// 当UIScrollView滑动到最后一位停止时,将UIScrollView的偏移位置改变
 } else if (scrollView.contentOffset.x == CGFloat(self.imageNameList.count + 1) * kScreenWidth) {
  scrollView.contentOffset = CGPoint(x: kScreenWidth,y: 0)
  self.pageControl.currentPage = 0
 } else {
  self.pageControl.currentPage = Int(scrollView.contentOffset.x / kScreenWidth) - 1
 }
 }

}

/// collectionView图片的cell
class ImageCollectionViewCell: UICollectionViewCell {

 /// 显示的图片
 let imageView = UIImageView()
 var imageName: String? = "" {
 didSet {
  if let name = imageName {
  imageView.image = UIImage(named: name)
  }
 }
 }

 override init(frame: CGRect) {
 super.init(frame: frame)

 setupCell();
 }

 /// 初始化视图
 func setupCell() {
 imageView.frame = self.bounds
 contentView.addSubview(imageView)
 }

 required init?(coder aDecoder: NSCoder) {
 fatalError("init(coder:) has not been implemented")
 }
}
ok,喜欢的话可以点一下收藏哈,用UIScrollView实现轮播的原理在:https://www.jb51.net/article/148185.htm,大家需要的话也可以了解一下。
总结
以上就是这篇文章的全部内容了,希望本文的内容对大家的学习或者工作具有一定的参考学习价值,如果有疑问大家可以留言交流,谢谢大家对自由互联的支持。
