本篇文章带大家继续angular的学习,对比一下tslint和eslint,介绍一下Angular中怎么将迁移tslint至eslint,希望对大家有所帮助! 大家好,最近做了Angular从12到13的升级,官方自动把angular.jso

大家好,最近做了Angular从12到13的升级,官方自动把angular.json中的tslint配置去除了,那么咱也最好遵从官方安排用起了eslint。【相关教程推荐:《angular教程》】
tslint vs eslint
如何迁移
1. 安装eslint依赖,运行以下命令:
ng add @angular-eslint/schematics
运行结果:
- .eslintrc.json文件自动在root生成,默认使用
@angular-eslinteslint插件。
{
  "root": true,
  "ignorePatterns": [
    "projects/**/*"
  ],
  "overrides": [
    {
      "files": [
        "*.ts"
      ],
      "parserOptions": {
        "project": [
          "tsconfig.json"
        ],
        "createDefaultProgram": true
      },
      "extends": [
        "plugin:@angular-eslint/recommended",
        "plugin:@angular-eslint/template/process-inline-templates"
      ],
      "rules": {
        "@angular-eslint/directive-selector": [
          "error",
          {
            "type": "attribute",
            "prefix": "app",
            "style": "camelCase"
          }
        ],
        "@angular-eslint/component-selector": [
          "error",
          {
            "type": "element",
            "prefix": "app",
            "style": "kebab-case"
          }
        ]
      }
    },
    {
      "files": [
        "*.html"
      ],
      "extends": [
        "plugin:@angular-eslint/template/recommended"
      ],
      "rules": {}
    }
  ]
}- 以下eslint相关的cli配置被添加至angular.json,今后如果通过ng命令行生成lib或者application,将会自动在该模块下生成.eslintrc.json
"cli": {
	    "defaultCollection": "@angular-eslint/schematics"
  }
2. 移除或替换tslint相关文件或者配置
- 删除根目录或模块下的tslint.json
- 删除tslint相关dev依赖包,如
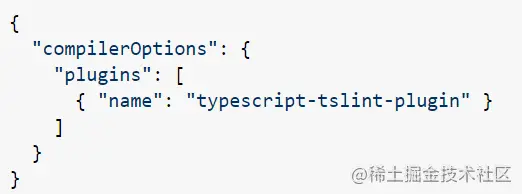
tslint或者typescript-tslint-plugin等 - (如有)在tsconfig.json中删除tslint-plugin相关配置,如
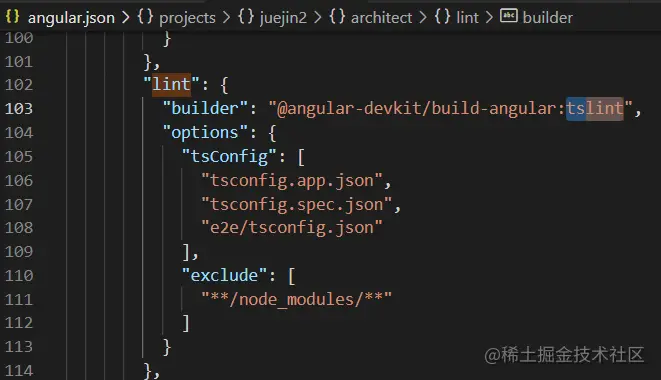
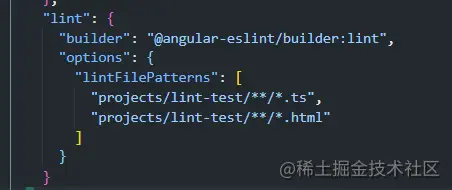
- 将angular.json下的tslint配置(如有)改为eslint,可能需要手动修改
原始tslint配置:
修改后的eslint配置(e.g.配置为在projects/lint-test目录下执行lint):
3. 如需暂时关闭一些代码或者文件的eslint检查
- 在代码上方添加以下注释可暂时关闭该代码eslint检查
/* eslint-disable */
const some_un_used_var;
- 可以在注释中加入eslint检查报错时的rule以表明暂时关闭检查的原因。例如以下代码,不希望某未用变量被eslint检查出来而抛错
/* eslint-disable @typescript-eslint/no-unused-vars */
const some_un_used_var;
- 需要关闭某些文件的eslint检查,可添加.eslintignore文件在root下
- 可在.eslintrc中配置需要lint检查的pattern(本文不赘述,官方介绍)
4. 检验是否可以使用
运行lint命令
ng lint
如运行成功,那么恭喜你迁移完成!
(可选)其他可配套的eslint插件
- eslint-plugin-deprecation:验证代码是否过时
- eslint-plugin-header:验证文件头部注释是否遵循一定规则(可用于版本,专利校验等)
- eslint-plugin-import:验证import地址拼写或者名字错误,语法等
- eslint-plugin-prefer-arrow:验证使用箭头函数
- eslint-plugin-unicorn:验证js,ts语法相关
- eslint-plugin-jsdoc:文档相关
- ...
可在.eslintrc.json中配置(官方文档)
(可选)配置VS code
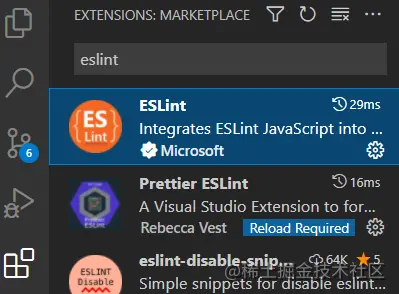
安装eslint插件
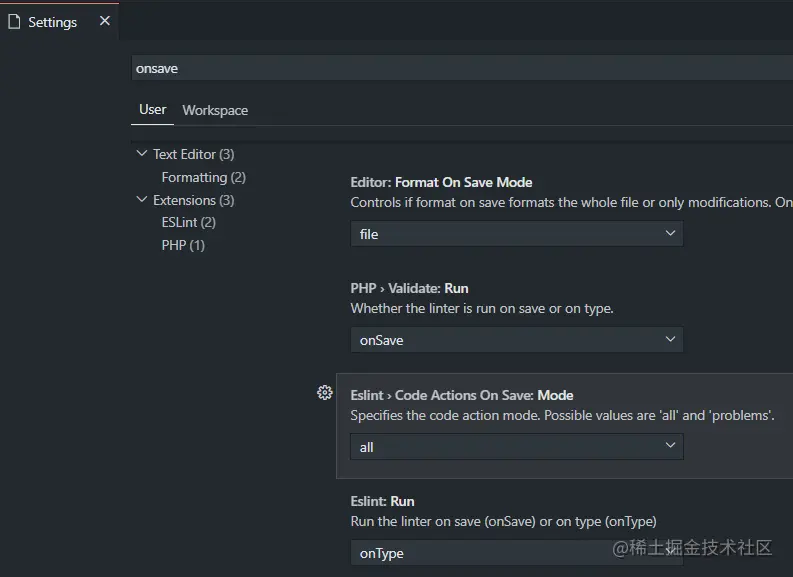
保存时VS code自动修正eslint相关问题
在.vscode/settings.json中设置
"editor.codeActionsOnSave": { "source.fixAll.eslint": true }或者在File->Preferences->Settings下搜索onsave设置,可找到eslint相关设置
更多编程相关知识,请访问:编程入门!!
以上就是聊聊Angular中怎么将迁移tslint至eslint的详细内容,更多请关注自由互联其它相关文章!
