1.pom.xml添加相应依赖 dependency groupIdorg.springframework.boot/groupId artifactIdspring-boot-starter-thymeleaf/artifactId/dependency 2.application.properties #thymeleafspring.thymeleaf.prefix=classpath:/templates/spring.thymeleaf.su
1.pom.xml添加相应依赖
<dependency>
  <groupId>org.springframework.boot</groupId>
  <artifactId>spring-boot-starter-thymeleaf</artifactId>
</dependency>
2.application.properties
#thymeleaf
spring.thymeleaf.prefix=classpath:/templates/
spring.thymeleaf.suffix=.html
spring.thymeleaf.mode=HTML5
spring.thymeleaf.encoding=UTF-8
spring.thymeleaf.content-type=text/html; charset=utf-8
spring.thymeleaf.cache=false
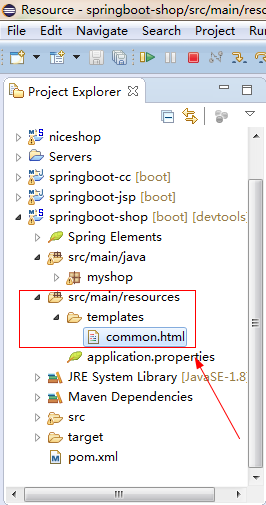
3.common.xml文件,注意文件路径
<html>
<head>
<meta http-equiv="Content-Type" content="text/html; charset=UTF-8"/>
<title>Insert title here</title>
</head>
<body>
  <h1>my first thymeleaf.</h1>
  hello, <span th:text="${name}"></span>
</body>
</html>
4.添加TemplateController.java
package myshop.controller;

import java.util.Map;

import org.springframework.stereotype.Controller;
import org.springframework.web.bind.annotation.RequestMapping;

/*
 * 这里使用@Controller而不是@RestController
 * 还有模板文件中得去掉<!DOCTYPE html PUBLIC "-//W3C//DTD HTML 4.01 Transitional//EN" "http://www.w3.org/TR/html4/loose.dtd">
 * 所有标签得闭合
 *
 * */
@Controller
@RequestMapping("/templates")
public class TemplateController {

  @RequestMapping("/common")
  public String Common(Map<String, Object> map)
  {
    map.put("name", "天恒");
    return "Common";
  }
}
5.添加app.java
package myshop;

import org.springframework.boot.SpringApplication;
import org.springframework.boot.autoconfigure.SpringBootApplication;

@SpringBootApplication
public class App {

  public static void main(String[] args) {
    // TODO Auto-generated method stub
    SpringApplication.run(App.class, args);
  }

}
6.访问路径,完成
http://localhost:8080/templates/common
以上就是本文的全部内容,希望对大家的学习有所帮助,也希望大家多多支持易盾网络。