本文我们来详细给小伙伴们介绍下SpringBoot整合SpringSecurity的过程,用到的技术为:SpringBoot2.2.1+SpringSecurity+SpringDataJPA+jsp来整合。
一、环境准备
1.创建SpringBoot项目
创建一个SpringBoot项目
2.导入基础依赖
导入基础的依赖
<parent><groupId>org.springframework.boot</groupId>
<artifactId>spring-boot-starter-parent</artifactId>
<version>2.2.1.RELEASE</version>
<relativePath/> <!-- lookup parent from repository -->
</parent>
<dependency>
<groupId>org.springframework.boot</groupId>
<artifactId>spring-boot-starter-web</artifactId>
</dependency>
3.创建controller
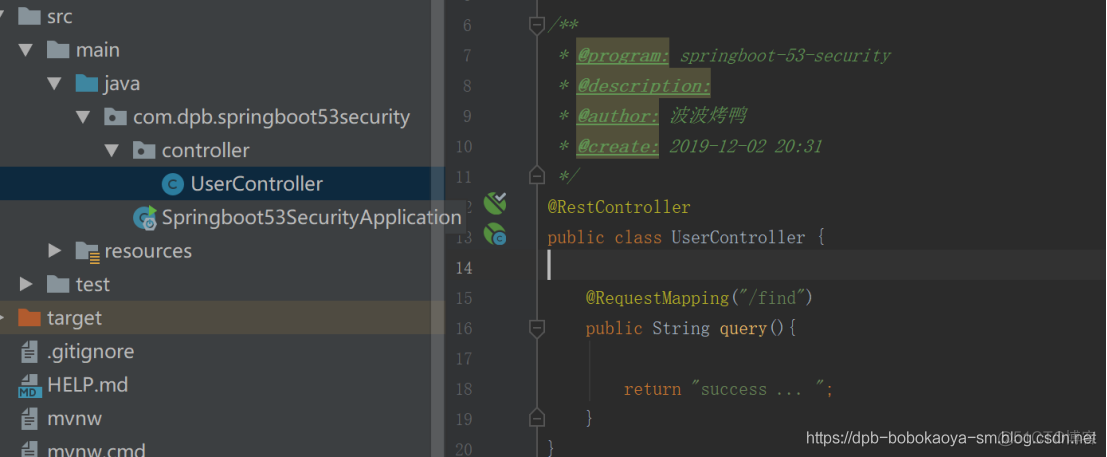
4.访问请求

二、初步整合
环境准备好之后我们可以来初步整合SpringSecurity。
1.导入SpringSecurityjar包
<dependency><groupId>org.springframework.boot</groupId>
<artifactId>spring-boot-starter-security</artifactId>
</dependency>
2.再次访问
SpringBoot已经为SpringSecurity提供了默认配置,默认所有资源都必须认证通过才能访问。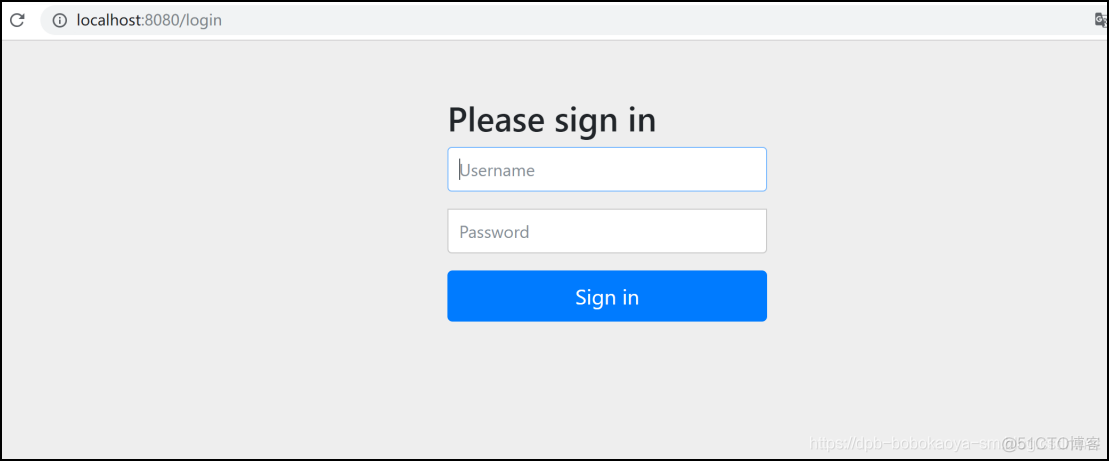
那么问题来了!此刻并没有连接数据库,也并未在内存中指定认证用户,如何认证呢?其实SpringBoot已经提供了默认用户名user,密码在项目启动时随机生成,如图: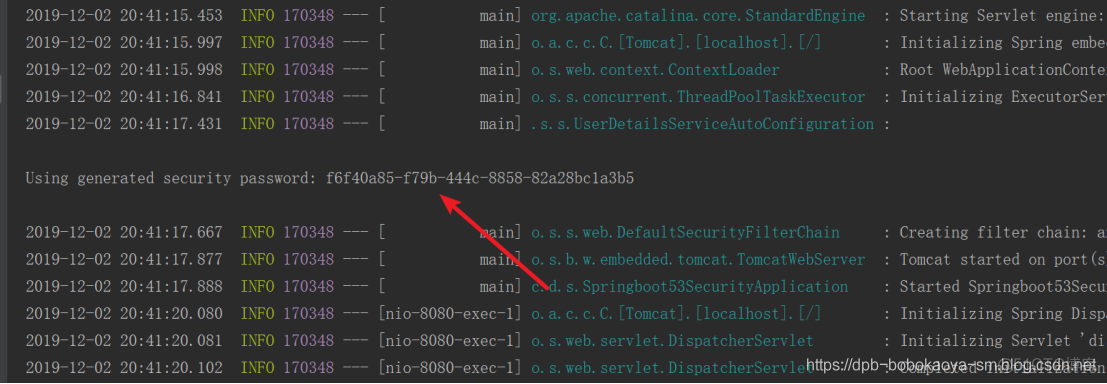
输入账号密码后就可以继续访问了

三、自定义登录界面
说明 SpringBoot官方是不推荐在SpringBoot中使用jsp的,那么到底可以使用吗?答案是肯定的!不过需要导入tomcat插件启动项目,不能再用SpringBoot默认tomcat了。
1.导入SpringBoot的tomcat启动插件jar包
<dependency><groupId>org.springframework.boot</groupId>
<artifactId>spring-boot-starter-tomcat</artifactId>
</dependency>
<dependency>
<groupId>org.apache.tomcat.embed</groupId>
<artifactId>tomcat-embed-jasper</artifactId>
</dependency>
2.1加入jsp页面等静态资源
在src/main目录下创建webapp目录
这时webapp目录并不能正常使用,因为只有web工程才有webapp目录,在pom文件中修改项目为web工程
这时webapp目录,可以正常使用了!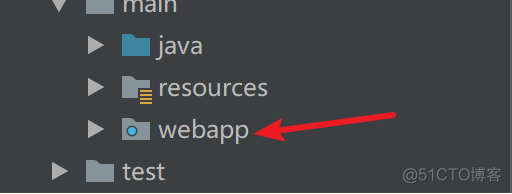
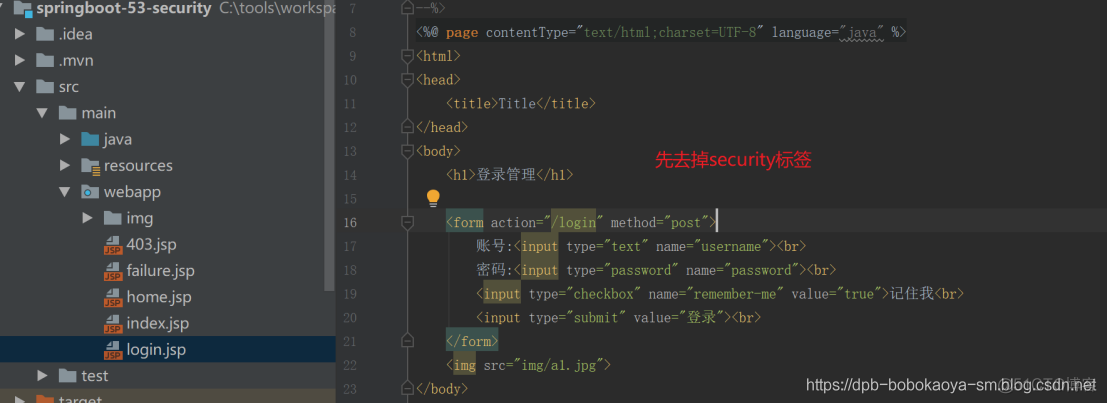
然后可以将我们前面的jsp内容导入过来了,注意不用加 WEB-INF等文件了
3.提供SpringSecurity配置类
package com.dpb.springboot53security.config;import org.springframework.context.annotation.Configuration;
import org.springframework.security.config.annotation.authentication.builders.AuthenticationManagerBuilder;
import org.springframework.security.config.annotation.method.configuration.EnableGlobalMethodSecurity;
import org.springframework.security.config.annotation.web.builders.HttpSecurity;
import org.springframework.security.config.annotation.web.configuration.EnableWebSecurity;
import org.springframework.security.config.annotation.web.configuration.WebSecurityConfigurerAdapter;
import org.springframework.security.core.userdetails.User;
/**
* @program: springboot-53-security
* @description: SpringSecurity的配置类
* @author: 波波烤鸭
* @create: 2019-12-02 20:49
*/
public class SpringSecurityConfig extends WebSecurityConfigurerAdapter {
/**
* 先通过内存中的账号密码来处理
* @param auth
* @throws Exception
*/
public void configure(AuthenticationManagerBuilder auth) throws Exception {
auth.inMemoryAuthentication()
.withUser("zhang")
.password("{noop}123")
.roles("USER");
}
public void configure(HttpSecurity http) throws Exception {
http.authorizeRequests()
.antMatchers("/login.jsp","/failuer.jsp","/css/**","/img/**")
.permitAll()
.antMatchers("/**").hasAnyRole("USER")
.anyRequest()
.authenticated()
.and()
.formLogin()
.loginPage("/login.jsp")
.loginProcessingUrl("/login")
.successForwardUrl("/home.jsp")
.failureForwardUrl("/failure.jsp")
.permitAll()
.and()
.logout()
.logoutUrl("/logout")
.invalidateHttpSession(true)
.logoutSuccessUrl("/login.jsp")
.permitAll()
.and()
.csrf()
.disable();
}
}
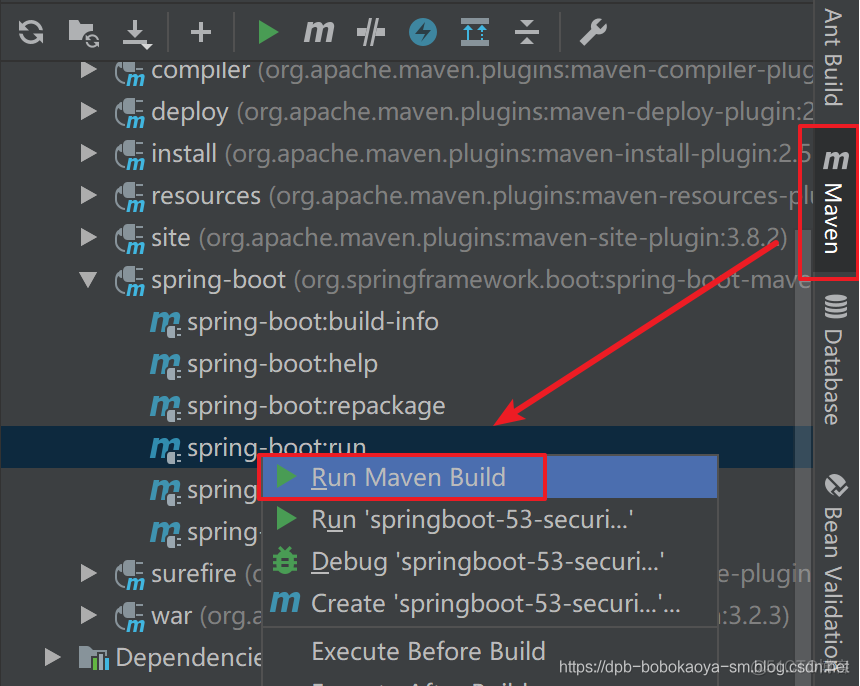
4.启动服务测试

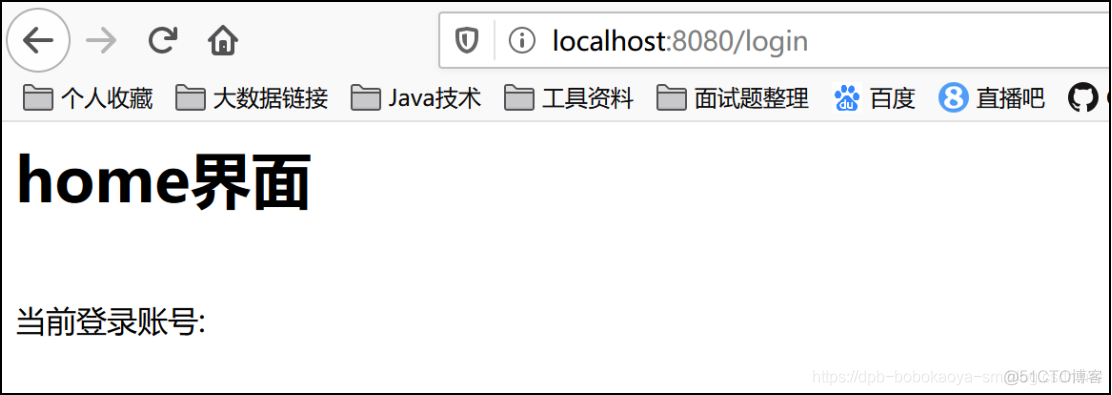
搞定~
四、使用数据库认证
接下来我们看看如何通过数据库的数据来验证,用到的数据还是我们前面案例中的标结果数据,只是在此处我们通过SpringDataJPA来实现认证
1.SpringDataJPA整合
1.1导入相关的依赖
<!-- springBoot的启动器 --><dependency>
<groupId>org.springframework.boot</groupId>
<artifactId>spring-boot-starter-data-jpa</artifactId>
</dependency>
<!-- mysql -->
<dependency>
<groupId>mysql</groupId>
<artifactId>mysql-connector-java</artifactId>
<version>5.1.47</version>
</dependency>
<!-- druid连接池 -->
<dependency>
<groupId>com.alibaba</groupId>
<artifactId>druid</artifactId>
<version>1.0.9</version>
</dependency>
1.2 数据库相关信息配置
在application.properties中添加如下信息
# jdbc 的相关信息spring.datasource.driverClassName=com.mysql.jdbc.Driver
spring.datasource.url=jdbc:mysql://localhost:3306/srm?characterEncoding=utf-8
spring.datasource.username=root
spring.datasource.password=123456
# 配置连接池信息
spring.datasource.type=com.alibaba.druid.pool.DruidDataSource
# 配置jpa的相关参数
spring.jpa.hibernate.ddl-auto=update
spring.jpa.show-sql=true
1.3 pojo处理
package com.dpb.springboot53security.pojo;import javax.persistence.*;
/**
* @program: springboot-53-security
* @description:
* @author: 波波烤鸭
* @create: 2019-12-02 23:49
*/
(name = "t_user")
public class UserPojo {
(strategy = GenerationType.IDENTITY)
(name = "id")
private Integer id;
(name = "username")
private String username;
(name = "password")
private String password;
(name = "status")
private Integer status;
public Integer getId() {
return id;
}
public void setId(Integer id) {
this.id = id;
}
public String getUsername() {
return username;
}
public void setUsername(String username) {
this.username = username;
}
public String getPassword() {
return password;
}
public void setPassword(String password) {
this.password = password;
}
public Integer getStatus() {
return status;
}
public void setStatus(Integer status) {
this.status = status;
}
}
1.4 接口定义
/*** @program: springboot-53-security
* @description:
* @author: 波波烤鸭
* @create: 2019-12-02 23:51
*/
public interface UserDao extends JpaRepository<UserPojo,Integer> {
("from UserPojo where username = :username ")
public UserPojo queryUesrByUserNameJPQL(String username);
}
2.SpringSecurity配置
持久层的处理准备好后我们就可以修改下SpringSecurity中的配置了。
2.1.service配置
之前分析过认证的源码流程,所以此处继承 UserDetailService接口即可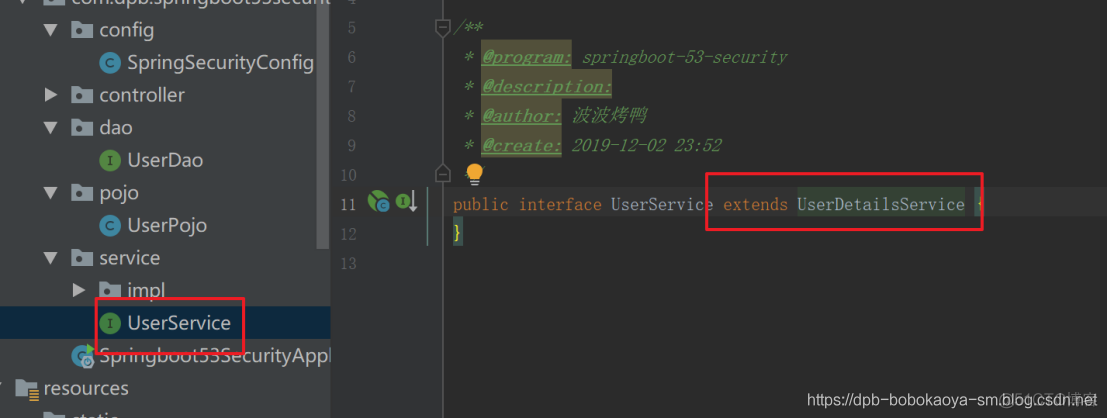
* @program: springboot-53-security
* @description:
* @author: 波波烤鸭
* @create: 2019-12-02 23:53
*/
public class UserServiceImpl implements UserService {
private UserDao dao;
public UserDetails loadUserByUsername(String s) throws UsernameNotFoundException {
// 根据账号查询
UserPojo userPojo = dao.queryUesrByUserNameJPQL(s);
if(userPojo != null){
List<SimpleGrantedAuthority> authorities = new ArrayList<>();
authorities.add(new SimpleGrantedAuthority("USER"));
UserDetails user = new User(userPojo.getUsername(),userPojo.getPassword(),authorities);
return user;
}
return null;
}
}
2.2.加密处理
在SpringBoot的启动器中注册
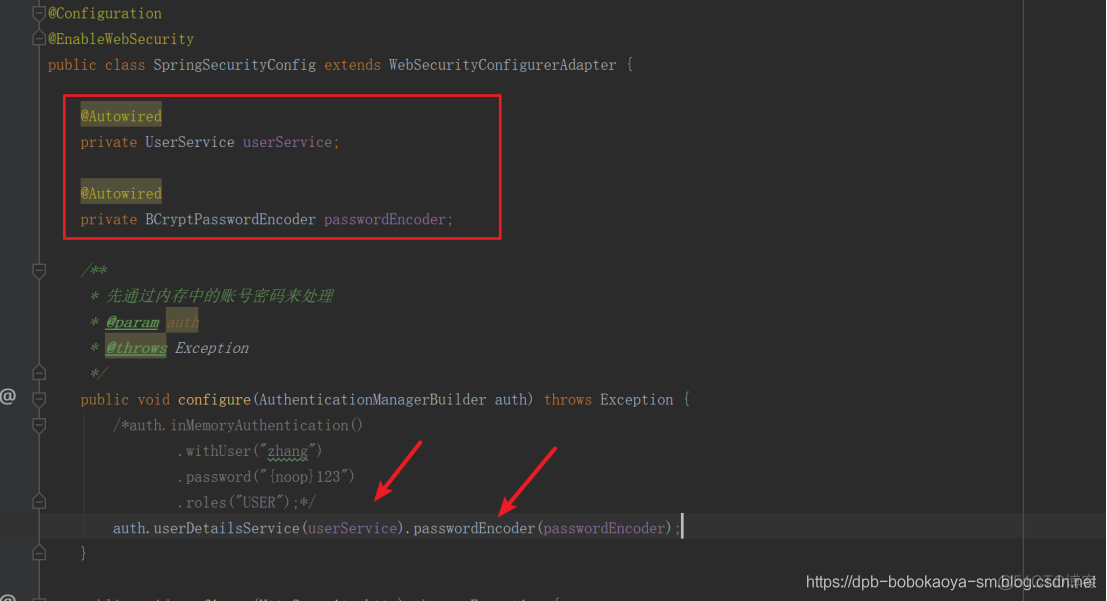
2.3配置文件修改
3.测试
启动服务,访问测试即可

五、授权管理
1.在启动类上添加开启方法级的授权注解


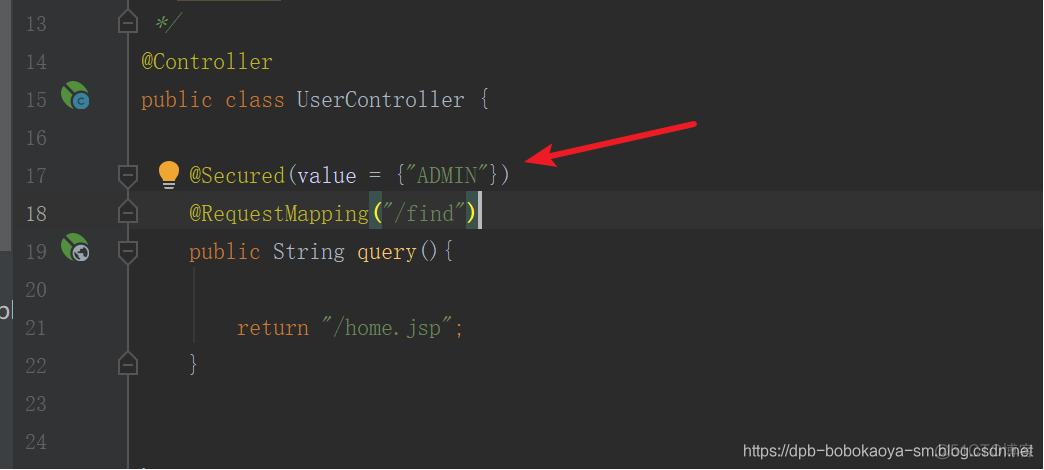
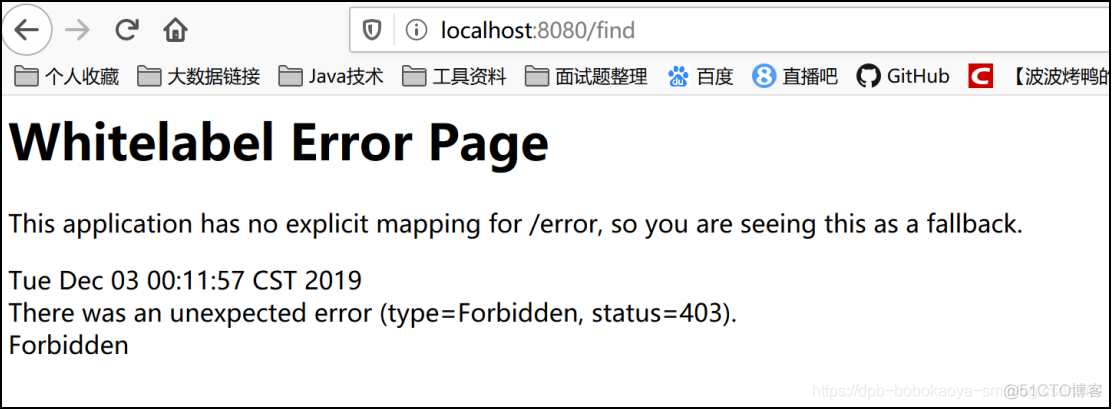
2.控制器中我们可以测试
3.自定义异常处理
此处参考前面介绍的SpringBoot全局异常处理即可
SpringBoot高级【异常处理的五种方式】
