Authelia和Nginx的结合使用
使用Authelia的一个登录页面保护所有自托管服务,这是一个SSO门户,用于在Nginx反向代理后面对你的所有服务进行身份验证。
关于 Authelia 容器化部署可参考官网或我之前写的k8s部署Authelia(LDAP认证),部署方式很多,选择一个适合自己环境的部署方式即可。
思路
- 使用Docker来部署我们的 Nginx 服务。
- Nginx 用于代理我们需要认证的后端应用程序和服务。
- Authelia 使用K8S部署,svc使用NodePort,nodePort端口固定。
- SSL证书使用openssl自建。
先决条件
- 为*.singapore.test.com子域创建一个DNS条目,我这里使用的是AWS Route53。
- 你的应用程序或后端服务被代理到上述的子域下。
- 将SSL证书添加到Nginx下。
服务部署
部署基于user/passwd认证的Authelia(非LDAP认证)
部署Docker版Nginx容器服务
使用openssl自建ssl证书
Authelia 配置和部署
涉及到的中间件如redis和postgresql,这里使用k8s容器化部署,需要有k8s环境。
这里我简单部署个基于k8s的单节点redis,有资源和需要的同学,可以部署集群环境。
单节点 redis 部署
$ cd ./plugins/redis $ kubectl apply -f config.yaml $ kubectl apply -f redis-deployment.yaml查看pod、svc状态
$ kubectl get pod,svc -n middle|grep redis单节点 postgresql 部署
这里我简单部署个基于k8s的单节点postgresql,有资源和需要的同学,可以部署集群环境。
$ cd ./plugins/postgresql $ kubectl apply -f postgres-pvc.yaml $ kubectl apply -f postgres-configmap.yaml $ kubectl apply -f postgres-deploy.yaml查看pod、svc状态
$ kubectl get pod,svc -n middle|grep postgres部署 Authelia
这里我将部署的yaml文件贴出来,大家参考下。
创建authelia的user/passwd
# 密码是加密的 $ docker run authelia/authelia:latest authelia hash-password -- '123456' # 输出加密密码,写到 authelia-users.yaml 配置文件中 Password hash: $argon2id$v=19$m=65536,t=1,p=8$VFIvUWw1VUtlVzlIQTJJZw$9x/Y/qt1cOFcYDKJKBqPjpJB3lspp+48RXQkPUKJXiQauthelia-configmap-user.yaml
--- apiVersion: v1 kind: ConfigMap metadata: name: authelia-conf namespace: middle data: configuration.yml: |- theme: light jwt_secret: test#888 ## 更改为真实的 default_redirection_url: https://ausingapore.test.com default_2fa_method: "" server: host: 0.0.0.0 port: 9091 path: "" read_buffer_size: 4096 write_buffer_size: 4096 enable_pprof: false enable_expvars: false disable_healthcheck: false tls: key: "" certificate: "" client_certificates: [] headers: csp_template: "" log: level: debug ntp: address: "time.cloudflare.com:123" version: 4 max_desync: 3s disable_startup_check: false disable_failure: false authentication_backend: disable_reset_password: false file: path: /config/users_database.yml access_control: default_policy: deny rules: ## 更改为真实的 - domain: '*.ausingapore.test.com' policy: one_factor ## 更改为真实的 - domain: 'secure.ausingapore.test.com' policy: two_factor session: name: authelia_session ## 更改为真实的 domain: ausingapore.test.com same_site: lax secret: insecure_session_secret expiration: 1h inactivity: 5m remember_me_duration: 1M redis: host: redis-authelia.middle.svc.cluster.local port: 6379 ## 更改为真实的 password: test#888 database_index: 0 maximum_active_connections: 8 minimum_idle_connections: 0 regulation: max_retries: 3 find_time: 2m ban_time: 5m storage: encryption_key: thisisjustatesthahaha postgres: host: postgres-authelia.middle.svc.cluster.local port: 5432 database: authelia schema: public username: authelia ## 更改为真实的 password: test#888 timeout: 5s notifier: disable_startup_check: true smtp: host: smtp.163.com port: 25 timeout: 5s ## 更改为真实的 username: 17521561234@163.com password: test#123 sender: "17521561234@163.com" identifier: localhost subject: "[Authelia] {title}" startup_check_address: 17521561234@163.com disable_require_tls: true disable_html_emails: true tls: skip_verify: false ## Minimum TLS version for either StartTLS or SMTPS. minimum_version: TLS1.2authelia-deployment-user.yaml
apiVersion: v1 kind: Service metadata: labels: app: sso-authelia name: sso-authelia namespace: middle spec: type: NodePort ports: - name: http port: 9091 protocol: TCP targetPort: 9091 nodePort: 32143 selector: app: sso-authelia --- apiVersion: apps/v1 kind: Deployment metadata: labels: app: sso-authelia name: sso-authelia namespace: middle spec: replicas: 1 selector: matchLabels: app: sso-authelia template: metadata: labels: app: sso-authelia spec: containers: - image: registry.cn-shanghai.aliyuncs.com/tengfeiwu/authelia:202206161044 name: sso-authelia #args: #- "--config=/config/config.yml" volumeMounts: - name: authelia-configmap mountPath: /config/configuration.yml subPath: configuration.yml - name: authelia-users mountPath: /config/users_database.yml subPath: users_database.yml ports: - containerPort: 9091 protocol: TCP imagePullSecrets: - name: IfNotPresent volumes: - name: authelia-configmap configMap: name: authelia-conf - name: authelia-users configMap: name: authelia-usersauthelia-users.yaml
--- apiVersion: v1 kind: ConfigMap metadata: name: authelia-users namespace: middle data: users_database.yml: |- users: devops: displayname: "devops" password: "$argon2id$v=19$m=65536,t=1,p=8$VFIvUWw1VUtlVzlIQTJJZw$9x/Y/qt1cOFcYDKJKBqPjpJB3lspp+48RXQkPUKJXiQ" email: 17521561234@163.com groups: - admins - dev进行authelia服务部署
$ kubectl apply -f authelia-users.yaml $ kubectl apply -f authelia-configmap-user.yaml $ kubectl apply -f authelia-deployment-user.yaml查看authelia的pod,svc
$ kubectl get pod,svc -n middle|grep authelia到这里,我们已经将Authelia服务部署完毕了,接下来,我们需要接着部署其他服务。
自签名SSL证书
这里使用openssl方式创建一个自签名的SSL证书,当然你也可以使用Let's Encrypt
gencret.sh
#!/bin/sh # create self-signed server certificate: read -p "Enter your domain [www.example.com]: " DOMAIN echo "Create server key..." # 需要注意的是,这里使用的是 2048,如果使用1024子域证书在nginx加载可能会报错 openssl genrsa -des3 -out $DOMAIN.key 2048 echo "Create server certificate signing request..." SUBJECT="/C=US/ST=Mars/L=iTranswarp/O=iTranswarp/OU=iTranswarp/CN=$DOMAIN" openssl req -new -subj $SUBJECT -key $DOMAIN.key -out $DOMAIN.csr echo "Remove password..." mv $DOMAIN.key $DOMAIN.origin.key openssl rsa -in $DOMAIN.origin.key -out $DOMAIN.key echo "Sign SSL certificate..." openssl x509 -req -days 3650 -in $DOMAIN.csr -signkey $DOMAIN.key -out $DOMAIN.crt echo "TODO:" echo "Copy $DOMAIN.crt to /etc/nginx/ssl/$DOMAIN.crt" echo "Copy $DOMAIN.key to /etc/nginx/ssl/$DOMAIN.key" echo "Add configuration in nginx:" echo "server {" echo " ..." echo " listen 443 ssl;" echo " ssl_certificate /etc/nginx/ssl/$DOMAIN.crt;" echo " ssl_certificate_key /etc/nginx/ssl/$DOMAIN.key;" echo "}"说明:nginx:记录SSL: error:140AB18F:SSL routines:SSL_CTX_use_certificate:ee key too small
# 需要注意的是,这里使用的是 2048,如果使用1024子域证书在nginx加载可能会报错 openssl genrsa -des3 -out $DOMAIN.key 2048运行脚本,子域名是*.singapore.test.com,那么按照提示输入:
$ chmod +x gencert.sh $ ./gencert.sh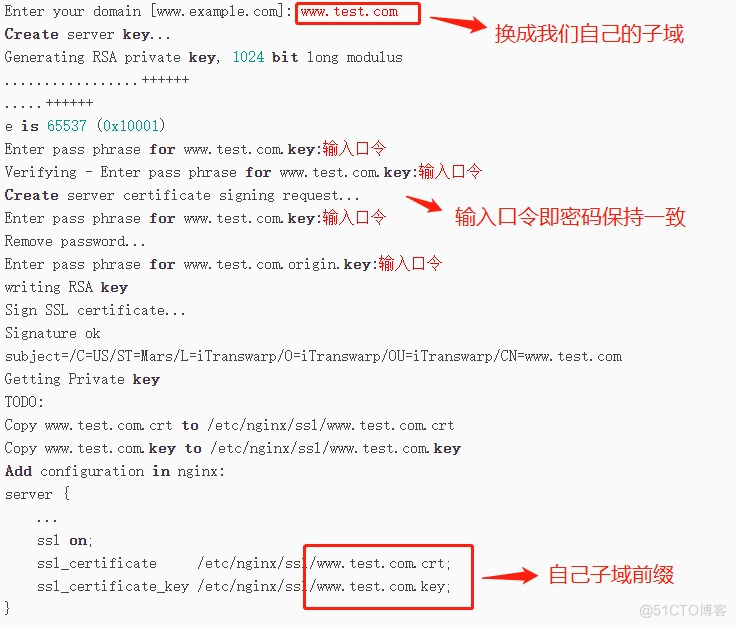
部署Nginx服务
这里使用Docker进行Nginx服务快速部署。
整体目录结构树:
$ tree nginx nginx ├── config │ ├── conf.d │ │ ├── default.conf │ │ └── who.conf # 最佳实践章节使用 │ └── nginx.conf ├── logs ├── nginx-start.sh ├── snippets │ ├── auth.conf │ ├── authelia.conf │ └── ssl.conf └── ssl ├── *.ausingapore.test.com.crt ├── *.ausingapore.test.com.csr ├── *.ausingapore.test.com.key ├── *.ausingapore.test.com.origin.key └── gencret.shnginx.conf
#运行nginx的用户 user nginx; #启动进程设置成和CPU数量相等 worker_processes 1; #全局错误日志及PID文件的位置 error_log /var/log/nginx/error.log warn; pid /var/run/nginx.pid; #工作模式及连接数上限 events { #单个后台work进程最大并发数设置为1024 worker_connections 1024; } http { #设定mime类型 include /etc/nginx/mime.types; default_type application/octet-stream; #设定日志格式 log_format main '$remote_addr - $remote_user [$time_local] "$request" ' '$status $body_bytes_sent "$http_referer" ' '"$http_user_agent" "$http_x_forwarded_for"'; access_log /var/log/nginx/access.log main; sendfile on; #tcp_nopush on; #设置连接超时的事件 keepalive_timeout 65; #开启GZIP压缩 #gzip on; include /etc/nginx/conf.d/*.conf; }default.conf
即authelia后端服务
server { server_name authelia.ausingapore.test.com; listen 80; return 301 https://$server_name$request_uri; } server { server_name authelia.ausingapore.test.com; listen 443 ssl http2; # 增加ssl #ssl on; #如果强制HTTPs访问,这行要打开 ssl_certificate /ssl/*.ausingapore.test.com.crt; ssl_certificate_key /ssl/*.ausingapore.test.com.key; location / { # authelia后端ip+port set $upstream_authelia http://172.10.2.100:32143; proxy_pass $upstream_authelia; client_body_buffer_size 128k; #Timeout if the real server is dead proxy_next_upstream error timeout invalid_header http_500 http_502 http_503; # Advanced Proxy Config send_timeout 5m; proxy_read_timeout 360; proxy_send_timeout 360; proxy_connect_timeout 360; # Basic Proxy Config proxy_set_header Host $host; proxy_set_header X-Real-IP $remote_addr; proxy_set_header X-Forwarded-For $proxy_add_x_forwarded_for; proxy_set_header X-Forwarded-Proto $scheme; proxy_set_header X-Forwarded-Host $http_host; proxy_set_header X-Forwarded-Uri $request_uri; proxy_set_header X-Forwarded-Ssl on; proxy_redirect http:// $scheme://; proxy_http_version 1.1; proxy_set_header Connection ""; proxy_cache_bypass $cookie_session; proxy_no_cache $cookie_session; proxy_buffers 64 256k; # If behind reverse proxy, forwards the correct IP set_real_ip_from 10.0.0.0/8; set_real_ip_from 172.0.0.0/8; set_real_ip_from 192.168.0.0/16; set_real_ip_from fc00::/7; real_ip_header X-Forwarded-For; real_ip_recursive on; } }Nginx配置片段
这里主要有三个文件:auth.conf、authelia.conf、ssl.conf。
auth.conf
# Basic Authelia Config # Send a subsequent request to Authelia to verify if the user is authenticated # and has the right permissions to access the resource. auth_request /authelia; # Set the `target_url` variable based on the request. It will be used to build the portal # URL with the correct redirection parameter. auth_request_set $target_url $scheme://$http_host$request_uri; # Set the X-Forwarded-User and X-Forwarded-Groups with the headers # returned by Authelia for the backends which can consume them. # This is not safe, as the backend must make sure that they come from the # proxy. In the future, it's gonna be safe to just use OAuth. auth_request_set $user $upstream_http_remote_user; auth_request_set $groups $upstream_http_remote_groups; auth_request_set $name $upstream_http_remote_name; auth_request_set $email $upstream_http_remote_email; proxy_set_header Remote-User $user; proxy_set_header Remote-Groups $groups; proxy_set_header Remote-Name $name; proxy_set_header Remote-Email $email; # If Authelia returns 401, then nginx redirects the user to the login portal. # If it returns 200, then the request pass through to the backend. # For other type of errors, nginx will handle them as usual. # 替换成你自己的子域地址 error_page 401 =302 https://authelia.ausingapore.test.com/?rd=$target_url;authelia.conf
# Virtual endpoint created by nginx to forward auth requests. location /authelia { internal; # authelia后端ip+port set $upstream_authelia http://172.10.2.100:32143/api/verify; proxy_pass_request_body off; proxy_pass $upstream_authelia; proxy_set_header Content-Length ""; # Timeout if the real server is dead proxy_next_upstream error timeout invalid_header http_500 http_502 http_503; # [REQUIRED] Needed by Authelia to check authorizations of the resource. # Provide either X-Original-URL and X-Forwarded-Proto or # X-Forwarded-Proto, X-Forwarded-Host and X-Forwarded-Uri or both. # Those headers will be used by Authelia to deduce the target url of the user. # Basic Proxy Config client_body_buffer_size 128k; proxy_set_header Host $host; proxy_set_header X-Original-URL $scheme://$http_host$request_uri; proxy_set_header X-Real-IP $remote_addr; proxy_set_header X-Forwarded-For $remote_addr; proxy_set_header X-Forwarded-Proto $scheme; proxy_set_header X-Forwarded-Host $http_host; proxy_set_header X-Forwarded-Uri $request_uri; proxy_set_header X-Forwarded-Ssl on; proxy_redirect http:// $scheme://; proxy_http_version 1.1; proxy_set_header Connection ""; proxy_cache_bypass $cookie_session; proxy_no_cache $cookie_session; proxy_buffers 4 32k; # Advanced Proxy Config send_timeout 5m; proxy_read_timeout 240; proxy_send_timeout 240; proxy_connect_timeout 240; }ssl.conf
# 增加ssl #ssl on; #如果强制HTTPs访问,这行要打开 ssl_certificate /ssl/*.ausingapore.test.com.crt; ssl_certificate_key /ssl/*.ausingapore.test.com.key;启动nginx容器
系统上提前安装好docker
nginx-start.sh
#!/bin/bash docker run -itd \ --name au-nginx \ -p 443:443\ -p 80:80 \ -v /root/admin-workspace/nginx/config/nginx.conf:/etc/nginx/nginx.conf/:rw\ -v /root/admin-workspace/nginx/config/conf.d:/etc/nginx/conf.d/:rw\ -v /root/admin-workspace/nginx/snippets:/etc/nginx/snippets/:rw\ -v /root/admin-workspace/nginx/logs:/var/log/nginx/:rw\ -v /root/admin-workspace/nginx/ssl:/ssl/:rw\ -d nginx启动nginx容器服务
$ sh nginx-start.sh # 查看容器运行状态 $ docker ps |grep au-nginxAuthelia服务验证
完成步骤后,nginx与authelia已经对接起来了,我们验证下authelia是否正常浏览器访问。
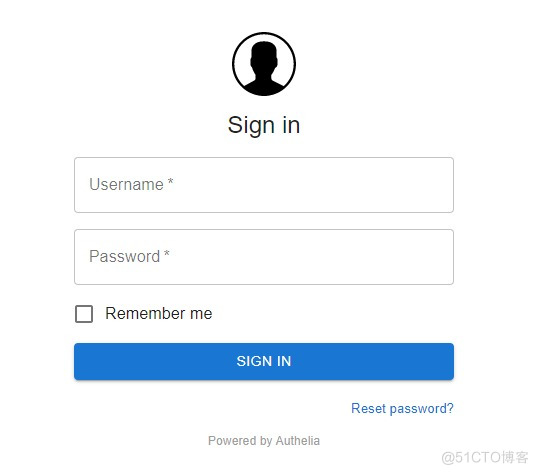
使用我们设置好的账号密码登录验证

小结:authelia站点可以正常访问,账号密码验证已通过。
最佳实践
现在我们部署一个服务验证下是否能实现我们服务登录验证需求。
需求分析
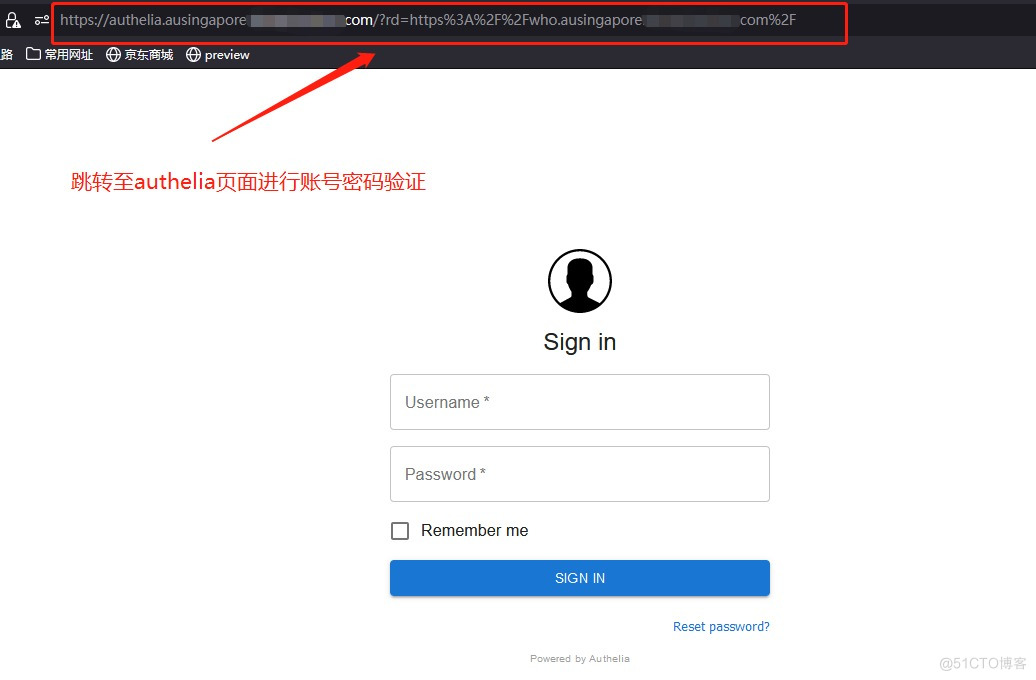
在浏览器中输入http://who.ausingapore.test.com,页面此时会跳转到http://authelia.ausingapore.test.com进行账号密码登录验证,如果没有通过认证将会把页面重定向到登陆页面。
部署测试服务
这里我部署在k8s上,yaml文件大家可以参考下。
who.yaml
apiVersion: v1 kind: Service metadata: name: whoami namespace: middle spec: type: NodePort ports: - protocol: TCP name: web port: 80 selector: app: whoami --- kind: Deployment apiVersion: apps/v1 metadata: name: whoami namespace: middle labels: app: whoami spec: replicas: 1 selector: matchLabels: app: whoami template: metadata: labels: app: whoami spec: containers: - name: whoami image: containous/whoami ports: - name: web containerPort: 80who.conf
server { server_name who.ausingapore.test.com; listen 80; return 301 https://$server_name$request_uri; } server { server_name who.ausingapore.test.com; listen 443 ssl http2; include snippets/ssl.conf; include snippets/authelia.conf; # Authelia auth endpoint location / { proxy_pass http://172.10.2.200:32230; proxy_set_header Host $host; proxy_set_header X-Real-IP $remote_addr; proxy_set_header X-Forwarded-For $proxy_add_x_forwarded_for; include snippets/auth.conf; # Protect this endpoint } }服务登录验证
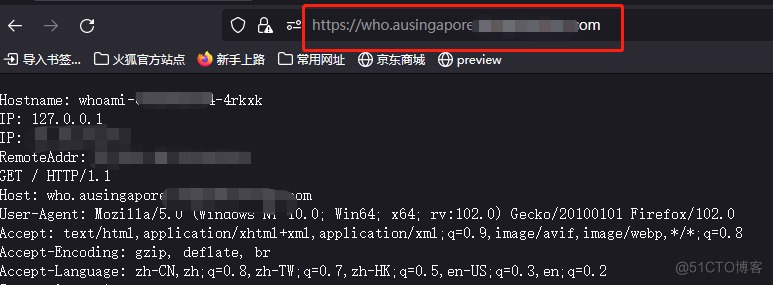
验证通过
输入账号密码,验证通过将跳转至who这个后端服务。
验证不通过
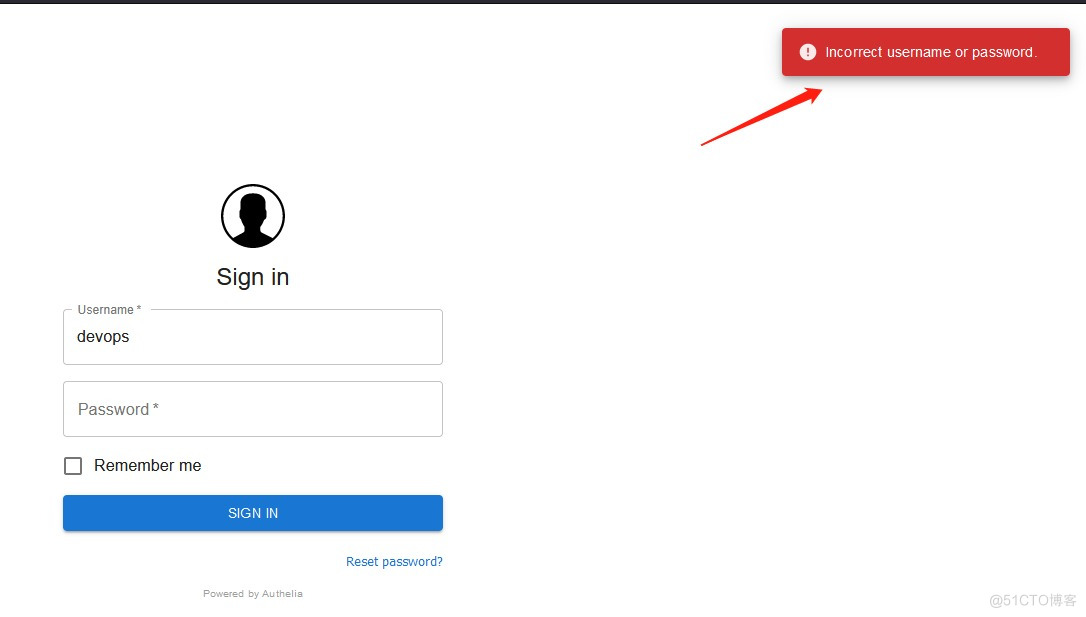
参考文档
使用 Authelia 和 NGINX 的自托管 SSO