欢迎访问我的GitHub 这里分类和汇总了欣宸的全部原创(含配套源码):https://github.com/zq2599/blog_demos 在《Flink1.7从安装到体验》一文中,我们安装和体验了Flink,今天就用java来一起开发一个
欢迎访问我的GitHub
这里分类和汇总了欣宸的全部原创(含配套源码):https://github.com/zq2599/blog_demos
- 在《Flink1.7从安装到体验》一文中,我们安装和体验了Flink,今天就用java来一起开发一个简单的Flink应用;
步骤列表
- 本次实战经历以下步骤:
- 创建应用;
- 编码;
- 构建;
- 提交任务到Flink,验证功能;
环境信息
Flink:1.7;
Flink所在机器的操作系统:CentOS Linux release 7.5.1804;
开发环境JDK:1.8.0_181;
开发环境Maven:3.5.0;
应用功能简介
- 在《Flink1.7从安装到体验》一文中,我们在Flink运行SocketWindowWordCount.jar,实现的功能是从socket读取字符串,将其中的每个单词的数量统计出来,今天我们就来编码开发这个应用,实现此功能;
创建应用
- 应用基本代码是通过mvn命令创建的,在命令行输入以下命令:
mvn archetype:generate -DarchetypeGroupId=org.apache.flink -DarchetypeArtifactId=flink-quickstart-java -DarchetypeVersion=1.7.0
- 按控制台的提示输入groupId、artifactId、version、package等信息,一路回车确认后,会生成一个和你输入的artifactId同名的文件夹,里面是个maven工程:
Define value for property 'groupId': com.bolingcavalry
Define value for property 'artifactId': socketwordcountdemo
Define value for property 'version' 1.0-SNAPSHOT: :
Define value for property 'package' com.bolingcavalry: :
Confirm properties configuration:
groupId: com.bolingcavalry
artifactId: socketwordcountdemo
version: 1.0-SNAPSHOT
package: com.bolingcavalry
编码
- 您可以选择直接从GitHub下载这个工程的源码,地址和链接信息如下表所示:
名称
链接
备注
项目主页
https://github.com/zq2599/blog_demos
该项目在GitHub上的主页
git仓库地址(https)
https://github.com/zq2599/blog_demos.git
该项目源码的仓库地址,https协议
git仓库地址(ssh)
git@github.com:zq2599/blog_demos.git
该项目源码的仓库地址,ssh协议
/**
* 记录单词及其出现频率的Pojo
*/
public static class WordWithCount {
/**
* 单词内容
*/
public String word;
/**
* 出现频率
*/
public long count;
public WordWithCount() {
super();
}
public WordWithCount(String word, long count) {
this.word = word;
this.count = count;
}
/**
* 将单词内容和频率展示出来
* @return
*/
@Override
public String toString() {
return word + " : " + count;
}
}
- 把所有业务逻辑写在StreamJob类的main方法中,如下所示,关键位置都加了中文注释:
public static void main(String[] args) throws Exception {
//环境信息
final StreamExecutionEnvironment env = StreamExecutionEnvironment.getExecutionEnvironment();
//数据来源是本机9999端口,换行符分隔,您也可以考虑将hostname和port参数通过main方法的入参传入
DataStream<String> text = env.socketTextStream("localhost", 9999, "\n");
//通过text对象转换得到新的DataStream对象,
//转换逻辑是分隔每个字符串,取得的所有单词都创建一个WordWithCount对象
DataStream<WordWithCount> windowCounts = text.flatMap(new FlatMapFunction<String, WordWithCount>() {
@Override
public void flatMap(String s, Collector<WordWithCount> collector) throws Exception {
for(String word : s.split("\\s")){
collector.collect(new WordWithCount(word, 1L));
}
}
})
.keyBy("word")//key为word字段
.timeWindow(Time.seconds(5)) //五秒一次的翻滚时间窗口
.reduce(new ReduceFunction<WordWithCount>() { //reduce策略
@Override
public WordWithCount reduce(WordWithCount a, WordWithCount b) throws Exception {
return new WordWithCount(a.word, a.count+b.count);
}
});
//单线程输出结果
windowCounts.print().setParallelism(1);
// 执行
env.execute("Flink Streaming Java API Skeleton");
}
构建
mvn clean package -U
- 命令执行完毕后,在target目录下的socketwordcountdemo-1.0-SNAPSHOT.jar文件就是构建成功的jar包;
在Flink验证
- Flink的安装和启动请参考《Flink1.7从安装到体验》;
- 登录到Flink所在机器,执行以下命令:
nc -l 9999
-
我这边Flink所在机器的IP地址是192.168.1.103,因此用浏览器访问的Flink的web地址为:http://192.168.1.103:8081;
-
选择刚刚生成的jar文件作为一个新的任务,如下图: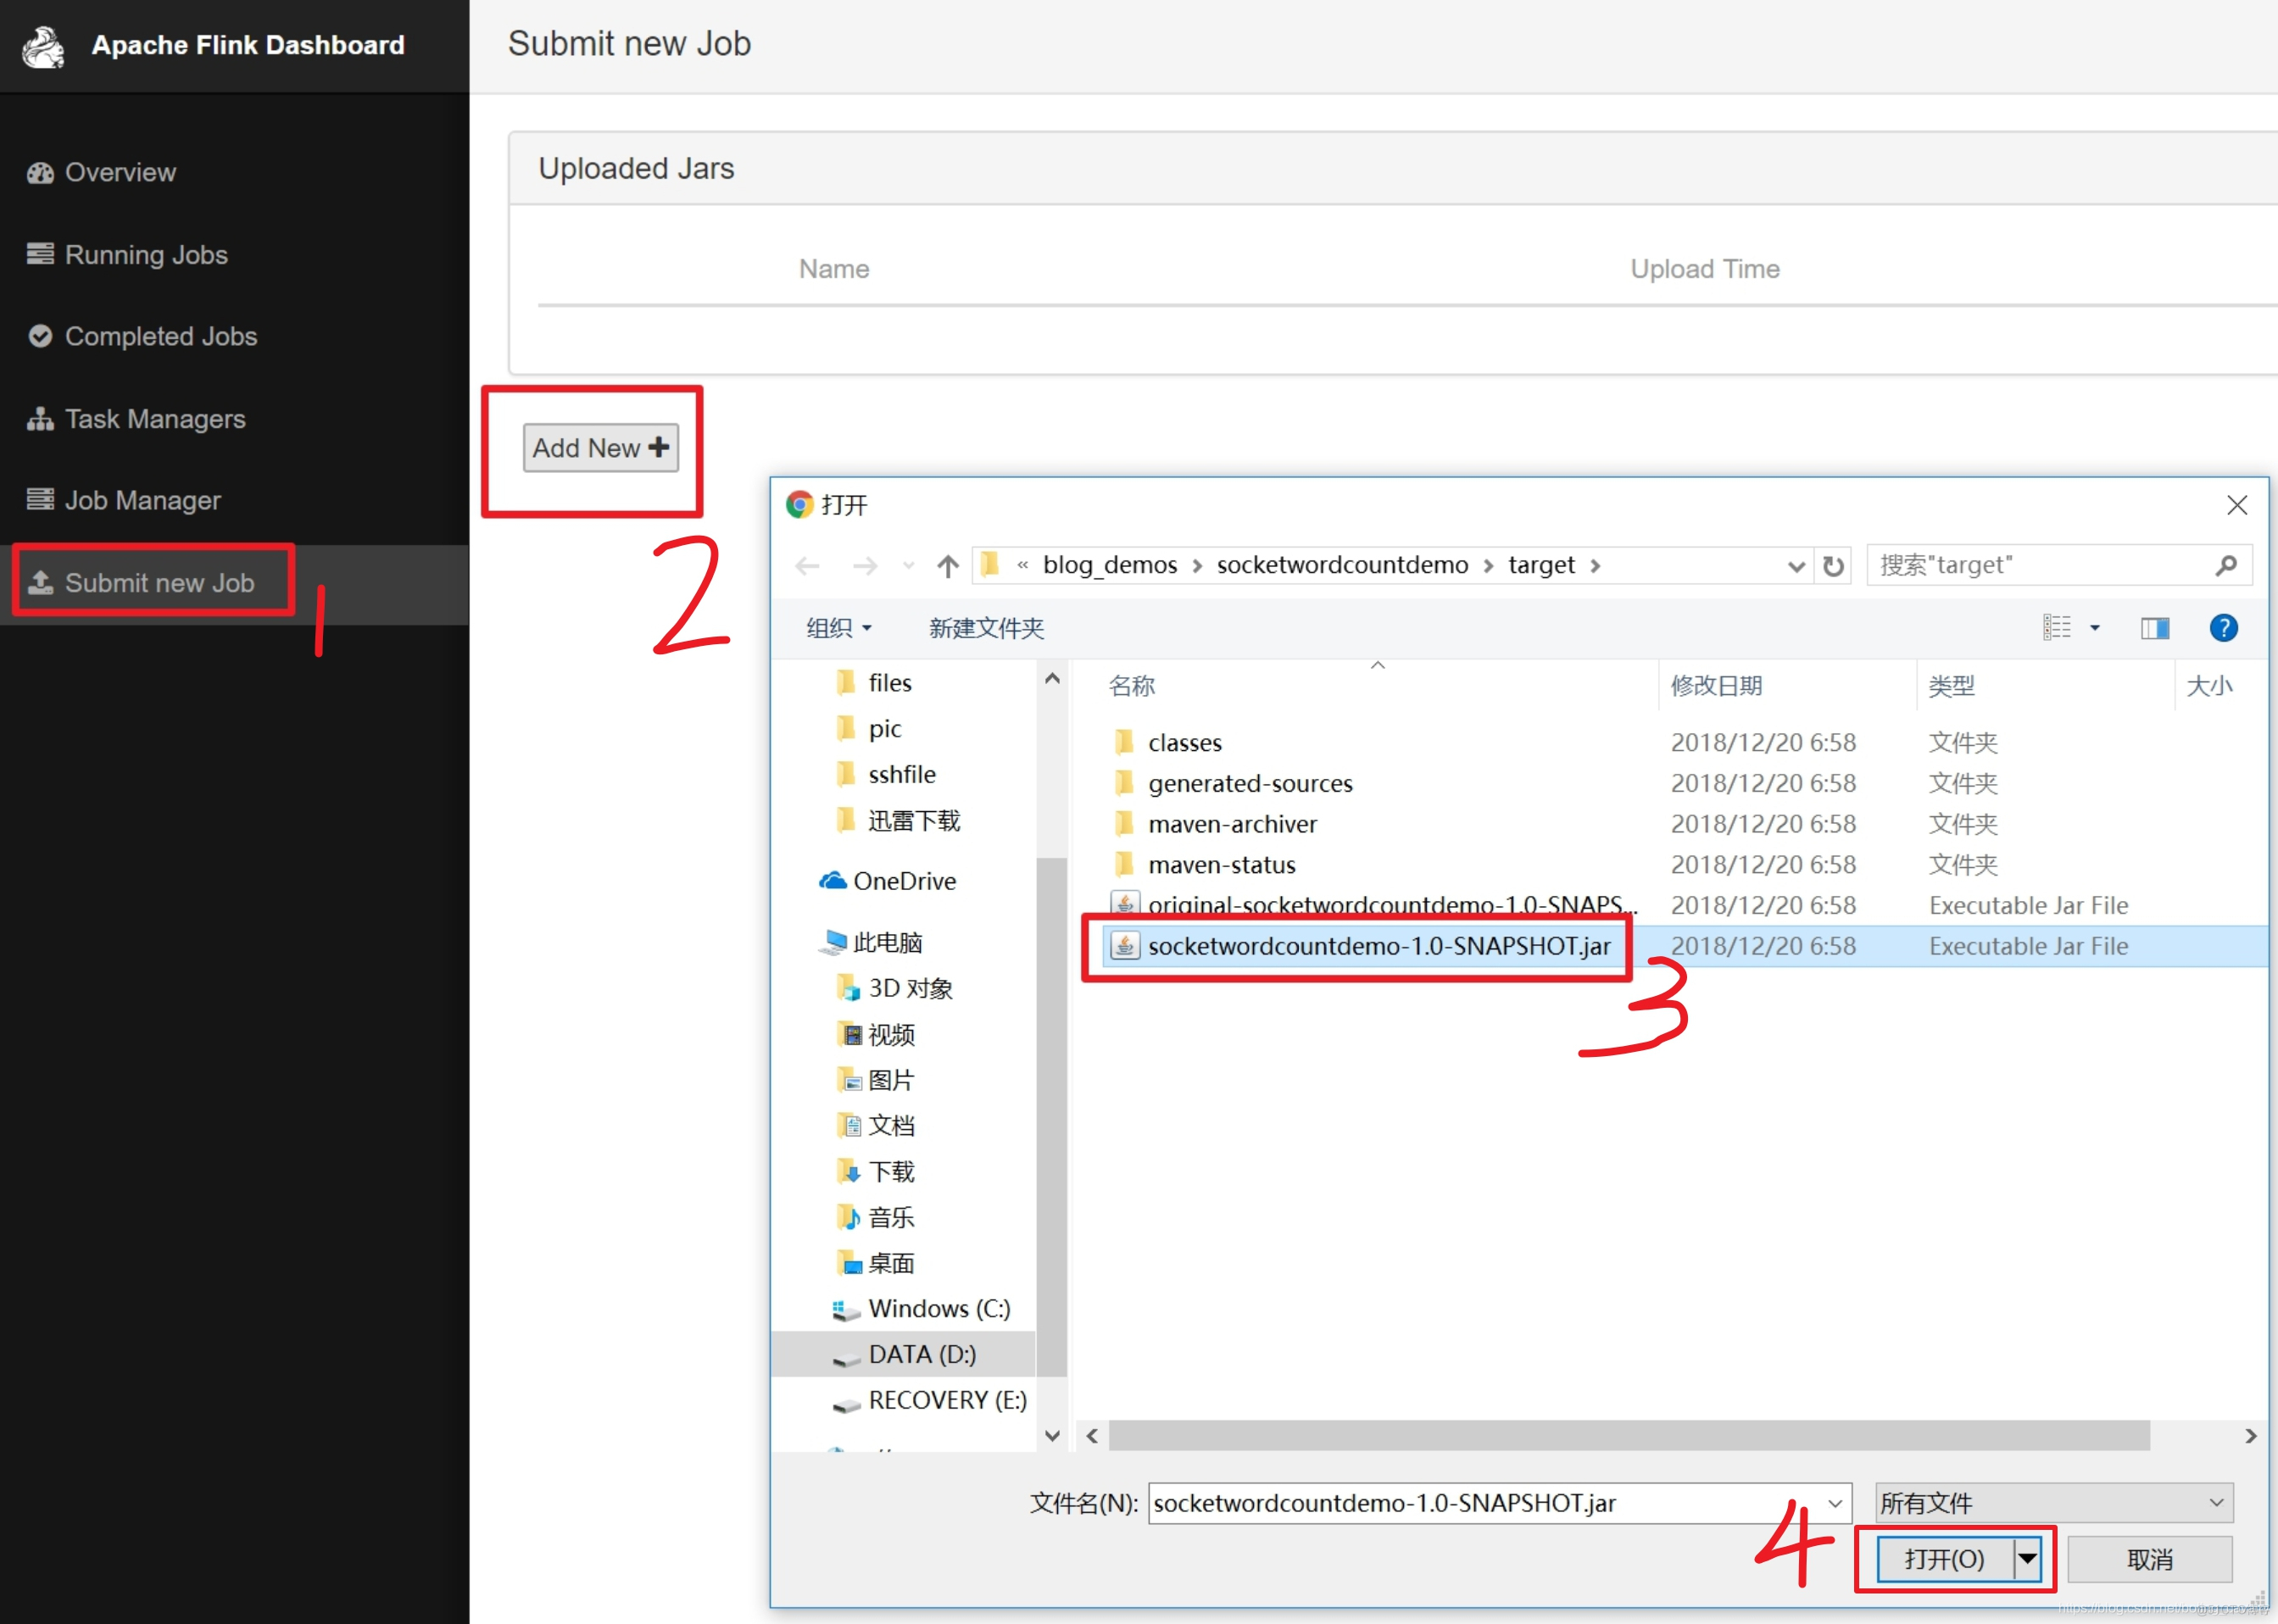
-
点击下图红框中的"upload",将文件提交: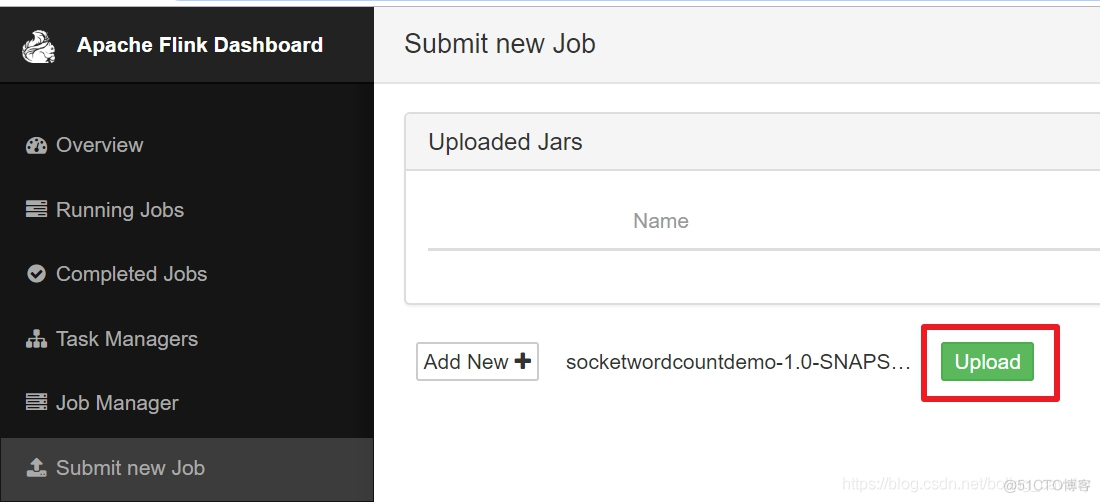
-
目前还只是将jar文件上传了而已,接下来就是手工设置执行类并启动任务,操作如下图,红框2中填写的前面编写的StreamingJob类的完整名称: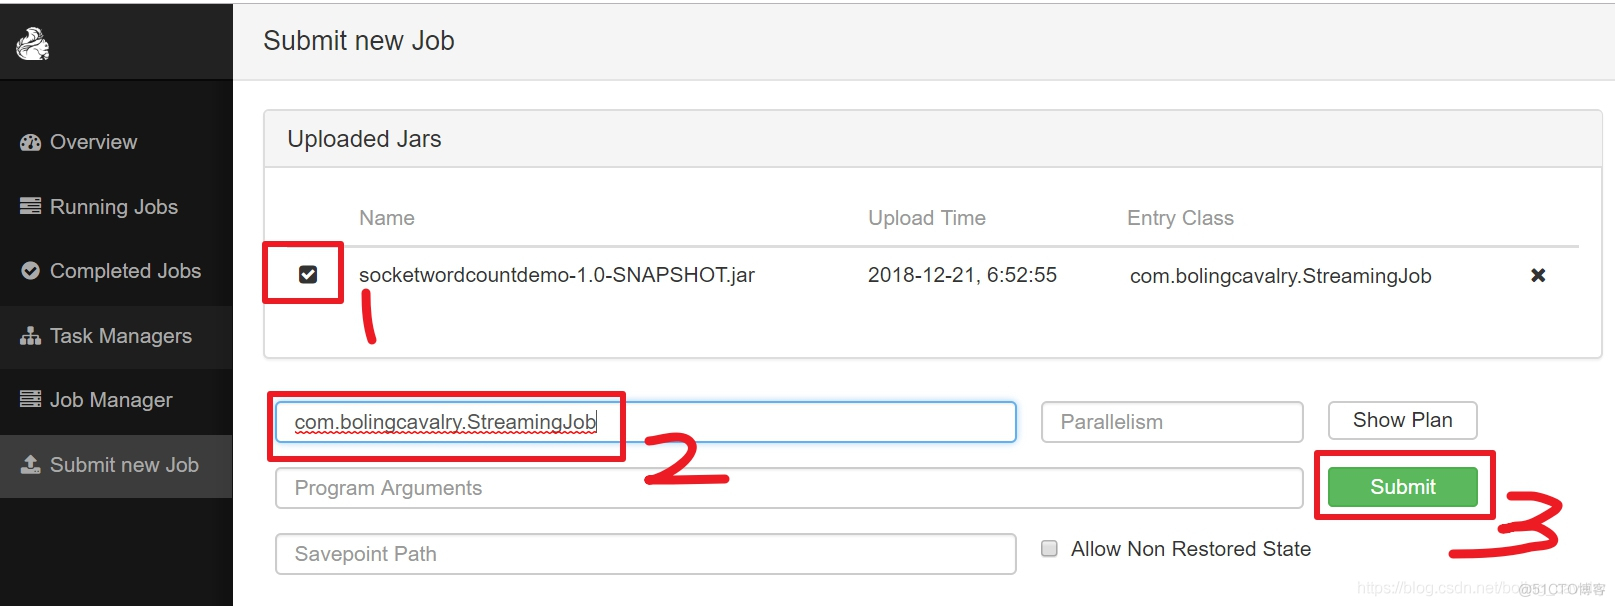
-
提交后的页面效果如下图所示,可见一个job已经在运行中了: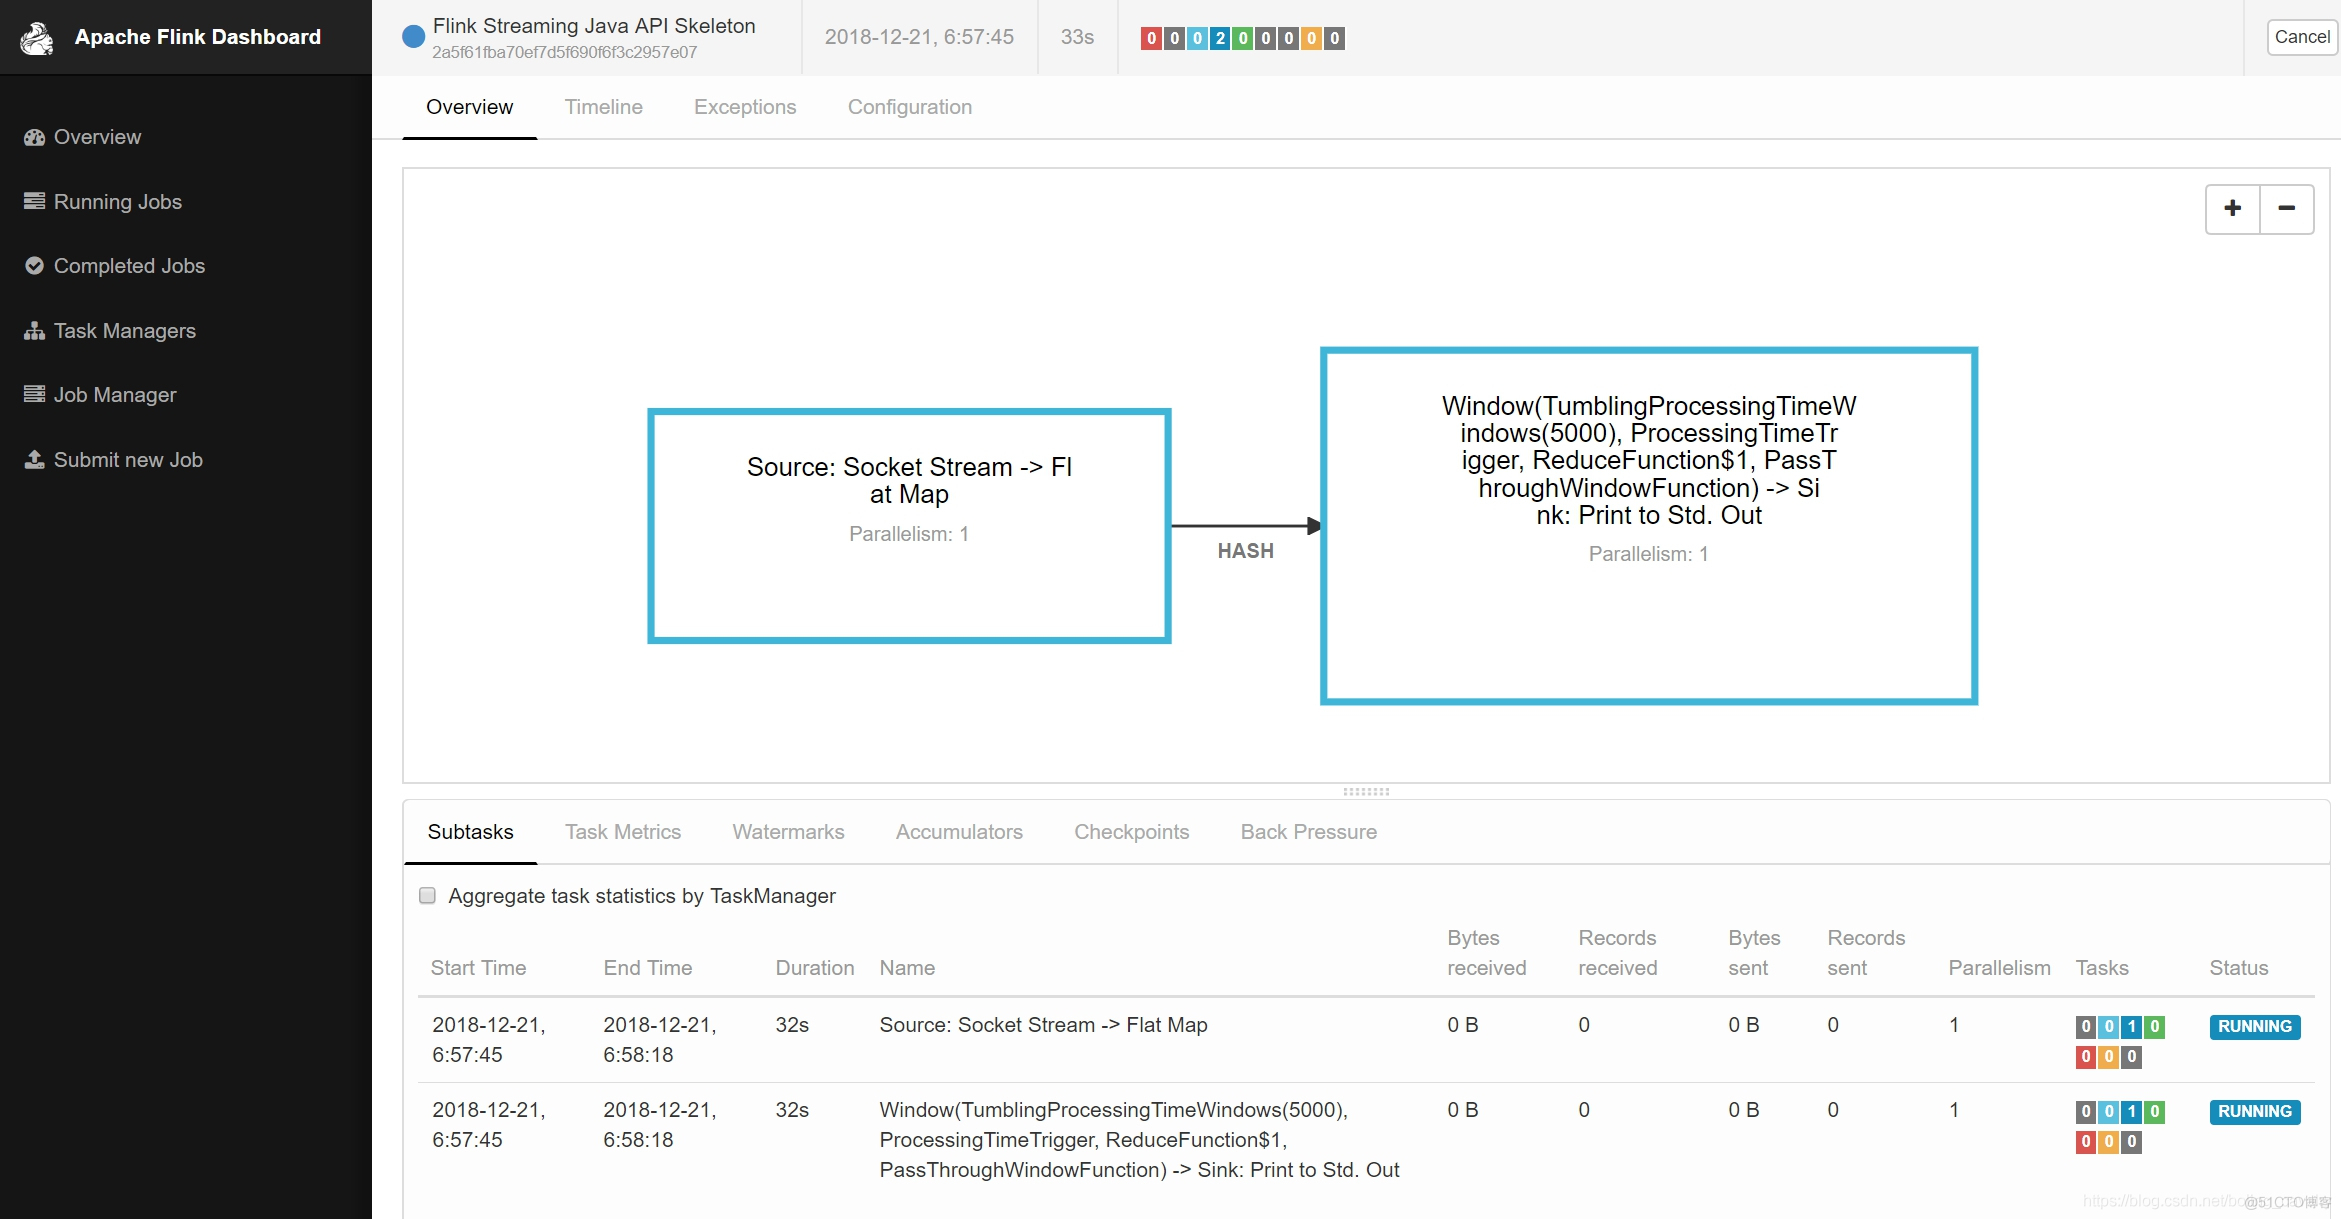
- 回到Flink所在机器的控制台,在之前输入了nc -l 9999的窗口输入一些英文句子,然后按下回车键,例如:
[root@vostro flink-1.7.0]# ./bin/start-cluster.sh
Starting cluster.
Starting standalonesession daemon on host vostro.
Starting taskexecutor daemon on host vostro.
[root@vostro flink-1.7.0]# nc -l 9999
Apache Flink is a framework and distributed processing engine for stateful computations over unbounded and bounded data streams. Flink has been designed to run in all common cluster environments, perform computations at in-memory speed and at any scale.
- 接下来看看我们的job的执行效果,如下图,点击左侧的"Task Managers",在右边的列表中只有一个Task,点击它:

- 出现的页面有三个tab页,点击"Stdout"这个tab,就能见到我们的任务对之前句子中的单词的统计结果,如下图:

- 至此,第一个最简单Flink就完成了。
### 欢迎关注51CTO博客:程序员欣宸
> [学习路上,你不孤单,欣宸原创一路相伴...](https://blog.51cto.com/u_13674465)