Zabbix基础入门 为什么做监控 企业中: 1.系统的监控:实际上是对系统不间断的实时监控2.实时反馈系统当前状态:我们监控某个硬件、或者某个系统,都是需要能实时看到当前系统的状态
Zabbix基础入门
为什么做监控
企业中:
1.系统的监控:实际上是对系统不间断的实时监控2.实时反馈系统当前状态:我们监控某个硬件、或者某个系统,都是需要能实时看到当前系统的状态,是正常、异常、或者故障。3.保证服务可靠性安全性:我们监控的目的就是要保证系统、服务、业务正常运行4.保证业务持续稳定运行:如果我们的监控做得很完善,即使出现故障,能第一时间接收到故障报警,在第一时间处理解决,从而保证业务持续性的稳定运行。(往往,第一时间知道业务宕机的都是用户)
监控软件
- CACTI 网络监控
- 官网:https://www.cacti.net/
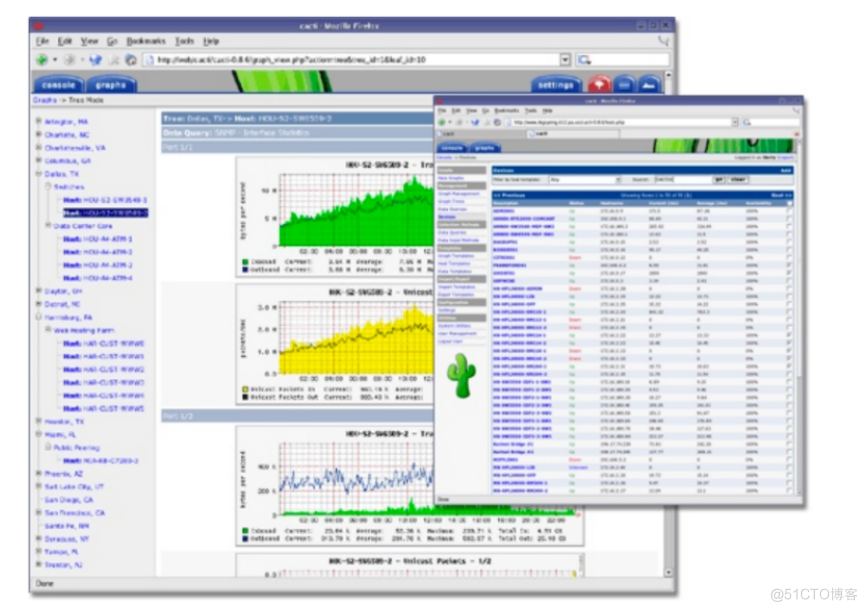
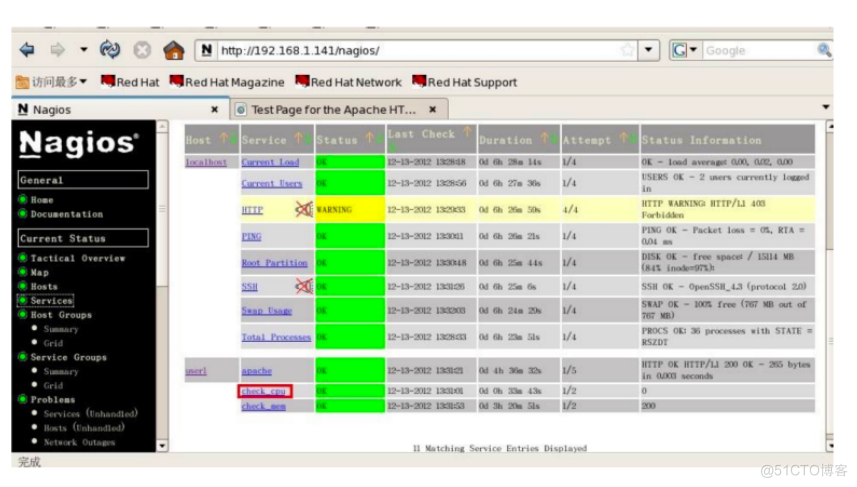
- Nagios
- 官网:https://www.nagios.com/
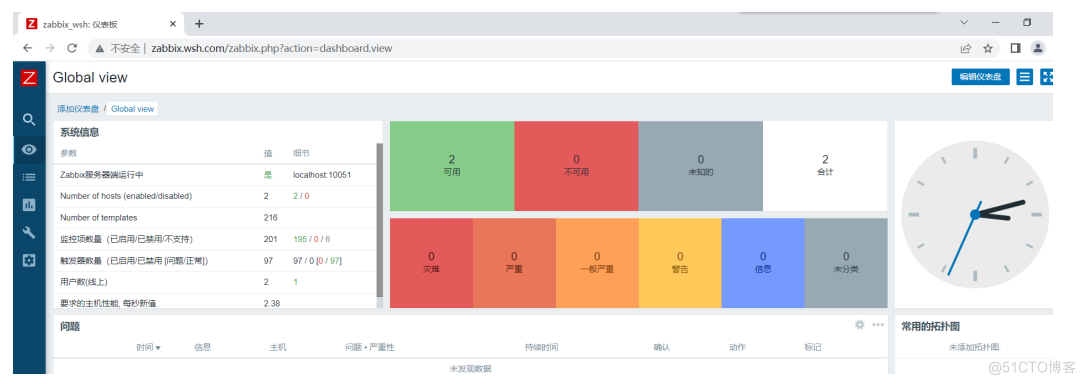
- Zabbix 分布式监控系统
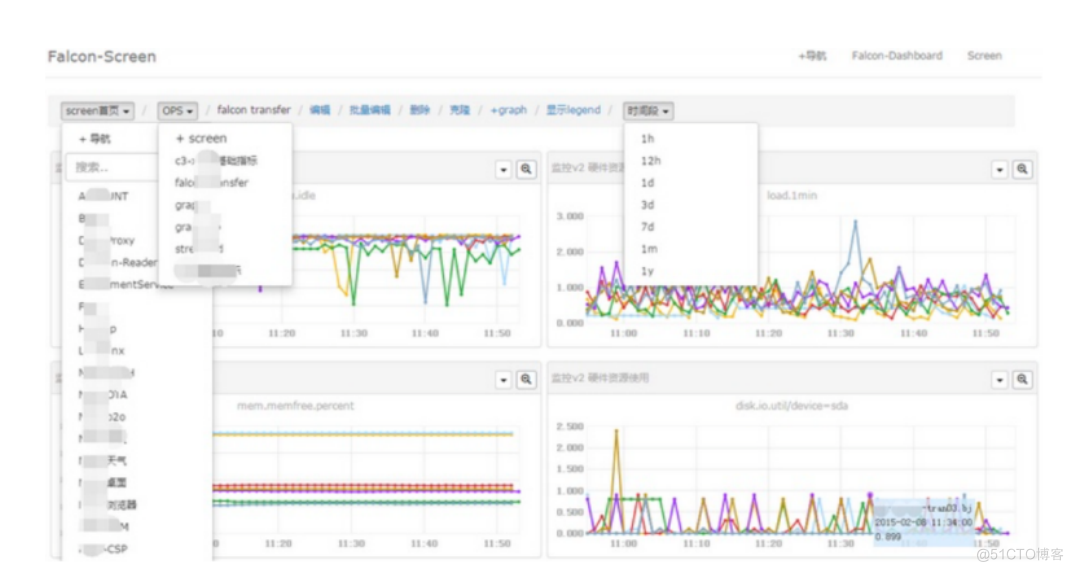
- open-falcon
- 官网:http://open-falcon.org/
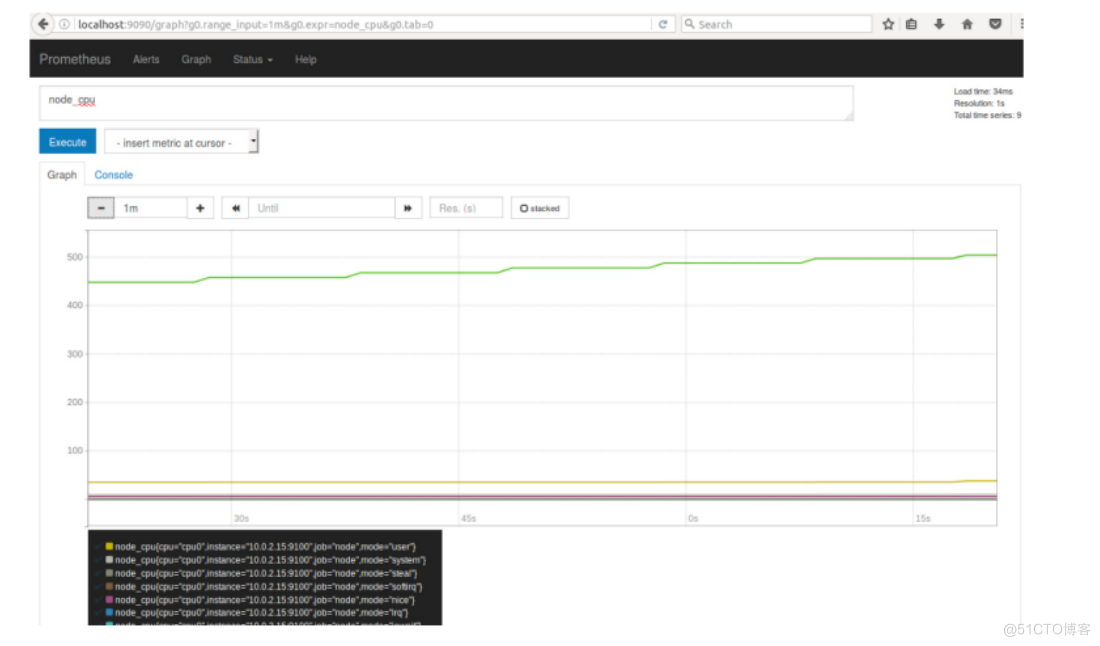
- 普罗米修斯 promtheus
- 官网:https://prometheus.io/
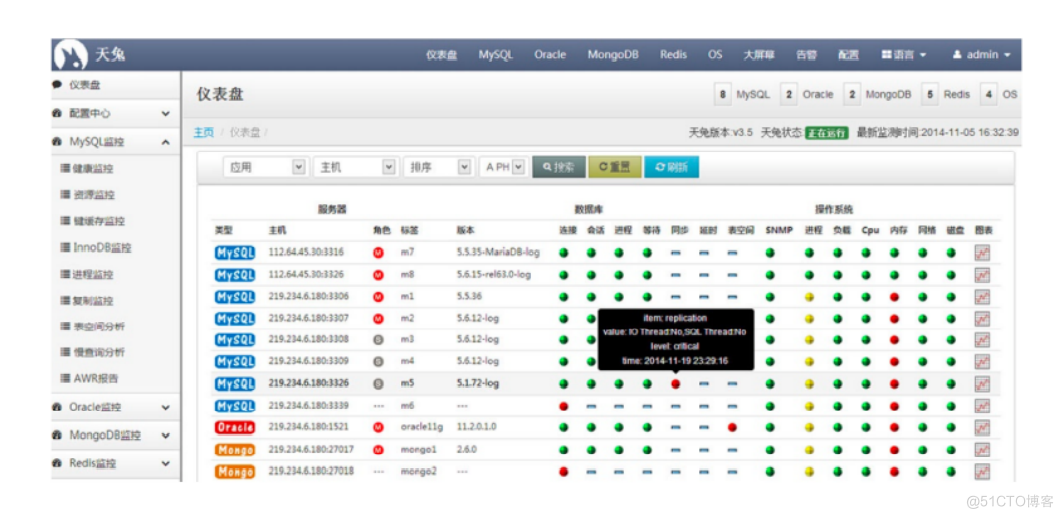
- 天兔
- 官网:https://www.lepus.cc/docs/lepus-v5/install/
面试问题
面试官:你们公司监控是如何做的?
监控软件我们使用的是zabbix,我们监控在不同的维度
-
硬件层面 Dell R710 R720 R730
- 如果不使用dell的idrac那就使用zabbix的IPMI接口监控硬件
1)CPU温度,2)风扇转速,3)磁盘是否损坏,4)CMOS电池电量5)内存是否损坏
.....
- 云主机,不需要说硬件层,一般云主机都自带,硬件监控
-
系统层面
- 内存
- 内存使用率
- 缓冲区
- 缓存区
- 堆
- 栈
- CPU
- CPU使用率
- CPU的负载
- CPU核心数线程
- 磁盘
- 磁盘使用率
- 磁盘大小
- 磁盘IO
-
网络层面
- 网卡接口
- 网卡流量
- 交换机
- 路由器
-
应用层面
- nginx
- 进程
- 端口
- 网站访问
- MySQL
- 进程
- 端口
- 主从复制
- SQL读写速率
- 是否可以登录
- InnoDB
- 缓存
- 表空间
- 慢查询
- tomcat
- JMX
- 老年代
- 新生代
- 永久代
- 垃圾回收
- full-gc
- 进程
- 端口
- 网站是否可以访问
- redis
- 进程
- 端口
- 连接状态
- 主从复制 info
- 集群状态
- key,缓存
- 缓存穿透
- 缓存击穿
- 缓存雪崩
- NFS、GFS(集群式的NFS)、Ceph、FastDFS
- 进程
- 挂载情况
- 数据同步
- PHP
- 进程
- 端口(socket)
- 网站访问情况
- php info
- ....
-
业务层面
- 代码
- 接口
单机监控命令
CPU监控命令
## 负载 [root@zabbix ~]# w 15:16:05 up 6:40, 1 user, load average: 0.00, 0.01, 0.05 USER TTY FROM LOGIN@ IDLE JCPU PCPU WHAT root pts/0 10.0.0.1 16:36 ? 0.08s 0.00s w ## CPU [root@zabbix ~]# top -n 1 ## 美化的top [root@zabbix ~]# yum install -y htop ## glances [root@zabbix ~]# yum -y install glances [root@zabbix ~]# glances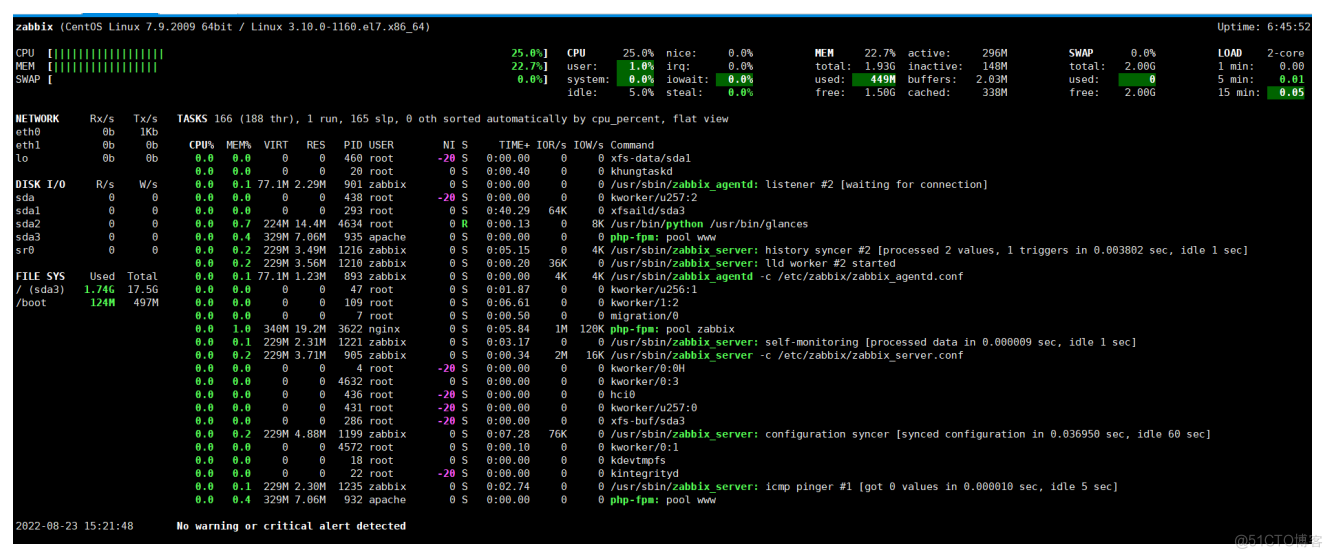
不管用什么命令监控,查看CPU,我们都必须了解,系统的用户态和内核态。
%Cpu(s): 0.0 us, 0.0 sy, 0.0 ni,100.0 id, 0.0 wa, 0.0 hi, 0.0 si, 0.0 st us: 用户态 跟用户的操作有关35% sy: 内核态 跟内核的处理有关65% id: CPU空闲 当我们执行一个命令的时候,很快能出来结果,但是有多少人知道,这个很快,他都占用了哪些时间呢? [root@zabbix ~]# time ls anaconda-ks.cfg zabbix-server-mysql-4.0.0-2.el7.x86_64.rpm zabbix-agent-4.0.0-2.el7.x86_64.rpm zabbix-web-mysql-4.0.0-2.el7.noarch.rpm real 0m0.032s user 0m0.002s sys 0m0.005s监控内存
## free # -g:超过1G才显示 [root@zabbix ~]# free -g total used free shared buff/cache available Mem: 1 0 1 0 0 1 Swap: 1 0 1 # -m:显示内存的单位为 M [root@zabbix ~]# free -m total used free shared buff/cache available Mem: 1980 307 1333 11 340 1518 Swap: 2047 0 2047 # -h:以可读形式显示容量 [root@zabbix ~]# free -h total used free shared buff/cache available Mem: 1.9G 310M 1.3G 11M 340M 1.5G Swap: 2.0G 0B 2.0G ## top ## glances ## htop ## lsmem [root@zabbix ~]# lsmem RANGE SIZE STATE REMOVABLE BLOCK 0x0000000000000000-0x0000000007ffffff 128M online no 0 0x0000000008000000-0x000000002fffffff 640M online yes 1-5 0x0000000030000000-0x0000000037ffffff 128M online no 6 0x0000000038000000-0x0000000047ffffff 256M online yes 7-8 0x0000000048000000-0x000000007fffffff 896M online no 9-15 Memory block size: 128M Total online memory: 2G Total offline memory: 0B ## cat /proc/meminfo如何查看单个进程占用内存?
# 进程占用内存公式 pmem = VmRSS / MemTotal * 100 process mem = 虚拟内存 / 总内存 * 100python脚本获取进程使用内存情况
[root@zabbix ~]# cat mem.py #!/usr/bin/env python # _*_ coding:UTF-8 _*_ # 收集程序所占用的物理内存大小,占所有物理内存的比例 # Python: 2.7.6 import sys import os from subprocess import Popen,PIPE def get_pid(program): '获取目标程序的PID列表' p = Popen(['pidof',program],stdout=PIPE,stderr=PIPE) pids,stderrput = p.communicate() # pids = p.stdout.read() #这种方法也是可以的 # 这里也可以对stderrput来进行判断 if pids: return pids.split() else: raise ValueError def mem_calc(pids): '计算PIDs占用的内存大小' mem_total = 0 for pid in pids: os.chdir('/proc/%s' % pid) with open('status') as fd: for line in fd: if line.startswith('VmRSS'): mem = line.strip().split()[1] mem_total += int(mem) break return mem_total def mem_percent(mem): '计算程序内存占用物理内存的百分比' with open('/proc/meminfo') as fd: for line in fd: if line.startswith('MemTotal'): total = line.strip().split()[1] percent = (float(mem)/int(total)) * 100 return percent def main(): try: program = sys.argv[1] pids = get_pid(program) except IndexError as e: sys.exit('%s need a Program name ' % __file__) except ValueError as e: sys.exit('%s not a Process Name or not Start' % program ) mem_total = mem_calc(pids) percent = mem_percent(mem_total) return program,mem_total,percent if __name__ == '__main__': program,mem_total,mem_percent=main() print('进程名称:%s\n物理内存为:%s\n百分比为:%.2f%%'% (program,mem_total,mem_percent)) [root@zabbix ~]# python mem.py zabbix_agentd 进程名称:zabbix_agentd 物理内存为:12332 百分比为:1.24% [root@zabbix ~]# python mem.py zabbix_server 进程名称:zabbix_server 物理内存为:115300 百分比为:11.58% [root@zabbix ~]# python mem.py httpd 进程名称:httpd 物理内存为:212148 百分比为:21.30%监控磁盘命令
## df # i:用信息索引点代替块表示使用状况 [root@zabbix ~]# df -i Filesystem Inodes IUsed IFree IUse% Mounted on devtmpfs 250807 383 250424 1% /dev tmpfs 253487 1 253486 1% /dev/shm tmpfs 253487 713 252774 1% /run tmpfs 253487 16 253471 1% /sys/fs/cgroup /dev/sda3 9180672 41281 9139391 1% / /dev/sda1 256000 326 255674 1% /boot tmpfs 253487 1 253486 1% /run/user/0 # -h:用常见的格式显示出大小 [root@zabbix ~]# df -h Filesystem Size Used Avail Use% Mounted on devtmpfs 980M 0 980M 0% /dev tmpfs 991M 0 991M 0% /dev/shm tmpfs 991M 9.6M 981M 1% /run tmpfs 991M 0 991M 0% /sys/fs/cgroup /dev/sda3 18G 1.8G 16G 10% / /dev/sda1 497M 125M 373M 25% /boot tmpfs 199M 0 199M 0% /run/user/0 [root@zabbix ~]# df -ih Filesystem Inodes IUsed IFree IUse% Mounted on devtmpfs 245K 383 245K 1% /dev tmpfs 248K 1 248K 1% /dev/shm tmpfs 248K 713 247K 1% /run tmpfs 248K 16 248K 1% /sys/fs/cgroup /dev/sda3 8.8M 41K 8.8M 1% / /dev/sda1 250K 326 250K 1% /boot tmpfs 248K 1 248K 1% /run/user/0 ## iotop查看进程对磁盘的使用情况,IO吞吐量情况 [root@zabbix ~]# iotop Total DISK READ : 0.00 B/s | Total DISK WRITE : 0.00 B/s Actual DISK READ: 0.00 B/s | Actual DISK WRITE: 0.00 B/s # 查看磁盘的IO吞吐量 -d:指定多久出一次结果 单位是秒 -m:指定出几次结果 [root@zabbix ~]# iostat -dm 1 10 Linux 3.10.0-1160.el7.x86_64 (zabbix) 08/23/2022 _x86_64_ (2 CPU) Device: tps MB_read/s MB_wrtn/s MB_read MB_wrtn scd0 0.00 0.00 0.00 1 0 sda 0.57 0.01 0.00 276 90 Device: tps MB_read/s MB_wrtn/s MB_read MB_wrtn scd0 0.00 0.00 0.00 0 0 sda 0.99 0.01 0.00 0 0 [root@zabbix ~]# yum install -y dstat [root@zabbix ~]# dstat -cdngy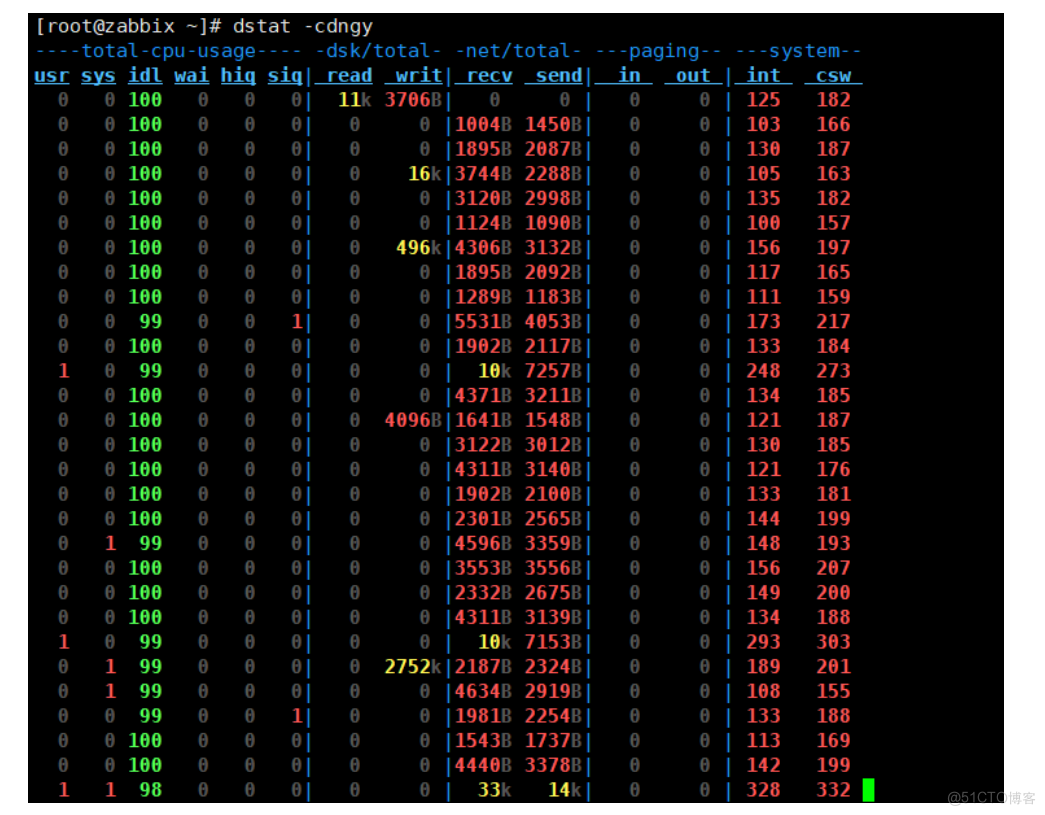
网络监控命令
## glances NETWORK Rx/s Tx/s eth0 592b 15Kb eth1 17Kb 13Kb lo 0b 0b ## iftop [root@zabbix-server ~]# iftop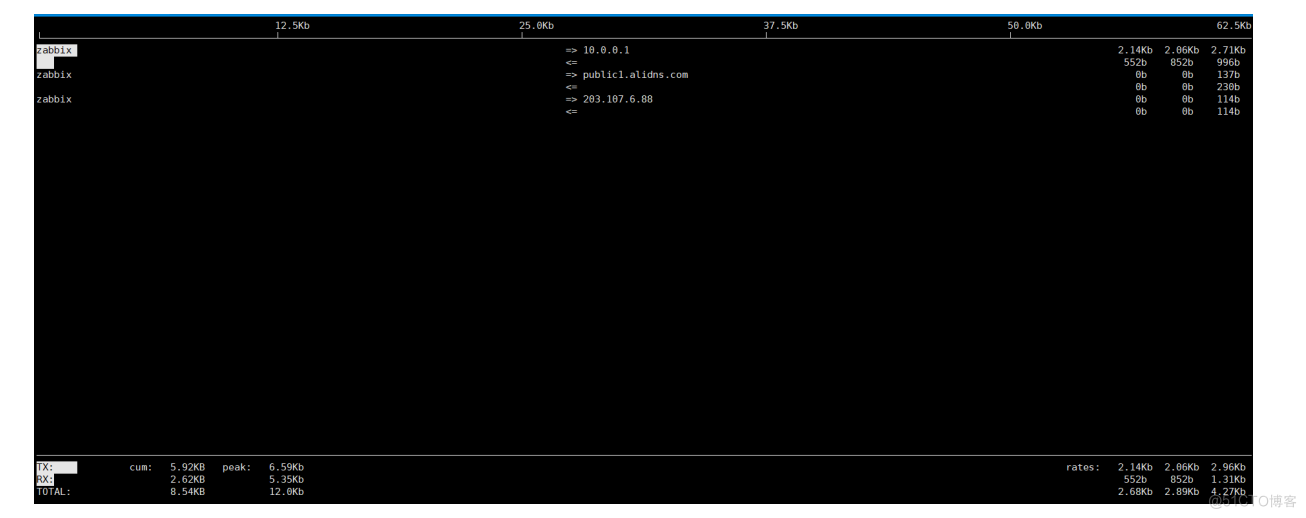
TCP11种状态监控命令
# netstat # 查看当前服务器上的所有应用TCP状态 [root@zabbix ~]# netstat -an [root@zabbix ~]# netstat -an|awk '/^tcp/ {print $NF}'|sort|uniq -c 28 ESTABLISHED 13 LISTEN 7 TIME_WAIT [root@zabbix ~]# netstat -an|awk '/^tcp/ {++state[$NF]} END {for(key in state) print key," \t" ,state[key]}' LISTEN 13 ESTABLISHED 28 TIME_WAIT 5生产场景需求
如何每1分钟监控当前系统的内存使用状态,如果可用低于100MB则发送邮件。同时打印当前还剩余多少内存 1.如何获取内存的状态信息 free -m 2.如何获取内存的可用状态 free -m|awk '/Mem/{print $NF}' 3.如何进行数字的比对,高于100MB不处理,低于100MB,发送邮件。 4.如何每分钟执行。 [root@web02 ~]# vim free.sh #!/bin/bash while true;do free_av=$(free -m|awk '/^Mem/{print $NF}') Hostname=$(hostname)_$(hostname -I|awk '{print $2}') Date=$(date +%F) if [ $free_av -lt 100 ];then echo "$Date: ${Hostname},内存低于100MB,还有${free_av}MB内存可用" fi sleep 2 done [root@web02 ~]# sh free.sh 2018-10-12: web02_,内存低于100MB,还有20MB内存可用 2018-10-12: web02_,内存低于100MB,还有6MB内存可用 2018-10-12: web02_,内存低于100MB,还有5MB内存可用系统的oom
## 关闭swap [root@zabbix-server ~]# swapoff -a 随着时间的推移,用户不断增多,服务消耗的内存越来越多,当系统内存不足的时候,可能会导致系统产生oom(out of memory) 1.当系统内存不足时就会大量使用swap(虚拟内存) 2.当系统大量使用swap的时候,系统会特别卡 注意:有时可能内存还有剩余300M或者500M,但是swap依然被使用 [root@web02 ~]# dd < /dev/zero > /dev/null bs=2000M [root@web02 ~]# tail -f /var/log/messages Out of memory: Kill process 29957 (dd) score 366 or sacrifice child Killed process 29957 (dd) total-vm:2532680kB, anon-rss:1416508kB, filers:0kB Aug 23 20:18:27 localhost kernel: Out of memory: Kill process 22208 (dd) score 599 or sacrifice child Aug 23 20:18:27 localhost kernel: Killed process 22208 (dd) total-vm:722512kB, anon-rss:614508kB, file-rss:0kB, shmem-rss:0kB使用脚本监控nginx
#!/bin/bash nginx_process=`ps -ef|grep -c [n]ginx` if [ $nginx_process -lt 2 ];then echo "目前nginx进程数是:$nginx_process"|mail -s "完犊子nginx挂了" 133411023@qq.com fizabbix 快速入门安装
C/S架构的服务
- 服务端:zabbix-server
- 客户端:zabbix-agent
zabbix官网:TP

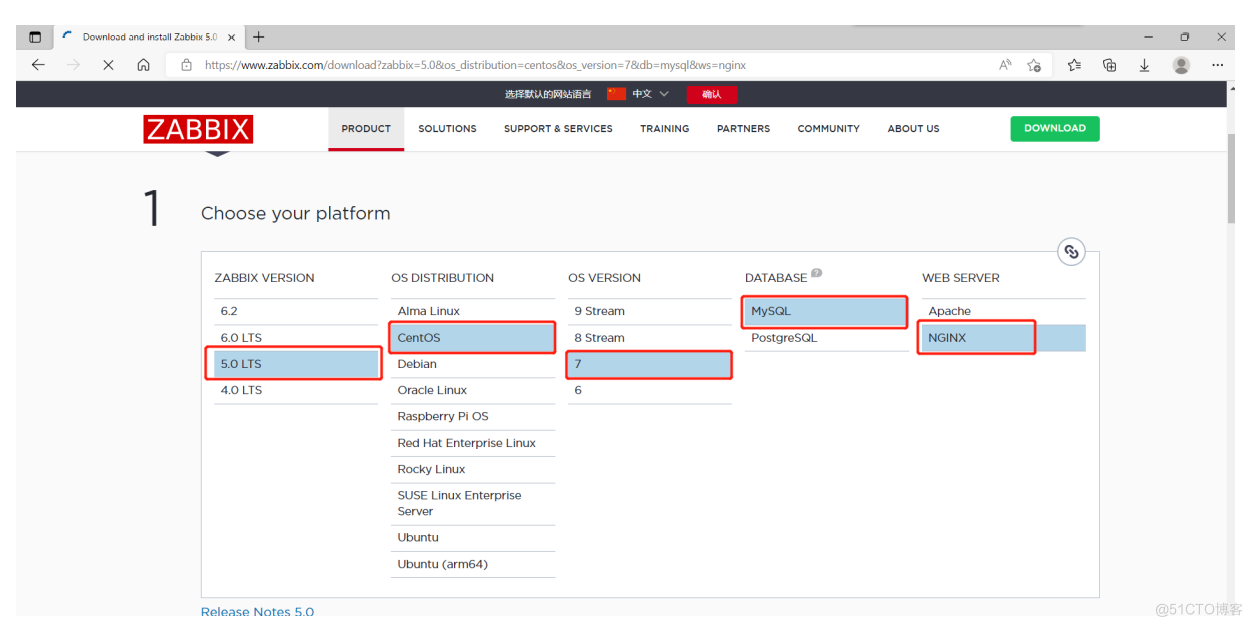

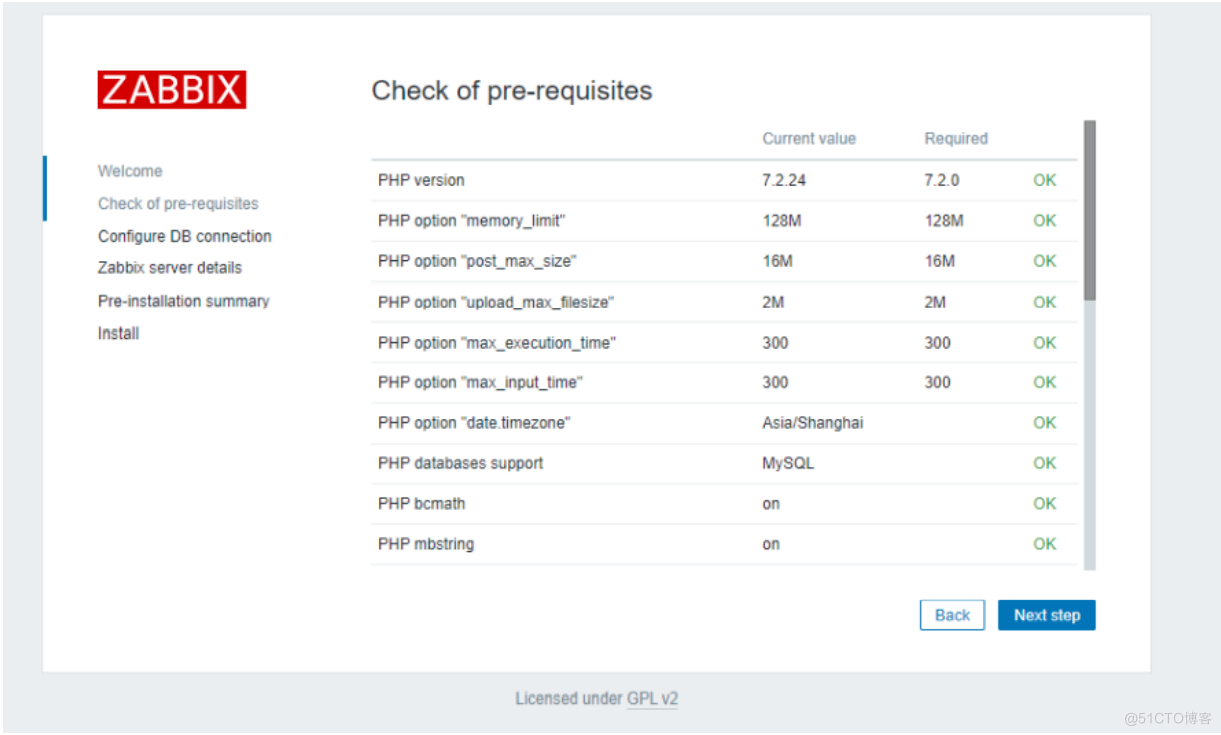
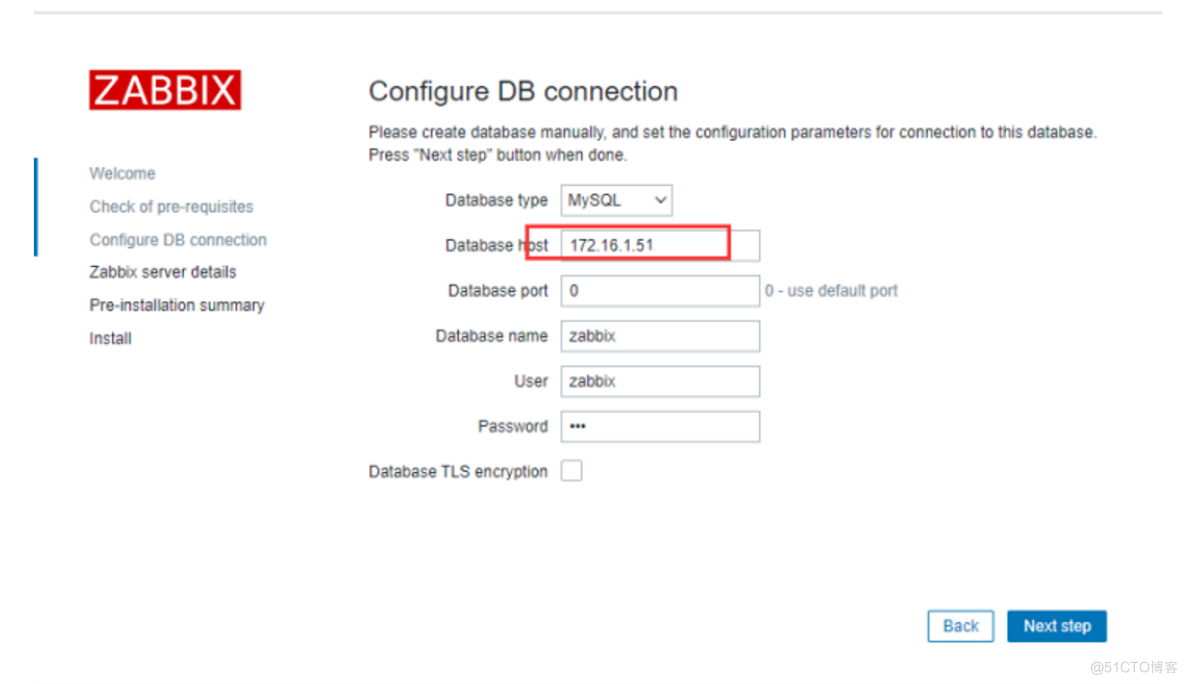
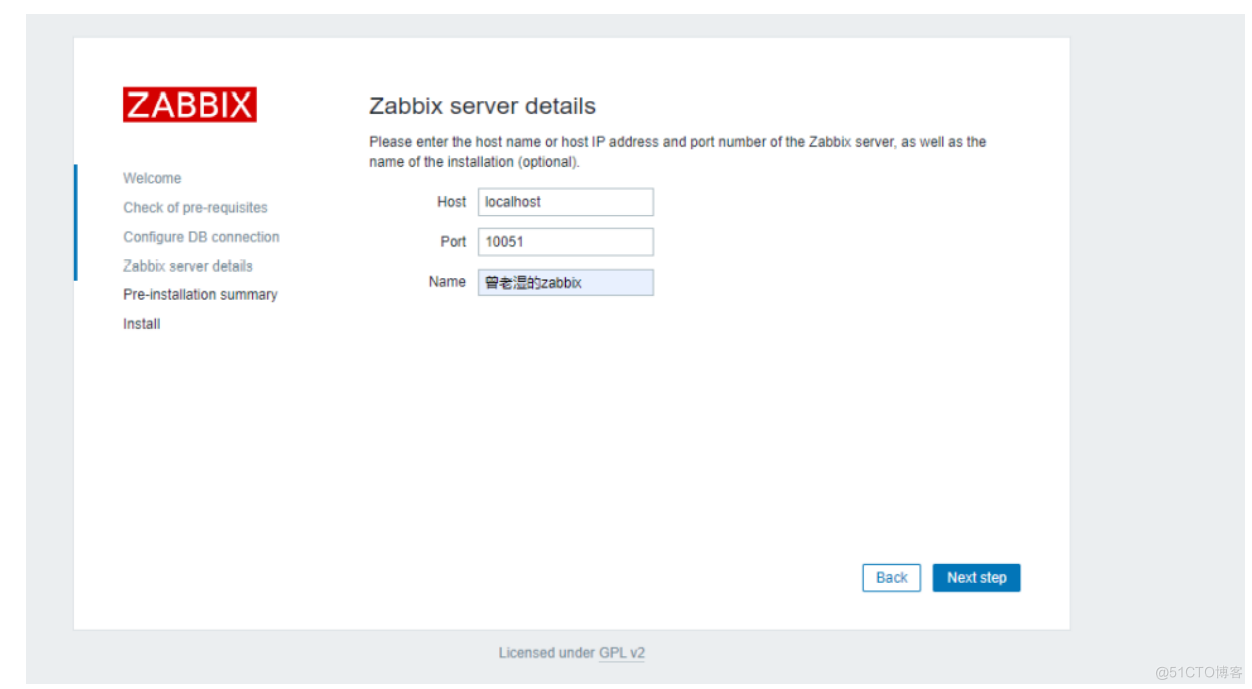


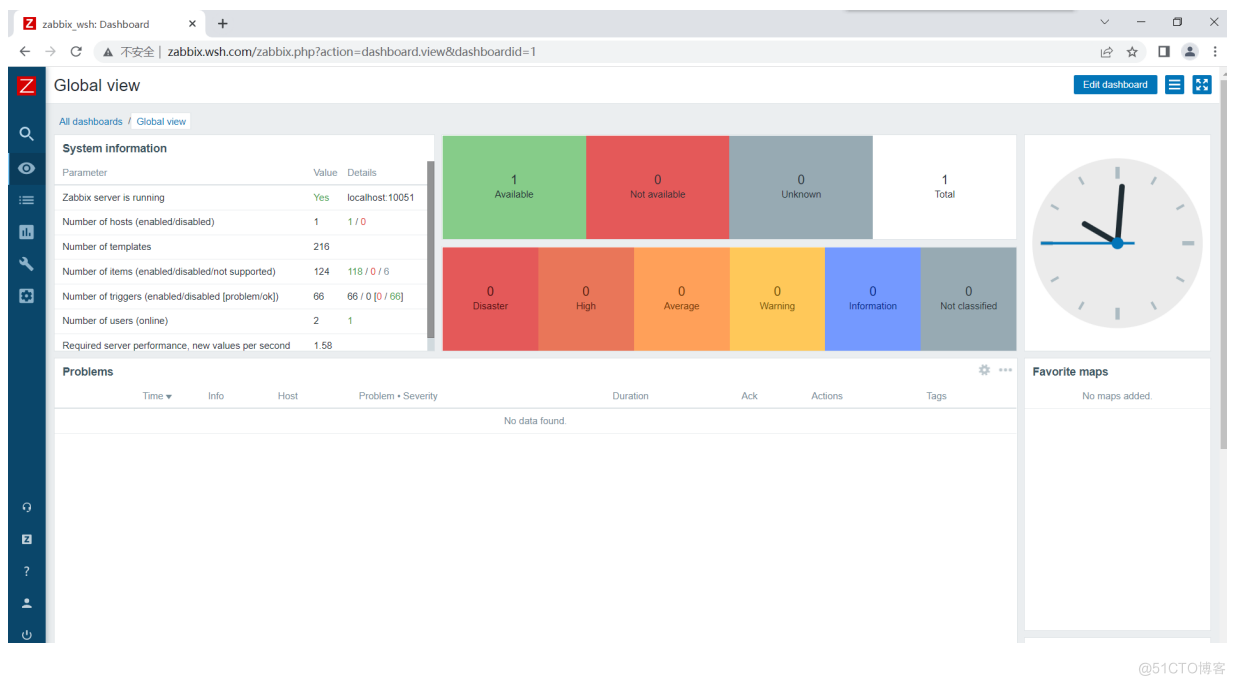
汉化zabbix
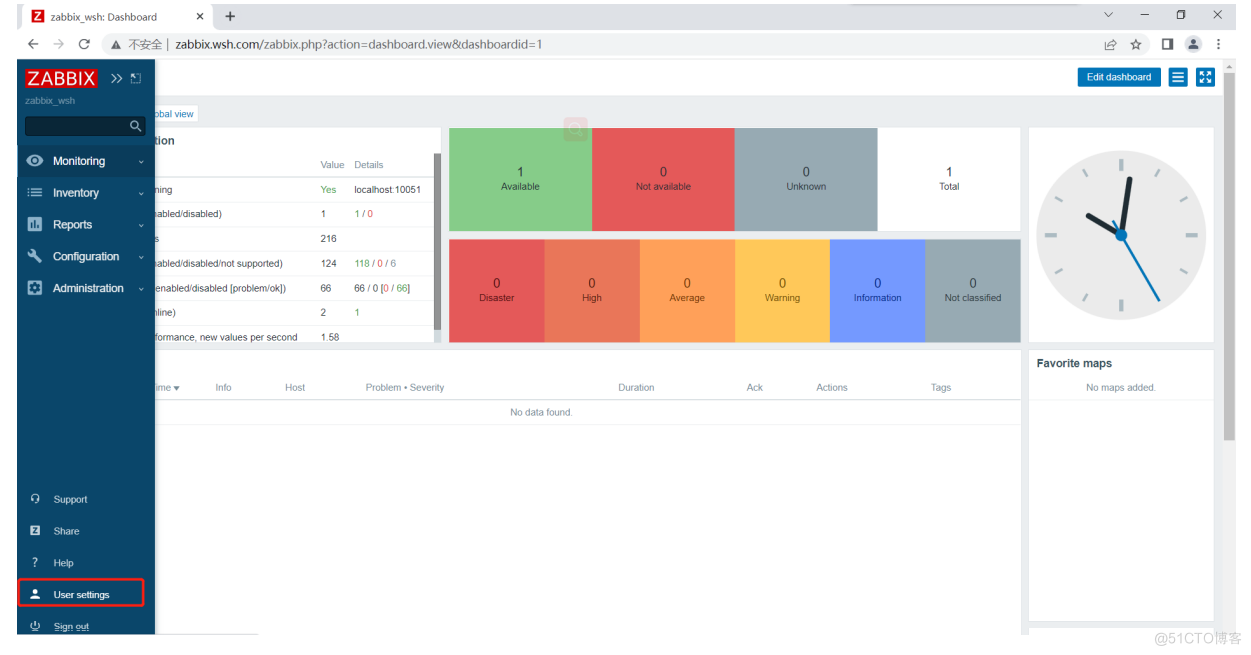
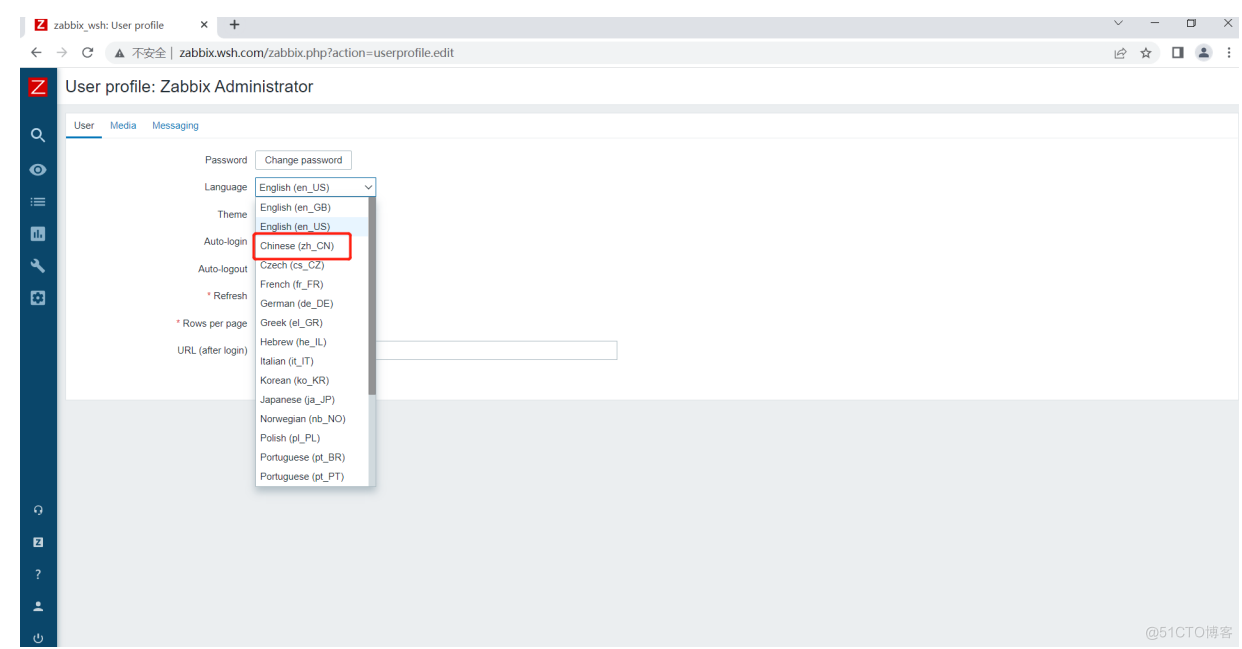

解决汉字无法显示问题

在windows中找到中文字体
C:\Windows\Fonts
# 进入zabbix字体路径 [root@zabbix ~]# cd /usr/share/zabbix/assets/fonts/ # 备份zabbix默认字体 [root@zabbix fonts]# mv graphfont.ttf graphfont.ttf.bak # 上传电脑中的字体 # 改名 [root@zabbix fonts]# mv FZSTK.TTF graphfont.ttf
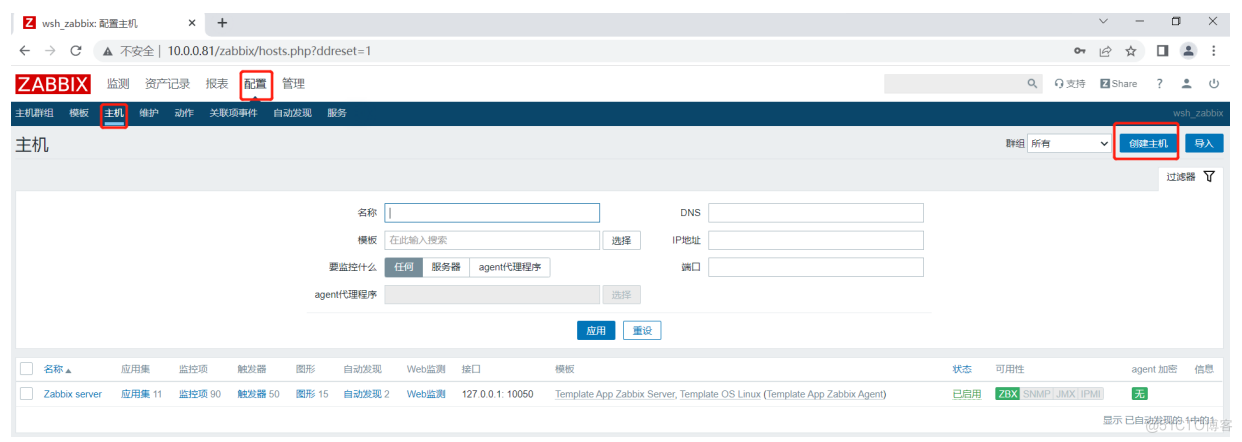
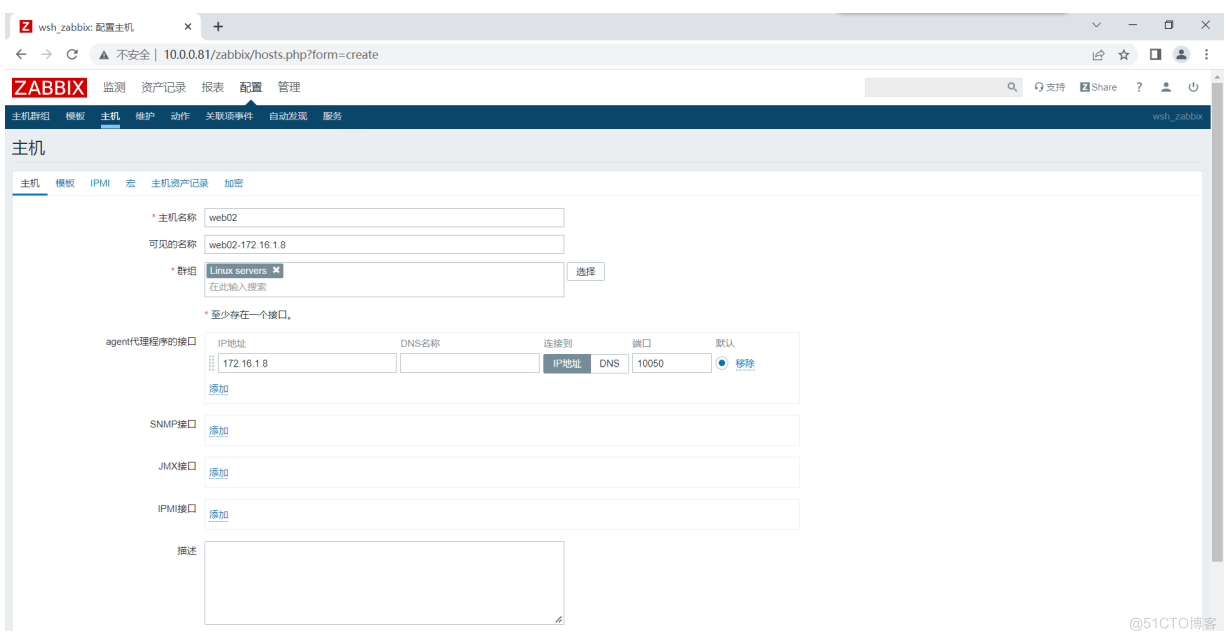
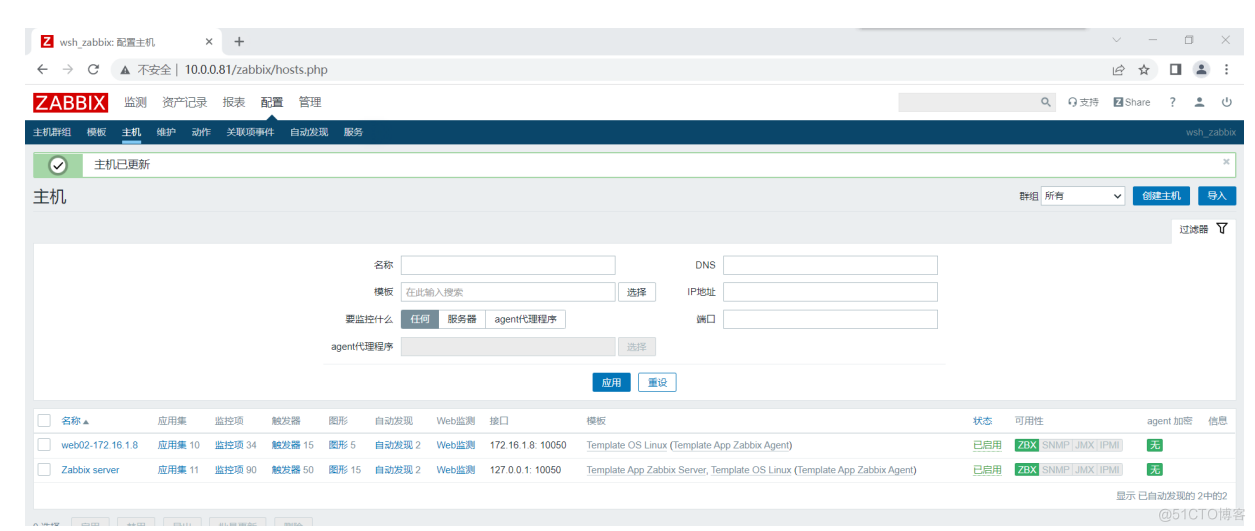
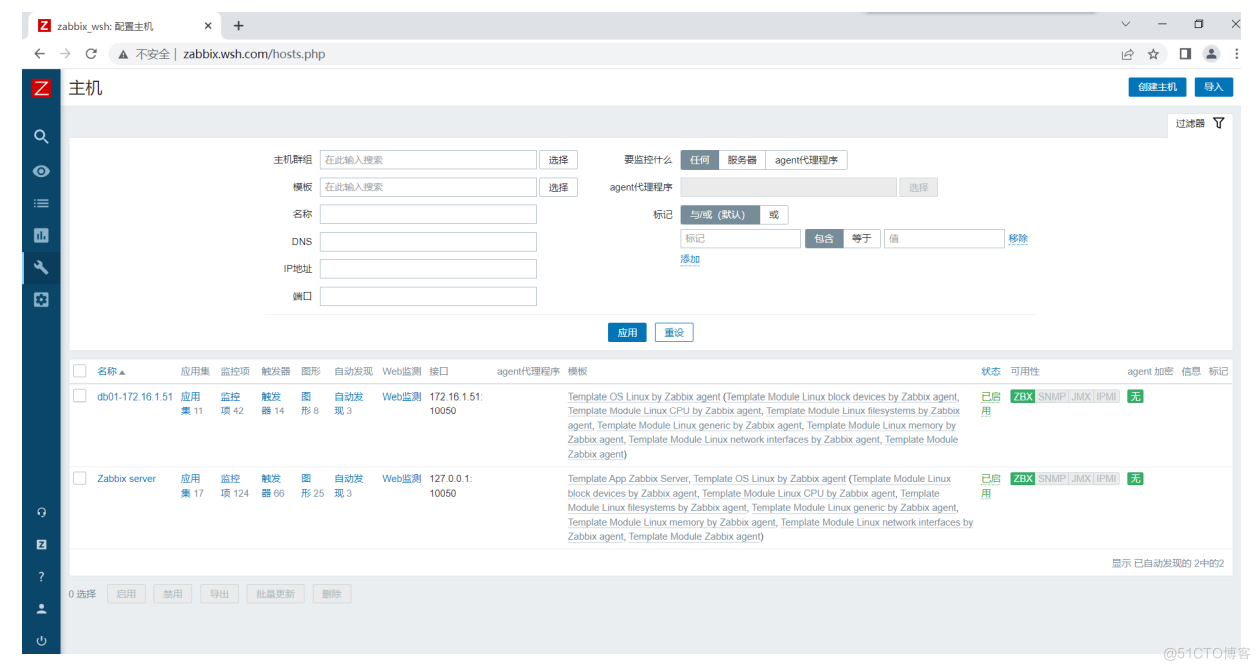
快速监控一台主机
# 查看服务端的版本 [root@zabbix ~]# zabbix_server -V zabbix_server (Zabbix) 5.0.26 # 安装对应版本的agent客户端 # 1.在其他机器上,安装zabbix的yum源 [root@db01 ~]# rpm -Uvh https://repo.zabbix.com/zabbix/5.0/rhel/7/x86_64/zabbix-release-5.0-1.el7.noarch.rpm # 2.安装客户端 [root@db01 ~]# yum install -y zabbix-agent-5.0.26 # 3.修改配置文件 [root@db01 ~]# vim /etc/zabbix/zabbix_agentd.conf Server=172.16.1.51 ServerActive=172.16.1.51 Hostname=db01 # 4.启动服务 [root@db01 ~]# systemctl start zabbix-agent # 5.检查端口 [root@db01 ~]# netstat -lntup |grep 10050 tcp 0 0 0.0.0.0:10050 0.0.0.0:* LISTEN 7681/zabbix_agentd tcp6 0 0 :::10050 :::* LISTEN 7681/zabbix_agentd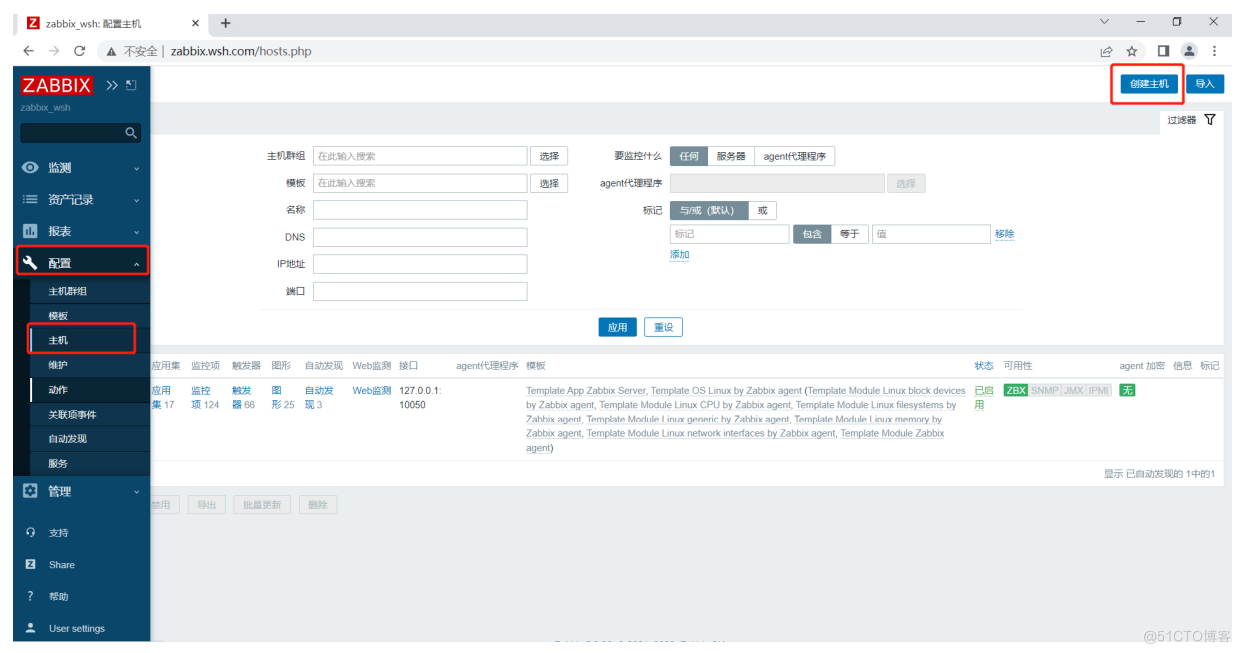


zabbix 4.0版本安装
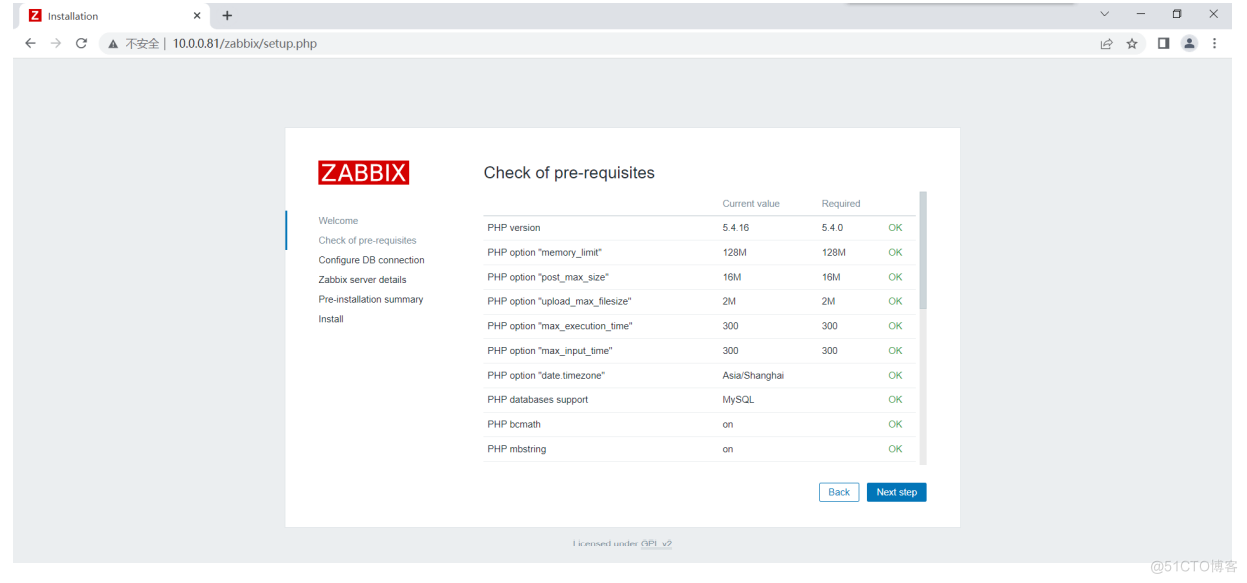
## 1.安装Zabbix库 [root@auto01 ~]# rpm -Uvh https://repo.zabbix.com/zabbix/4.0/rhel/7/x86_64/zabbix-release-4.0-2.el7.noarch.rpm [root@auto01 ~]# yum clean all ## 2.安装Zabbix server,Web前端,agent [root@auto01 ~]# yum install zabbix-server-mysql zabbix-web-mysql zabbix-agent ## 3.创建初始数据库 [root@db01 ~]# mysql -uroot -p Enter password: mysql> create database zabbix_40 character set utf8 collate utf8_bin; mysql> grant all on zabbix_40.* to zabbix@'172.16.1.%'; ## 4.将zabbix的建表语句SQL文件发送到主库上 [root@auto01 ~]# scp /usr/share/doc/zabbix-server-mysql-4.0.43/create.sql.gz 172.16.1.51:/opt/ ## 5.主库导入SQL文件 [root@db01 ~]# zcat /opt/create.sql.gz | mysql -uzabbix -p123 -h172.16.1.51 zabbix_40 ## 6.为Zabbix server配置数据库 [root@auto01 ~]# vim /etc/zabbix/zabbix_server.conf DBHost=172.16.1.51 # 数据库的ip地址 DBUser=zabbix DBName=zabbix DBPassword=123 ## 7.修改zabbix的nginx配置文件 [root@auto01 ~]# vim /etc/httpd/conf.d/zabbix.conf php_value date.timezone Asia/Shanghai ## 8.启动Zabbix server和agent进程,并为它们设置开机自启 [root@auto01 ~]# systemctl restart zabbix-server zabbix-agent httpd [root@auto01 ~]# systemctl enable zabbix-server zabbix-agent httpd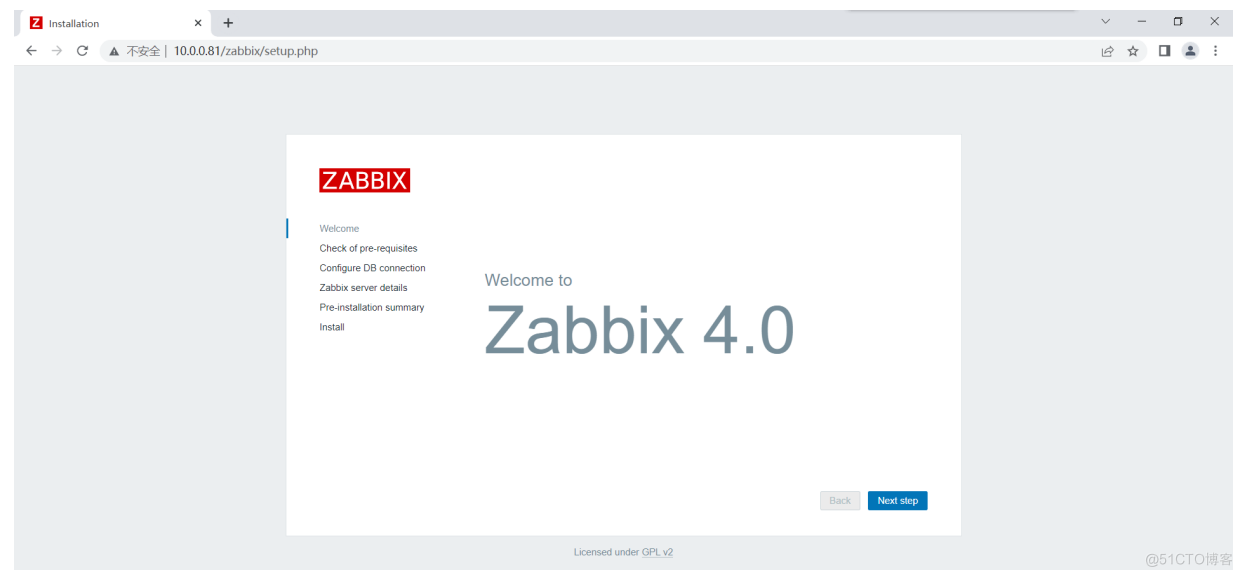
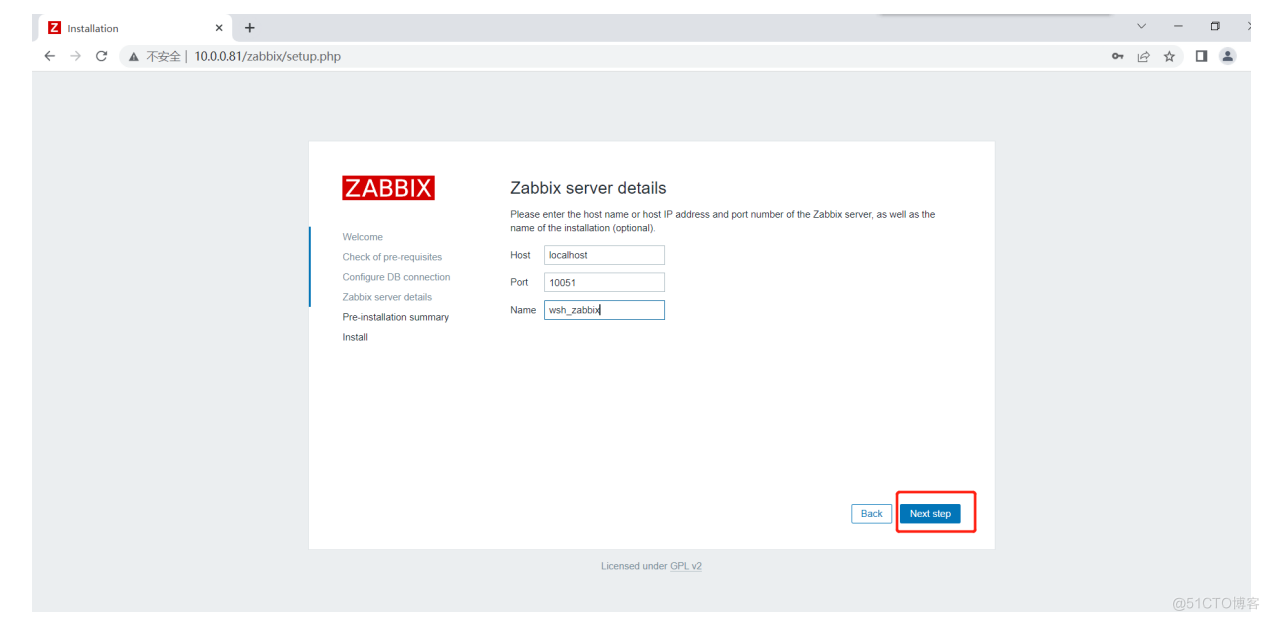
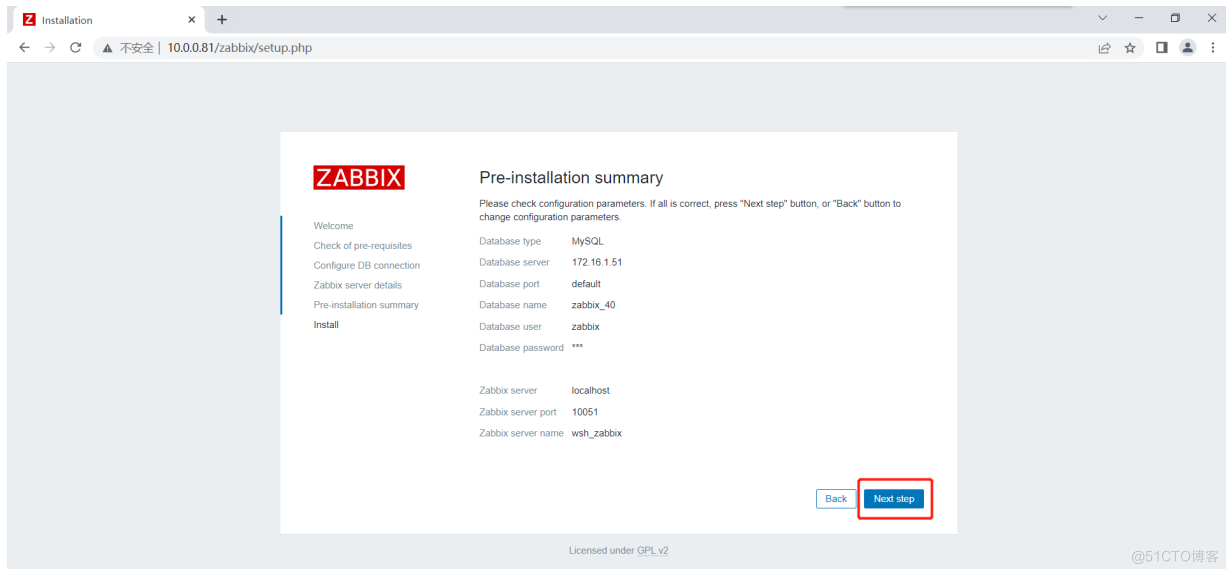
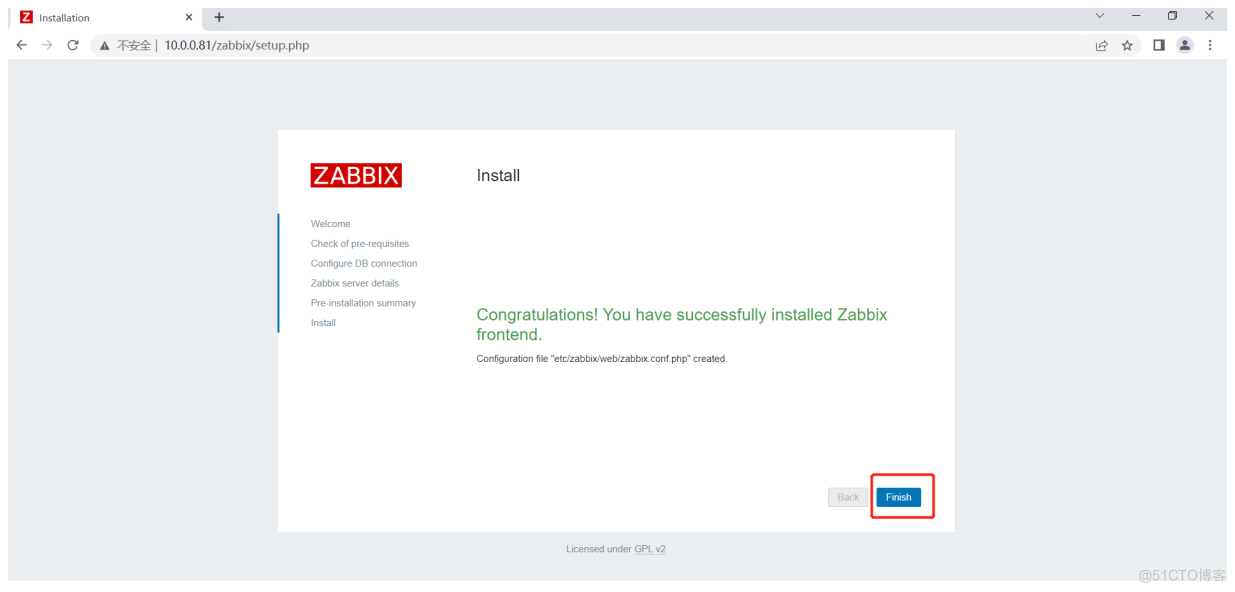

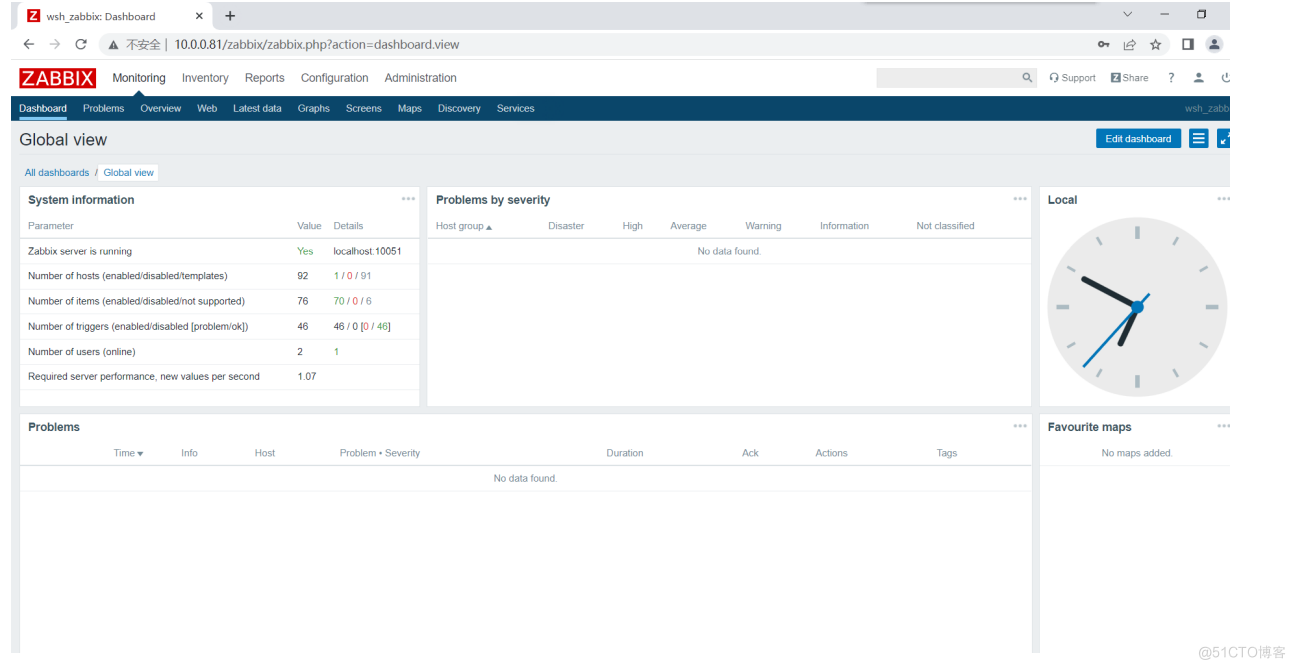
汉化zabbix4.0
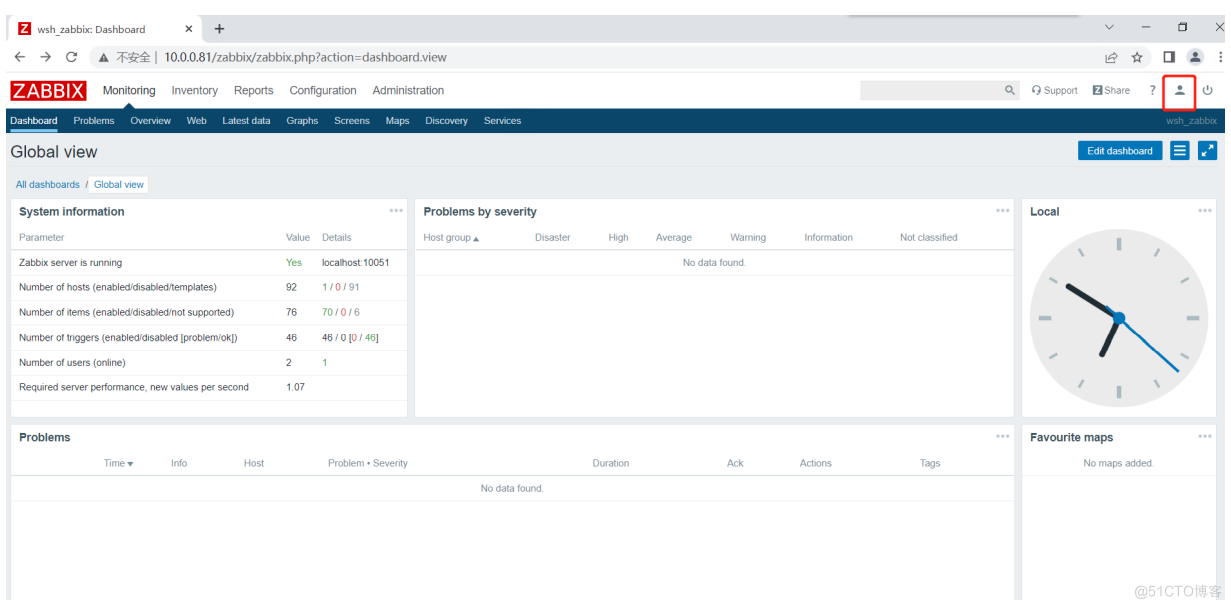
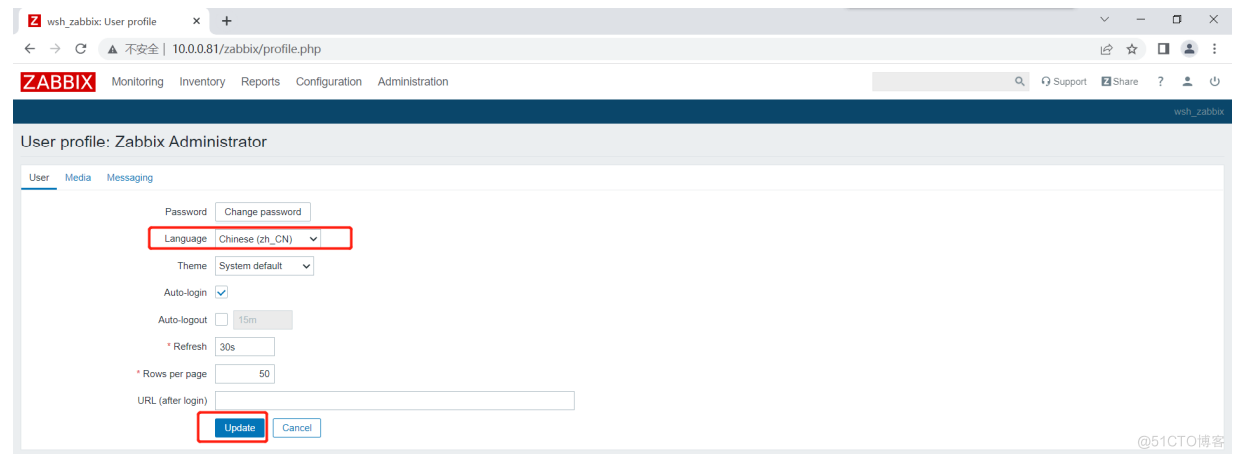
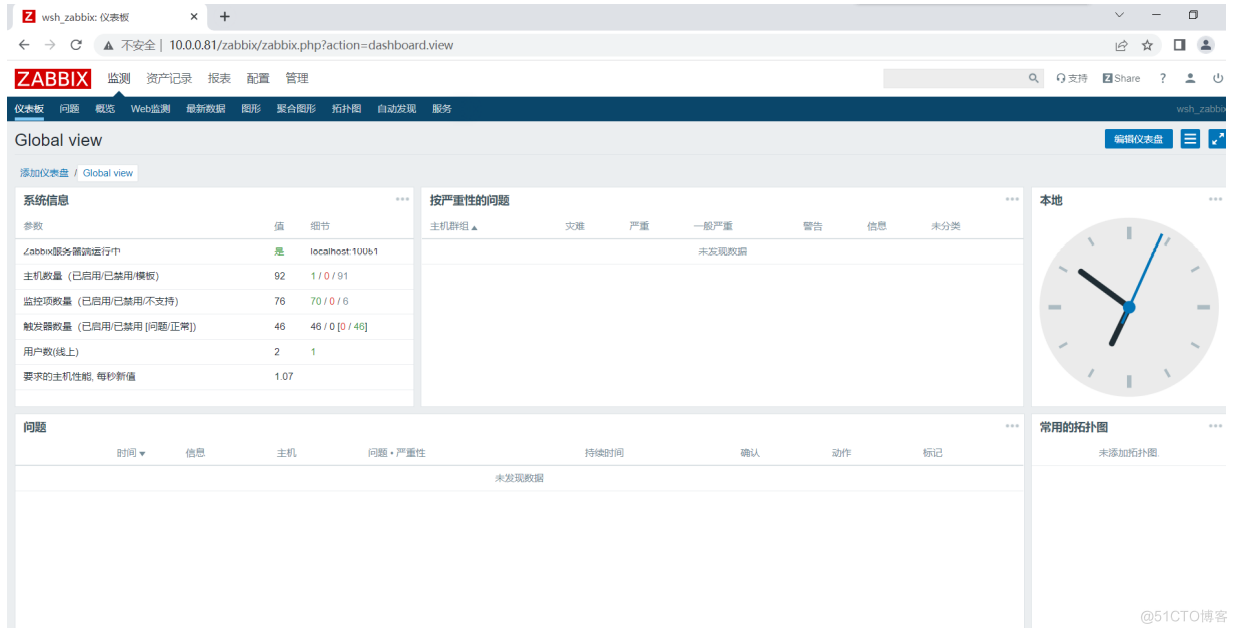
解决汉子无法显示问题
 在windows中找到中文字体
C:\Windows\Fonts
# 进入zabbix字体路径 [root@auto01 ~]# cd /usr/share/zabbix/assets/fonts/ # 备份zabbix默认字体 [root@auto01 fonts]# mv graphfont.ttf graphfont.ttf.bak # 上传电脑中的字体 # 改名 [root@auto01 fonts]# mv SIMSUN.TTC graphfont.ttf
zabbix4.0监控主机
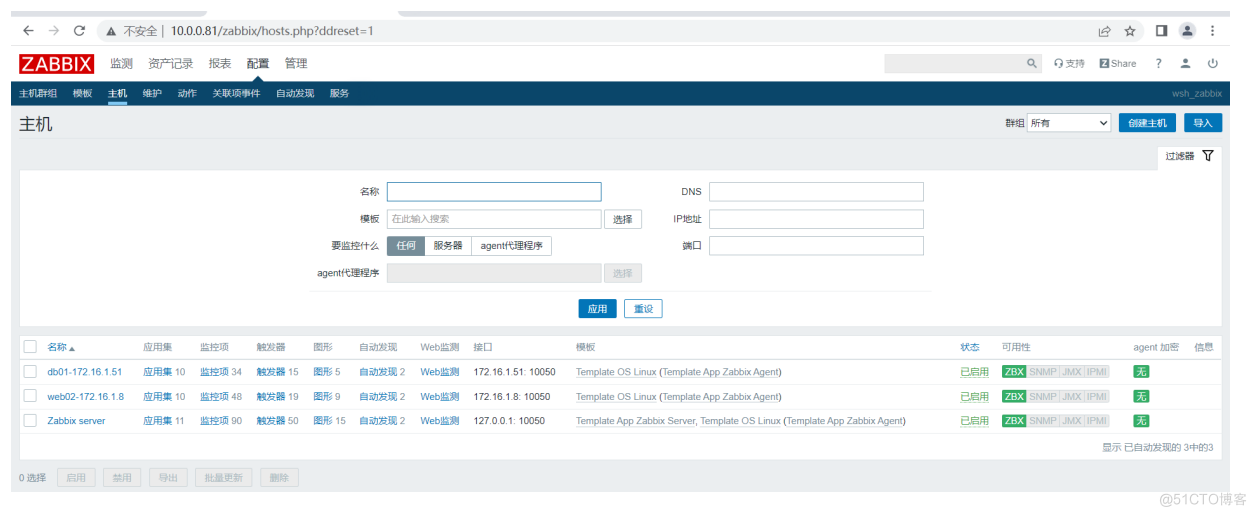
## 1.安装Zabbix库 [root@web02 ~]# rpm -Uvh https://repo.zabbix.com/zabbix/4.0/rhel/7/x86_64/zabbix-release-4.0-2.el7.noarch.rpm [root@web02 ~]# yum clean all ## 2.安装zabbix agent [root@web02 ~]# yum -y install zabbix-agent ## 3.修改配置文件 [root@web02 ~]# vim /etc/zabbix/zabbix_agentd.conf Server=172.16.1.81,172.16.1.71 ServerActive=172.16.1.81,172.16.1.71 Hostname=web02 #注意:如需要不同版本的zabbix服务端监控客户端,需在配置文件Server和ServerActive,隔开再输入服务端IP地址 ## 3.启动Zabbix agent进程 [root@web02 ~]# systemctl restart zabbix-agent [root@web02 ~]# systemctl enable zabbix-agent