IOS 应用程序管理的实现 1. 项目名称:应用管理 2. 项目截图展示 3. 项目功能 展示应用图标,名称和下载按钮 点击下载按钮,出现“正在下载”图标 4. 项目代码 模型代码:AppInfo.h #im
IOS 应用程序管理的实现
1. 项目名称:应用管理
2. 项目截图展示
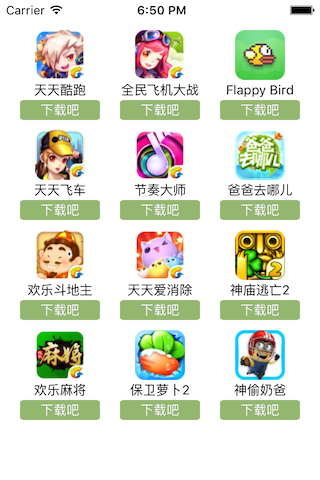
3. 项目功能
展示应用图标,名称和下载按钮
点击下载按钮,出现“正在下载”图标
4. 项目代码
模型代码:AppInfo.h
#import <Foundation/Foundation.h>
#import <UIKit/UIKit.h>

@interface AppInfo : NSObject

@property (nonatomic, copy) NSString *name;
@property (nonatomic, copy) NSString *icon;

@property (nonatomic, strong, readonly) UIImage *image;

/** 使用字典实例化模型 */
- (instancetype)initWithDict:(NSDictionary *)dict;

/** 快速实例化一个对象 */
+ (instancetype)appInfoWithDict:(NSDictionary *)dict;

/** 返回所有plist中的数据模型数组 */
+ (NSArray *)appList;


@end
模型代码:AppInfo.m
#import "AppInfo.h"

@implementation AppInfo

// 合成指令,主动指定属性使用的成员变量名称
@synthesize image = _image;

//图片模型
- (UIImage *)image
{
  if (_image == nil) {
    _image = [UIImage imageNamed:self.icon];
  }
  return _image;
}

- (instancetype)initWithDict:(NSDictionary *)dict
{

  self = [super init];
  if (self) {
    // 用字典给属性赋值
    //    self.name = dict[@"name"]; //将字典的内容赋值给属性
    //    self.icon = dict[@"icon"];
    [self setValuesForKeysWithDictionary:dict];
  }
  return self;
}

+ (instancetype)appInfoWithDict:(NSDictionary *)dict
{
  return [[self alloc] initWithDict:dict];
}

+ (NSArray *)appList
{
  NSArray *array = [NSArray arrayWithContentsOfFile:[[NSBundle mainBundle] pathForResource:@"app.plist" ofType:nil]];

  // 创建一个临时可变数组
  NSMutableArray *arrayM = [NSMutableArray array];

  // 遍历数组,依次转换模型
  for (NSDictionary *dict in array) {
    [arrayM addObject:[AppInfo appInfoWithDict:dict]];
  }

  return arrayM;
}

@end
模型View:AppView.h
#import <UIKit/UIKit.h>

@class AppInfo;

@interface AppView : UIView

/** 类方法,方便调用视图 */
+ (instancetype)appView;

/** 实例化视图,并使用appInfo设置视图的显示 */
+ (instancetype)appViewWithAppInfo:(AppInfo *)appInfo;

// 自定义视图中显示的数据来源是数据模型
// 使用模型设置自定义视图的显示
@property (nonatomic, strong) AppInfo *appInfo;

@end
模型View:AppView.m
#import "AppView.h"
#import "AppInfo.h"

@interface AppView()

@property (weak, nonatomic) IBOutlet UIImageView *iconView;
@property (weak, nonatomic) IBOutlet UILabel *label;

@end

@implementation AppView

//实例化xib
+ (instancetype)appView
{
  return [[[NSBundle mainBundle] loadNibNamed:@"AppView" owner:nil options:nil] lastObject];
}

//根据模型实例化xib
+ (instancetype)appViewWithAppInfo:(AppInfo *)appInfo
{
  // 1. 实例化一个视图
  AppView *view = [self appView];

  // 2. 设置视图的显示
  view.appInfo = appInfo;//包含,AppView有appInfo的属性

  // 3. 返回视图
  return view;
}

/**
 利用setter方法设置视图的界面显示
 */
- (void)setAppInfo:(AppInfo *)appInfo
{
  _appInfo = appInfo;

  self.label.text = appInfo.name;
  self.iconView.image = appInfo.image;
}

/** 按钮监听方法 */
- (IBAction)click:(UIButton *)button
{
  // 添加一个UILabel到界面上
  UILabel *label = [[UILabel alloc] initWithFrame:CGRectMake(80, 400, 160, 40)];
  // 数值是0表示黑色,1表示纯白;alpha表示透明度
  label.backgroundColor = [UIColor colorWithWhite:0.0 alpha:0.2];

  label.text = self.appInfo.name;
  label.textAlignment = NSTextAlignmentCenter;

  // self.superview就是视图控制器中的self.view
  [self.superview addSubview:label];

  // 动画效果
  label.alpha = 0.0;

  // 禁用按钮,如果点击了按钮以后就禁用按钮
  button.enabled = NO;

  // 动画结束之后删除
  [UIView animateWithDuration:1.0f animations:^{
    // 要修改的动画属性
    label.alpha = 1.0;
  } completion:^(BOOL finished) {
    [UIView animateWithDuration:1.0 animations:^{
      label.alpha = 0.0;
    } completion:^(BOOL finished)
      [label removeFromSuperview];
    }];
  }];
}

@end
ViewController.m
#import "ViewController.h"
#import "AppInfo.h"
#import "AppView.h"

#define kAppViewW 80
#define kAppViewH 90
#define kColCount 3
#define kStartY  20

@interface ViewController ()

/** 应用程序列表 */
@property (nonatomic, strong) NSArray *appList;

@end

@implementation ViewController


- (NSArray *)appList
{
  if (_appList == nil) {
    _appList = [AppInfo appList];
  }
  return _appList;
}

- (void)viewDidLoad
{
  [super viewDidLoad];

  // 搭建九宫格
  // 320 - 3 * 80 = 80 / 4 = 20
  CGFloat marginX = (self.view.bounds.size.width - kColCount * kAppViewW) / (kColCount + 1);
  CGFloat marginY = 10;

  for (int i = 0; i < self.appList.count; i++) {

    // 行
    int row = i / kColCount;

    // 列
    int col = i % kColCount;

    CGFloat x = marginX + col * (marginX + kAppViewW);
    CGFloat y = kStartY + marginY + row * (marginY + kAppViewH);

    //加载第i个xib视图
    AppView *appView = [AppView appViewWithAppInfo:self.appList[i]];

    // 设置视图位置
    appView.frame = CGRectMake(x, y, kAppViewW, kAppViewH);

    [self.view addSubview:appView];

    }
}
5. 本项目必须掌握的代码段
字典转模型
- (instancetype)initWithDict:(NSDictionary *)dict
{
  self = [super init];
  if (self) {
    [self setValuesForKeysWithDictionary:dict];
  }
  return self;
}

+ (instancetype)appInfoWithDict:(NSDictionary *)dict
{
  return [[self alloc] initWithDict:dict];
}

+ (NSArray *)appList
{
  NSArray *array = [NSArray arrayWithContentsOfFile:[[NSBundle mainBundle] pathForResource:@"app.plist" ofType:nil]];

  // 创建一个临时可变数组
  NSMutableArray *arrayM = [NSMutableArray array];

  // 遍历数组,依次转换模型
  for (NSDictionary *dict in array) {

    [arrayM addObject:[AppInfo appInfoWithDict:dict]];
  }

  return arrayM;
}
KVC
[self setValuesForKeysWithDictionary:dict];
6. 笔记
字典转模型:
plist文件有多个字典,把字典的元素转换成模型类对象的成员变量,将模型类对象放入数组中 模型的属性名称和plist文件中的key名称必须一致
如有疑问请留言或者到本站社区交流讨论,感谢阅读,希望能帮助到大家,谢谢大家对本站的支持!