在 iOS 开发中,为了防止短信验证码的恶意获取,注册时需要图片验证,比如某共享单车 APP 在注册时就用了图片验证码,如下图: 图片验证码封装思路: 第一眼看到图片验证码,可能
在 iOS 开发中,为了防止短信验证码的恶意获取,注册时需要图片验证,比如某共享单车 APP 在注册时就用了图片验证码,如下图:
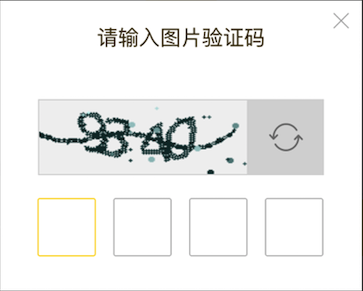
图片验证码封装思路:
第一眼看到图片验证码,可能会觉得图片验证码是由 UIImage 实现的,但事实上明显不是,这里简单说下图片验证码封装思路。
- 首先要有一个数组,里面包含 1-9、a-z 这些字符
- 在 UIView 上显示这些字符
- 同时在 UIView 上绘制干扰线
效果图
图片验证码效果图
用法
  _testView = [[NNValidationView alloc] initWithFrame:CGRectMake((self.view.frame.size.width - 100) / 2, 200, 100, 40) andCharCount:4 andLineCount:4];
  [self.view addSubview:_testView];
以上两行代码便可以实现图片验证码,其中 charCount 和 lineCount 分别指显示的字符串数量以及干扰线的数量。
另外我们还需要知道图片验证码上的字符串,可以用下边这个 block 获取:
 __weak typeof(self) weakSelf = self;
  /// 返回验证码数字
  _testView.changeValidationCodeBlock = ^(void){
    NSLog(@"验证码被点击了:%@", weakSelf.testView.charString);
  };
打印效果如下
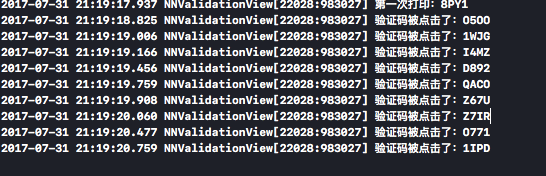
获取验证码数字
核心代码
#pragma mark - 绘制界面
- (void)drawRect:(CGRect)rect {
  [super drawRect:rect];
  self.backgroundColor = NNRandomColor;
  CGFloat rectWidth = rect.size.width;
  CGFloat rectHeight = rect.size.height;
  CGFloat pointX, pointY;

  NSString *text = [NSString stringWithFormat:@"%@",self.charString];
  NSInteger charWidth = rectWidth / text.length - 15;
  NSInteger charHeight = rectHeight - 25;

  // 依次绘制文字
  for (NSInteger i = 0; i < text.length; i++) {
    // 文字X坐标
    pointX = arc4random() % charWidth + rectWidth / text.length * i;
    // 文字Y坐标
    pointY = arc4random() % charHeight;
    unichar charC = [text characterAtIndex:i];
    NSString *textC = [NSString stringWithFormat:@"%C", charC];

    [textC drawAtPoint:CGPointMake(pointX, pointY) withAttributes:@{NSFontAttributeName:[UIFont systemFontOfSize:arc4random() % 10 + 15]}];
  }

  // 获取上下文
  CGContextRef context = UIGraphicsGetCurrentContext();
  // 设置线宽
  CGContextSetLineWidth(context, 1.0);

  // 依次绘制直线
  for(NSInteger i = 0; i < self.lineCount; i++) {
    // 设置线的颜色
    CGContextSetStrokeColorWithColor(context, NNRandomColor.CGColor);
    // 设置线的起点
    pointX = arc4random() % (NSInteger)rectWidth;
    pointY = arc4random() % (NSInteger)rectHeight;
    CGContextMoveToPoint(context, pointX, pointY);
    // 设置线的终点
    pointX = arc4random() % (NSInteger)rectWidth;
    pointY = arc4random() % (NSInteger)rectHeight;
    CGContextAddLineToPoint(context, pointX, pointY);
    // 绘画路径
    CGContextStrokePath(context);
  }
}
代码中写了注释,因此这里不再详细解释,需要看全部代码的童鞋可以点击下边的链接,有疑问或有建议的话欢迎讨论。
demo 地址:NNValidationView
以上就是本文的全部内容,希望对大家的学习有所帮助,也希望大家多多支持自由互联。