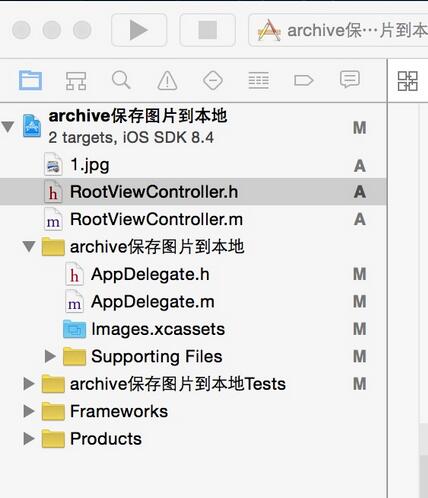
本文实例为大家分享了iOS保存图片到本地的具体代码,供大家参考,具体内容如下 一、工程图 二、代码 RootViewController.h #import UIKit/UIKit.h@interface RootViewController : UIViewController{ UIImageVie
本文实例为大家分享了iOS保存图片到本地的具体代码,供大家参考,具体内容如下
一、工程图

二、代码
RootViewController.h
#import <UIKit/UIKit.h>

@interface RootViewController : UIViewController
{
 UIImageView *imageView;
}
@end
RootViewController.m
#import "RootViewController.h"

@interface RootViewController ()

@end

@implementation RootViewController

- (id)initWithNibName:(NSString *)nibNameOrNil bundle:(NSBundle *)nibBundleOrNil
{
 self = [super initWithNibName:nibNameOrNil bundle:nibBundleOrNil];
 if (self) {
  // Custom initialization
 }
 return self;
}

- (void)viewDidLoad
{
 [super viewDidLoad];
 // Do any additional setup after loading the view.

 //初始化背景图
 imageView=[[UIImageView alloc]initWithFrame:CGRectMake(100, 100, 100, 100)];
 imageView.backgroundColor=[UIColor redColor];
 [self.view addSubview:imageView];

 //将图片保存
 [self archive];

 //提取保存在本地的图片
 [self unarchive];


}
#pragma -mark -functions
//归档
-(void)archive
{
 NSData *data=[NSKeyedArchiver archivedDataWithRootObject:[UIImage imageNamed:@"1.jpg"]];
 NSUserDefaults *imageDefault = [NSUserDefaults standardUserDefaults];
 [imageDefault setObject:data forKey:@"image"];
 [imageDefault synchronize];

}
//反归档
-(void)unarchive
{
 NSData* data = [[NSUserDefaults standardUserDefaults]objectForKey:@"image"];
 id image= [NSKeyedUnarchiver unarchiveObjectWithData:data];
 imageView.image=image;


}
以上就是本文的全部内容,希望对大家的学习有所帮助,也希望大家多多支持自由互联。
