Huffman编码主要是通过统计各元素出现的频率,进而生成编码最终达到压缩的目的。 这里是Huffman树中节点的结构。 typedef struct Tree{ int freq;//频率 int key;//键值 struct Tree *left, *right; Tree(i
Huffman编码主要是通过统计各元素出现的频率,进而生成编码最终达到压缩的目的。
这里是Huffman树中节点的结构。
typedef struct Tree
{
 int freq;//频率
 int key;//键值
 struct Tree *left, *right;
 Tree(int fr=0, int k=0,Tree *l=nullptr, Tree *r=nullptr):
  freq(fr),key(k),left(l),right(r){};
}Tree,*pTree;
首先用一个名为freq的hashtable来记录各个元素的频率:
void read(){
 int a;

 std::ios::sync_with_stdio(false);
 while(cin>>a){
  if(freq.find(a)==freq.end()) {freq[a]=1;}
  else {freq[a]++;}
 }

}
Huffman树的构建过程如下代码所示:
void huffman()
{
 int i;
 string c;
 int fr;
 auto it = freq.begin();
 while(it!=freq.end()){
  Tree *pt= new Tree;
  pt->key = it->first;
  pt->freq = it->second;
  it++;
  th.Insert(pt);//此处的th为一种优先队列
 }

 while(true)//构建哈夫曼树
 {

  Tree *proot = new Tree;
  pTree pl,pr;
  pl = th.findMin();
  th.Delete(0);
  if(th.isEmpty()){
    th.Insert(pl);
    break;
  }

  pr = th.findMin();
  th.Delete(0);
  //合并节点
  proot->freq = pl->freq + pr->freq;
  std::ios::sync_with_stdio(false);
  proot->left = pl;
  proot->right = pr;
  th.Insert(proot);
  //合并后再插入
 }

 string s;

 print_Code(th.findMin(), s);

 del(th.findMin());
}
其中print_Code和del函数如下:
void print_Code(Tree *proot, string st)//从根节点开始打印,左0右1
{
 if(proot == NULL)
  return ;
 if(proot->left)
 {
  st +='0';
 }
 print_Code(proot->left, st);
 std::ios::sync_with_stdio(false);
 if(!proot->left && !proot->right)
 {
  cout<<proot->key<<" ";
  for(size_t i=0; i<st.length(); ++i){
   cout<<st[i];ml+=st[i];
  }
  cout<<endl;encoded[proot->key]=ml;ml="";
 }
 st.pop_back();
 if(proot->right)
  st+='1';
 print_Code(proot->right, st);
}


void del(Tree *proot)
{
 if(proot == nullptr)
  return ;
 del(proot->left);
 del(proot->right);
 delete proot;
}
至此就完成了Huffman的编码。
当然,由于huffman的编码都是0或1,因此需要进行位的表示才能完成压缩。注意,位需要以8个为一组进行写入:
while(in>>a){
   int x=atoi(a.c_str());
   auto m=encoded.find(x);
   //encoded是另外一个哈希表用于记录元素及它的编码
   if(m==encoded.end()) continue;
   else {
     string t=m->second;
     ss+=t;
   }

 }
 unsigned char buf = 0;
 int count = 0;
 int i = 0;
 while(ss[i] != '\0')//位写入,8个为一组
 {
  buf = buf | ((ss[i++]-'0') << (7 - count));
  count++;
  if (count == 8)
  {
   count = 0;
   fout << buf;
   buf = 0;
  }
 }
 if(count != 0)
  fout << buf;
至此就完成了Huffman的编码以及压缩,效果十分可观:
当对69.6M的txt文件(其中含有大约10000000个数据)进行压缩时,产生的encoded.bin文件仅为24.6MB:Ubuntu测试环境:

下面进行Huffman解码的解说:
Huffman解码首先是根据编码表进行huffman树的重建:
void decode(){
 auto it=decoded.begin();
 Tree *p=proot;
 while(it!=decoded.end()){
   string s=it->first;int t=it->second;int i=0;
   while(i<s.length()){
    if(s[i]=='0') {
     if(proot->left==nullptr) proot->left=new Tree(5);
     proot=proot->left;
     }
    else{
     if(proot->right==nullptr) proot->right=new Tree(5);
     proot=proot->right;
     }
    i++;
   }
   proot->data=t;
   proot=p;
   it++;
 }

}
然后读取bin文件的一系列位:
while (f.get(c)){
   stringstream a;
   for (int i = 7; i > 0; i--)
    a<<((c >> i) & 1);
   a<<(c&1);
   m+=a.str();//将位转为字符串
 }
然后用Huffman树根据左0右1进行查找并输出:
int i=0;Tree *p=proot;

 while(i<m.length()){
   if(m[i]=='0'&&proot->left!=nullptr)
    {proot=proot->left;i++;}
   else if(m[i]=='1'&&proot->right!=nullptr)
    {proot=proot->right;i++;}
   else
    {cout<<proot->data<<endl;proot=p;}
 }
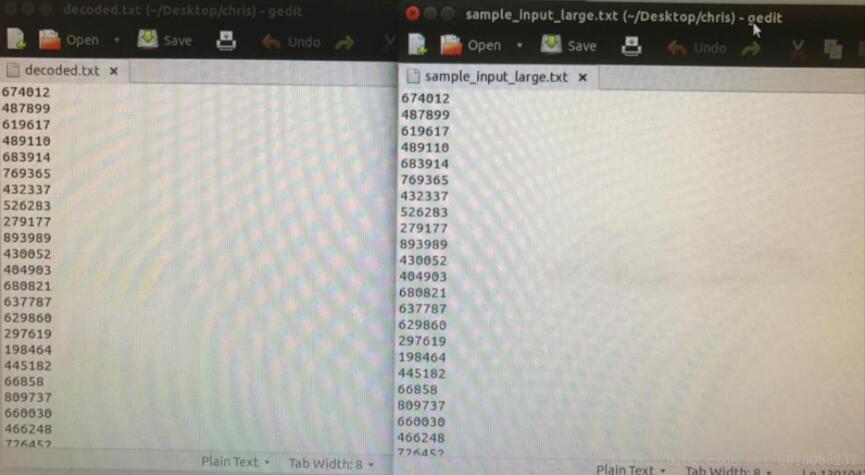
至此就完成了Huffman树的解码:

总的来说,Huffman对于大数据的压缩效果是很好的,运行时间也很快,大概需要20s就可以完成对1000000个数据的编码压缩。
难点在于位的写入与读取,花了相当多的精力进行操作。
以上就是本文的全部内容,希望对大家的学习有所帮助,也希望大家多多支持自由互联。
