台式电脑安装机械硬盘分为两步:第一步是安装和接线;第二步是对添加的硬盘进行分区。 第一步:安装和接线 打开机箱两侧的面板,找到机械硬盘插槽,将硬盘装入硬盘插槽并固定
台式电脑安装机械硬盘分为两步:第一步是安装和接线;第二步是对添加的硬盘进行分区。
第一步:安装和接线
打开机箱两侧的面板,找到机械硬盘插槽,将硬盘装入硬盘插槽并固定。
![](http://img.558idc.com/uploadfile/allimg/jinyan/093420F11-0.jpg)
![](http://img.558idc.com/uploadfile/allimg/jinyan/093420JD-1.jpg)
![](http://img.558idc.com/uploadfile/allimg/jinyan/093420K56-2.jpg)
![](http://img.558idc.com/uploadfile/allimg/jinyan/0934204016-3.jpg)
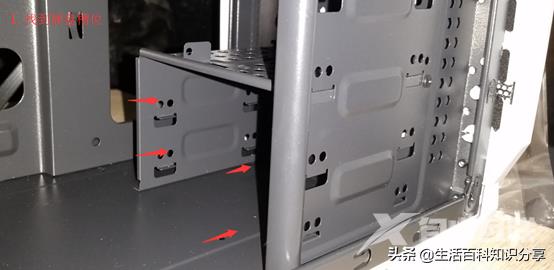
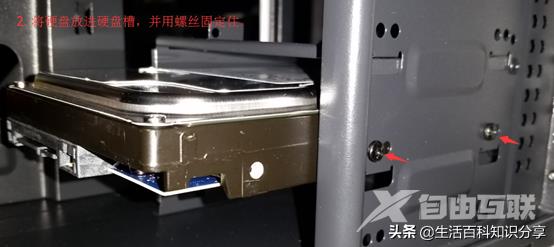
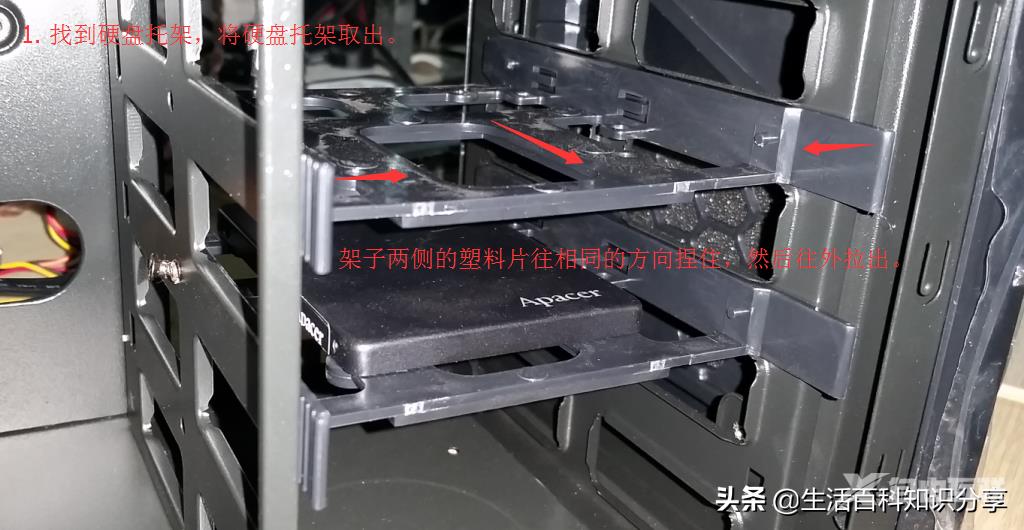
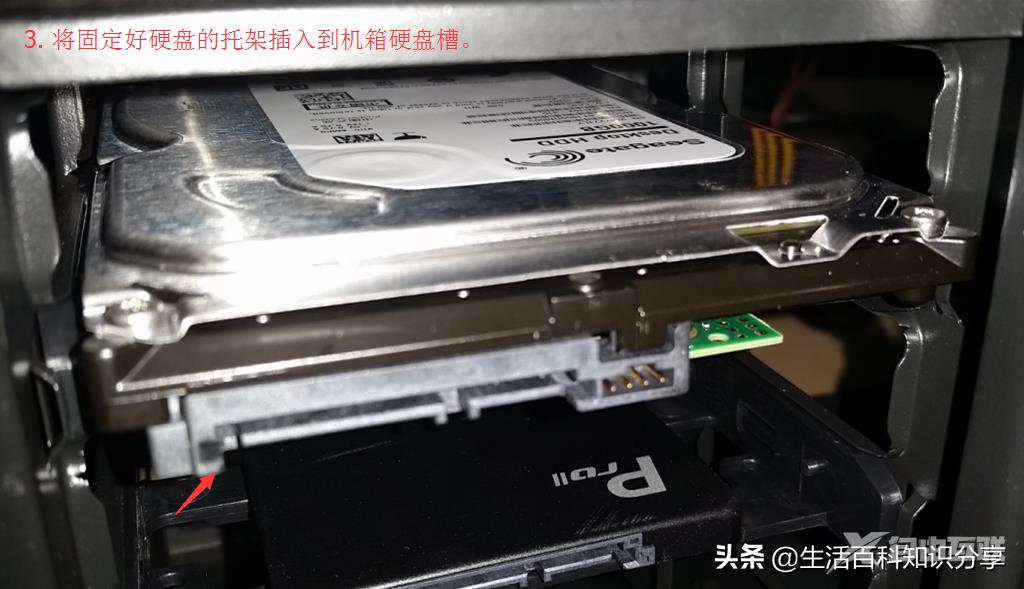
以上是螺丝固定硬盘的安装示意图。下面我们介绍带支架硬盘的安装方法:
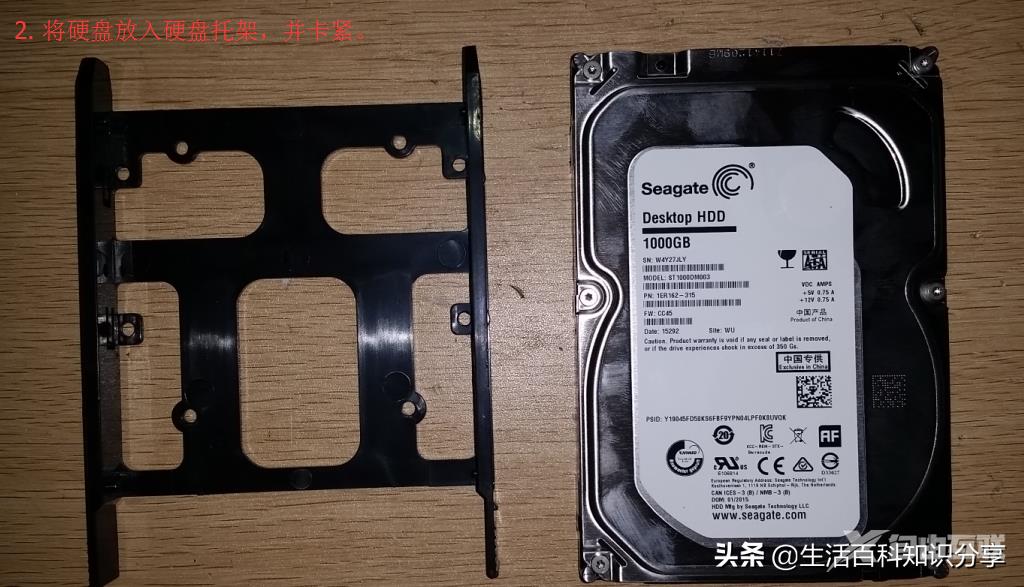
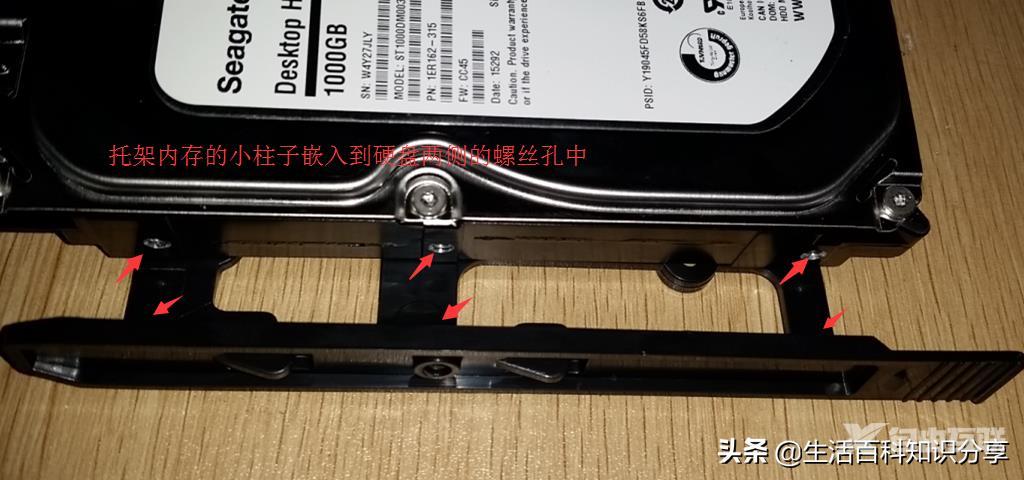
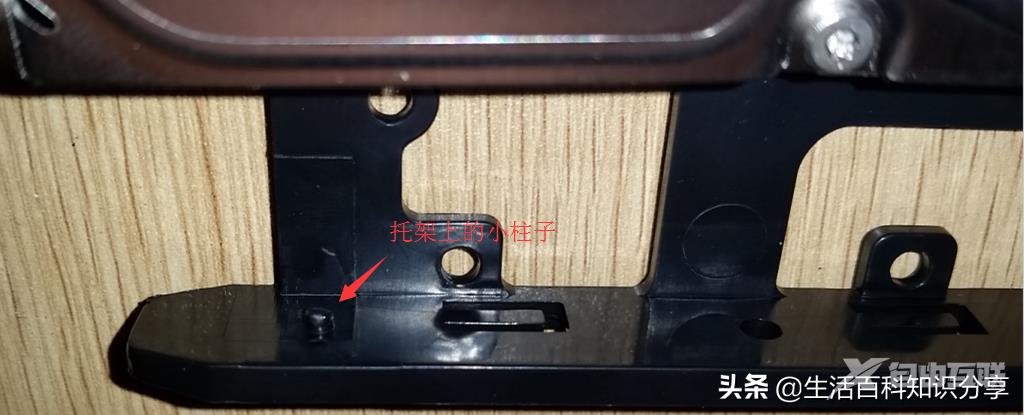
固定硬盘和螺丝固定方式略有不同。首先,打开机箱两侧的面板,找到靠近主机箱前面板的硬盘插槽。卸下支架后,先将硬盘固定在支架上,然后将支架插入硬盘槽中。 (如图)
![](http://img.558idc.com/uploadfile/allimg/jinyan/0934204510-4.jpg)
![](http://img.558idc.com/uploadfile/allimg/jinyan/0934201515-5.jpg)
![](http://img.558idc.com/uploadfile/allimg/jinyan/0934201L6-6.jpg)
![](http://img.558idc.com/uploadfile/allimg/jinyan/0934204420-7.jpg)
![](http://img.558idc.com/uploadfile/allimg/jinyan/0934203115-8.jpg)
![](http://img.558idc.com/uploadfile/allimg/jinyan/09342041C-9.jpg)
![](http://img.558idc.com/uploadfile/allimg/jinyan/09342022S-10.jpg)
![](http://img.558idc.com/uploadfile/allimg/jinyan/0934202959-11.jpg)
![](http://img.558idc.com/uploadfile/allimg/jinyan/0934206117-12.jpg)
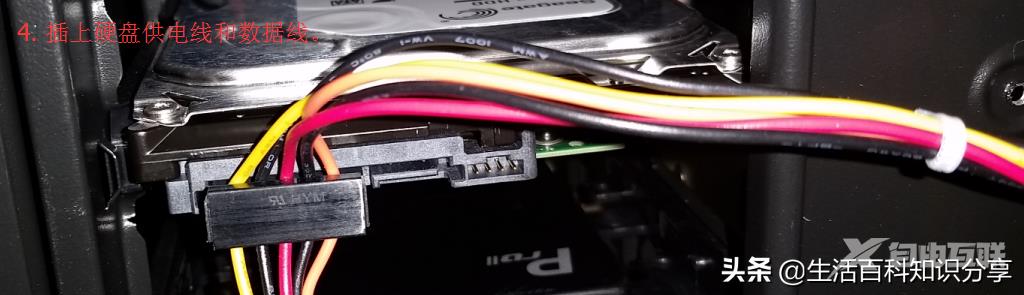
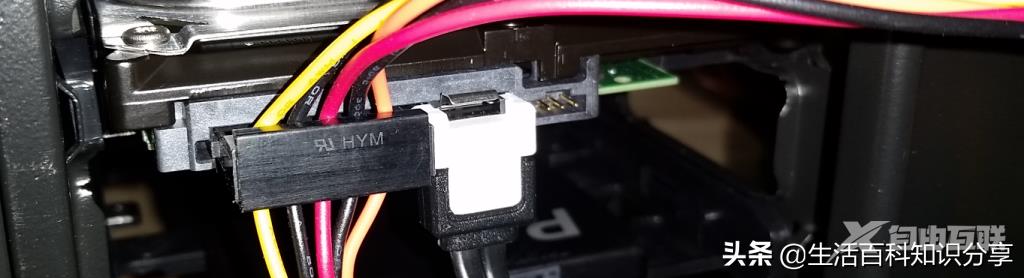
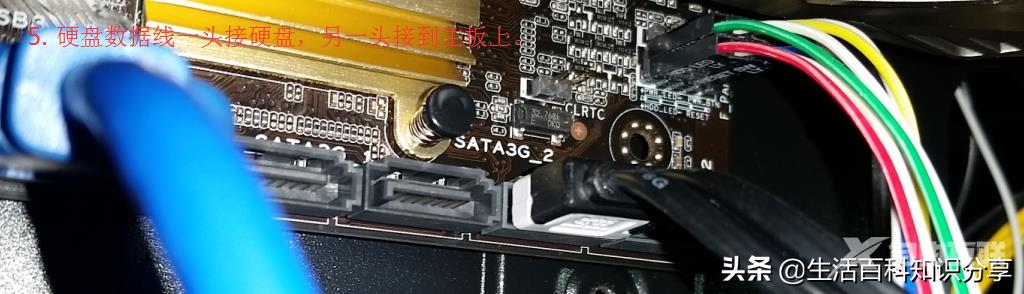
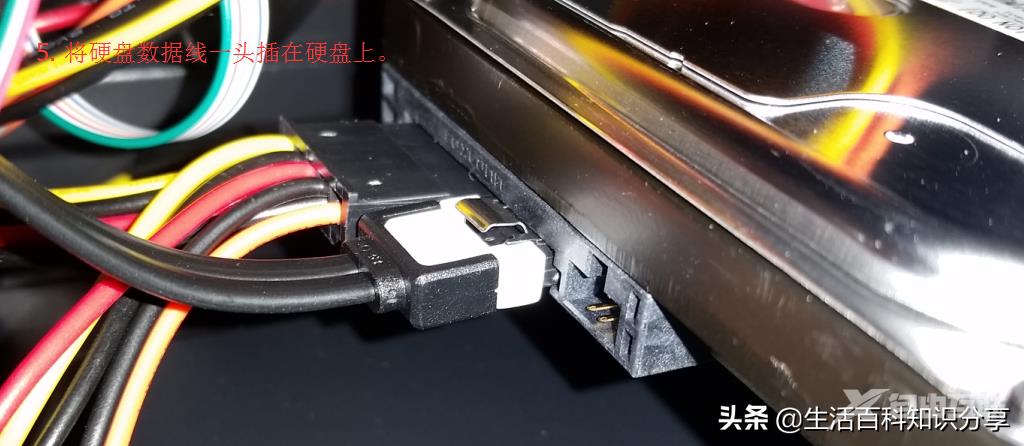
硬盘已经固定并连接到主板上,然后就可以启动到分区了。
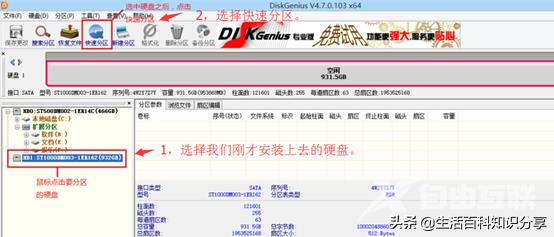
第二步:给硬盘分区
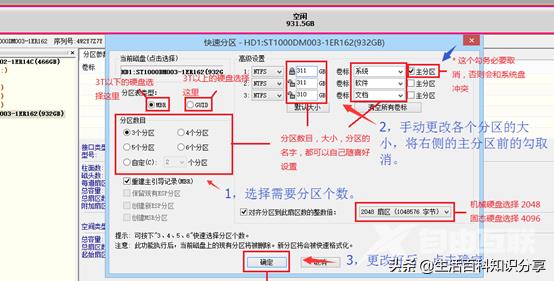
首先开机进入系统,因为添加的硬盘没有分区,所以在“我的电脑”里面是看不到硬盘的,我们需要先分区:我们安装的硬盘是从盘,所以我们分区到避免生成较多的主分区,导致启动时从安装的副盘启动,导致蓝屏或无法进入系统。分区时,不能通过磁盘来管理分区。我们需要下载一个分区工具“Disk Genius”来对硬盘进行分区。
![](http://img.558idc.com/uploadfile/allimg/jinyan/0934202454-13.jpg)
![](http://img.558idc.com/uploadfile/allimg/jinyan/0934202937-14.jpg)
![](http://img.558idc.com/uploadfile/allimg/jinyan/09342041S-15.jpg)
![](http://img.558idc.com/uploadfile/allimg/jinyan/093420D50-16.jpg)
![](http://img.558idc.com/uploadfile/allimg/jinyan/0934204957-17.jpg)
![](http://img.558idc.com/uploadfile/allimg/jinyan/0934204A3-18.jpg)
![](http://img.558idc.com/uploadfile/allimg/jinyan/0934205W6-19.jpg)
![](http://img.558idc.com/uploadfile/allimg/jinyan/09342051T-20.jpg)
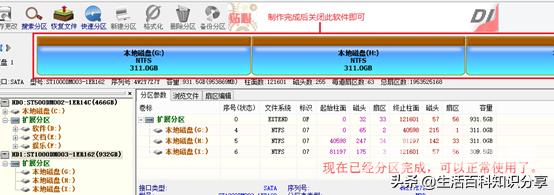
最后关闭分区工具,打开“计算机”就可以看到分好区后的各个盘符了。