与依赖项属性类似,WPF也为路由事件提供了WPF事件系统这一组成。为一个类型添加一个路由事件的方式与为类型添加依赖项属性的方法类似,添加一个自定义路由事件的步骤: 一、声明
与依赖项属性类似,WPF也为路由事件提供了WPF事件系统这一组成。为一个类型添加一个路由事件的方式与为类型添加依赖项属性的方法类似,添加一个自定义路由事件的步骤:
一、声明路由事件变量并注册
定义只读的静态变量字段RouteEvent类来声明一个变量,然后使用EventManager的RegisterRoutedEvent()方法向事件系统注册路由事件,该方法的签名如下:
public static RoutedEvent RegisterRoutedEvent(string name, RoutingStrategy routingStrategy, Type handlerType, Type ownerType);
该方法带有四个参数:
- 第一个参数name表示该路由事件在WPF事件系统中的名称。
- 第二个参数routingStrategy是RoutingStrategy类型的枚举值,标明了路由事件的路由策略,共三种策略:
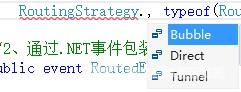
- 第一种Bubble是冒泡策略,这种模式是从触发点向根节点传递,直到最外层。
- 第二种是Direct就是传统的事件一样的。
- 第三种是隧道策略,这和冒泡策略相反,向下传递。
- 第三个参数handlerType用来标明事件处理函数的类型。
- 第四个个参数ownerType则用来标明拥有该路由事件的类型。
EventManager的RegisterRoutedEvent()方法返回一个RoutedEvent类型的实例。一般情况下,该实例将由一个public static readonly字段所保存。
二、通过标准的.NET事件包装路由事件
事件包装器使用AddHandler方法来添加路由事件的调用程序,然后使用RemoveHandler来删除已经添加的调用程序。
三、创建可以激发路由事件的方法
演示创建自定义路由事件:
1、新建用户控件,添加一个Button按钮,添加按钮的Click事件,XAML代码如下:
<UserControl x:Class="CustomWpfRouteEvent.RouteEventControl"
             xmlns="http://schemas.microsoft.com/winfx/2006/xaml/presentation"
             xmlns:x="http://schemas.microsoft.com/winfx/2006/xaml"
             xmlns:mc="http://schemas.openxmlformats.org/markup-compatibility/2006"
             xmlns:d="http://schemas.microsoft.com/expression/blend/2008"
             mc:Ignorable="d"
             d:DesignHeight="300" d:DesignWidth="300">
    <Grid>
        <Button Height="30" Width="100" Content="调用路由事件" Click="Button_Click"></Button>
    </Grid>
</UserControl>
2、在用户控件的后台代码中创建自定义路由事件,C#代码如下:
using System;
using System.Collections.Generic;
using System.Linq;
using System.Text;
using System.Threading.Tasks;
using System.Windows;
using System.Windows.Controls;
using System.Windows.Data;
using System.Windows.Documents;
using System.Windows.Input;
using System.Windows.Media;
using System.Windows.Media.Imaging;
using System.Windows.Navigation;
using System.Windows.Shapes;

namespace CustomWpfRouteEvent
{
    /// <summary>
    /// RouteEventControl.xaml 的交互逻辑
    /// </summary>
    public partial class RouteEventControl : UserControl
    {
        public RouteEventControl()
        {
            InitializeComponent();
        }

        //1、声明并注册路由事件,使用冒泡策略
        public static readonly RoutedEvent MyClientEvent = EventManager.RegisterRoutedEvent("MyClick",
            RoutingStrategy.Bubble, typeof(RoutedEventHandler), typeof(RouteEventControl));

        //2、通过.NET事件包装路由事件
        public event RoutedEventHandler MyClick
        {
            add
            {
                AddHandler(MyClientEvent, value);
            }
            remove
            {
                RemoveHandler(MyClientEvent, value);
            }
        }

        /// <summary>
        /// 3、使用按钮的单击事件激发路由事件
        /// </summary>
        /// <param name="sender"></param>
        /// <param name="e"></param>
        private void Button_Click(object sender, RoutedEventArgs e)
        {
            RoutedEventArgs arg = new RoutedEventArgs();
            arg.RoutedEvent = MyClientEvent;
            RaiseEvent(arg);
        }
    }
}
3、在主界面中引入新创建的用户控件,使用自定义的路由事件MyClick,并为MyClick事件编写调用的方法,XAML代码如下:
<Window x:Class="CustomWpfRouteEvent.MainWindow"
        xmlns="http://schemas.microsoft.com/winfx/2006/xaml/presentation"
        xmlns:x="http://schemas.microsoft.com/winfx/2006/xaml"
        xmlns:u="clr-namespace:CustomWpfRouteEvent"
        Title="演示自定义路由事件" Height="350" Width="525" WindowStartupLocation="CenterScreen">
    <Grid>
        <u:RouteEventControl MyClick="RouteEventControl_MyClick"></u:RouteEventControl>
    </Grid>
</Window>
4、RouteEventControl_MyClick方法的后台代码如下:
using System;
using System.Collections.Generic;
using System.Linq;
using System.Text;
using System.Threading.Tasks;
using System.Windows;
using System.Windows.Controls;
using System.Windows.Data;
using System.Windows.Documents;
using System.Windows.Input;
using System.Windows.Media;
using System.Windows.Media.Imaging;
using System.Windows.Navigation;
using System.Windows.Shapes;
namespace CustomWpfRouteEvent
{
/// <summary>
/// MainWindow.xaml 的交互逻辑
/// </summary>
public partial class MainWindow : Window
{
public MainWindow()
{
InitializeComponent();
}
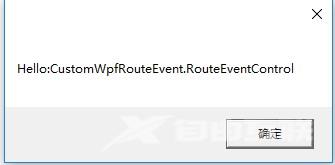
private void RouteEventControl_MyClick(object sender, RoutedEventArgs e)
{
MessageBox.Show("Hello:" + e.Source.ToString());
}
}
}
5、运行程序,单击Button按钮,效果如下所示:
到此这篇关于WPF自定义路由事件的文章就介绍到这了。希望对大家的学习有所帮助,也希望大家多多支持自由互联。