目录 转存文章到MD 转存图片到本地 鉴于有些小伙伴在寻找博客园迁移到个人博客的方案,本人针对博客园实现了一个自动备份脚本,可以快速将博客园中自己的文章备份成Markdown格式的
目录
- 转存文章到MD
- 转存图片到本地
鉴于有些小伙伴在寻找博客园迁移到个人博客的方案,本人针对博客园实现了一个自动备份脚本,可以快速将博客园中自己的文章备份成Markdown格式的独立文件,备份后的md文件可以直接放入到hexo博客中,快速生成自己的站点,而不需要自己逐篇文章迁移,提高了备份文章的效率。
首先第一步将博客园主题替换为codinglife默认主题,第二步登录到自己的博客园后台,然后选择博客备份,备份所有的随笔文章,如下所示:

备份出来以后将其命名为backup.xml,然后新建一个main.py脚本,以及一个blog目录,代码实现的原理是,解析xml格式并依次提取出文档内容,然后分别保存为markdown文件。

转存文章到MD
写入备份脚本,代码如下所示,运行后即可自动转存文件到blog目录下,当运行结束后备份也就结束了。
# powerby: LyShark
# blog: www.cnblogs.com/lyshark
from bs4 import BeautifulSoup
import requests, os,re

header = {"User-Agent": "Mozilla/5.0 (Windows NT 6.1; WOW64) AppleWebKit/537.36 (KHTML, like Gecko) By LyShark CnblogsBlog Backup Script"}

# 获取文章,并转成markdown
# blog: www.lyshark.com
def GetMarkDown(xml_file):
    con = open(xml_file, 'r', encoding='utf8').read()
    # 每篇文章都在 <item> 标签里
    items = re.findall("<item>.*?</item>", con, re.I | re.M | re.S)
    ele2 = ['<title>(.+?)</title>', '<link>(.+?)</link>', '<description>(.+?)</description>']
    # md_name = xml_file.split('.xml')[0] + '.md'
    for item in items:
        try:
            title = re.findall(ele2[0], item, re.I | re.S | re.M)[0]
            link = re.findall(ele2[1], item, re.I | re.S | re.M)[0]
            des = re.findall(ele2[2], item, re.I | re.S | re.M)[0]
            des = re.findall('<!\[CDATA\[(.+?)\]\]>', des, re.I | re.S | re.M)[0]  # CDATA 里面放的是文章的内容
            des = des.replace('~~~', "```")
            lines = des.split('\n')
            with open("./blog/" + title.replace("/","") + ".md", mode='w+', encoding='utf8') as f:
                f.write("---\n")
                f.write("title: '{}'\n".format(title.replace("##","").replace("###","").replace("-","").replace("*","").replace("<br>","").replace(":","").replace(":","").replace(" ","").replace(" ","").replace("`","")))
                f.write("copyright: true\n")

                setdate = "2018-12-27 00:00:00"
                try:
                    # 读取时间
                    response = requests.get(url=link, headers=header)
                    print("读取状态: {}".format(response.status_code))

                    if response.status_code == 200:
                        bs = BeautifulSoup(response.text, "html.parser")
                        ret = bs.select('span[id="post-date"]')[0]
                        setdate = str(ret.text)
                        pass
                    else:
                        f.write("date: '2018-12-27 00:00:00'\n")
                except Exception:
                    f.write("date: '2018-12-27 00:00:00'\n")
                    pass

                f.write("date: '{}'\n".format(setdate))

                # description检测
                description_check = lines[0].replace("##","").replace("###","").replace("-","").replace("*","").replace("<br>","").replace(":","").replace(":","").replace(" ","").replace(" ","")
                if description_check == "":
                    f.write("description: '{}'\n".format("该文章暂无概述"))
                elif description_check == "```C":
                    f.write("description: '{}'\n".format("该文章暂无概述"))
                elif description_check == "```Python":
                    f.write("description: '{}'\n".format("该文章暂无概述"))
                else:
                    f.write("description: '{}'\n".format(description_check))

                print("[*] 时间: {} --> 标题: {}".format(setdate, title))
                f.write("tags: '{}'\n".format("tags10245"))
                f.write("categories: '{}'\n".format("categories10245"))
                f.write("---\n\n")
                f.write('%s' %des)
                f.close()
        except Exception:
            pass

if __name__ == "__main__":
    GetMarkDown("backup.xml")
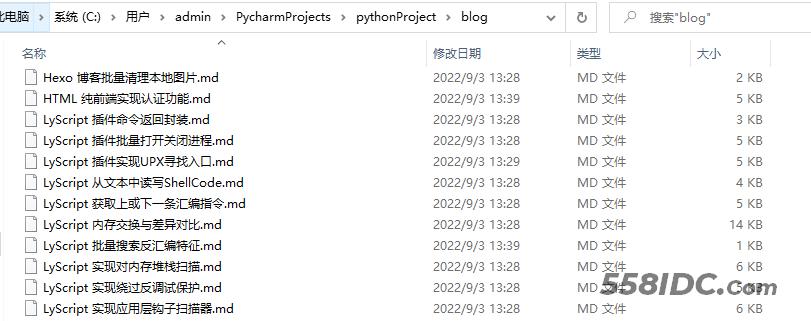
备份后的效果如下所示:

打开Markdown格式看一下,此处的标签和分类使用了一个别名,在备份下来以后,你可以逐个区域进行替换,将其替换成自己需要的分类类型即可。

转存图片到本地
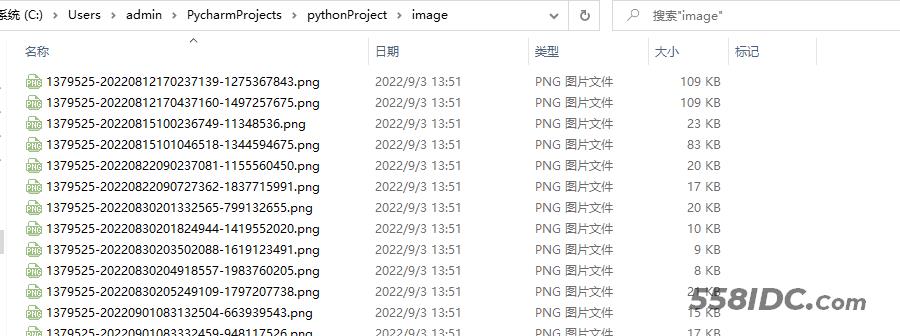
接着就是继续循环将博客中所有图片备份下来,同样新建一个image文件夹,并运行如下代码实现备份。
# powerby: LyShark
# blog: www.cnblogs.com/lyshark
from bs4 import BeautifulSoup
import requests, os,re

header = {"User-Agent": "Mozilla/5.0 (Windows NT 6.1; WOW64) AppleWebKit/537.36 (KHTML, like Gecko) By LyShark CnblogsBlog Backup Script"}

# 从备份XML中找到URL
# blog: www.cnblogs.com/lyshark
def GetURL(xml_file):
    blog_url = []
    con = open(xml_file, 'r', encoding='utf8').read()
    items = re.findall("<item>.*?</item>", con, re.I | re.M | re.S)
    ele2 = ['<title>(.+?)</title>', '<link>(.+?)</link>', '<description>(.+?)</description>']
    for item in items:
        title = re.findall(ele2[0], item, re.I | re.S | re.M)[0]
        link = re.findall(ele2[1], item, re.I | re.S | re.M)[0]
        print("标题: {} --> URL: {} ".format(title,link))
        blog_url.append(link)
    return blog_url

# 下载所有图片
# blog: www.lyshark.com
def DownloadURLPicture(url):
    params = {"encode": "utf-8"}
    response = requests.get(url=url, params=params, headers=header)
    # print("网页编码方式: {} -> {}".format(response.encoding,response.apparent_encoding))
    context = response.text.encode(response.encoding).decode(response.apparent_encoding, "ignore")
    try:
        bs = BeautifulSoup(context, "html.parser")
        ret = bs.select('div[id="cnblogs_post_body"] p img')
        for item in ret:
            try:
                img_src_path = item.get("src")
                img_src_name = img_src_path.split("/")[-1]
                print("[+] 下载图片: {} ".format(img_src_name))
                img_download = requests.get(url=img_src_path, headers=header, stream=True)
                with open("./image/" + img_src_name, "wb") as fp:
                    for chunk in img_download.iter_content(chunk_size=1024):
                        fp.write(chunk)
            except Exception:
                print("下载图片失败: {}".format(img_src_name))
                pass
    except Exception:
        pass

if __name__ == "__main__":
    url = GetURL("backup.xml")
    for u in url:
        DownloadURLPicture(u)
备份后的效果如下:

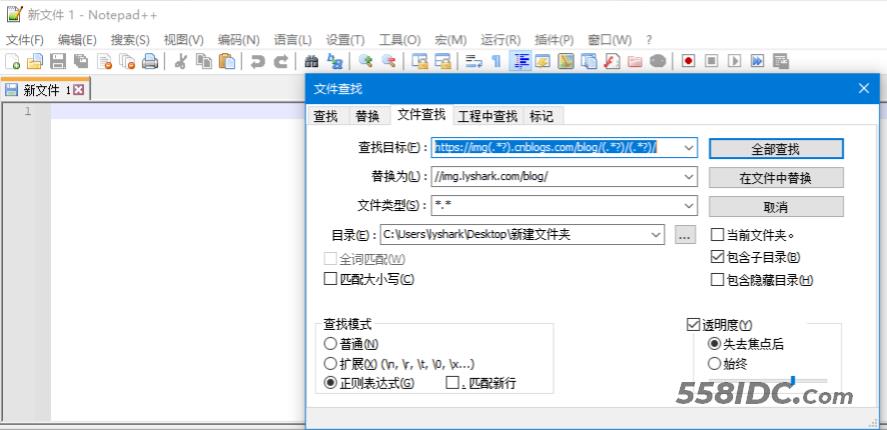
替换文章内的图片链接地址,可以使用编辑器,启用正则批量替换。

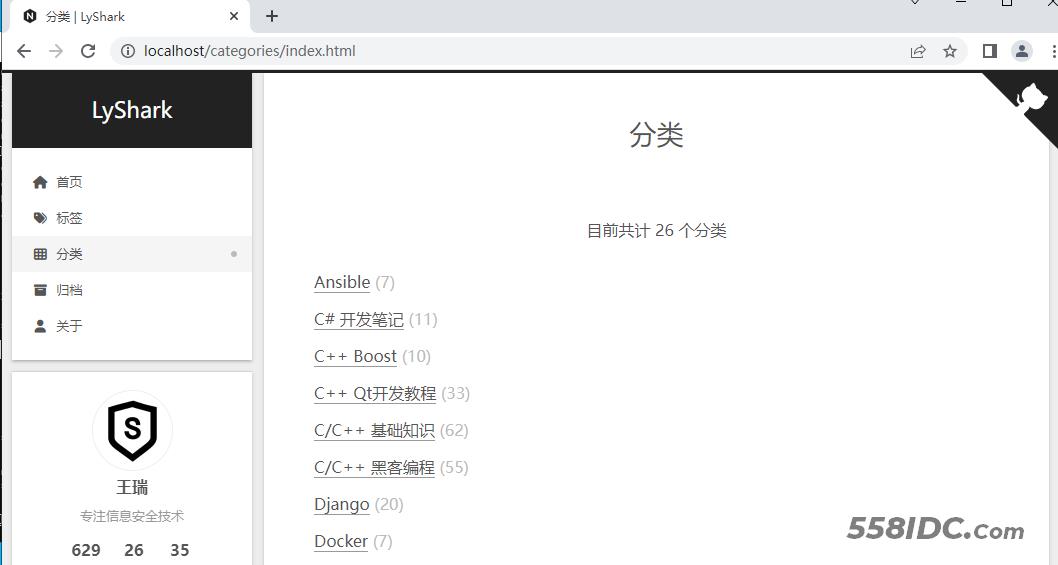
当把博客备份下来以后你就可以把这些文章拷贝到hexo博客_post目录下面,然后hexo命令快速渲染生成博客园的镜像站点,这样也算是增加双保险了。

到此这篇关于Python实现博客快速备份的脚本分享的文章就介绍到这了,更多相关Python备份博客内容请搜索自由互联以前的文章或继续浏览下面的相关文章希望大家以后多多支持自由互联!
