现在新买的电脑基本都是默认只有c盘一个分区,没有d,e等分区,有时候文件管理那些非常不方便。我们可以给电脑划分多个分区进行文件分类管理等。那么预装win10系统新电脑怎么分
现在新买的电脑基本都是默认只有c盘一个分区,没有d,e等分区,有时候文件管理那些非常不方便。我们可以给电脑划分多个分区进行文件分类管理等。那么预装win10系统新电脑怎么分区?下面小编就教下大家新买的win10电脑分区教程。
Win10电脑分区教程:
注意事项:
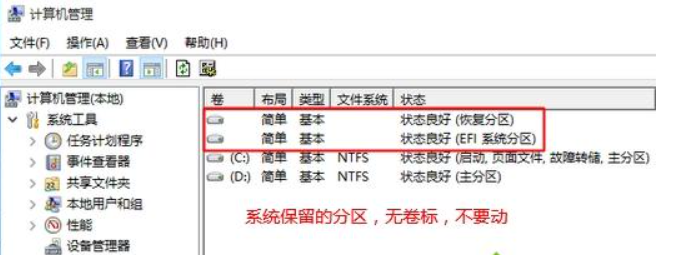
不要动这些分区:恢复分区、EFI系统分区,否则预装系统无法恢复。
分区教程如下:
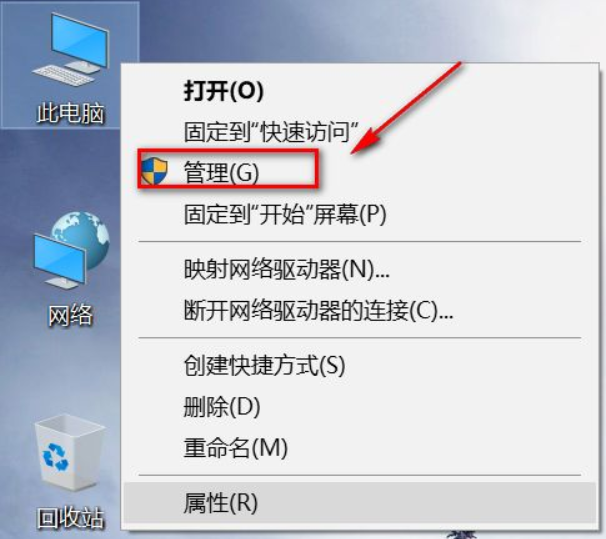
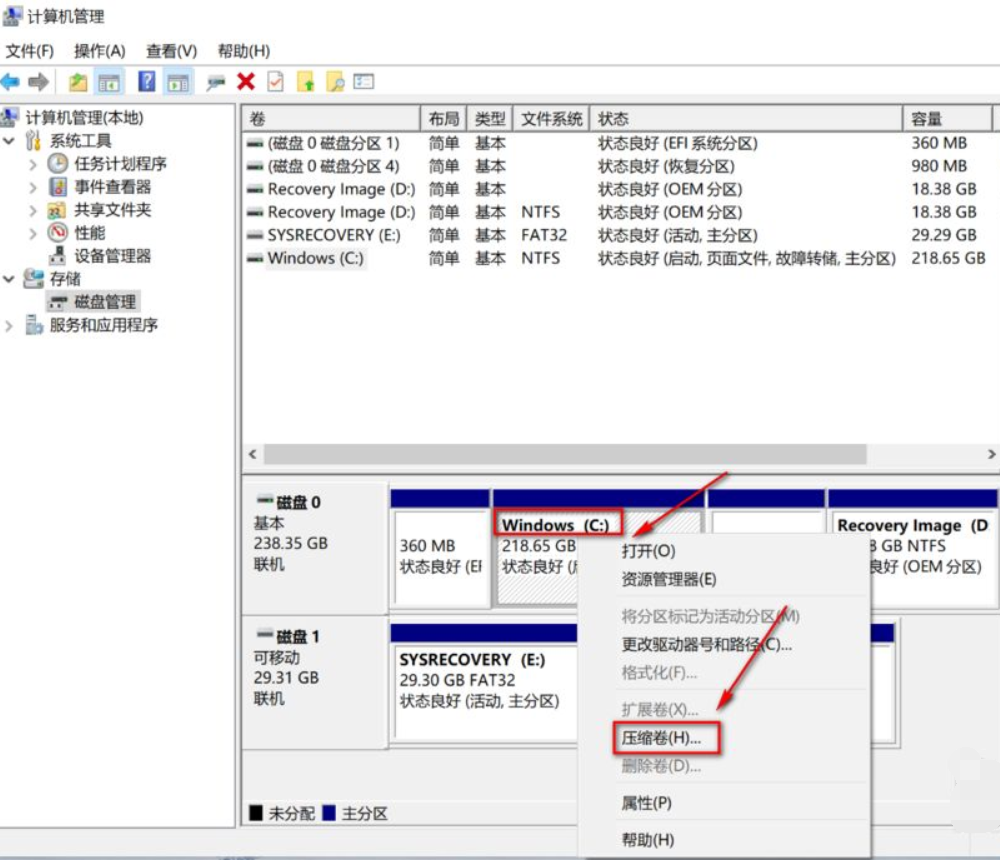
1、首先桌面右键单击此电脑--管理。
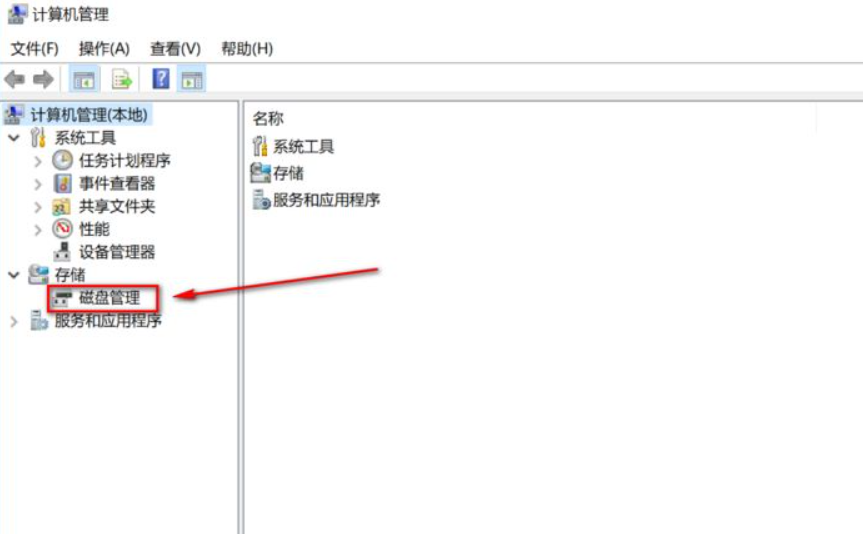
2、管理界面双击磁盘管理。
3、进入未分区磁盘界面,点右键单击磁盘--压缩卷。
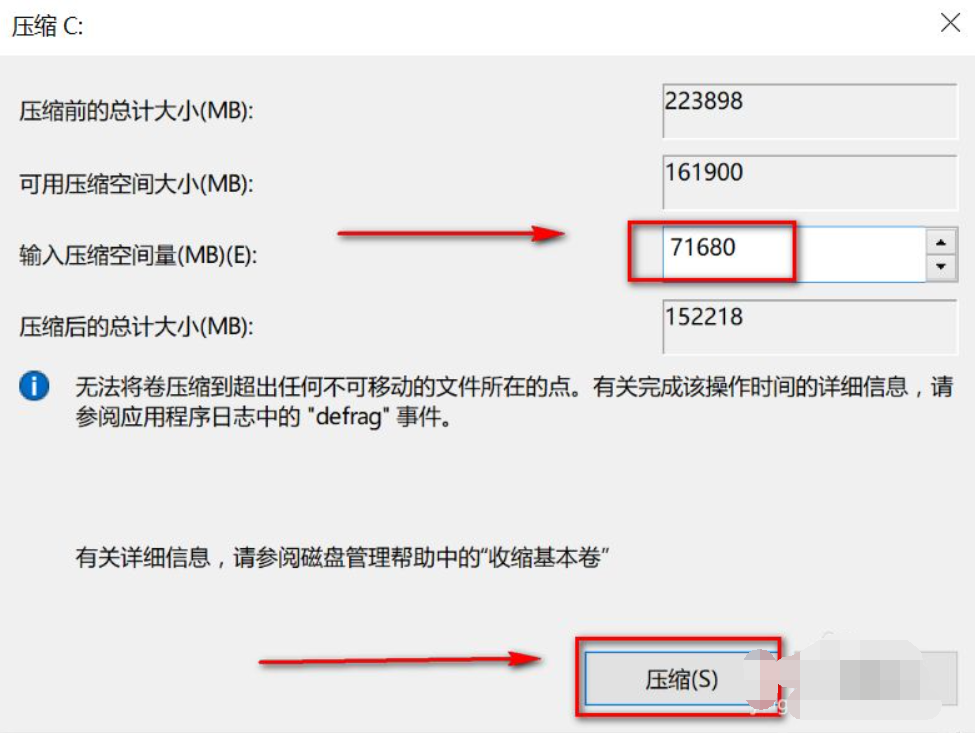
4、设置压缩卷分区,这个就是你划分出来的部分磁盘的大小,点击压缩按钮。
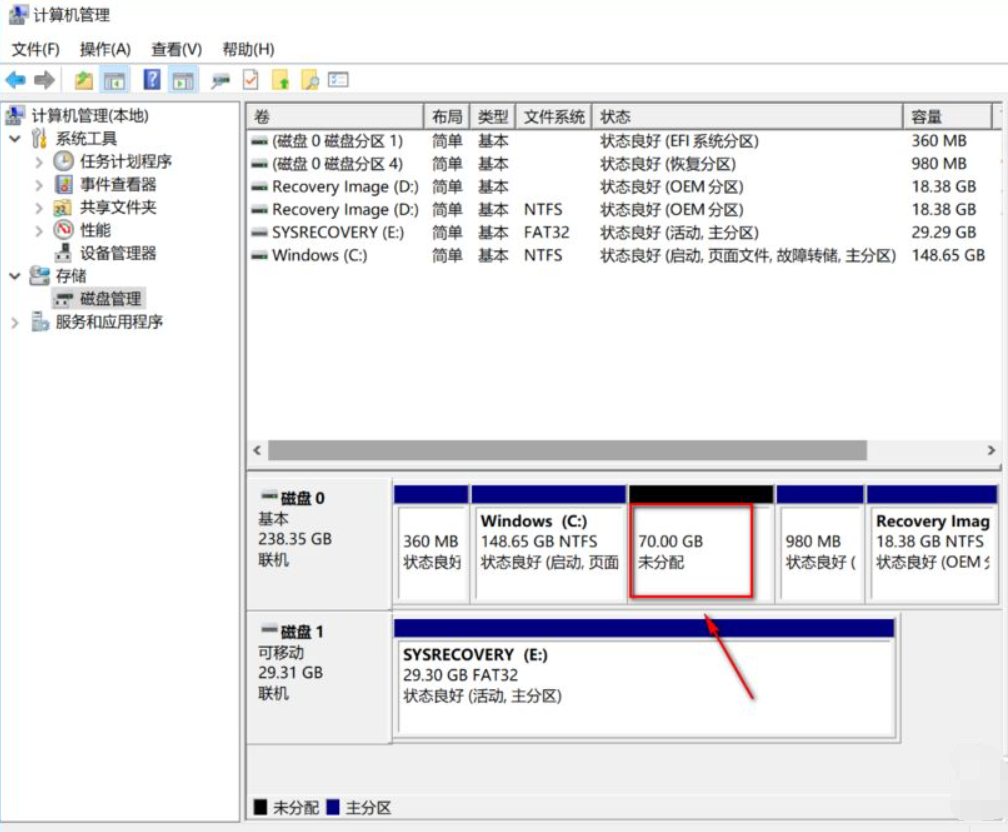
5、磁盘区域分出来了,如下图所示。
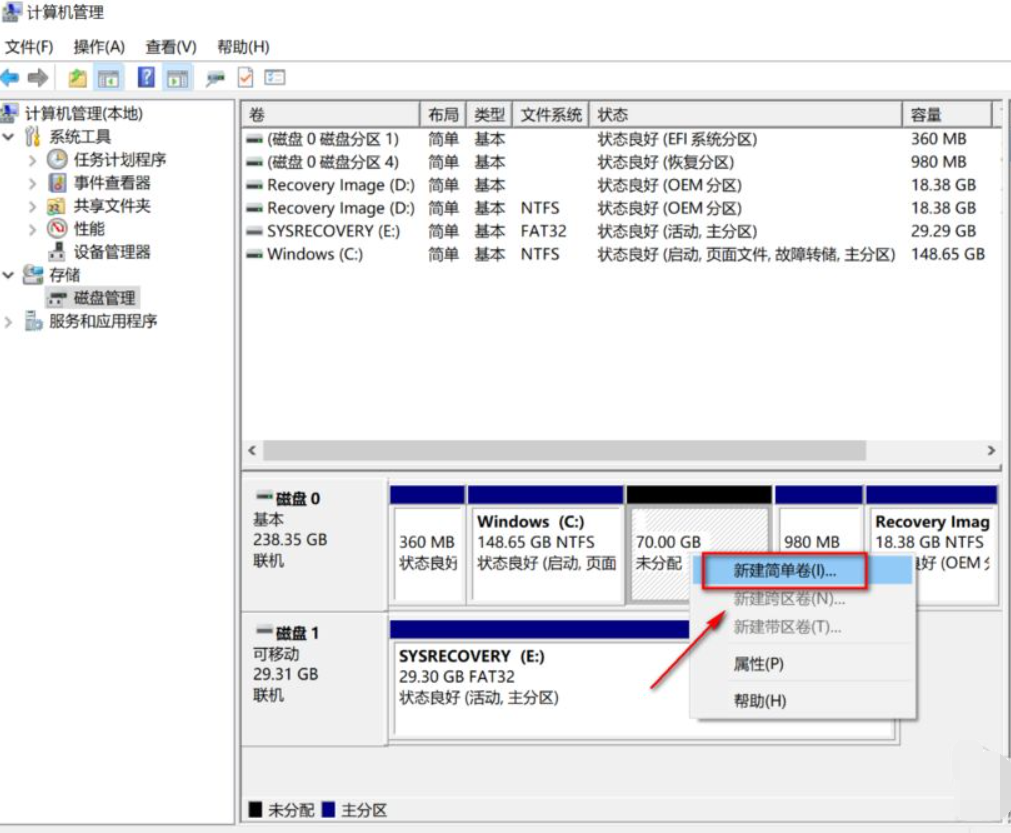
6、右键单击新的磁盘,选择新建简单卷。
7、进入向导,点击下一步,如下图所示。

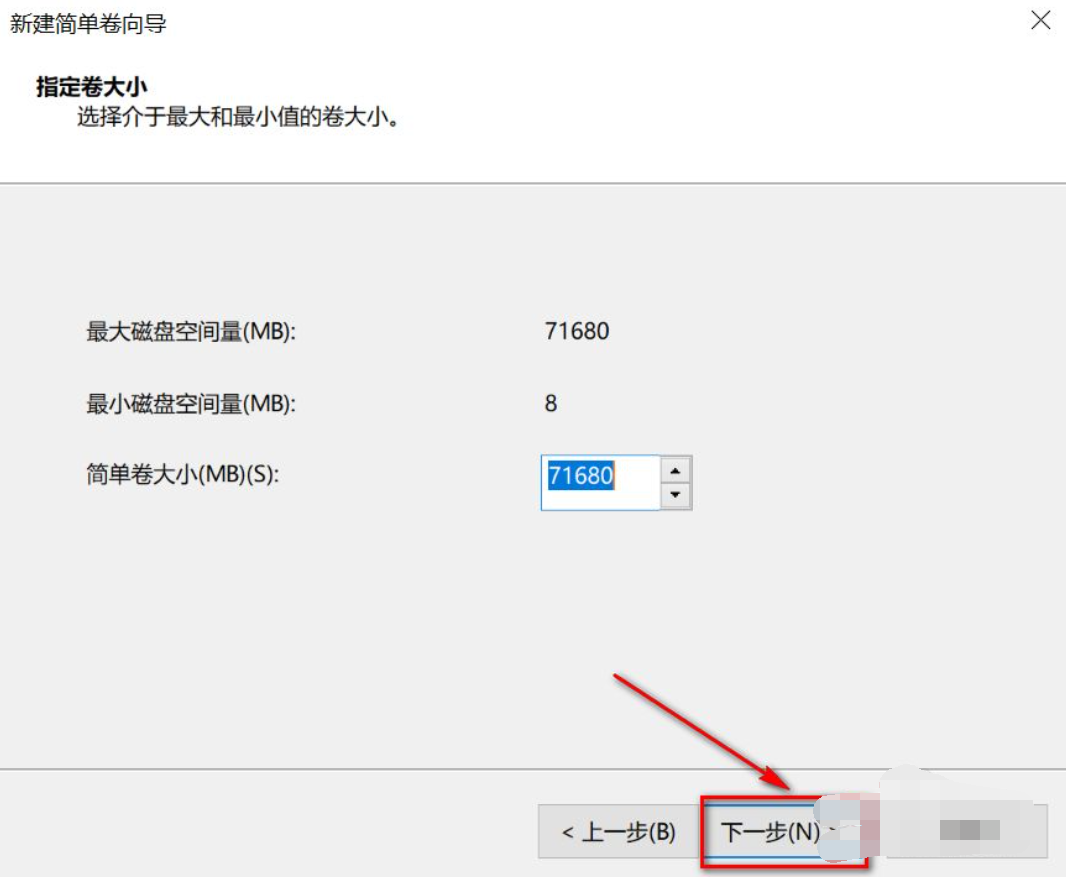
8、制定新建卷大小,点击下一步。
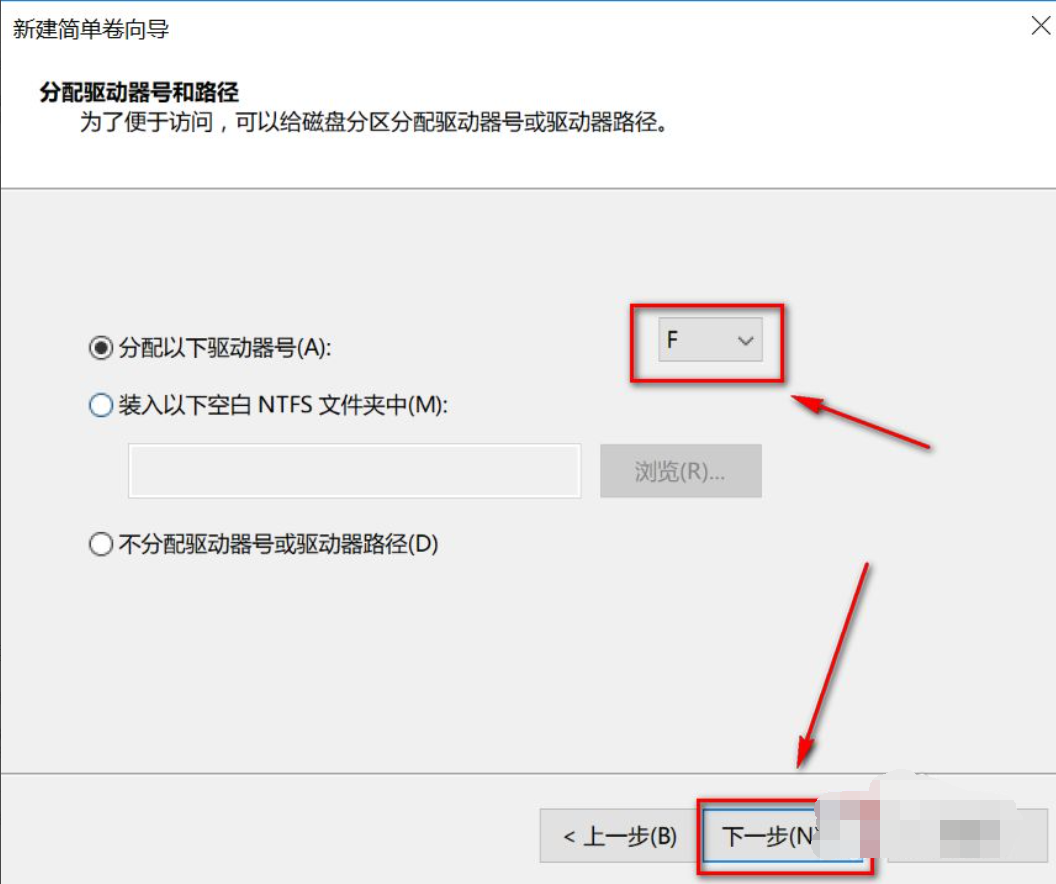
9、选择盘符,点击下一步,如下图所示。
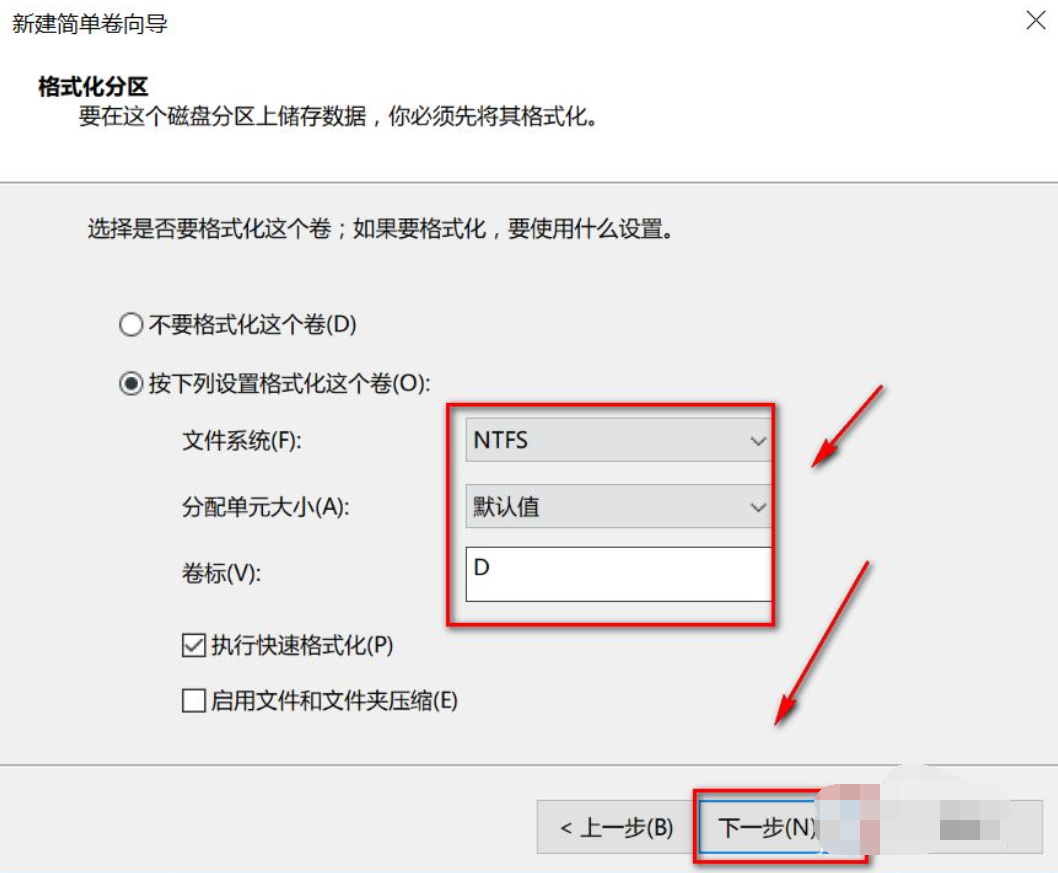
10、选择磁盘格式和卷标,点击下一步。
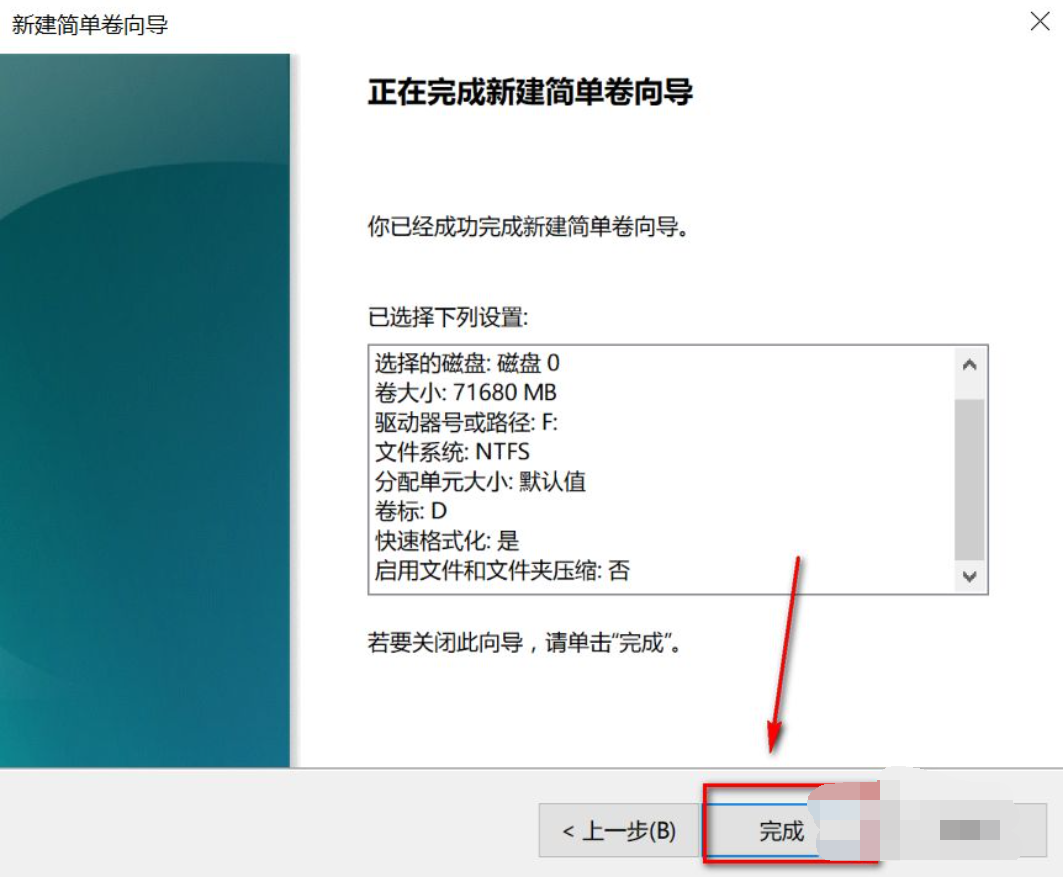
11、点击完成,磁盘分区完成。