硬盘分区实质上是对硬盘的一种格式化,使用分区编辑器在磁盘上划分几个逻辑部分,不同类的目录与文件可以存储进不同的分区,方便管理互不干扰,有利于硬盘规划。可以简单理解
硬盘分区实质上是对硬盘的一种格式化,使用分区编辑器在磁盘上划分几个逻辑部分,不同类的目录与文件可以存储进不同的分区,方便管理互不干扰,有利于硬盘规划。可以简单理解为硬盘就好像一个柜子一样,然后被分为了几个抽屉,每个软件以及文件被放在不同的抽屉里,所以寻找起来比较方便,从而也规范了硬盘使用范围。
Win10硬盘分区教程
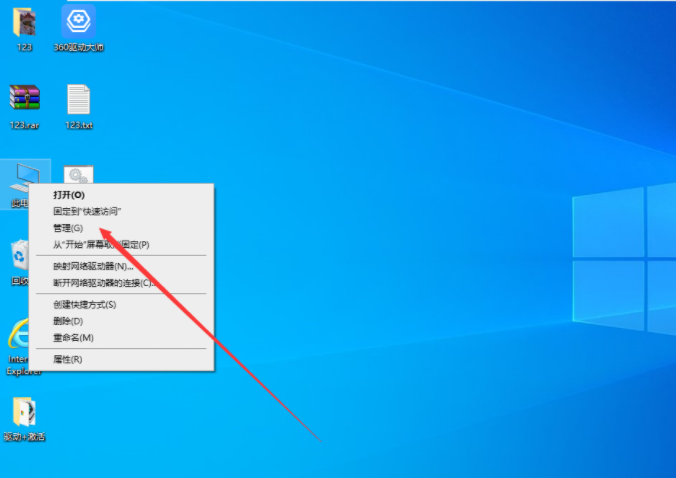
1、右键点击此电脑,点击管理。
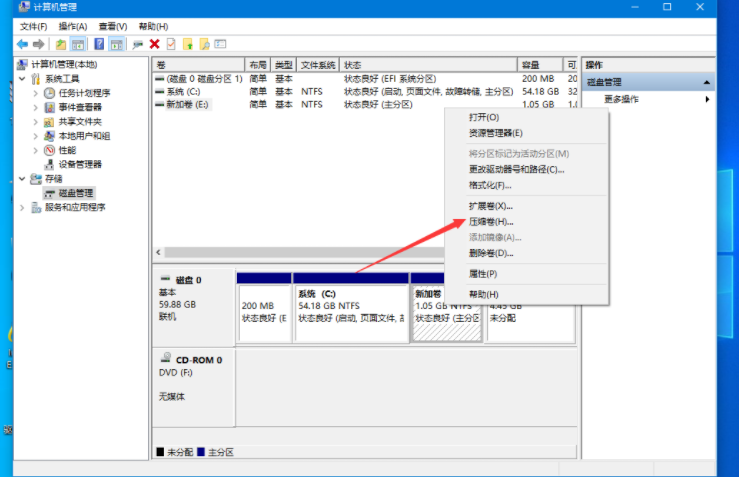
2、在新的窗口中,左侧点击磁盘管理。

3、找到你要进行分区的磁盘,右键点击压缩卷。
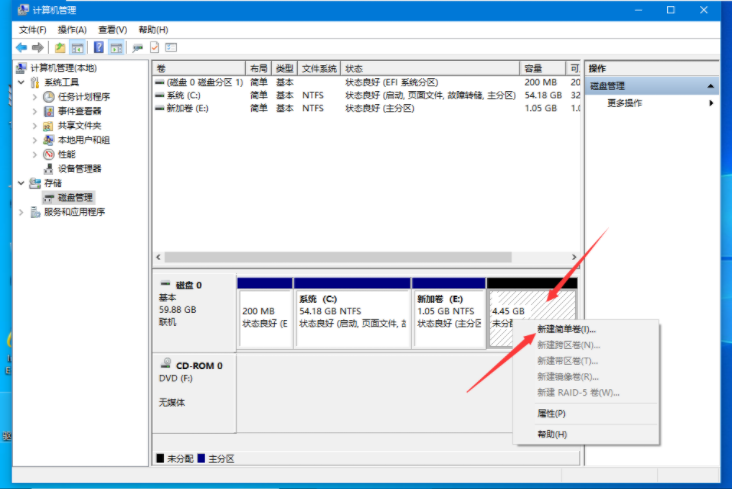
4、这时候会出现未分配的可用空间,右键点击新建简单卷。
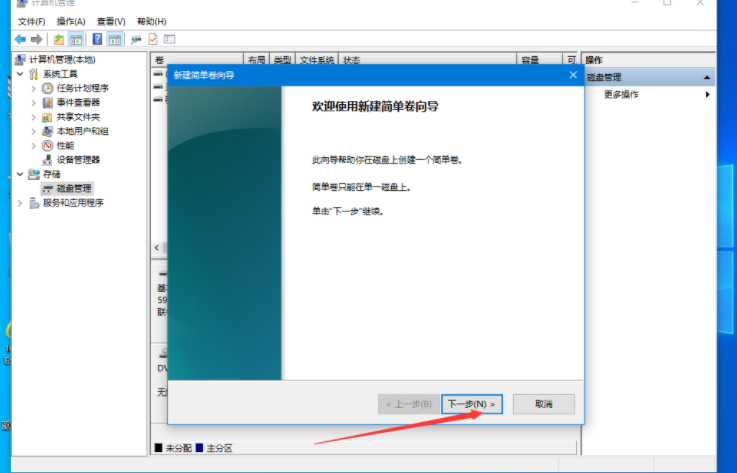
5、进入新建简单卷向导窗口,点击下一步。
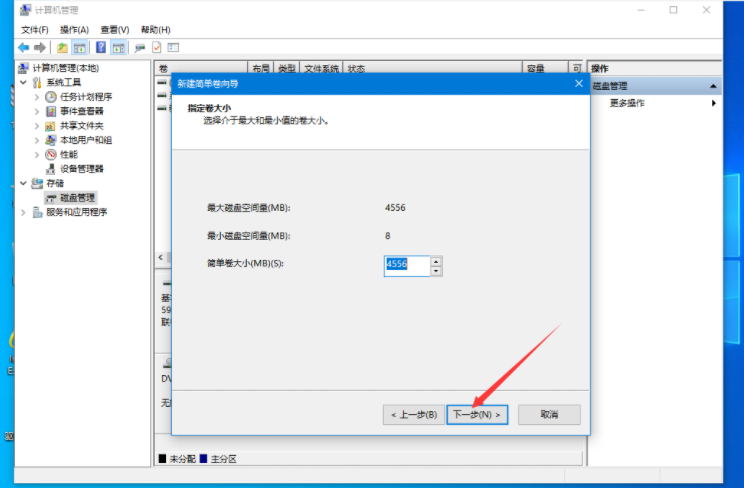
6、设置卷的大小后,点击下一步。
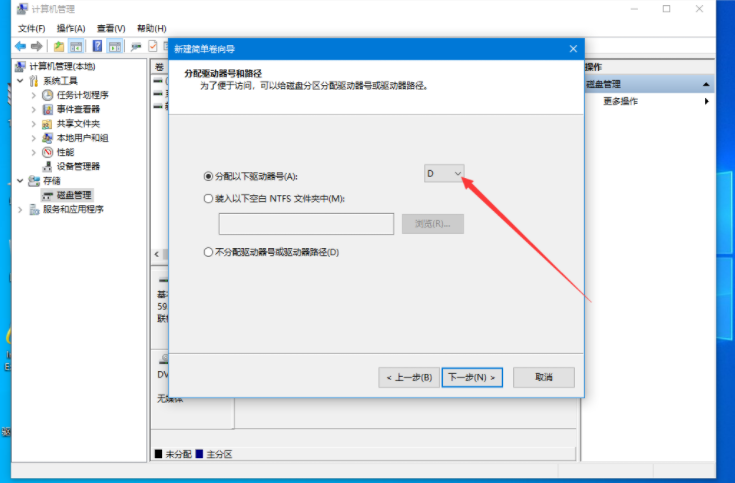
7、选择盘符后,点击下一步。
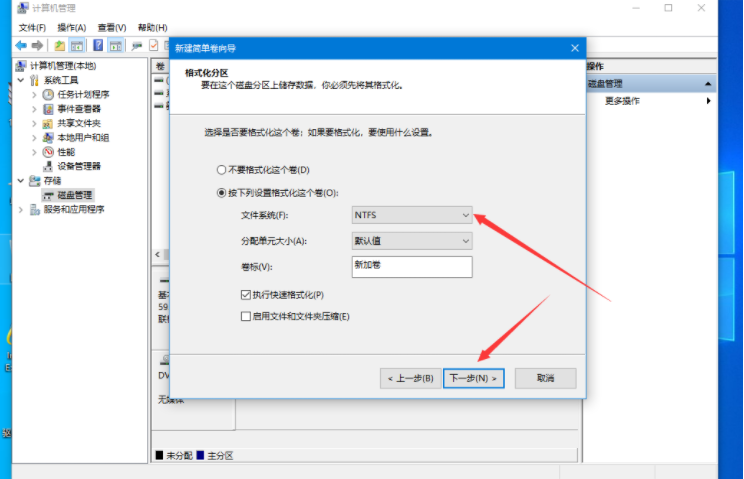
8、文件系统选择ntfs,点击下一步。
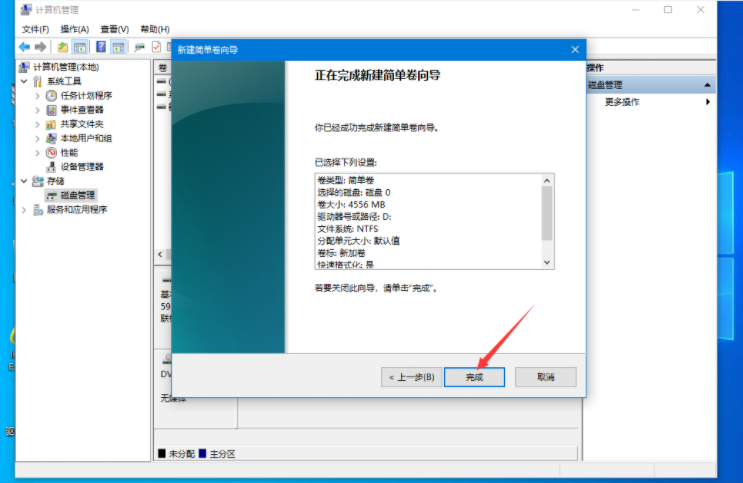
9、点击完成即可。
10、或者使用分区工具分区,简单快捷!点击查看相关教程!
那么以上即是联想电脑硬盘如何分区win10教程的全部内容,想对你有所帮助!