很多用户都将自己的电脑系统升级为Win10 20H2系统了,总的体验还不错,但是其中有的用户在使用的时候,经常会弹出提示文件保护功能的问题,想关闭却不知道怎么操作。下面小编就给
很多用户都将自己的电脑系统升级为Win10 20H2系统了,总的体验还不错,但是其中有的用户在使用的时候,经常会弹出提示文件保护功能的问题,想关闭却不知道怎么操作。下面小编就给大家分享一下Win10 20H2关闭文件保护的方法吧。
Win10 20H2关闭文件保护的方法:
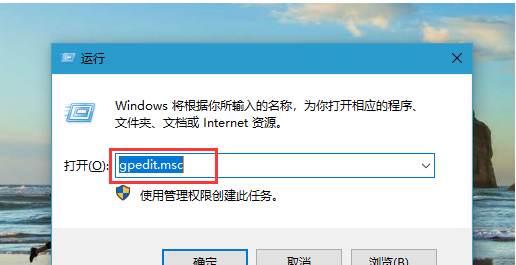
1、在电脑桌面使用键盘同时按住“Win+R”打开运行窗口,输入“gpedit.msc”并点击“确定”。
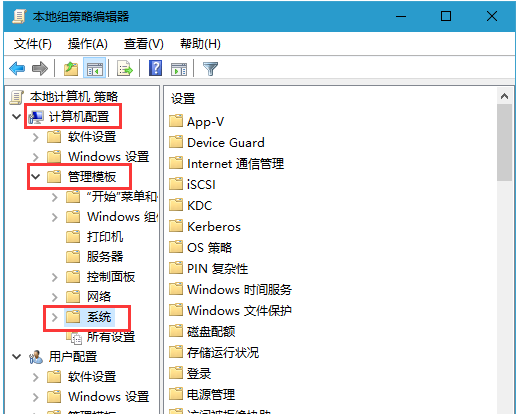
2、进入本地组策略编辑器后,按照以下顺序展开【计算机配置/管理模版/系统】。
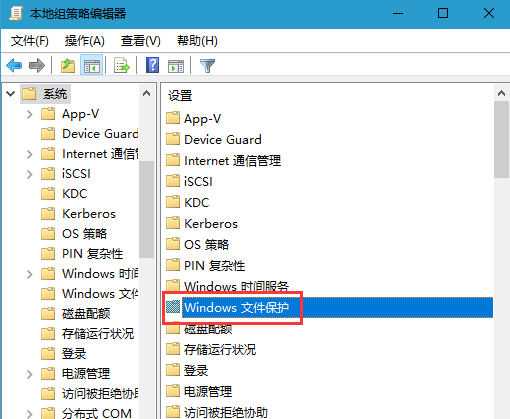
3、点击“系统”,并在右侧页面找到并双击“Windows 文件保护”。
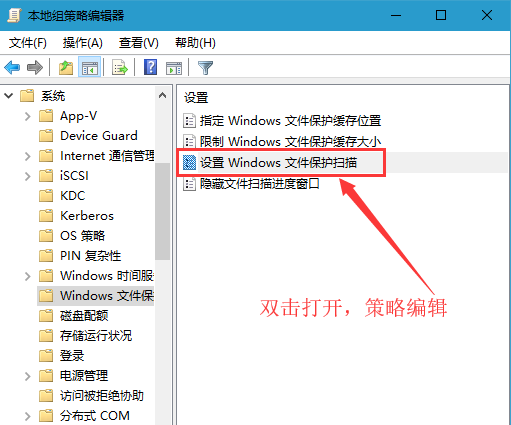
4、随后,点击选中右侧的“设置Windows文件保护扫描”,再双击打开进行“策略设置”。
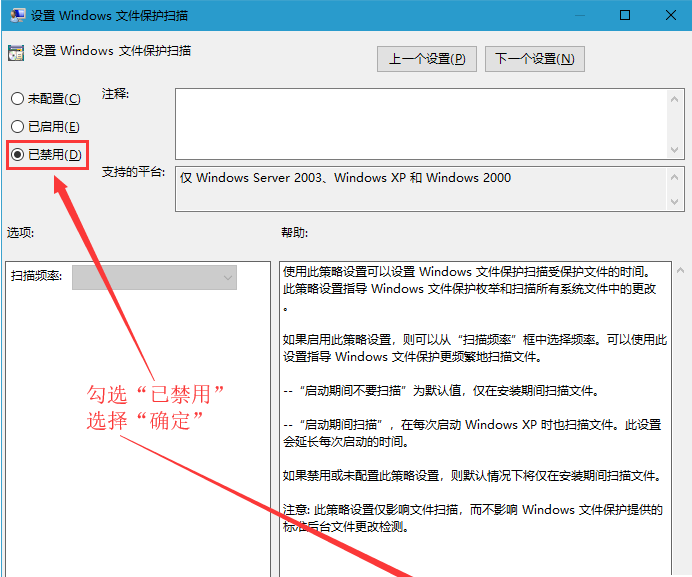
5、在设置页面中,选择“已禁用”,最后点击“应用”并“确定”即可。
以上就是关于Win10 20H2关闭文件保护的方法了,系统之家还有更多关于Win7系统的介绍噢~