目录
- 前言
- Quic API
- 小试牛刀
前言
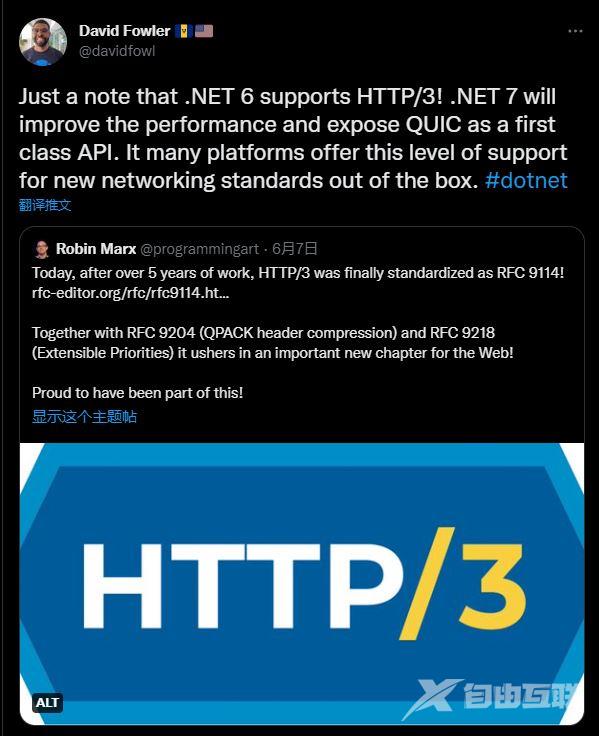
随着今年6月份的 HTTP/3 协议的正式发布,它背后的网络传输协议 QUIC,凭借其高效的传输效率和多路并发的能力,也大概率会取代我们熟悉的使用了几十年的 TCP,成为互联网的下一代标准传输协议。
在去年 .NET 6 发布的时候,已经可以看到 HTTP/3 和 Quic 支持的相关内容了,但是当时 HTTP/3 的 RFC 还没有定稿,所以也只是预览功能,而 Quic 的 API 也没有在 .NET 6 中公开。
在最新的 .NET 7 中,.NET 团队公开了 Quic API,它是基于 MSQuic 库来实现的 , 提供了开箱即用的支持,命名空间为 System.Net.Quic。

Quic API
下面的内容中,我会介绍如何在 .NET 中使用 Quic。
下面是 System.Net.Quic 命名空间下,比较重要的几个类。
QuicConnection
表示一个 QUIC 连接,本身不发送也不接收数据,它可以打开或者接收多个QUIC 流。
QuicListener
用来监听入站的 Quic 连接,一个 QuicListener 可以接收多个 Quic 连接。
QuicStream
表示 Quic 流,它可以是单向的 (QuicStreamType.Unidirectional),只允许创建方写入数据,也可以是双向的(QuicStreamType.Bidirectional),它允许两边都可以写入数据。
小试牛刀
下面是一个客户端和服务端应用使用 Quic 通信的示例。
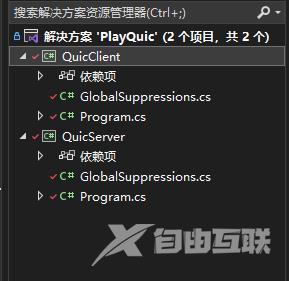
1.分别创建了 QuicClient 和 QuicServer 两个控制台程序。

项目的版本为 .NET 7, 并且设置 EnablePreviewFeatures = true。
下面创建了一个 QuicListener,监听了本地端口 9999,指定了 ALPN 协议版本。
Console.WriteLine("Quic Server Running...");

// 创建 QuicListener
var listener = await QuicListener.ListenAsync(new QuicListenerOptions
{
    ApplicationProtocols = new List<SslApplicationProtocol> { SslApplicationProtocol.Http3  },
    ListenEndPoint = new IPEndPoint(IPAddress.Loopback,9999),
    ConnectionOptionsCallback = (connection,ssl, token) => ValueTask.FromResult(new QuicServerConnectionOptions()
    {
        DefaultStreamErrorCode = 0,
        DefaultCloseErrorCode = 0,
        ServerAuthenticationOptions = new SslServerAuthenticationOptions()
        {
            ApplicationProtocols = new List<SslApplicationProtocol>() { SslApplicationProtocol.Http3 },
            ServerCertificate = GenerateManualCertificate()
        }
    })
});
因为 Quic 需要 TLS 加密,所以要指定一个证书,GenerateManualCertificate 方法可以方便地创建一个本地的测试证书。
X509Certificate2 GenerateManualCertificate()
{
    X509Certificate2 cert = null;
    var store = new X509Store("KestrelWebTransportCertificates", StoreLocation.CurrentUser);
    store.Open(OpenFlags.ReadWrite);
    if (store.Certificates.Count > 0)
    {
        cert = store.Certificates[^1];

        // rotate key after it expires
        if (DateTime.Parse(cert.GetExpirationDateString(), null) < DateTimeOffset.UtcNow)
        {
            cert = null;
        }
    }
    if (cert == null)
    {
        // generate a new cert
        var now = DateTimeOffset.UtcNow;
        SubjectAlternativeNameBuilder sanBuilder = new();
        sanBuilder.AddDnsName("localhost");
        using var ec = ECDsa.Create(ECCurve.NamedCurves.nistP256);
        CertificateRequest req = new("CN=localhost", ec, HashAlgorithmName.SHA256);
        // Adds purpose
        req.CertificateExtensions.Add(new X509EnhancedKeyUsageExtension(new OidCollection
        {
            new("1.3.6.1.5.5.7.3.1") // serverAuth

        }, false));
        // Adds usage
        req.CertificateExtensions.Add(new X509KeyUsageExtension(X509KeyUsageFlags.DigitalSignature, false));
        // Adds subject alternate names
        req.CertificateExtensions.Add(sanBuilder.Build());
        // Sign
        using var crt = req.CreateSelfSigned(now, now.AddDays(14)); // 14 days is the max duration of a certificate for this
        cert = new(crt.Export(X509ContentType.Pfx));

        // Save
        store.Add(cert);
    }
    store.Close();

    var hash = SHA256.HashData(cert.RawData);
    var certStr = Convert.ToBase64String(hash);
    //Console.WriteLine($"\n\n\n\n\nCertificate: {certStr}\n\n\n\n"); // <-- you will need to put this output into the JS API call to allow the connection
    return cert;
}
阻塞线程,直到接收到一个 Quic 连接,一个 QuicListener 可以接收多个 连接。
var connection = await listener.AcceptConnectionAsync();

Console.WriteLine($"Client [{connection.RemoteEndPoint}]: connected");
接收一个入站的 Quic 流, 一个 QuicConnection 可以支持多个流。
var stream = await connection.AcceptInboundStreamAsync();

Console.WriteLine($"Stream [{stream.Id}]: created");
接下来,使用 System.IO.Pipeline 处理流数据,读取行数据,并回复一个 ack 消息。
Console.WriteLine();

await ProcessLinesAsync(stream);

Console.ReadKey();

// 处理流数据
async Task ProcessLinesAsync(QuicStream stream)
{
    var reader = PipeReader.Create(stream);
    var writer = PipeWriter.Create(stream);

    while (true)
    {
        ReadResult result = await reader.ReadAsync();
        ReadOnlySequence<byte> buffer = result.Buffer;

        while (TryReadLine(ref buffer, out ReadOnlySequence<byte> line))
        {
            // 读取行数据
            ProcessLine(line);

            // 写入 ACK 消息
            await writer.WriteAsync(Encoding.UTF8.GetBytes($"Ack: {DateTime.Now.ToString("HH:mm:ss")} \n"));
        }

        reader.AdvanceTo(buffer.Start, buffer.End);

        if (result.IsCompleted)
        {
            break;
        }
    }

    Console.WriteLine($"Stream [{stream.Id}]: completed");

    await reader.CompleteAsync();
    await writer.CompleteAsync();
}

bool TryReadLine(ref ReadOnlySequence<byte> buffer, out ReadOnlySequence<byte> line)
{
    SequencePosition? position = buffer.PositionOf((byte)'\n');

    if (position == null)
    {
        line = default;
        return false;
    }

    line = buffer.Slice(0, position.Value);
    buffer = buffer.Slice(buffer.GetPosition(1, position.Value));
    return true;
}

void ProcessLine(in ReadOnlySequence<byte> buffer)
{
    foreach (var segment in buffer)
    {
        Console.WriteLine("Recevied -> " + System.Text.Encoding.UTF8.GetString(segment.Span));
    }

    Console.WriteLine();
}
以上就是服务端的完整代码了。
接下来我们看一下客户端 QuicClient 的代码。
直接使用 QuicConnection.ConnectAsync 连接到服务端。
Console.WriteLine("Quic Client Running...");

await Task.Delay(3000);

// 连接到服务端
var connection = await QuicConnection.ConnectAsync(new QuicClientConnectionOptions
{
    DefaultCloseErrorCode = 0,
    DefaultStreamErrorCode = 0,
    RemoteEndPoint = new IPEndPoint(IPAddress.Loopback, 9999),
    ClientAuthenticationOptions = new SslClientAuthenticationOptions
    {
        ApplicationProtocols = new List<SslApplicationProtocol> { SslApplicationProtocol.Http3 },
        RemoteCertificateValidationCallback = (sender, certificate, chain, errors) =>
        {
            return true;
        }
    }
});
创建一个出站的双向流。
// 打开一个出站的双向流
var stream = await connection.OpenOutboundStreamAsync(QuicStreamType.Bidirectional);

var reader = PipeReader.Create(stream);
var writer = PipeWriter.Create(stream);
后台读取流数据,然后循环写入数据。
// 后台读取流数据
_ = ProcessLinesAsync(stream);

Console.WriteLine();

// 写入数据
for (int i = 0; i < 7; i++)
{
    await Task.Delay(2000);

    var message = $"Hello Quic {i} \n";

    Console.Write("Send -> " + message);

    await writer.WriteAsync(Encoding.UTF8.GetBytes(message));
}

await writer.CompleteAsync();

Console.ReadKey();
ProcessLinesAsync 和服务端一样,使用 System.IO.Pipeline 读取流数据。
async Task ProcessLinesAsync(QuicStream stream)
{
    while (true)
    {
        ReadResult result = await reader.ReadAsync();
        ReadOnlySequence<byte> buffer = result.Buffer;

        while (TryReadLine(ref buffer, out ReadOnlySequence<byte> line))
        {
            // 处理行数据
            ProcessLine(line);
        }

        reader.AdvanceTo(buffer.Start, buffer.End);

        if (result.IsCompleted)
        {
            break;
        }
    }

    await reader.CompleteAsync();
    await writer.CompleteAsync();

}

bool TryReadLine(ref ReadOnlySequence<byte> buffer, out ReadOnlySequence<byte> line)
{
    SequencePosition? position = buffer.PositionOf((byte)'\n');

    if (position == null)
    {
        line = default;
        return false;
    }

    line = buffer.Slice(0, position.Value);
    buffer = buffer.Slice(buffer.GetPosition(1, position.Value));
    return true;
}

void ProcessLine(in ReadOnlySequence<byte> buffer)
{
    foreach (var segment in buffer)
    {
        Console.Write("Recevied -> " + System.Text.Encoding.UTF8.GetString(segment.Span));
        Console.WriteLine();
    }

    Console.WriteLine();
}
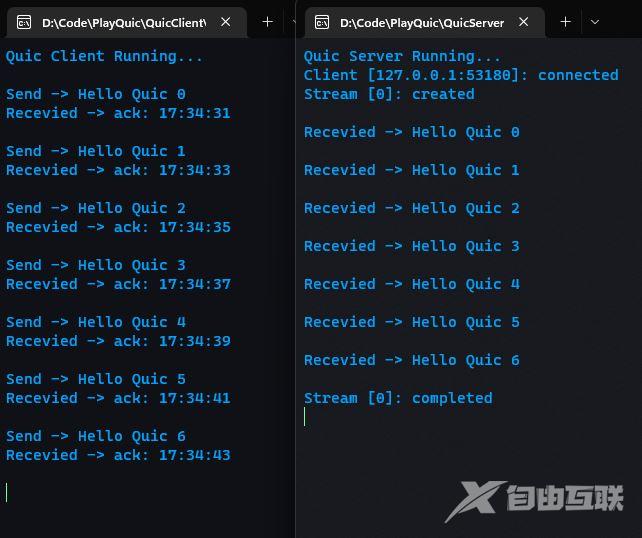
到这里,客户端和服务端的代码都完成了,客户端使用 Quic 流发送了一些消息给服务端,服务端收到消息后在控制台输出,并回复一个 Ack 消息,因为我们创建了一个双向流。
程序的运行结果如下

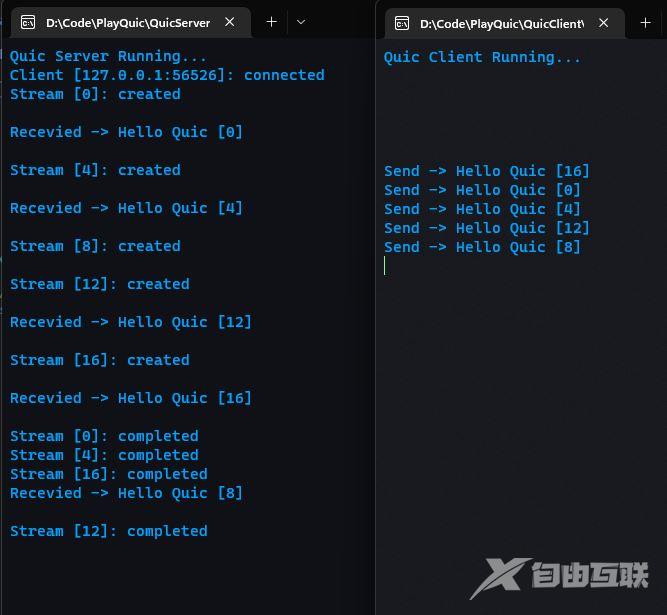
我们上面说到了一个 QuicConnection 可以创建多个流,并行传输数据。
改造一下服务端的代码,支持接收多个 Quic 流。
var cts = new CancellationTokenSource();

while (!cts.IsCancellationRequested)
{
    var stream = await connection.AcceptInboundStreamAsync();

    Console.WriteLine($"Stream [{stream.Id}]: created");

    Console.WriteLine();

    _ = ProcessLinesAsync(stream);
}

Console.ReadKey();
对于客户端,我们用多个线程创建多个 Quic 流,并同时发送消息。
默认情况下,一个 Quic 连接的流的限制是 100,当然你可以设置 QuicConnectionOptions 的 MaxInboundBidirectionalStreams 和 MaxInboundUnidirectionalStreams 参数。
for (int j = 0; j < 5; j++)
{
    _ = Task.Run(async () => {

        // 创建一个出站的双向流
        var stream = await connection.OpenOutboundStreamAsync(QuicStreamType.Bidirectional);

        var writer = PipeWriter.Create(stream);

        Console.WriteLine();

        await Task.Delay(2000);

        var message = $"Hello Quic [{stream.Id}] \n";

        Console.Write("Send -> " + message);

        await writer.WriteAsync(Encoding.UTF8.GetBytes(message));

        await writer.CompleteAsync();
    });
}
最终程序的输出如下

完整的代码可以在下面的 github 地址找到,希望对您有用!
https://github.com/SpringLeee/PlayQuic
到此这篇关于基于 .NET 7 的 QUIC 实现 Echo 服务的文章就介绍到这了,更多相关.NET 7 实现 Echo 服务内容请搜索自由互联以前的文章或继续浏览下面的相关文章希望大家以后多多支持自由互联!
