一、简单介绍
CAPropertyAnimation的子类
属性解析:
fromValue:keyPath相应属性的初始值
toValue:keyPath相应属性的结束值
随着动画的进行,在长度为duration的持续时间内,keyPath相应属性的值从fromValue渐渐地变为toValue
如果fillMode=kCAFillModeForwards和removedOnComletion=NO,那么在动画执行完毕后,图层会保持显示动画执行后的状态。但在实质上,图层的属性值还是动画执行前的初始值,并没有真正被改变。
比如,CALayer的position初始值为(0,0),CABasicAnimation的fromValue为(10,10),toValue为(100,100),虽然动画执行完毕后图层保持在(100,100)这个位置,实质上图层的position还是为(0,0)
二、平移动画
代码示例:
复制代码 代码如下:
//
// YYViewController.m
// 07-核心动画(基础动画)
//
// Created by apple on 14-6-21.
// Copyright (c) 2014年 itcase. All rights reserved.
//
#import "YYViewController.h"
@interface YYViewController ()
@property(nonatomic,strong)CALayer *myLayer;
@end
复制代码 代码如下:
@implementation YYViewController
- (void)viewDidLoad
{
[super viewDidLoad];
//创建layer
CALayer *myLayer=[CALayer layer];
//设置layer的属性
myLayer.bounds=CGRectMake(0, 0, 50, 80);
myLayer.backgroundColor=[UIColor yellowColor].CGColor;
myLayer.position=CGPointMake(50, 50);
myLayer.anchorPoint=CGPointMake(0, 0);
myLayer.cornerRadius=20;
//添加layer
[self.view.layer addSublayer:myLayer];
self.myLayer=myLayer;
}
//设置动画(基础动画)
-(void)touchesBegan:(NSSet *)touches withEvent:(UIEvent *)event
{
//1.创建核心动画
// CABasicAnimation *anima=[CABasicAnimation animationWithKeyPath:<#(NSString *)#>]
CABasicAnimation *anima=[CABasicAnimation animation];
//1.1告诉系统要执行什么样的动画
anima.keyPath=@"position";
//设置通过动画,将layer从哪儿移动到哪儿
anima.fromValue=[NSValue valueWithCGPoint:CGPointMake(0, 0)];
anima.toValue=[NSValue valueWithCGPoint:CGPointMake(200, 300)];
//1.2设置动画执行完毕之后不删除动画
anima.removedOnCompletion=NO;
//1.3设置保存动画的最新状态
anima.fillMode=kCAFillModeForwards;
//2.添加核心动画到layer
[self.myLayer addAnimation:anima forKey:nil];
}
@end
代码说明:
第42行设置的keyPath是@"position",说明要修改的是CALayer的position属性,也就是会执行平移动画
第44,45行,这里的属性接收的时id类型的参数,因此并不能直接使用CGPoint这种结构体类型,而是要先包装成NSValue对象后再使用。
默认情况下,动画执行完毕后,动画会自动从CALayer上移除,CALayer又会回到原来的状态。为了保持动画执行后的状态,可以加入第48,50行代码
byValue和toValue的区别,前者是在当前的位置上增加多少,后者是到指定的位置。
执行效果:
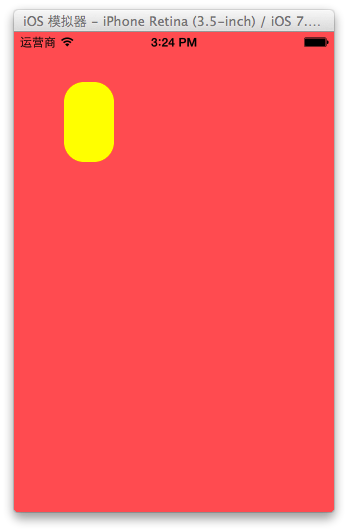
设置代理:设置动画的代理,可以监听动画的执行过程,这里设置控制器为代理。
代码示例:
复制代码 代码如下:
#import "YYViewController.h"
@interface YYViewController ()
@property(nonatomic,strong)CALayer *myLayer;
@end
@implementation YYViewController
- (void)viewDidLoad
{
[super viewDidLoad];
//创建layer
CALayer *myLayer=[CALayer layer];
//设置layer的属性
myLayer.bounds=CGRectMake(0, 0, 50, 80);
myLayer.backgroundColor=[UIColor yellowColor].CGColor;
myLayer.position=CGPointMake(50, 50);
myLayer.anchorPoint=CGPointMake(0, 0);
myLayer.cornerRadius=20;
//添加layer
[self.view.layer addSublayer:myLayer];
self.myLayer=myLayer;
}
//设置动画(基础动画)
-(void)touchesBegan:(NSSet *)touches withEvent:(UIEvent *)event
{
//1.创建核心动画
// CABasicAnimation *anima=[CABasicAnimation animationWithKeyPath:<#(NSString *)#>]
CABasicAnimation *anima=[CABasicAnimation animation];
//1.1告诉系统要执行什么样的动画
anima.keyPath=@"position";
//设置通过动画,将layer从哪儿移动到哪儿
anima.fromValue=[NSValue valueWithCGPoint:CGPointMake(0, 0)];
anima.toValue=[NSValue valueWithCGPoint:CGPointMake(200, 300)];
//1.2设置动画执行完毕之后不删除动画
anima.removedOnCompletion=NO;
//1.3设置保存动画的最新状态
anima.fillMode=kCAFillModeForwards;
anima.delegate=self;
//打印
NSString *str=NSStringFromCGPoint(self.myLayer.position);
NSLog(@"执行前:%@",str);
//2.添加核心动画到layer
[self.myLayer addAnimation:anima forKey:nil];
}
-(void)animationDidStart:(CAAnimation *)anim
{
NSLog(@"开始执行动画");
}
-(void)animationDidStop:(CAAnimation *)anim finished:(BOOL)flag
{
//动画执行完毕,打印执行完毕后的position值
NSString *str=NSStringFromCGPoint(self.myLayer.position);
NSLog(@"执行后:%@",str);
}
@end
打印position的属性值,验证图层的属性值还是动画执行前的初始值{50,50},并没有真正被改变为{200,300}。

三、缩放动画
实现缩放动画的代码示例:
复制代码 代码如下:
//
// YYViewController.m
// 08-核心动画平移
//
// Created by apple on 14-6-21.
// Copyright (c) 2014年 itcase. All rights reserved.
//
#import "YYViewController.h"
@interface YYViewController ()
@property(nonatomic,strong)CALayer *myLayer;
@end
复制代码 代码如下:
@implementation YYViewController
- (void)viewDidLoad
{
[super viewDidLoad];
//创建layer
CALayer *myLayer=[CALayer layer];
//设置layer的属性
myLayer.bounds=CGRectMake(0, 0, 150, 60);
myLayer.backgroundColor=[UIColor yellowColor].CGColor;
myLayer.position=CGPointMake(50, 50);
myLayer.anchorPoint=CGPointMake(0, 0);
myLayer.cornerRadius=40;
//添加layer
[self.view.layer addSublayer:myLayer];
self.myLayer=myLayer;
}
-(void)touchesBegan:(NSSet *)touches withEvent:(UIEvent *)event
{
//1.创建动画
CABasicAnimation *anima=[CABasicAnimation animationWithKeyPath:@"bounds"];
//1.1设置动画执行时间
anima.duration=2.0;
//1.2设置动画执行完毕后不删除动画
anima.removedOnCompletion=NO;
//1.3设置保存动画的最新状态
anima.fillMode=kCAFillModeForwards;
//1.4修改属性,执行动画
anima.toValue=[NSValue valueWithCGRect:CGRectMake(0, 0, 200, 200)];
//2.添加动画到layer
[self.myLayer addAnimation:anima forKey:nil];
}
@end
实现效果:
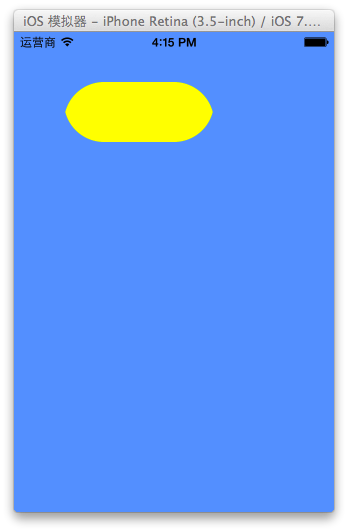
四、旋转动画
代码示例:
复制代码 代码如下:
//
// YYViewController.m
// 09-核心动画旋转
//
// Created by apple on 14-6-21.
// Copyright (c) 2014年 itcase. All rights reserved.
//
#import "YYViewController.h"
@interface YYViewController ()
@property(nonatomic,strong)CALayer *myLayer;
@end
复制代码 代码如下:
@implementation YYViewController
- (void)viewDidLoad
{
[super viewDidLoad];
//创建layer
CALayer *myLayer=[CALayer layer];
//设置layer的属性
myLayer.bounds=CGRectMake(0, 0, 150, 60);
myLayer.backgroundColor=[UIColor yellowColor].CGColor;
myLayer.position=CGPointMake(50, 50);
myLayer.anchorPoint=CGPointMake(0, 0);
myLayer.cornerRadius=40;
//添加layer
[self.view.layer addSublayer:myLayer];
self.myLayer=myLayer;
}
-(void)touchesBegan:(NSSet *)touches withEvent:(UIEvent *)event
{
//1.创建动画
CABasicAnimation *anima=[CABasicAnimation animationWithKeyPath:@"transform"];
//1.1设置动画执行时间
anima.duration=2.0;
//1.2修改属性,执行动画
anima.toValue=[NSValue valueWithCATransform3D:CATransform3DMakeRotation(M_PI_2+M_PI_4, 1, 1, 0)];
//1.3设置动画执行完毕后不删除动画
anima.removedOnCompletion=NO;
//1.4设置保存动画的最新状态
anima.fillMode=kCAFillModeForwards;
//2.添加动画到layer
[self.myLayer addAnimation:anima forKey:nil];
}
@end
实现效果:
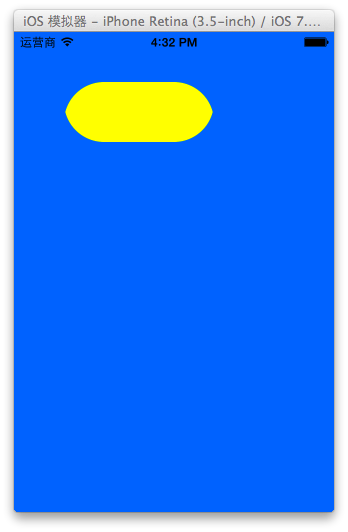
补充:
可以通过transform(KVC)的方式来进行设置。
代码示例(平移):
复制代码 代码如下:
#import "YYViewController.h"
@interface YYViewController ()
@property(nonatomic,strong)CALayer *myLayer;
@end
复制代码 代码如下:
@implementation YYViewController
- (void)viewDidLoad
{
[super viewDidLoad];
//创建layer
CALayer *myLayer=[CALayer layer];
//设置layer的属性
myLayer.bounds=CGRectMake(0, 0, 150, 60);
myLayer.backgroundColor=[UIColor yellowColor].CGColor;
myLayer.position=CGPointMake(50, 50);
myLayer.anchorPoint=CGPointMake(0, 0);
myLayer.cornerRadius=40;
//添加layer
[self.view.layer addSublayer:myLayer];
self.myLayer=myLayer;
}
-(void)touchesBegan:(NSSet *)touches withEvent:(UIEvent *)event
{
//1.创建动画
CABasicAnimation *anima=[CABasicAnimation animation];
anima.keyPath=@"transform";
//1.1设置动画执行时间
anima.duration=2.0;
//1.2修改属性,执行动画
anima.toValue=[NSValue valueWithCATransform3D:CATransform3DMakeTranslation(0, 100, 1)];
//1.3设置动画执行完毕后不删除动画
anima.removedOnCompletion=NO;
//1.4设置保存动画的最新状态
anima.fillMode=kCAFillModeForwards;
//2.添加动画到layer
[self.myLayer addAnimation:anima forKey:nil];
}
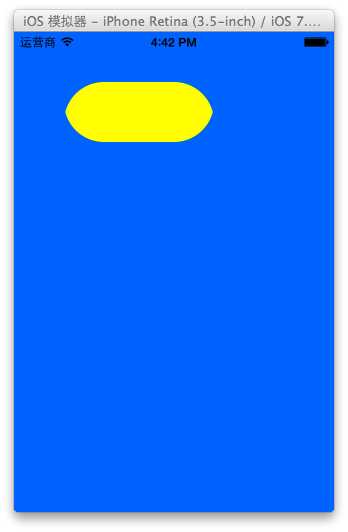
实现效果:
绘制的图形在y的方向上移动100个单位。
五、关键帧动画
1.简单介绍
是CApropertyAnimation的子类,跟CABasicAnimation的区别是:CABasicAnimation只能从一个数值(fromValue)变到另一个数值(toValue),而CAKeyframeAnimation会使用一个NSArray保存这些数值
属性解析:
values:就是上述的NSArray对象。里面的元素称为”关键帧”(keyframe)。动画对象会在指定的时间(duration)内,依次显示values数组中的每一个关键帧
path:可以设置一个CGPathRef\CGMutablePathRef,让层跟着路径移动。path只对CALayer的anchorPoint和position起作用。如果你设置了path,那么values将被忽略
keyTimes:可以为对应的关键帧指定对应的时间点,其取值范围为0到1.0,keyTimes中的每一个时间值都对应values中的每一帧.当keyTimes没有设置的时候,各个关键帧的时间是平分的
说明:CABasicAnimation可看做是最多只有2个关键帧的CAKeyframeAnimation
2.代码示例
第一种方式:
代码:
复制代码 代码如下:
//
// YYViewController.m
// 10-核心动画(关键帧动画1)
//
// Created by apple on 14-6-21.
// Copyright (c) 2014年 itcase. All rights reserved.
//
#import "YYViewController.h"
@interface YYViewController ()
@property (weak, nonatomic) IBOutlet UIView *customView;
@end
复制代码 代码如下:
@implementation YYViewController
-(void)touchesBegan:(NSSet *)touches withEvent:(UIEvent *)event
{
//1.创建核心动画
CAKeyframeAnimation *keyAnima=[CAKeyframeAnimation animation];
//平移
keyAnima.keyPath=@"position";
//1.1告诉系统要执行什么动画
NSValue *value1=[NSValue valueWithCGPoint:CGPointMake(100, 100)];
NSValue *value2=[NSValue valueWithCGPoint:CGPointMake(200, 100)];
NSValue *value3=[NSValue valueWithCGPoint:CGPointMake(200, 200)];
NSValue *value4=[NSValue valueWithCGPoint:CGPointMake(100, 200)];
NSValue *value5=[NSValue valueWithCGPoint:CGPointMake(100, 100)];
keyAnima.values=@[value1,value2,value3,value4,value5];
//1.2设置动画执行完毕后,不删除动画
keyAnima.removedOnCompletion=NO;
//1.3设置保存动画的最新状态
keyAnima.fillMode=kCAFillModeForwards;
//1.4设置动画执行的时间
keyAnima.duration=4.0;
//1.5设置动画的节奏
keyAnima.timingFunction=[CAMediaTimingFunction functionWithName:kCAMediaTimingFunctionEaseInEaseOut];
//设置代理,开始—结束
keyAnima.delegate=self;
//2.添加核心动画
[self.customView.layer addAnimation:keyAnima forKey:nil];
}
-(void)animationDidStart:(CAAnimation *)anim
{
NSLog(@"开始动画");
}
-(void)animationDidStop:(CAAnimation *)anim finished:(BOOL)flag
{
NSLog(@"结束动画");
}
@end
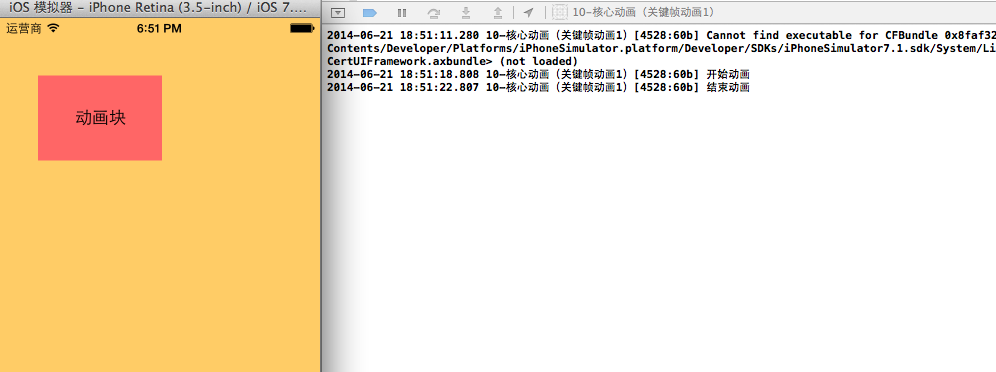
说明:这个项目在storyboard中拖入了一个view,并和控制器中的custom进行了关联。
效果和打印结果:
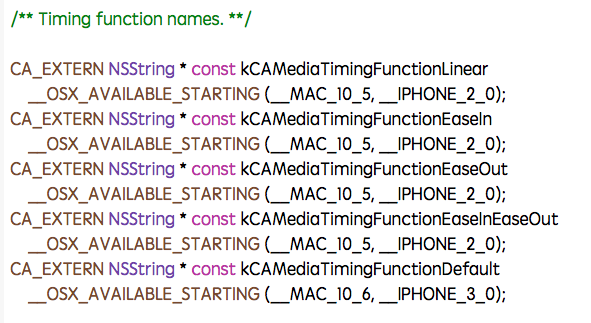
补充:设置动画的节奏
第二种方式(使用path)让layer在指定的路径上移动(画圆):
代码:
复制代码 代码如下:
#import "YYViewController.h"
@interface YYViewController ()
@property (weak, nonatomic) IBOutlet UIView *customView;
@end
复制代码 代码如下:
@implementation YYViewController
-(void)touchesBegan:(NSSet *)touches withEvent:(UIEvent *)event
{
//1.创建核心动画
CAKeyframeAnimation *keyAnima=[CAKeyframeAnimation animation];
//平移
keyAnima.keyPath=@"position";
//1.1告诉系统要执行什么动画
//创建一条路径
CGMutablePathRef path=CGPathCreateMutable();
//设置一个圆的路径
CGPathAddEllipseInRect(path, NULL, CGRectMake(150, 100, 100, 100));
keyAnima.path=path;
//有create就一定要有release
CGPathRelease(path);
//1.2设置动画执行完毕后,不删除动画
keyAnima.removedOnCompletion=NO;
//1.3设置保存动画的最新状态
keyAnima.fillMode=kCAFillModeForwards;
//1.4设置动画执行的时间
keyAnima.duration=5.0;
//1.5设置动画的节奏
keyAnima.timingFunction=[CAMediaTimingFunction functionWithName:kCAMediaTimingFunctionEaseInEaseOut];
//设置代理,开始—结束
keyAnima.delegate=self;
//2.添加核心动画
[self.customView.layer addAnimation:keyAnima forKey:nil];
}
-(void)animationDidStart:(CAAnimation *)anim
{
NSLog(@"开始动画");
}
-(void)animationDidStop:(CAAnimation *)anim finished:(BOOL)flag
{
NSLog(@"结束动画");
}
@end
说明:可以通过path属性,让layer在指定的轨迹上运动。
停止动画:
复制代码 代码如下:
#import "YYViewController.h"
@interface YYViewController ()
@property (weak, nonatomic) IBOutlet UIView *customView;
- (IBAction)stopOnClick:(UIButton *)sender;
@end
复制代码 代码如下:
@implementation YYViewController
-(void)touchesBegan:(NSSet *)touches withEvent:(UIEvent *)event
{
//1.创建核心动画
CAKeyframeAnimation *keyAnima=[CAKeyframeAnimation animation];
//平移
keyAnima.keyPath=@"position";
//1.1告诉系统要执行什么动画
//创建一条路径
CGMutablePathRef path=CGPathCreateMutable();
//设置一个圆的路径
CGPathAddEllipseInRect(path, NULL, CGRectMake(150, 100, 100, 100));
keyAnima.path=path;
//有create就一定要有release
CGPathRelease(path);
//1.2设置动画执行完毕后,不删除动画
keyAnima.removedOnCompletion=NO;
//1.3设置保存动画的最新状态
keyAnima.fillMode=kCAFillModeForwards;
//1.4设置动画执行的时间
keyAnima.duration=5.0;
//1.5设置动画的节奏
keyAnima.timingFunction=[CAMediaTimingFunction functionWithName:kCAMediaTimingFunctionEaseInEaseOut];
//2.添加核心动画
[self.customView.layer addAnimation:keyAnima forKey:@"wendingding"];
}
- (IBAction)stopOnClick:(UIButton *)sender {
//停止self.customView.layer上名称标示为wendingding的动画
[self.customView.layer removeAnimationForKey:@"wendingding"];
}
@end
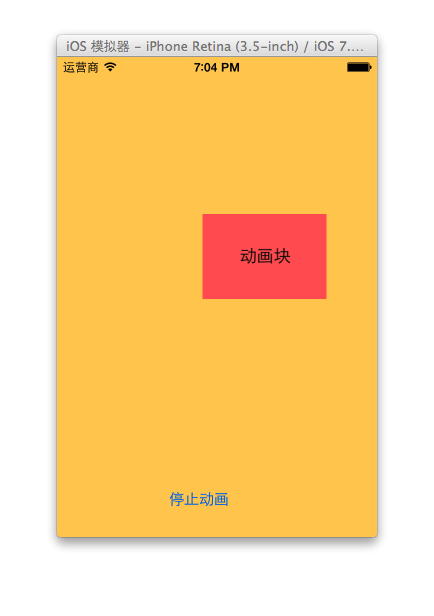
点击停止动画,程序内部会调用 [self.customView.layer removeAnimationForKey:@"wendingding"];停止self.customView.layer上名称标示为wendingding的动画。
3.图标抖动
代码示例:
复制代码 代码如下:
//
// YYViewController.m
// 12-图标抖动
//
// Created by apple on 14-6-21.
// Copyright (c) 2014年 itcase. All rights reserved.
//
#import "YYViewController.h"
#define angle2Radian(angle) ((angle)/180.0*M_PI)
@interface YYViewController ()
@property (weak, nonatomic) IBOutlet UIImageView *iconView;
@end
复制代码 代码如下:
@implementation YYViewController
-(void)touchesBegan:(NSSet *)touches withEvent:(UIEvent *)event
{
//1.创建核心动画
CAKeyframeAnimation *keyAnima=[CAKeyframeAnimation animation];
keyAnima.keyPath=@"transform.rotation";
//设置动画时间
keyAnima.duration=0.1;
//设置图标抖动弧度
//把度数转换为弧度 度数/180*M_PI
keyAnima.values=@[@(-angle2Radian(4)),@(angle2Radian(4)),@(-angle2Radian(4))];
//设置动画的重复次数(设置为最大值)
keyAnima.repeatCount=MAXFLOAT;
keyAnima.fillMode=kCAFillModeForwards;
keyAnima.removedOnCompletion=NO;
//2.添加动画
[self.iconView.layer addAnimation:keyAnima forKey:nil];
}
@end
说明:图标向左向右偏转一个弧度(4),产生抖动的视觉效果。
程序界面:
