基本配置、测试 1、导入依赖 dependency groupIdorg.springframework.boot/groupId artifactIdspring-boot-starter-freemarker/artifactId/dependency 2、准备一个Freemarker模板(.ftl) 3、注入Configuration对象(freemarker.tem
基本配置、测试
1、导入依赖
<dependency>
  <groupId>org.springframework.boot</groupId>
  <artifactId>spring-boot-starter-freemarker</artifactId>
</dependency>
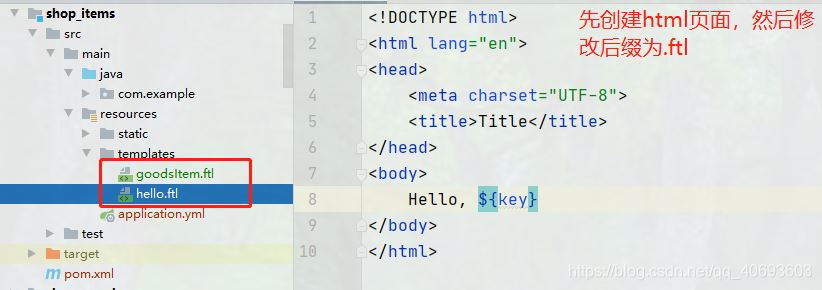
2、准备一个Freemarker模板(.ftl)
3、注入Configuration对象(freemarker.template包下)

4、生成商品详情模板
@Controller
@RequestMapping("/goodItem")
public class GoodItemController {
  @Reference
  private IGoodsService goodsService;

  @Autowired
  private Configuration configuration;

  @RequestMapping("/createHtml")
  @ResponseBody
  public String createHtml(int gid, HttpServletRequest request){
    //通过商品id获取商品详情信息
    Goods goods = goodsService.queryById(gid);
    String [] images=goods.getGimage().split("\\|");
    //通过模板生成商品静态页面
    try {
      //获取商品详情的模板对象
      Template template = configuration.getTemplate("goodsItem.ftl");
      //准备商品数据
      Map<String,Object> map=new HashMap<>();
      map.put("goods",goods);
      map.put("context",request.getContextPath());
      //freemarker页面没有分割功能,所以通过后台将图片分割后,将图片数组传到后台
      map.put("images",images);
      //生成静态页
      //获得classpath路径
      //静态页面的名称必须和商品有所关联,最简单的方式就是用商品的id作为页面的名字
      String path = this.getClass().getResource("/static/page/").getPath()+goods.getId()+".html";;
      template.process(map,new FileWriter(path));
    } catch (Exception e) {
      e.printStackTrace();
    }
    return "";
  }
}
注意:
1、freemarker页面不能通过<base th:href="${#request.getContextPath()+'/'}" rel="external nofollow" >获得项目的根路径。
因此可从后台将根路径传到前端,然后通过<base href="${context}/" rel="external nofollow" />获取。
2、当page是一个空文件夹的时候,会报错。这是因为maven项目不会对空文件夹进行打包编译。
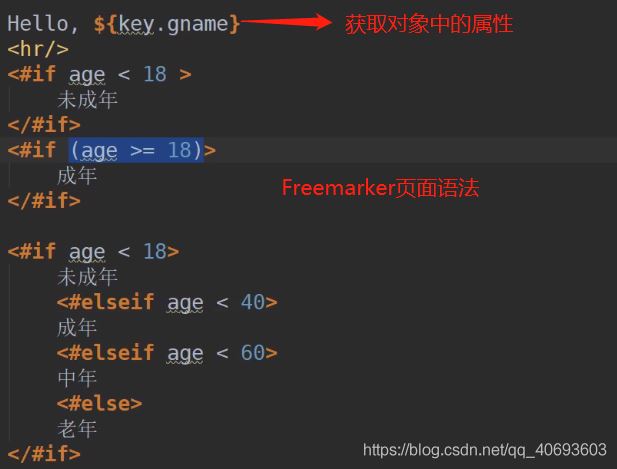
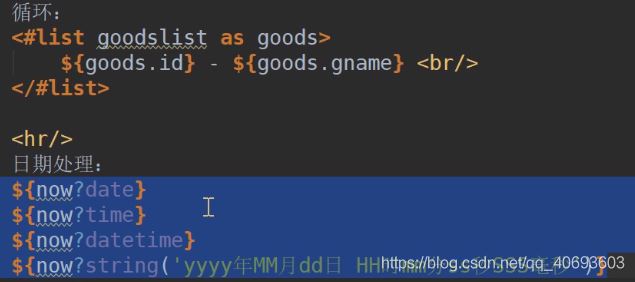
FreeMarker的基本语法
到此这篇关于Springboot整合Freemarker的实现详细过程的文章就介绍到这了,更多相关Springboot整合Freemarker内容请搜索易盾网络以前的文章或继续浏览下面的相关文章希望大家以后多多支持易盾网络!