一 后端服务器使用过滤器 新建过滤器: /** * 解决跨域 */public class AccessControlAllowOriginFilter implements Filter { @Override public void init(FilterConfig filterConfig) throws ServletException { } @Override public void
一 后端服务器使用过滤器
新建过滤器:
/**
 * 解决跨域
 */
public class AccessControlAllowOriginFilter implements Filter {
  @Override
  public void init(FilterConfig filterConfig) throws ServletException { }

  @Override
  public void doFilter(ServletRequest servletRequest, ServletResponse servletResponse, FilterChain filterChain) throws IOException, ServletException {
    System.out.println("解决跨域请求");
    HttpServletResponse response = (HttpServletResponse) servletResponse;
    response.setHeader("Access-Control-Allow-Origin", "*");//允许所有网站跨域访问
    response.setHeader("Access-Control-Allow-Methods", "POST, GET, OPTIONS, DELETE");
    response.setHeader("Access-Control-Allow-Credentials", "true");    //这里如果前端请求header首字母是小写也是不行得,所以大小写都写上就没问题了
    response.setHeader("Access-Control-Allow-Headers", "access-control-allow-origin,content-type,x-requested-with,Content-Type,Access-Control-Allow-Headers,Content-Length,Accept,Authorization,X-Requested-With");
    filterChain.doFilter(servletRequest, response);
  }

  @Override
  public void destroy() {}
}
前端header需要添加:
$.ajax( {
      url : 'http://c2.zhuzher.com/pdm/know/active?hotelid=808047&sdate=2019-11-09&edate=2019-11-11',
      beforeSend: function (xhr) {
          xhr.setRequestHeader("Access-Control-Allow-Origin", "*"); //设置跨域访问信息
          xhr.setRequestHeader("Content-Type", "application/json;charset=utf-8");
      },
      type : 'get',
      dataType : 'json',
      data:{},
      success : function(data) {
        alert(1111);
      }
    });
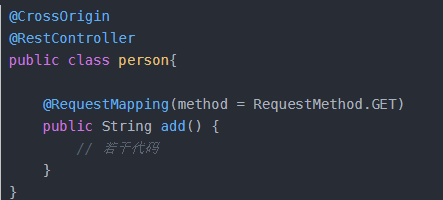
二 后端接口springboot/springmvc使用注解
springMVC的版本要在4.2或以上版本才支持@CrossOrigin ;
方法需要指明Get或者POST才行:
三 本地nginx反向代理(推荐)
本地下载解压nginx,添加一个server配置文件:
注意,如果是放在nginx的html目录下一般是不需要加跨域配置的,否则会报配置多余错误
每次可先直接使用试试,不行再加下面add_header等配置.
###start跨域支持配置####
  add_header Access-Control-Allow-Origin '*';
  add_header Access-Control-Allow-Headers Accept,Origin,X-Requested-With,Content-Type,If-Modified-Since,Last-Modified,Content-Length,Content-Range,Range,Content-Description,Content-Disposition;
  add_header Access-Control-Allow-Methods GET,POST,PUT,DELETE,OPTIONS;
  add_header Access-Control-Request-Headers Content-Disposition;
  add_header Access-Control-Allow-Credentials true;

  ###end ###

  server {
    listen    80;
    server_name 127.0.0.1;

    #charset koi8-r;

    #access_log logs/host.access.log main;

    location / {
      root  html;
      index index.html index.htm;
    }

    #自定义本地路径,代理转发请求
    location /pdm    {
      proxy_pass  http://c2.zhuzher.com/pdm;
    }

  }

  server {
    listen    8081;
    server_name 127.0.0.1;

    #charset koi8-r;

    #access_log logs/host.access.log main;

    location / {
      root  html;
      index index.html index.htm;
    }

    #自定义本地路径,代理转发请求
     location /pdm    {
      proxy_pass http://c2.zhuzher.com/pdm;
      charset utf-8;
      #  proxy_set_header Host $host;
      proxy_set_header X-Real-IP $remote_addr;
      proxy_set_header X-Forwarded-For $proxy_add_x_forwarded_for;
    }

  }
项目里面直接调用配置的8081端口就可以了:
api.get('//localhost:8081/pdm/user/login',data)
注意这里还有一点需要注意,如果Content-Type是 application/json的话是无法发送跨域请求的,这里提供一种解决办法,就是接口前端请求type改成
'Content-Type':'text/plain'
发送数据转成字符串:
JSON.stringify(data)
后端接口用String接受数据,然后再转成对象就可以了:
@PostMapping("/distributeBatch")
  public ResMsg distributeSaleBatch(@RequestBody String params){
    System.out.println(params);
    //Integer user_id, Integer customer_id
    //Gson 字符串转对象
    List<Map<String, Integer>> fromJson = new Gson().fromJson(params, new TypeToken<List<Map<String, Integer>>>() {
    }.getType());
    System.out.println(new Gson().toJson(fromJson));
    return registeredCustomerService.distributeSaleBatch(fromJson);
  }
以上就是本文的全部内容,希望对大家的学习有所帮助,也希望大家多多支持易盾网络。