在《Asp.Net Core: Swagger 与 Identity Server 4》一文中介绍了如何生成受保护的Web Api的Swagger文档,本文介绍使用PostMan Canary测试受Identity Server 4保护的Web Api。
首先搭建一下Identity Server 4的环境,并且创建一个测试用的Web Api和访问Web Api的客户端,这部分在系列文章《Identity Server 4 从入门到落地》中有详细的介绍。
Identity Server 4 Admin的代码和测试用Web Api和Client的代码可以从Github下载:
https://github.com/zhenl/IDS4Admin
https://github.com/zhenl/IDS4ClientDemo
这里只列出测试用Web Api项目appsettings.json中的配置项:
  "IdentityServer4Api": {
    "Authority": "http://host.docker.internal:4010",
    "CorsOrgins": [
      "http://host.docker.internal:5291"
    ],
    "Policies": [
      {
        "Name": "ApiScope",
        "RequireAuthenticatedUser": "true",
        "Claims": [
          {
            "ClaimType": "scope",
            "AllowValues": [ "testapi" ]
          }
        ]
      }
    ],
访问这个Web Api的测试用Web应用appsettings.json中相关配置项:
  "IdentityServer4Client": {
    "Authority": "http://host.docker.internal:4010",
    "ClientId": "testclient",
    "ClientSecret": "secret",
    "ResponseType": "code",
    "SaveTokens": "true",
    "RequireHttpsMetadata": "false",
    "Scopes": [ "openid", "profile", "testapi" ],
    "JsonKeys": []

  }
我们使用最新的PostMan Canary进行测试,下载地址https://www.postman.com/downloads/canary/。安装完成后,就可以访问Web Api了。
如果直接访问 Web Api,会提示401错误:

我们需要在PostMan中实现认证,才能访问受保护的Web Api。我们已经在认证中心设置了可以访问Web Api的Client,信息如下:
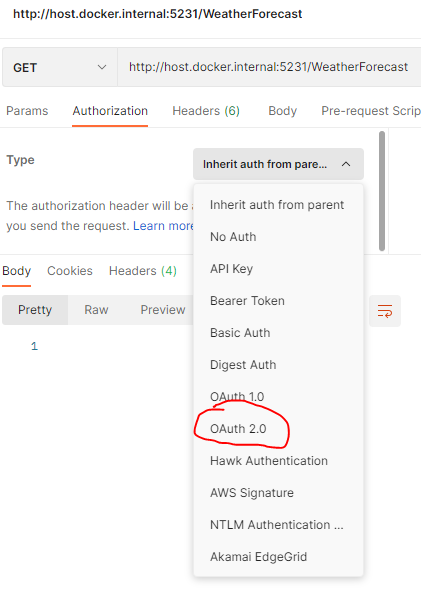
现在,在PostMan中进入Authorization分页:

选择认证类型为OAuth2.0:

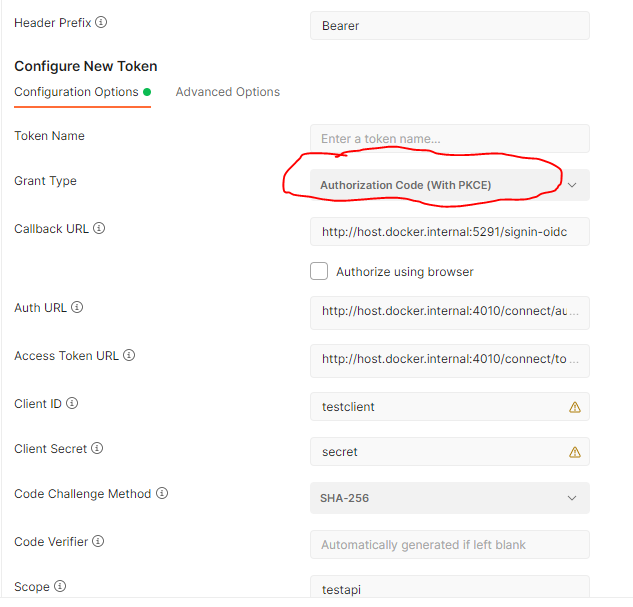
在右边出现认证需要的参数表单,其中Grant Type选择Authorization Code(With PKCE),说明我们使用OpenID Connect。其它参数参考已经配置的Client 参数。

还需要说明的是,认证的地址为:[认证服务地址]/connect/authorize,在这个例子中这个地址为http://host.docker.internal:4010/connect/authorize。获取Token的URL为[认证服务地址]/connect/token,在这个例子中地址为:http://host.docker.internal:4010/connect/token 。
参数填写完成后,点击Get Access Token按钮:

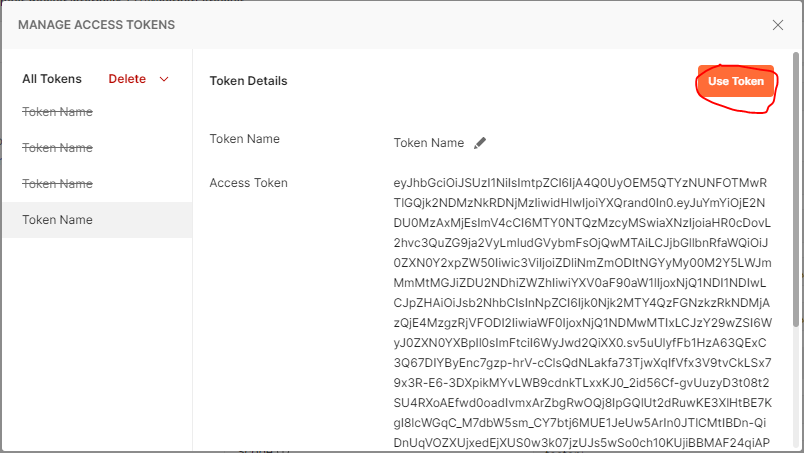
如果设置正确的话,会弹出认证页面,输入用户名,密码,认证完成后,PostMan关闭认证页面,并返回Access Token:

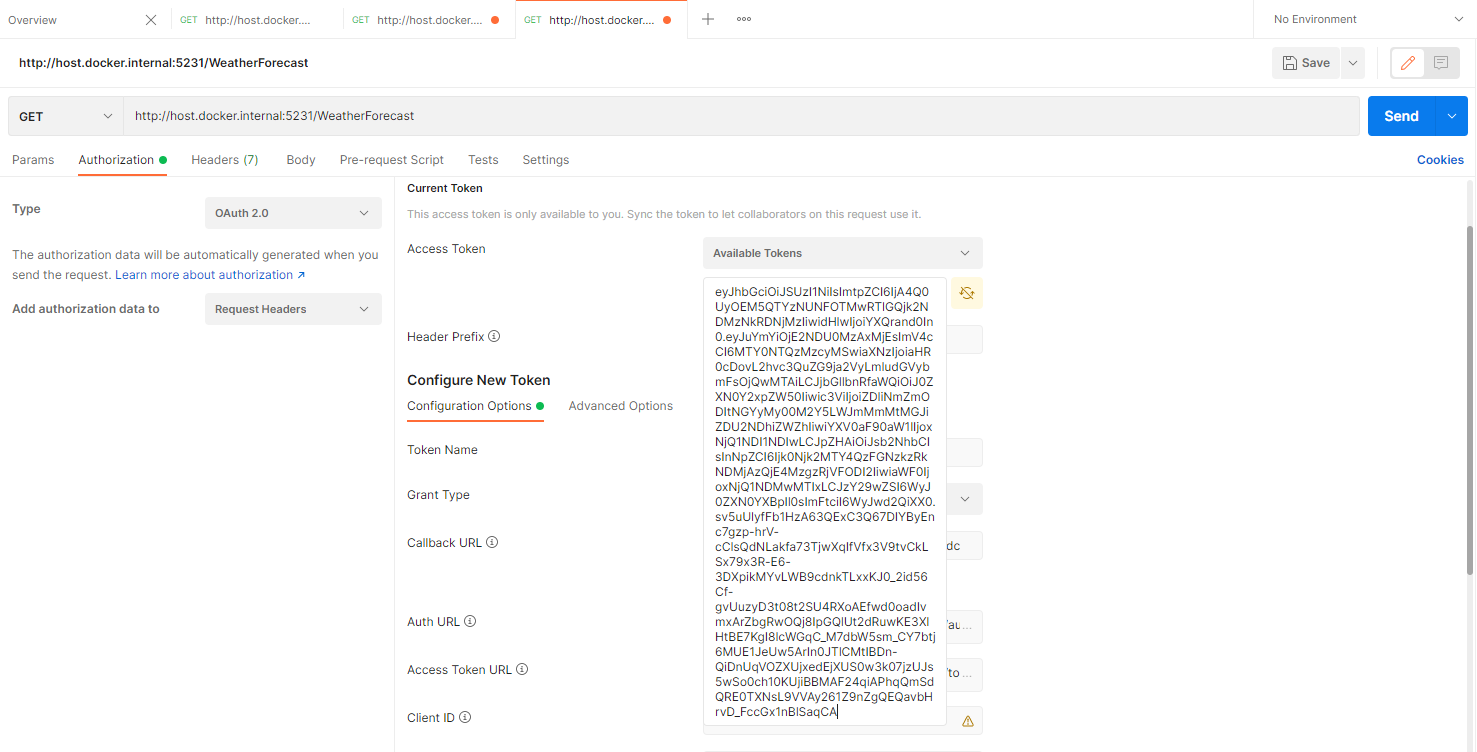
点击Use Token,Token被自动填写到访问页面:

这时再次按Send访问Web Api,可以正确地获取返回数据了:

