对于开发的API文档,我们可以通过Swagger等工具来自动生成了。但是对于数据库表结构的文档呢,在实际开发中在开发前我们一般会先设计好表结构,大家讨论一下, 这个时候就很需要
对于开发的API文档,我们可以通过Swagger等工具来自动生成了。但是对于数据库表结构的文档呢,在实际开发中在开发前我们一般会先设计好表结构,大家讨论一下,
这个时候就很需要有个数据库表结构的文档,如果常规操作就是一通无脑的 CV 大法,产出一份小几十页的 Word 文档,这样不仅容易出错,而且如果表结构变了还需修改
Word文档,非常不方便。
这里介绍并演示一个开源的 生成数据库表结构的文档 的工具,可以帮我们高效的自动 生成数据库表结构文档。
工具名称: screw。
开源地址: https://gitee.com/leshalv/screw。
有兴趣的朋友可以研究下源码,没兴趣就直接拿来用就好了。
一、 screw 简介
screw 是一个简洁好用的数据库表结构文档的生成工具 ,支持 MySQL、Oracle、PostgreSQL 等主流的关系数据库。
生成的文档有 HTML、Word、Markdown 三种格式 ,示例如下图所示:
1、Html演示效果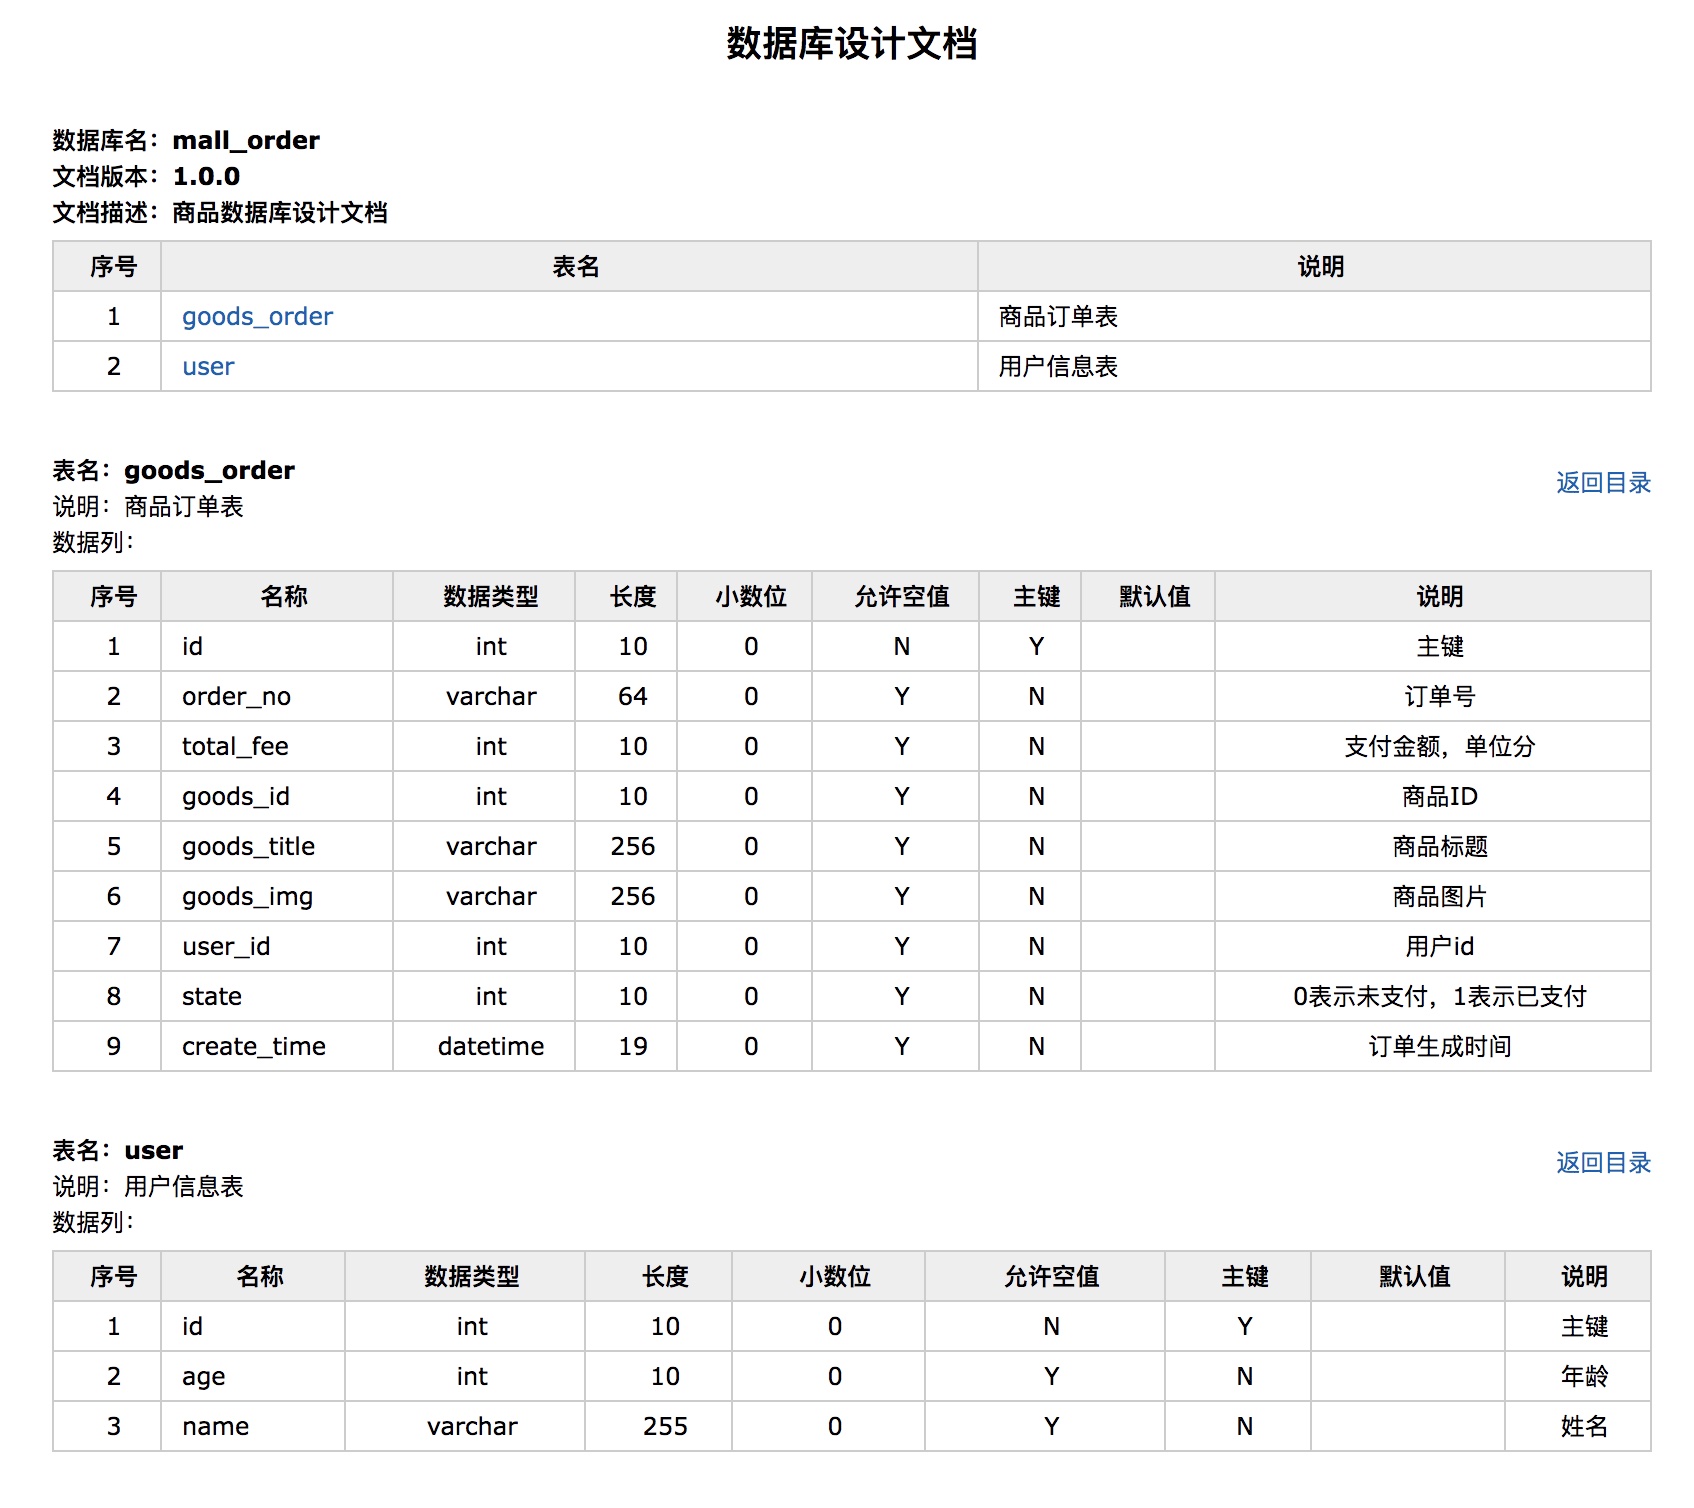 2、Word演示效果
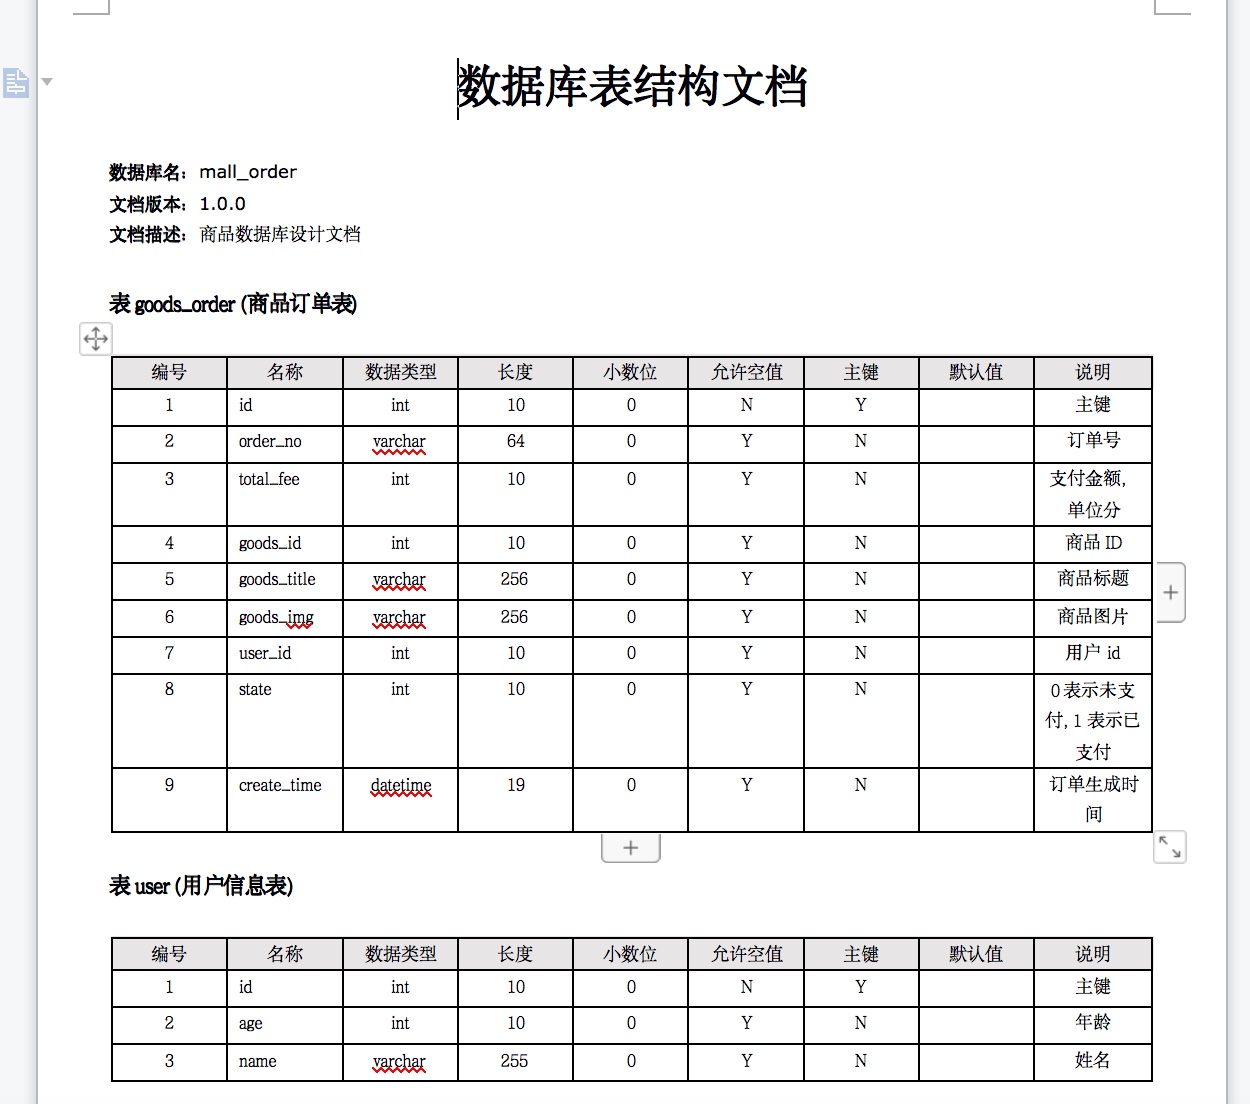 3、Markdown演示效果
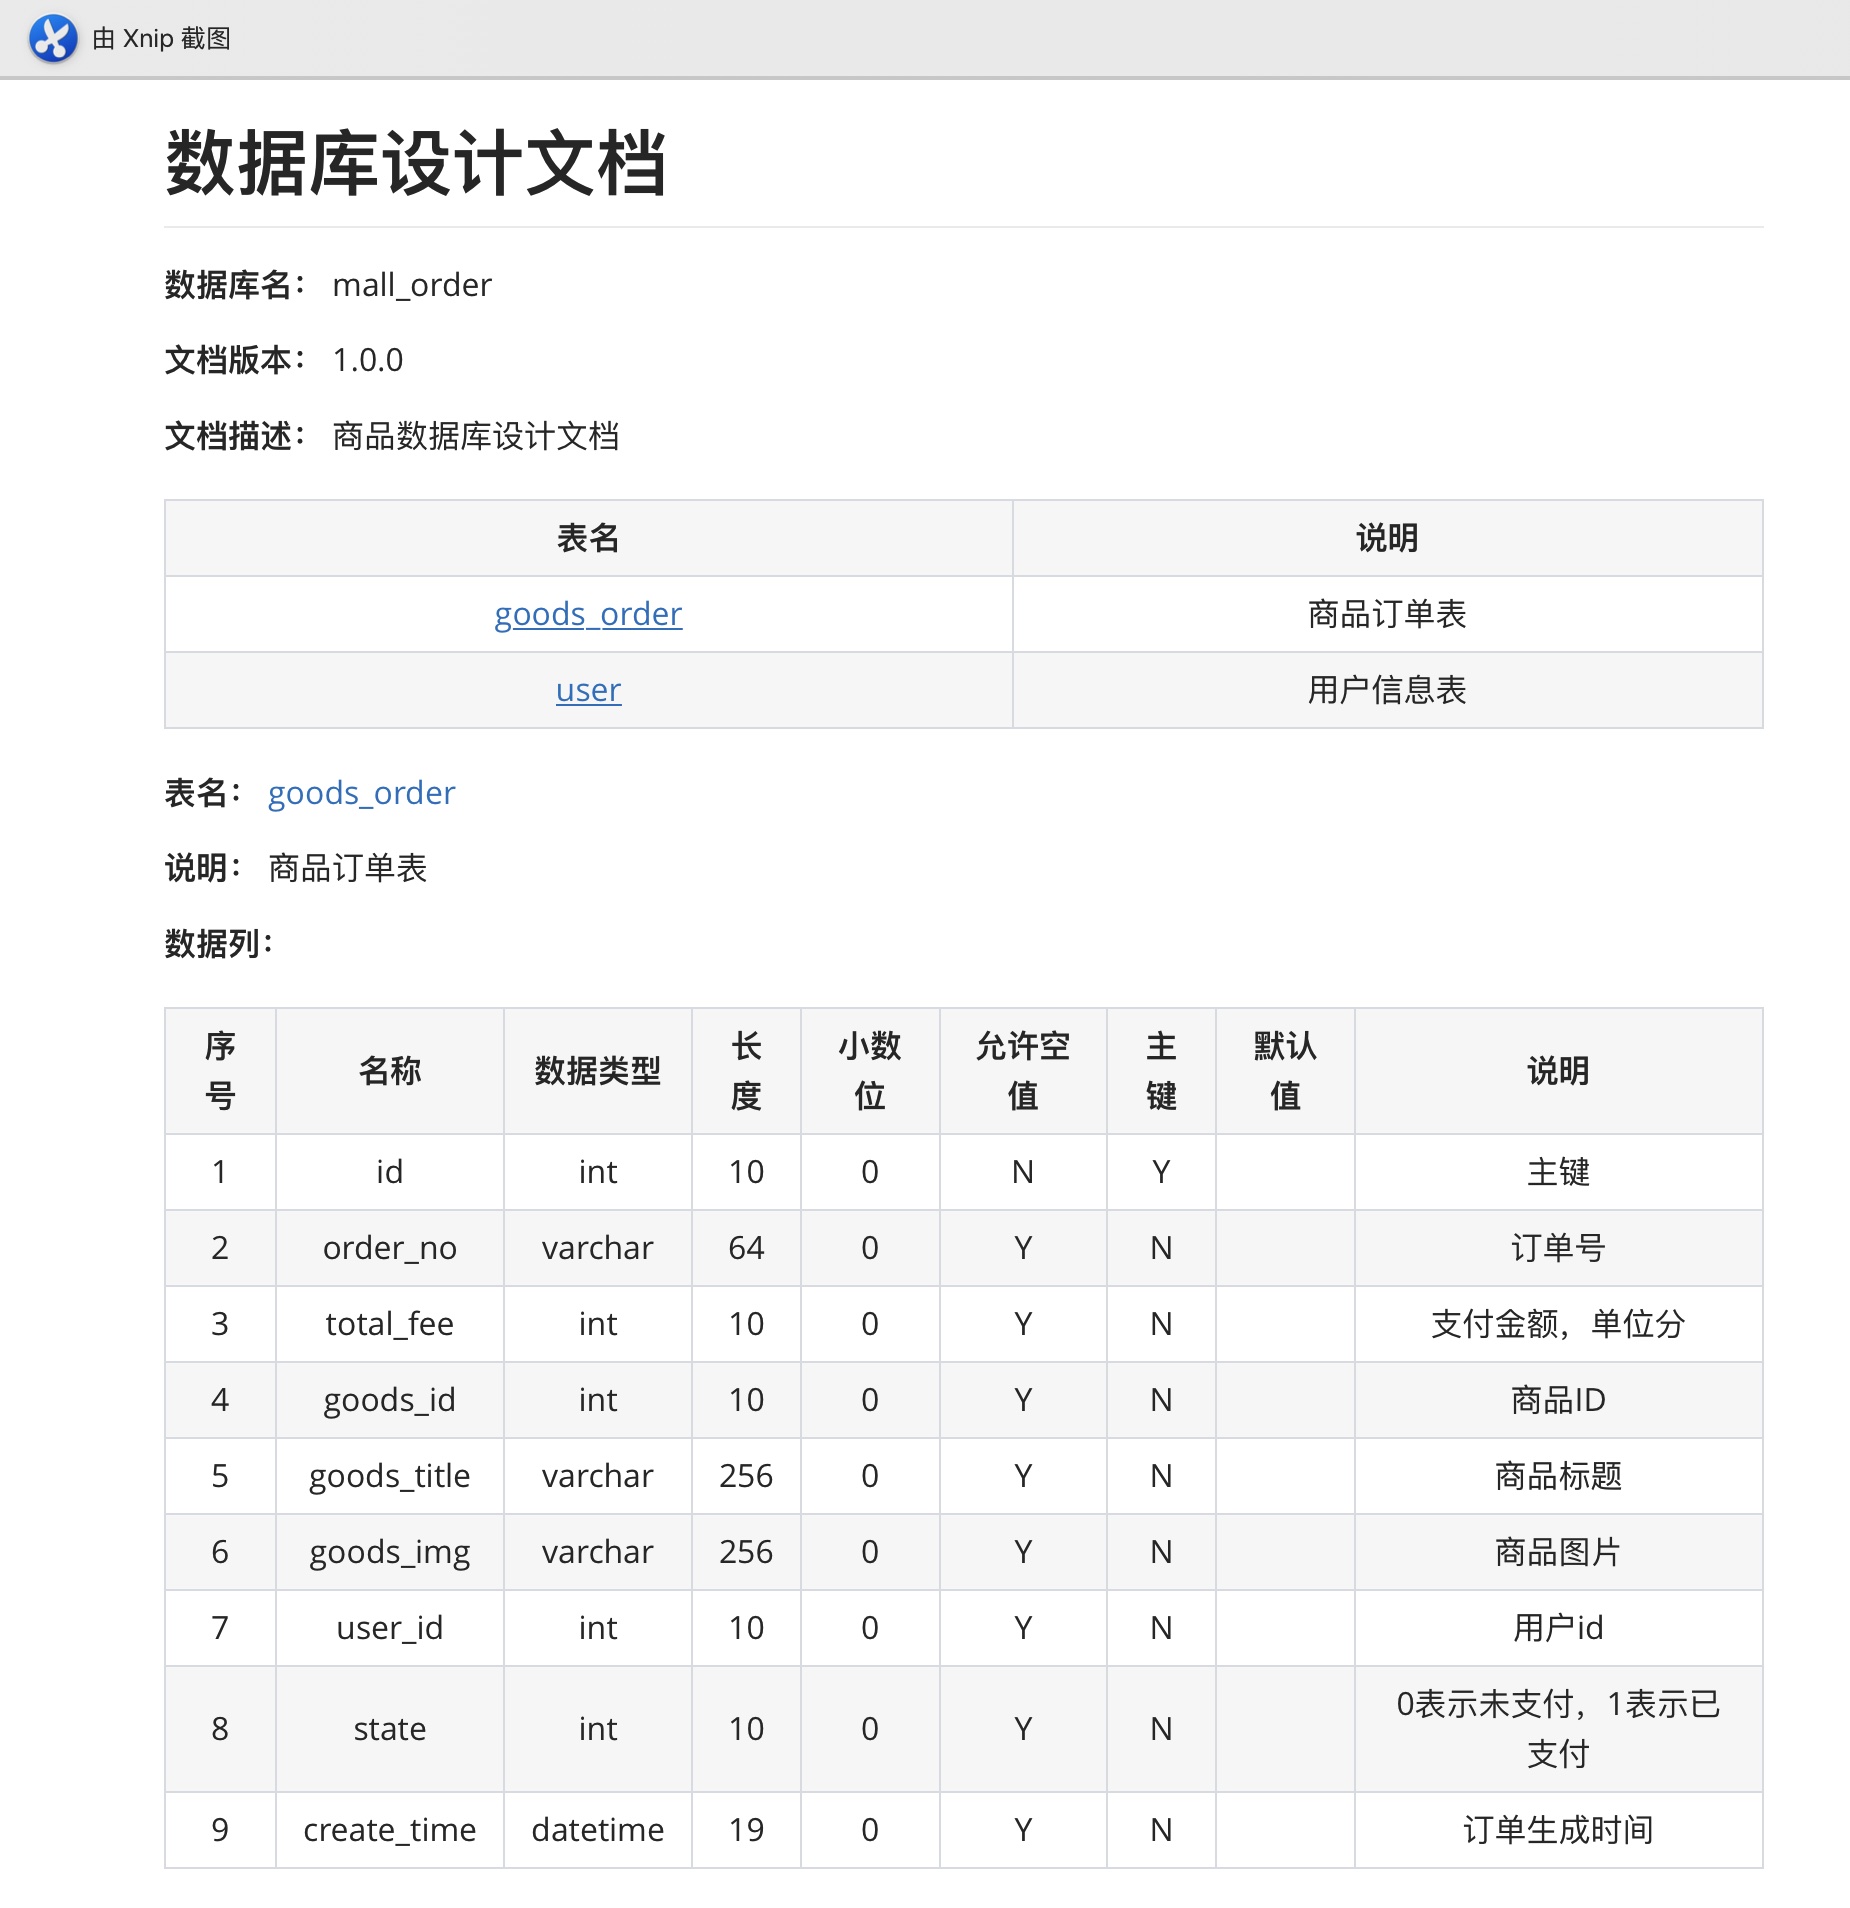
看完演示效果,我们接下来看看如果生成 数据库文档,其实非常简单,我们下面示范下。
二、快速入门
screw 有两种方式 来生成文档,通过 Java代码 或者 Maven插件 。
下面,我们来分别快速入门下。
1、使用 Java 代码的方式1、引入pom文件
    <dependencies>
        <dependency>
            <groupId>cn.smallbun.screw</groupId>
            <artifactId>screw-core</artifactId>
            <version>1.0.5</version>
        </dependency>
        <!-- 数据库连接 -->
        <dependency>
            <groupId>com.zaxxer</groupId>
            <artifactId>HikariCP</artifactId>
            <version>3.4.5</version>
        </dependency>
        <dependency>
            <groupId>mysql</groupId>
            <artifactId>mysql-connector-java</artifactId>
            <version>8.0.22</version>
        </dependency>
    </dependencies>
2、实现工具类
public class ScrewUtil {

    public static void main(String[] args) {
        ScrewUtil.documentGeneration();
    }
    /**
     * 文档生成
     */
   static void documentGeneration() {
        //数据源
        HikariConfig hikariConfig = new HikariConfig();
        hikariConfig.setDriverClassName("com.mysql.cj.jdbc.Driver");
        hikariConfig.setJdbcUrl("jdbc:mysql://localhost:3306/mall_order");
        hikariConfig.setUsername("root");
        hikariConfig.setPassword("root");
        //设置可以获取tables remarks信息
        hikariConfig.addDataSourceProperty("useInformationSchema", "true");
        hikariConfig.setMinimumIdle(2);
        hikariConfig.setMaximumPoolSize(5);
        DataSource dataSource = new HikariDataSource(hikariConfig);
        //生成配置
        EngineConfig engineConfig = EngineConfig.builder()
                //生成文件路径
                .fileOutputDir("你的生成文件地址")
                //打开目录
                .openOutputDir(true)
                //文件类型
                .fileType(EngineFileType.HTML)
                //生成模板实现
                .produceType(EngineTemplateType.freemarker)
                //自定义文件名称
                .fileName("商品数据库表结构").build();

        //忽略表
        ArrayList<String> ignoreTableName = new ArrayList<>();
        ignoreTableName.add("test_user");
        ignoreTableName.add("test_group");
        //忽略表前缀
        ArrayList<String> ignorePrefix = new ArrayList<>();
        ignorePrefix.add("test_");
        //忽略表后缀
        ArrayList<String> ignoreSuffix = new ArrayList<>();
        ignoreSuffix.add("_test");
        ProcessConfig processConfig = ProcessConfig.builder()
                //指定生成逻辑、当存在指定表、指定表前缀、指定表后缀时,将生成指定表,其余表不生成、并跳过忽略表配置
                //根据名称指定表生成
                .designatedTableName(new ArrayList<>())
                //根据表前缀生成
                .designatedTablePrefix(new ArrayList<>())
                //根据表后缀生成
                .designatedTableSuffix(new ArrayList<>())
                //忽略表名
                .ignoreTableName(ignoreTableName)
                //忽略表前缀
                .ignoreTablePrefix(ignorePrefix)
                //忽略表后缀
                .ignoreTableSuffix(ignoreSuffix).build();
        //配置
        Configuration config = Configuration.builder()
                //版本
                .version("1.0.0")
                //描述
                .description("商品数据库设计文档")
                //数据源
                .dataSource(dataSource)
                //生成配置
                .engineConfig(engineConfig)
                //生成配置
                .produceConfig(processConfig)
                .build();
        //执行生成
        new DocumentationExecute(config).execute();
    }
}
pom文件添加插件
<build>
    <plugins>
        <plugin>
            <groupId>cn.smallbun.screw</groupId>
            <artifactId>screw-maven-plugin</artifactId>
            <version>${lastVersion}</version>
            <dependencies>
                <!-- HikariCP -->
                <dependency>
                    <groupId>com.zaxxer</groupId>
                    <artifactId>HikariCP</artifactId>
                    <version>3.4.5</version>
                </dependency>
                <!--mysql driver-->
                <dependency>
                    <groupId>mysql</groupId>
                    <artifactId>mysql-connector-java</artifactId>
                    <version>8.0.20</version>
                </dependency>
            </dependencies>
            <configuration>
                <!--username-->
                <username>root</username>
                <!--password-->
                <password>password</password>
                <!--driver-->
                <driverClassName>com.mysql.cj.jdbc.Driver</driverClassName>
                <!--jdbc url-->
                <jdbcUrl>jdbc:mysql://127.0.0.1:3306/xxxx</jdbcUrl>
                <!--生成文件类型-->
                <fileType>HTML</fileType>
                <!--打开文件输出目录-->
                <openOutputDir>false</openOutputDir>
                <!--生成模板-->
                <produceType>freemarker</produceType>
                <!--文档名称 为空时:将采用[数据库名称-描述-版本号]作为文档名称-->
                <fileName>测试文档名称</fileName>
                <!--描述-->
                <description>数据库文档生成</description>
                <!--版本-->
                <version>${project.version}</version>
                <!--标题-->
                <title>数据库文档</title>
            </configuration>
            <executions>
                <execution>
                    <phase>compile</phase>
                    <goals>
                        <goal>run</goal>
                    </goals>
                </execution>
            </executions>
        </plugin>
    </plugins>
</build>
运行插件
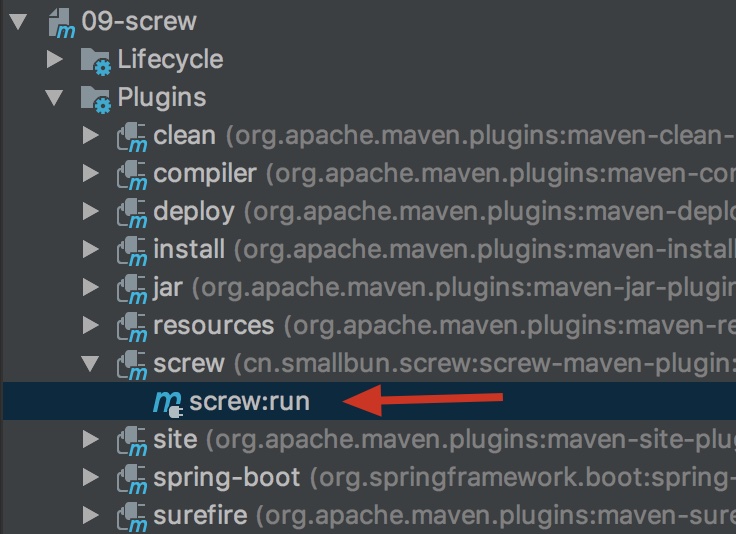
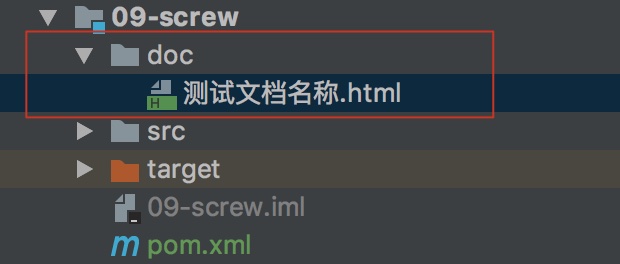
运行成功后,我们看到在当前项目中已经存在了,数据库文档。
补充
有关screw工具的补充,可以查看源码: https://gitee.com/leshalv/screw。
自己也把该篇文章的演示代码放到了github上,具体地址: https://github.com/yudiandemingzi/spring-boot-study

