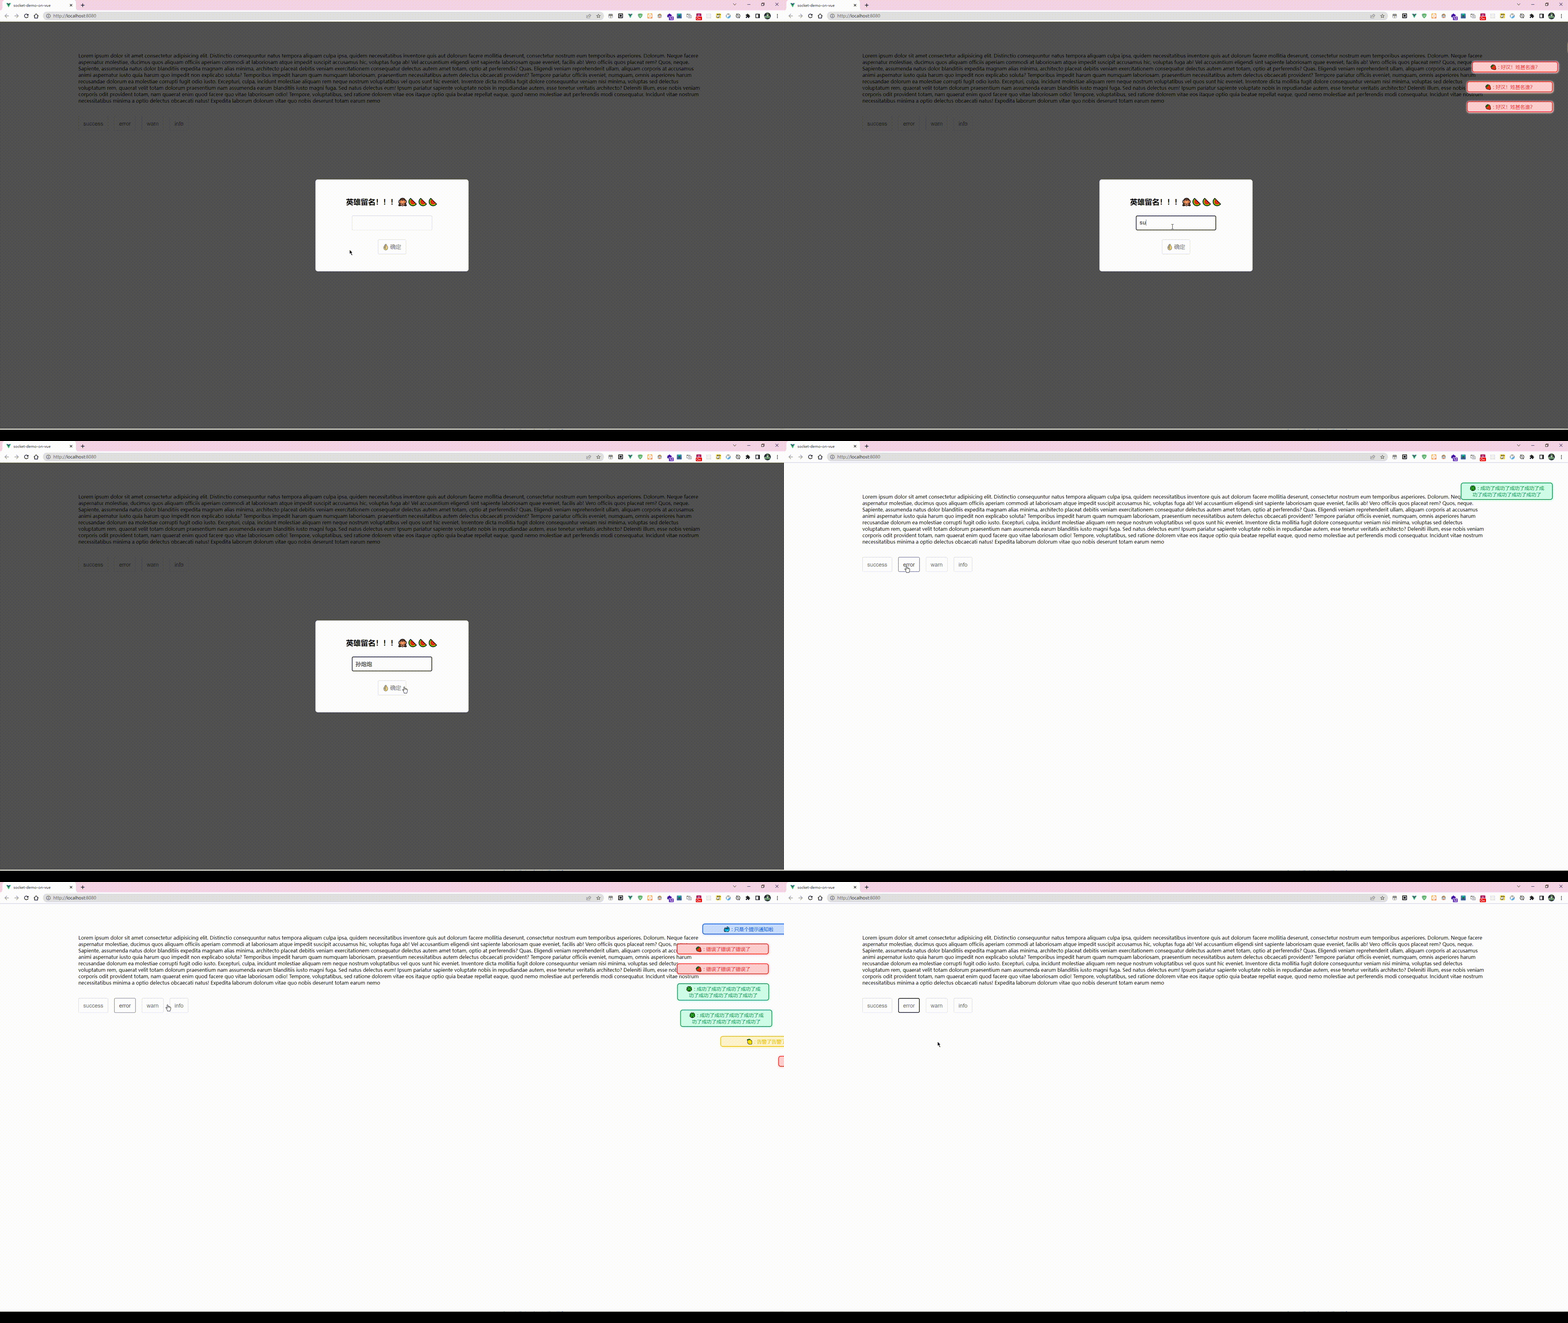
下面将会实现这样的效果: 组件动态创建脚本: NotificationBanner.js import Vue from "vue";import Notice from "@/components/Noticer/Notice.vue";function create(Component, props) { // 先建立实例 const vm = new Vue({ re
下面将会实现这样的效果:
-
组件动态创建脚本:
NotificationBanner.js
import Vue from "vue";
import Notice from "@/components/Noticer/Notice.vue";

function create(Component, props) {
  // 先建立实例
  const vm = new Vue({
    render(h) {
      //h就是createElement,它返回VNode
      return h(Component, { props });
    },
  }).$mount();
  // 手动挂载

  // 判断是否存在container,如果不存在则先创建
  let container;
  container = document.querySelector(".noticer-container");
  if (container == null) {
    container = document.createElement("div");
    container.classList.add("noticer-container");
    container.style.position = "fixed";
    container.style.top = "50px";
    container.style.right = "0px";
    container.style.overflow = "hidden";
    container.style.zIndex = 9999;

    document.body.appendChild(container);
  }

  container.appendChild(vm.$el);

  //销毁方法
  const comp = vm.$children[0];
  comp.remove = function () {
    container.removeChild(comp["$el"]);
    vm.$destroy();
  };
  comp.show();
  return comp;
}

Vue.prototype.$notice = {
  error: function (props) {
    create(Notice, Object.assign(props, { type: "error" }));
  },
  info: function (props) {
    create(Notice, Object.assign(props, { type: "info" }));
  },
  success: function (props) {
    create(Notice, Object.assign(props, { type: "success" }));
  },
  warn: function (props) {
    create(Notice, Object.assign(props, { type: "warn" }));
  },
};
这里有一些值得注意的地方:
- container: 的作用是notice的容器,它可以用于定位notice在页面的哪里展示,注意notice不应该随页面卷动,因此其定位是
fixed, 而之所以设定为overflow:hidden的原因则是,notice 在出现和移除的时候,发生的动画偏移,会让页面出现横向滚动条。为了避免重复创建container, 这里做了一个判断逻辑。然后所有动态生成的notice实例dom都会通过appendChild添加到这个容器。 - 在移除的时候, 移除的是
vm.$children[0]["$el"], 原因是,Notice 模板的实现中,外层套了一个 transition , 而这个transition是并不会渲染dom的。
- container: 的作用是notice的容器,它可以用于定位notice在页面的哪里展示,注意notice不应该随页面卷动,因此其定位是
-
创建Notice组件模板:
组件模板
<template> <transition enter-active-class="animate__animated animate__slideInRight" leave-active-class="animate__animated animate__slideOutRight" @after-leave="afterLeave" > <div v-if="isShow" class="notice__root"> <div :class="`notice-type-${type}`" class="noticer"> {{ type === "error" ? "🍓" : type === "success" ? "🍀" : type === "warn" ? "🍋" : "🐳" }} : {{ message }} </div> </div> </transition> </template> <script> export default { props: { title: { type: String, default: "", }, message: { type: String, default: "", }, time: { type: Number, default: 1000, }, type: { type: String, }, }, data() { return { isShow: false, }; }, methods: { show() { this.isShow = true; setTimeout(this.hide, this.time); }, hide() { this.isShow = false; }, afterLeave() { this.remove(); }, }, }; </script> <style lang="less" scoped> @error: rgb(255, 30, 30); @warn: rgb(240, 192, 0); @success: rgb(0, 144, 74); @info: rgb(0, 80, 218); @errorBg: rgb(255, 208, 208); @warnBg: rgb(255, 245, 207); @successBg: rgb(210, 255, 233); @infoBg: rgb(203, 222, 255); .notice__root { user-select: none; padding: 5px 50px 5px 5px; } .noticer { padding: 5px 20px; margin: 10px 0px; // margin-right: 50px; border-radius: 8px; font-size: 16px; width: auto; min-width: 280px; max-width: 300px; word-break: break-all; text-align: center; box-sizing: border-box; } .notice-type-error { color: @error !important; border: 2px solid @error; box-shadow: 1px 1px 5px 2px @errorBg; background-color: @errorBg; // border: 1px solid red; } .notice-type-warn { color: @warn !important; border: 2px solid @warn; background-color: @warnBg; box-shadow: 1px 1px 5px 2px @warnBg; } .notice-type-success { color: @success !important; border: 2px solid @success; background-color: @successBg; box-shadow: 1px 1px 5px 2px @successBg; } .notice-type-info { color: @info !important; border: 2px solid @info; background-color: @infoBg; box-shadow: 1px 1px 5px 2px @infoBg; } </style> -
在 main.js 中引入执行该脚本即可
import Vue from "vue"; import App from "./App.vue"; import "animate.css"; import "@/components/Noticer/NotificationBanner.js"; new Vue({ render: (h) => h(App), }).$mount("#app"); -
代码中使用实例:
if (!this.nickname) {
    this.$notice.error({
        message: "好汉!姓甚名谁?",
        time: 3000,
    });
} else {
    this.showModal = false;
    this.$notice.info({
        message: this.nickname + "来了!!!",
        time: 3000,
    });
}
动态创建组件的执行逻辑:
当在使用的时候:
this.$notice.error({
    message: "好汉!姓甚名谁?",
    time: 3000,
});
上方代码触发,实际上会触发 NotificationBanner.js 中的 create函数,该函数创建了一个notice 的组件实例,并在实力上添加了一个remove 方法,然后直接触发组件中的 show 方法。
notice 模板实例中:
methods: {
    show() {
        this.isShow = true;
        setTimeout(this.hide, this.time);
    },
    hide() {
        this.isShow = false;
    },
    afterLeave() {
        this.remove();
    },
},
show 方法执行,除了展示 notice,立即设定一个延时函数执行 hide 方法。
hide 方法执行, vue 提供的 transition 钩子 afterleave() 会在移除动画执行完毕后触发。 这时候,去触发 remove 方法,将该notice 组件实例移除。
