ELK监控Windows事件日志+Grafana展示 这里介绍使用Winlogbeat+Logstash+Grafana展示windows安全日志,由于数据量不大,没有采用Redis缓存,数据由Winlogbeat直接传输到Logstash进行数据过滤,再发送
ELK监控Windows事件日志+Grafana展示

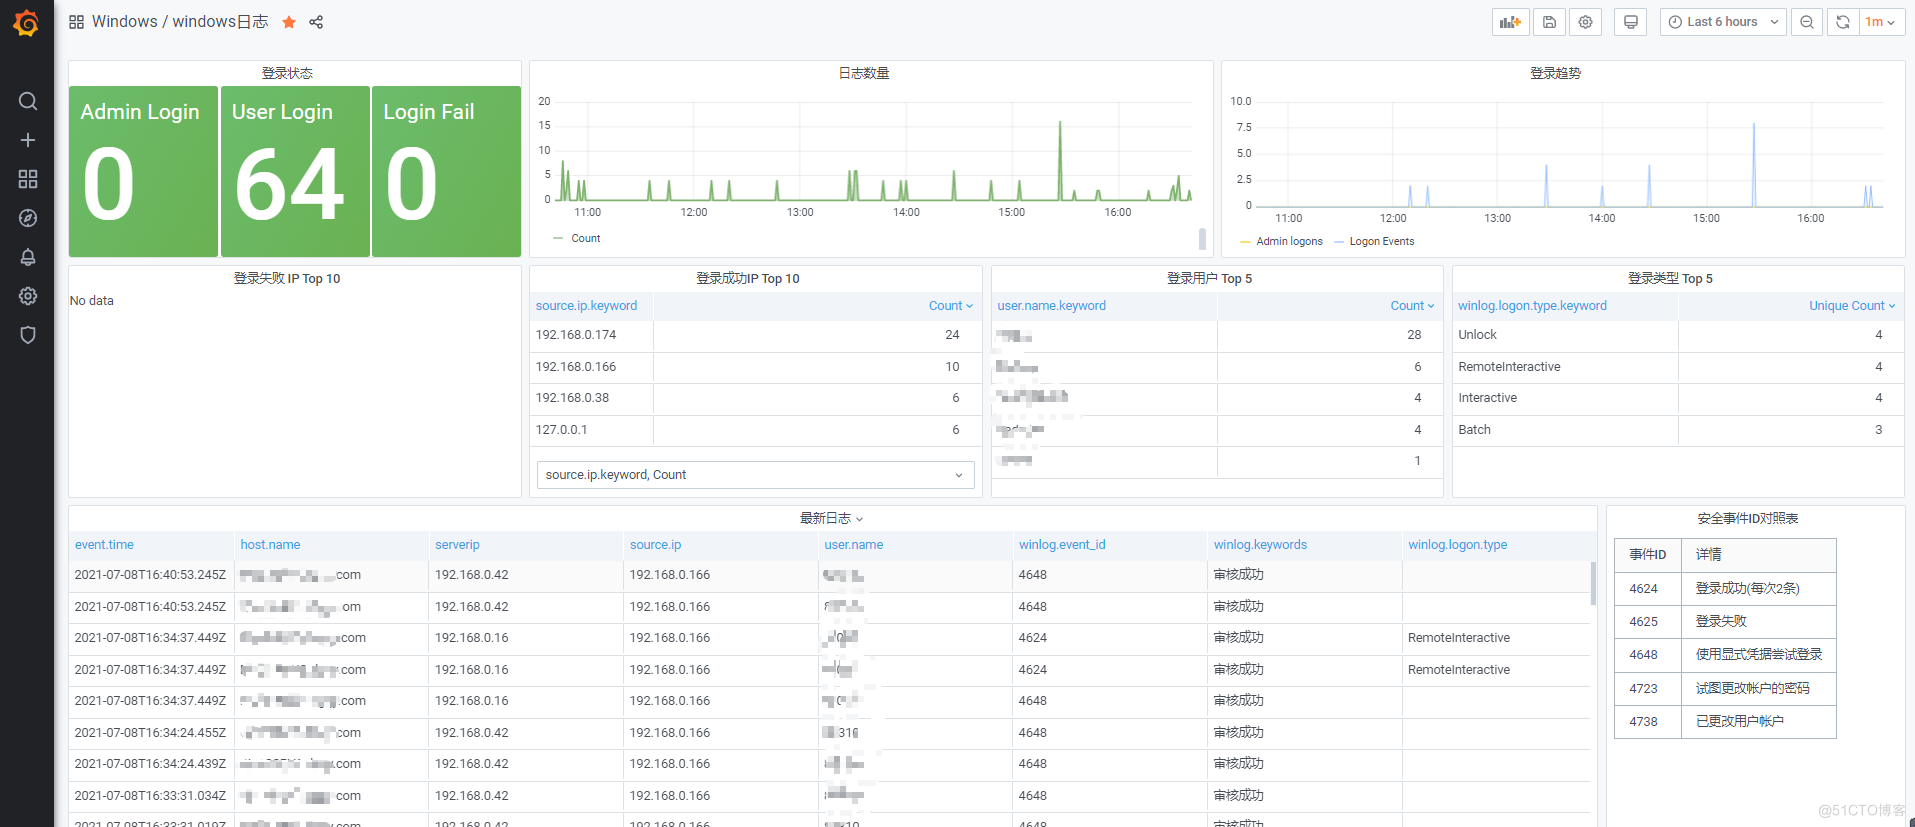
这里介绍使用Winlogbeat+Logstash+Grafana展示windows安全日志,由于数据量不大,没有采用Redis缓存,数据由Winlogbeat直接传输到Logstash进行数据过滤,再发送到Elasticsearch存储,使用Grafana数据展示
组件如下:
- Winlogbeat:Beats内的轻量化采集组件,可以方便采集Windows的应用程序、安全、系统日志,可参考Winlogbeat官方文档
- Logstash:数据过滤组件,里面有丰富的插件,主要包括三个模块:Input(数据输入),Filter(数据过滤),Output(数据输出),可参考Logstash官方文档
- Elasticserch:全文索引搜索+存储引擎,java写的,暂未详细了解,可参考Elasticsearch官方文档
- Kibana:可视化平台,可展示、检索、管理Elasticsearch中的数据。参考Kibana官方文档
- Grafana:可视化平台,能接入不同的数据源,进行数据图表展示,由于比较熟悉grafana,这里采用grafana进行展示。参考Grafana官方文档
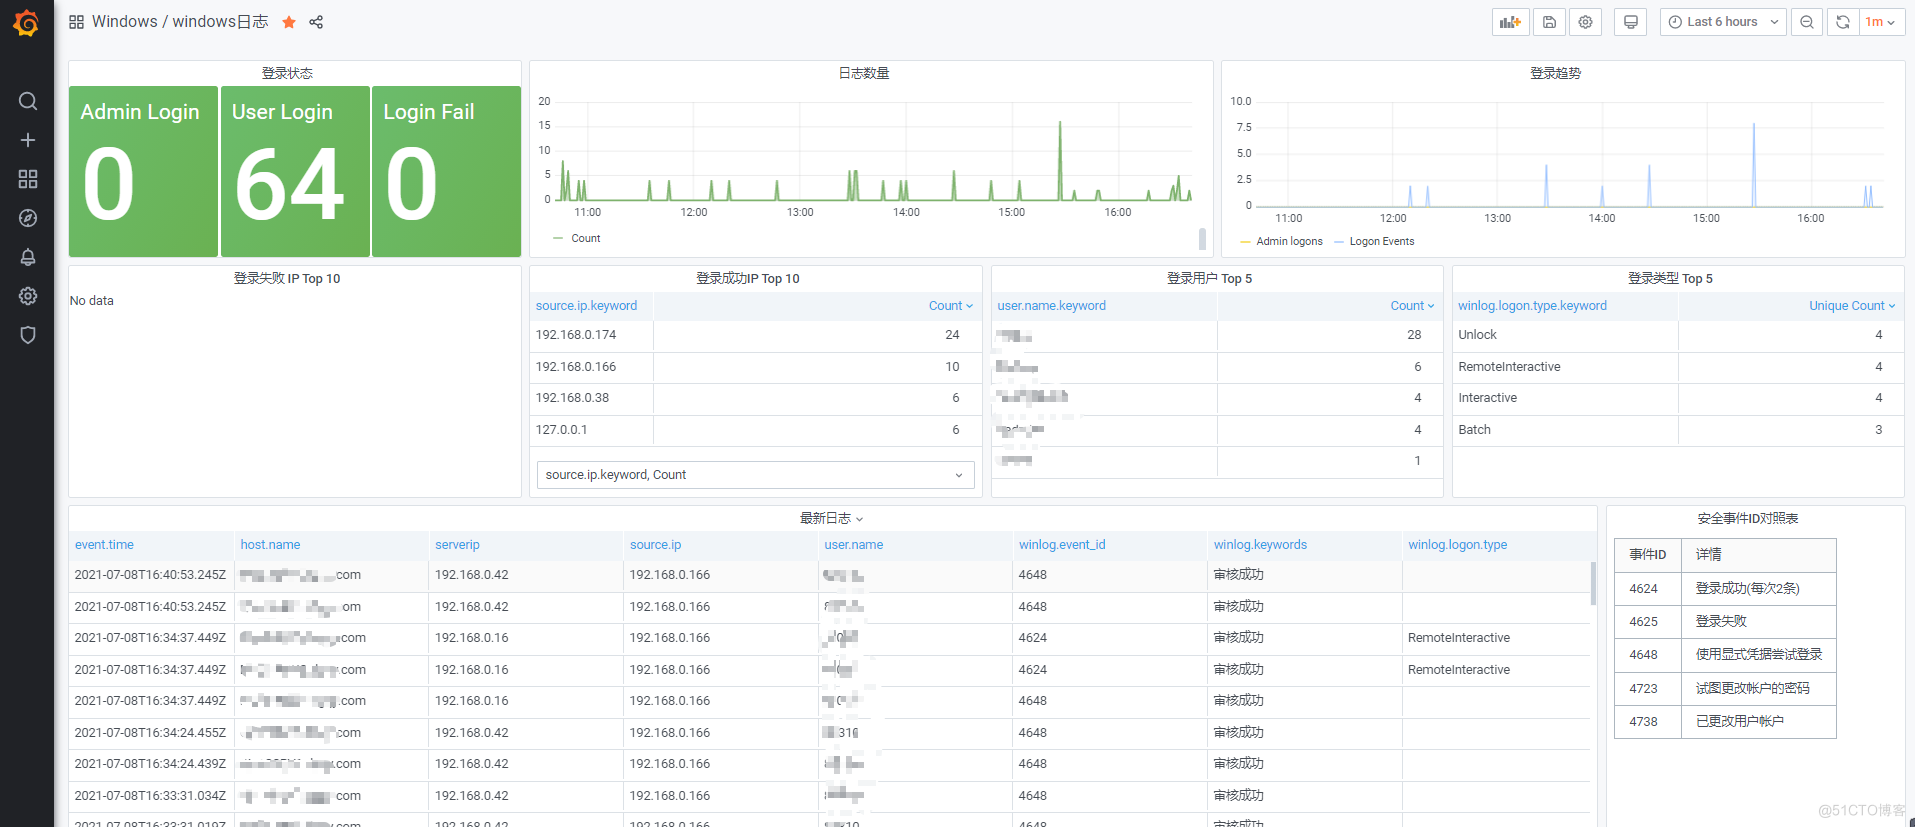
Grafana效果展示
一、安装ELK
参考 Elasticsearch+Logstash+Kibana+Head安装
二、安装Winlogbeat
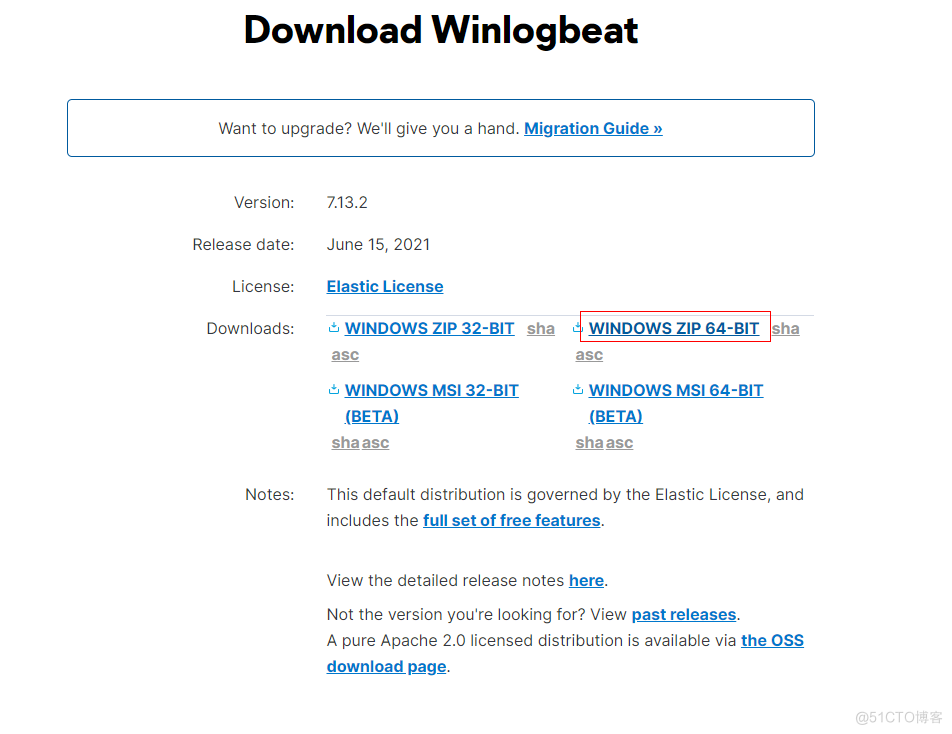
下载Winlogbeat
Winlogbeat官网下载
修改Winlogbeat.yml
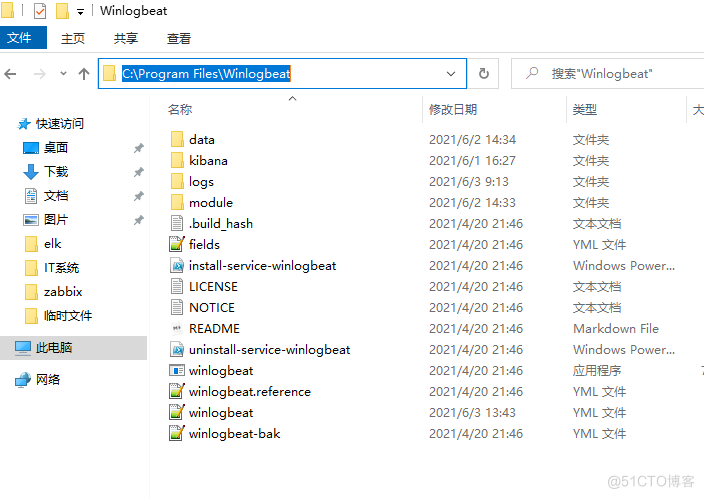
# ======================== Winlogbeat specific options ========================= Winlogbeat.event_logs: # - name: Application # - name: System - name: Security #这里只抓取安全日志 ignore_older: 72h #第一次抓取过去72h内的日志 event_id: 4624,4625,4648,4649,4720,4722,4723,4724,4725,4726,4738,4740,4727,4737,4739,4762 # 只抓取以上事件ID的日志 #fields: # type: "winlog_security" # log_topic: "winlog_security" #fields_under_root: true processors: - script: lang: javascript id: security file: ${path.home}/module/security/config/Winlogbeat-security.js # ====================== Elasticsearch template settings ======================= setup.template.settings: index.number_of_shards: 1 # ================================= Dashboards ================================= #setup.dashboards.enabled: false #setup.dashboards.url: # =================================== Kibana =================================== setup.kibana: setup.dashboards.enabled: true setup.dashboards.index: "winlog_security-*" host: "SERVER IP:5601" username: "USERNAME" password: "PASSWORD" # ================================== Outputs =================================== # ---------------------------- Elasticsearch Output ---------------------------- #output.elasticsearch: # hosts: ["SERVER IP:9200"] # indices: # - index: "winlog_security-%{+yyyy.MM.dd}" # Authentication credentials - either API key or username/password. #api_key: "id:api_key" #username: "USERNAME" #password: "PASSWORD" # ------------------------------ Logstash Output ------------------------------- output.logstash: # The Logstash hosts hosts: ["192.168.0.170:6515"] # ================================= Processors ================================= processors: - add_host_metadata: when.not.contains.tags: forwarded - add_cloud_metadata: ~文件夹移动至C:\Program Files,并重命名为Winlogbeat
管理员打开powershell
PS C:\Windows\system32> cd 'C:\Program Files\Winlogbeat' PS C:\Program Files\Winlogbeat> .\install-service-winlogbeat.ps1安装完成后提示

如果弹出无法安装提示

需要运行以下命令安装
PowerShell.exe -ExecutionPolicy UnRestricted -File .\install-service-winlogbeat.ps1
测试配置文件
.\winlogbeat.exe setup -e
开启服务
Start-Service winlogbeat
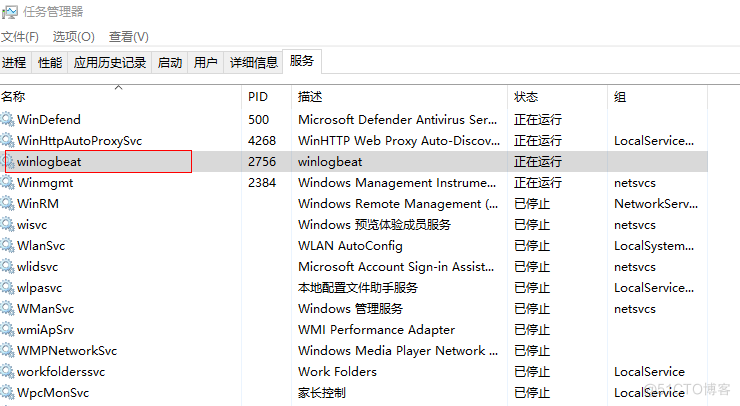
三、配置Logstash
vim /opt/logstash/config/winlog-security.conf
# ---------------input 输入模块----------------------- input{ beats{ #winlogbeat为数据源,使用beats插件 type => "winlog_security" #输入数据打上winlog_security 类型 host => "0.0.0.0" #接收任意主机数据 port => 6515 #定义端口,需和采集器配置一致 codec => plain{ charset => "UTF-8" } } } # ---------------filter 过滤模块----------------------- filter{ if [type] == "winlog_security" { #此文件的数据源才过滤处理 date{ match => ["event.time","dd/MMM/yyyy:HH:mm:ss Z"] } ruby{ code => "event.set('event.time', event.get('@timestamp').time.localtime + 8*60*60)" } mutate{ #删除不需要的字段 copy => {"[@metadata][ip_address]" => "serverip"} copy => {"[log][level]" => "severity_label"} remove_field => ["[agent]","@version","[process]","tags"] remove_field => ["task","api","keywords","record_id"] remove_field => ["[ecs]","[log]","[winlog_channel]"] remove_field => ["[keywords]","provider_guid"] remove_field => ["[os]","opcode","id","related","kind","message","[event]"] } if ([winlog][event_data][LogonType] == "3") { #由于只是需要用户安全登录日志,将一些系统的登录日志删除 drop {} } if ([winlog][event_data][LogonType] == "5") { drop {} } if ([user][domain] == "Window Manager") { drop {} } } } # ---------------output 输出模块----------------------- output{ if [type] == "winlog_security" { elasticsearch { #输出到es hosts => ["192.168.0.170:9200"] user => "elastic" password => "PASSWORD" index => "winlog_security-%{+yyyy.MM.dd}" #创建索引 } } }四、配置kibana
登录kibana
http://192.168.0.170:5601/
创建索引模式
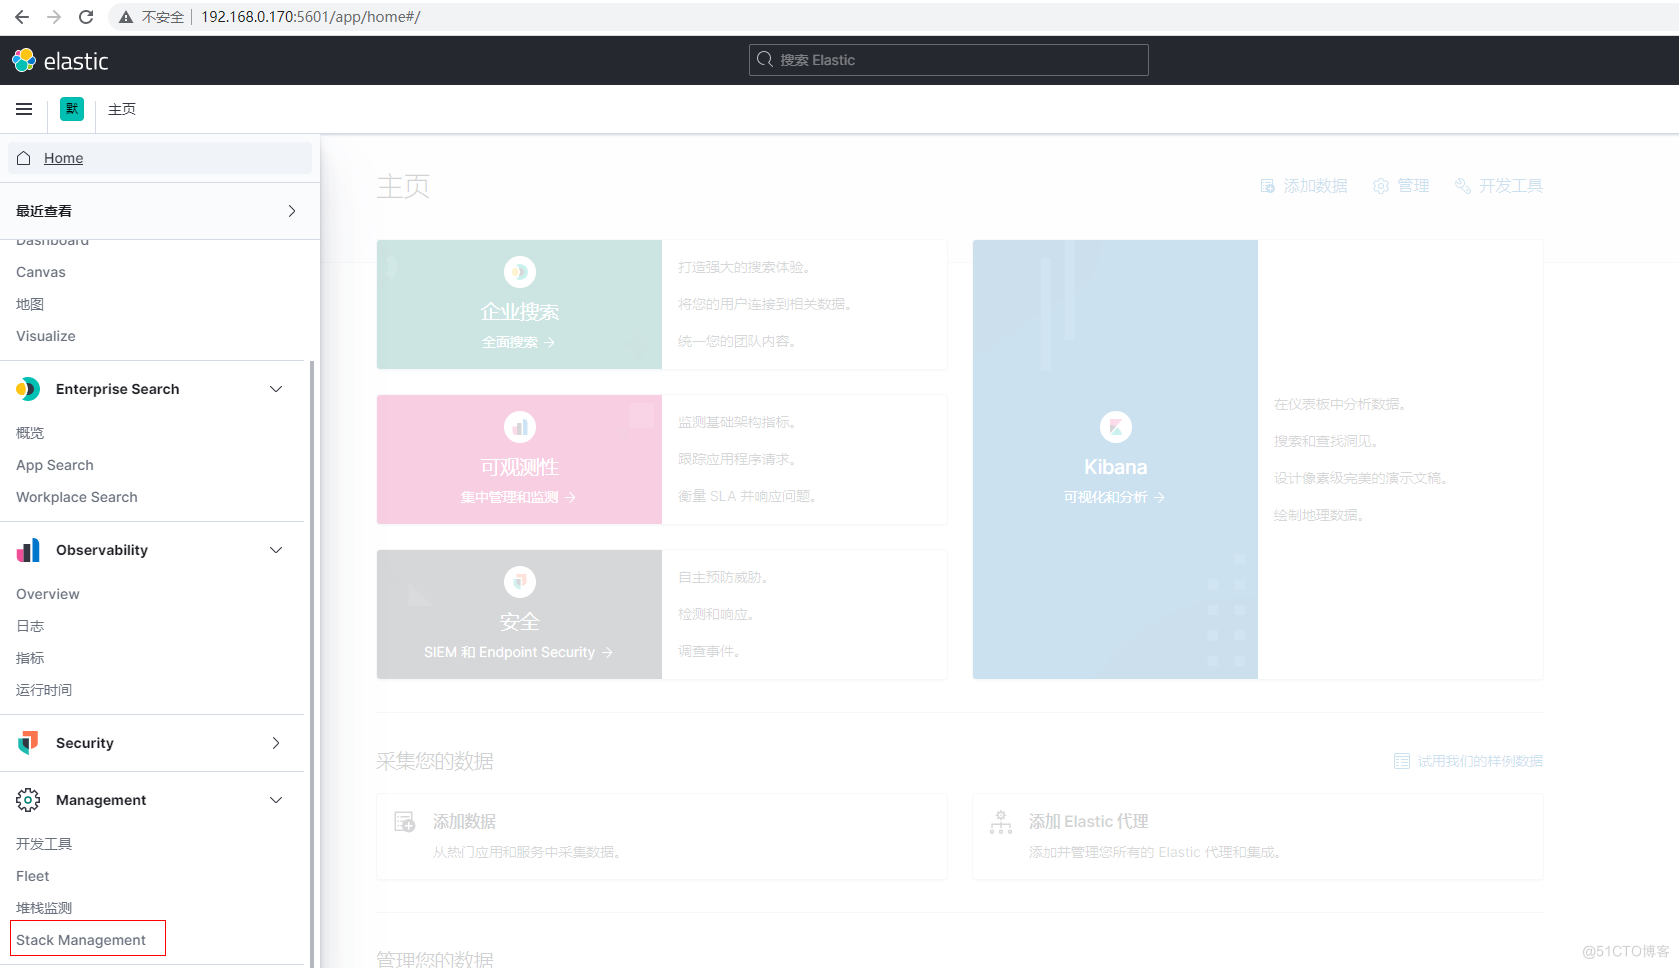
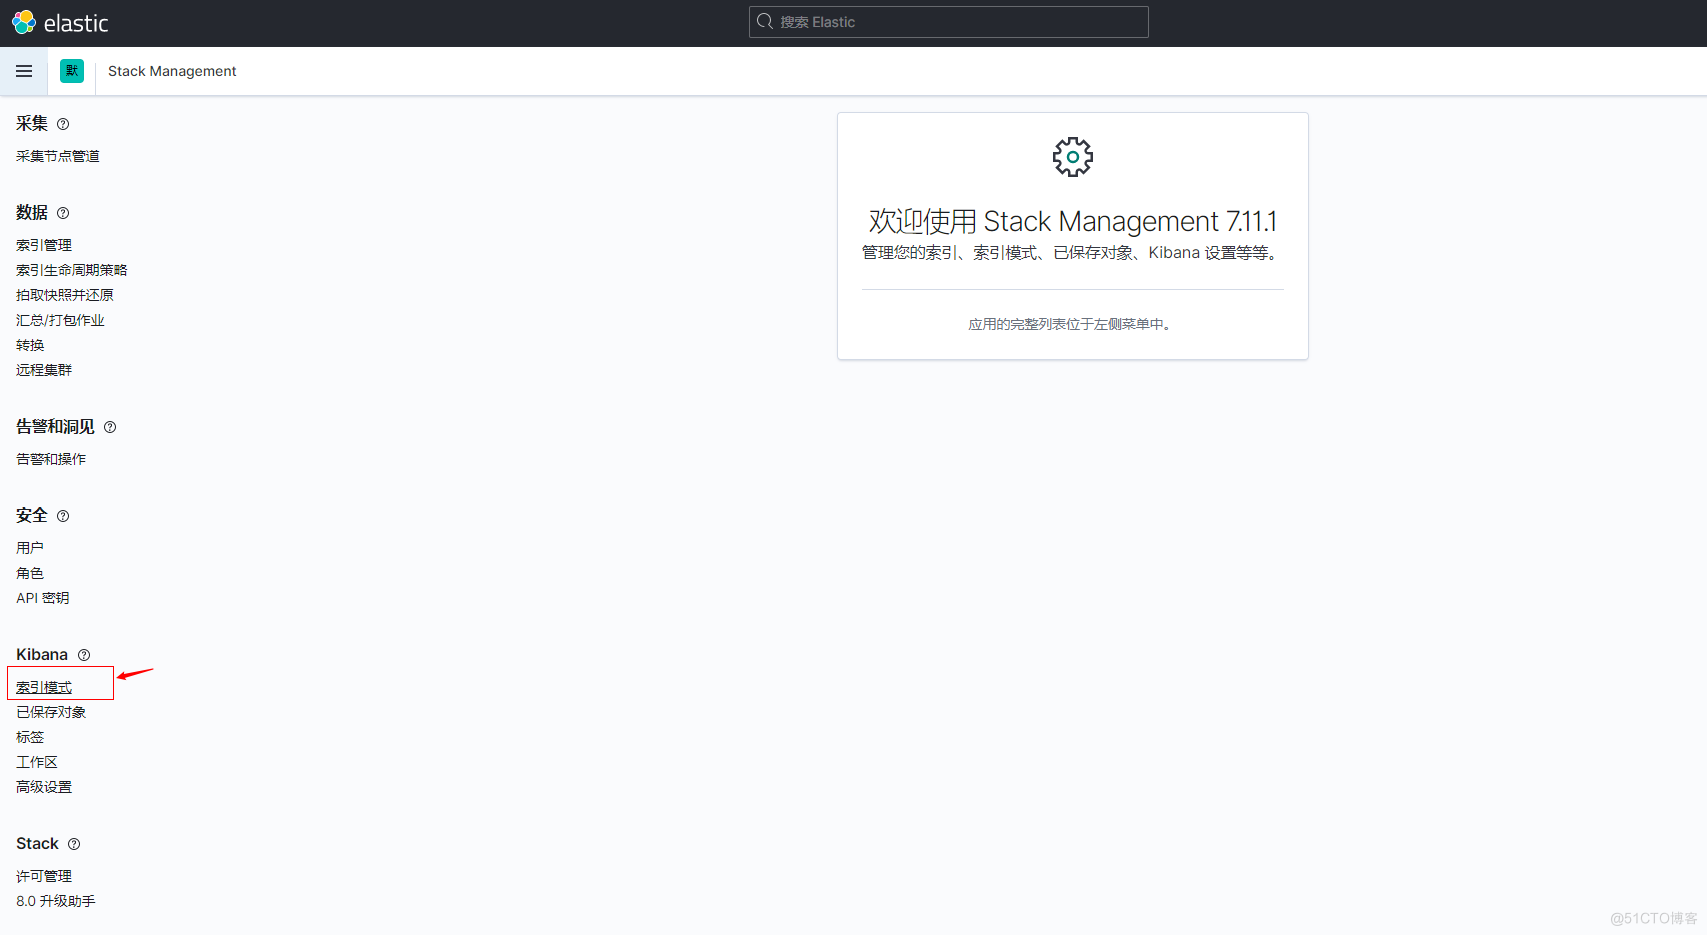
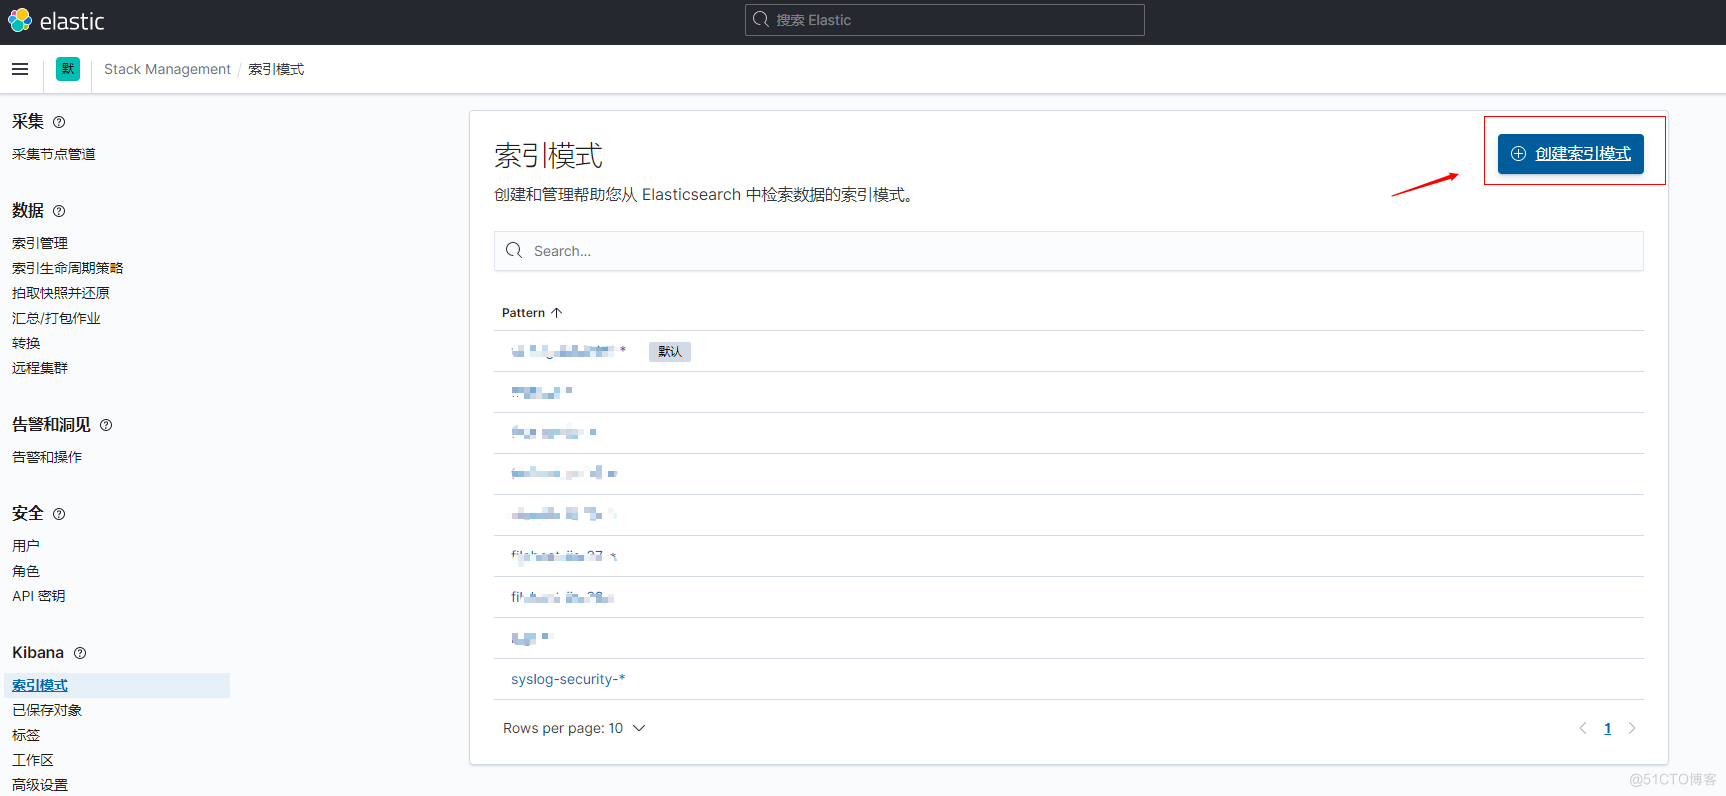
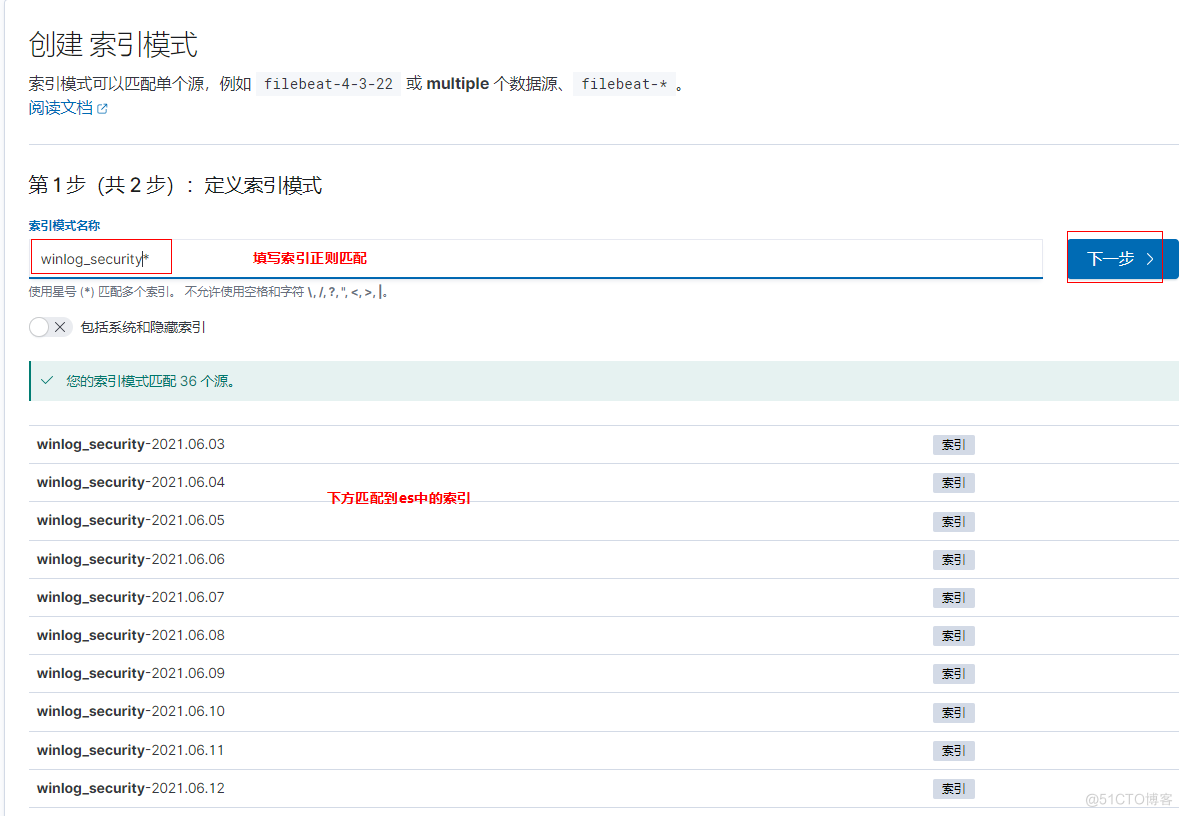
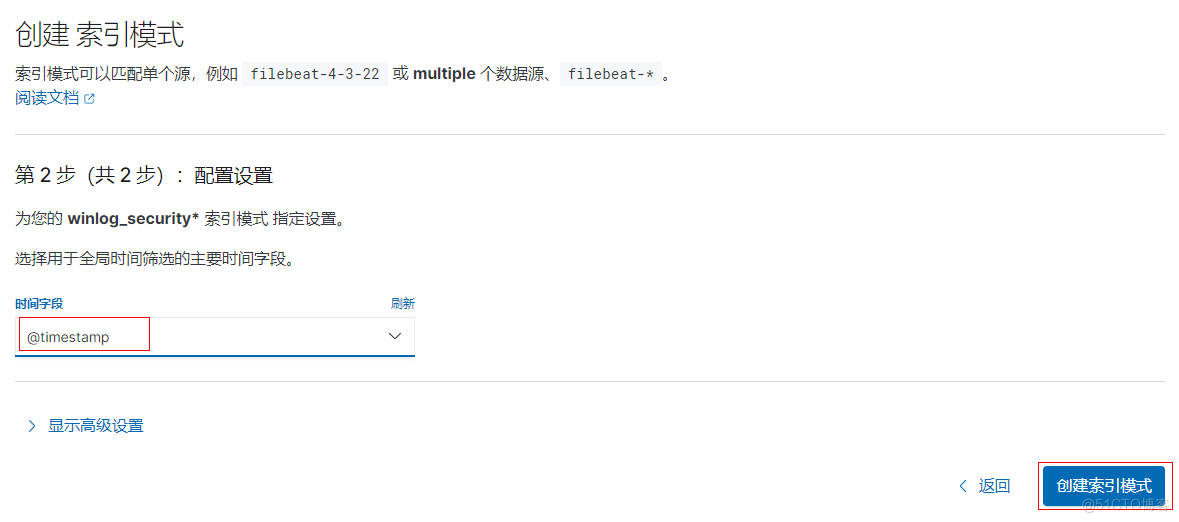
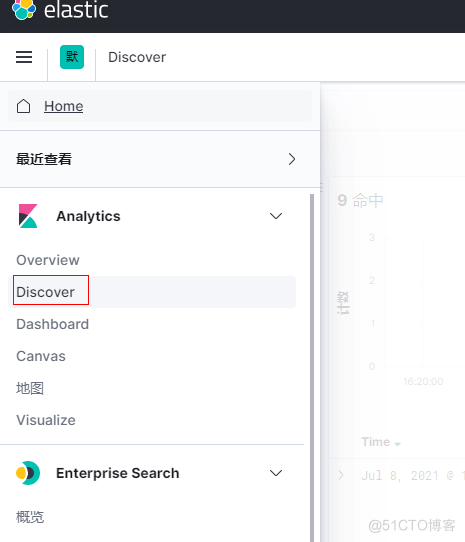
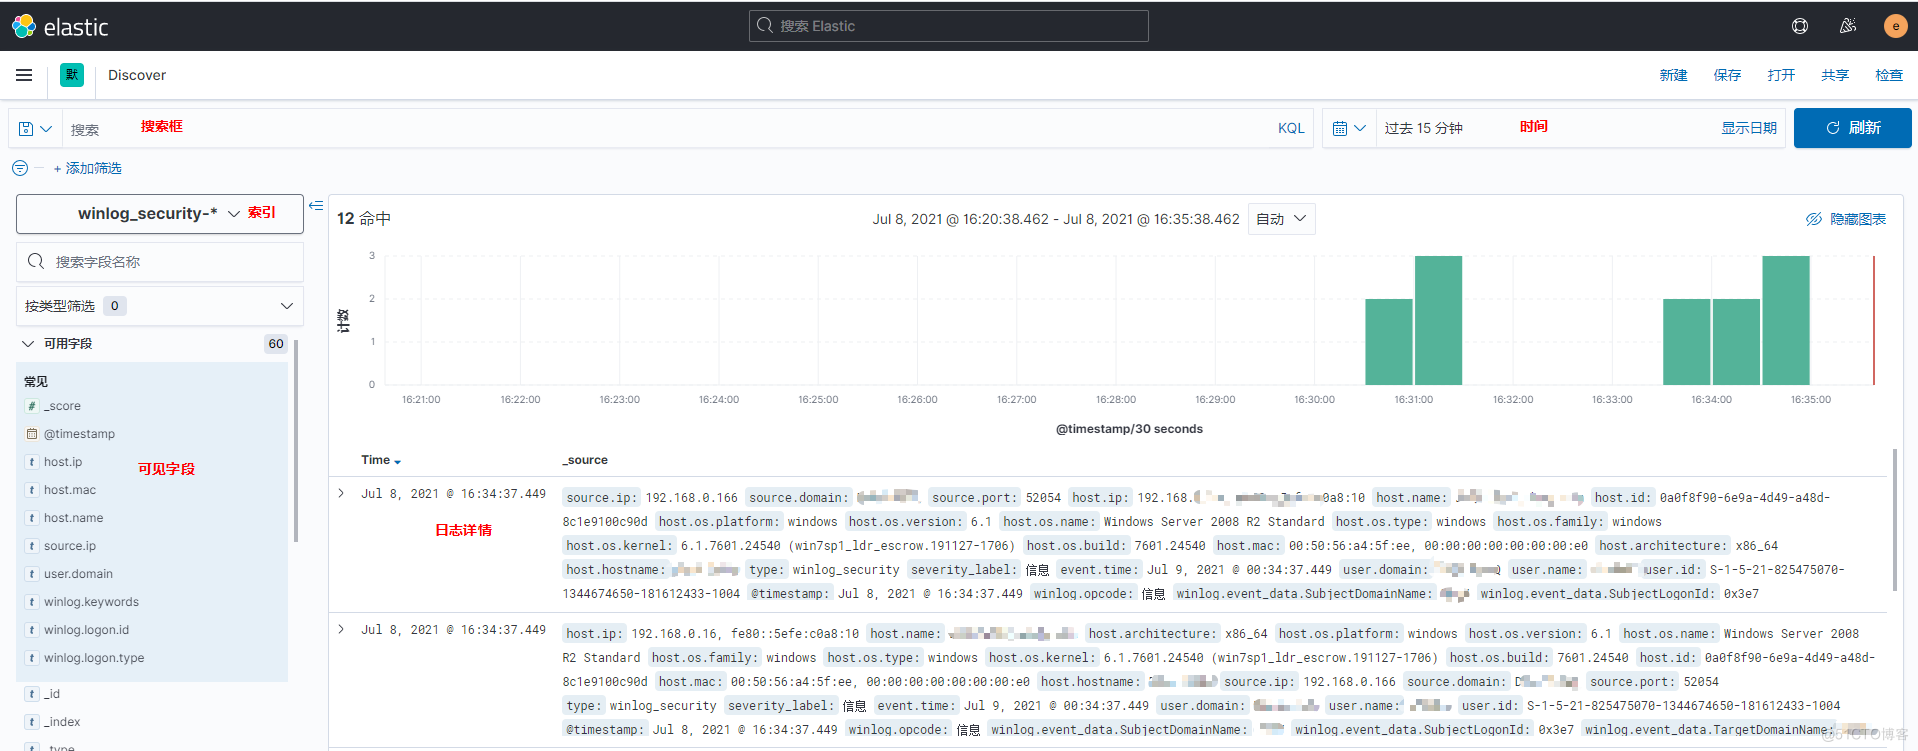
创建完成后,在Discover就可以看得刚创建的索引
五、Grafana展示
参考 Grafana安装
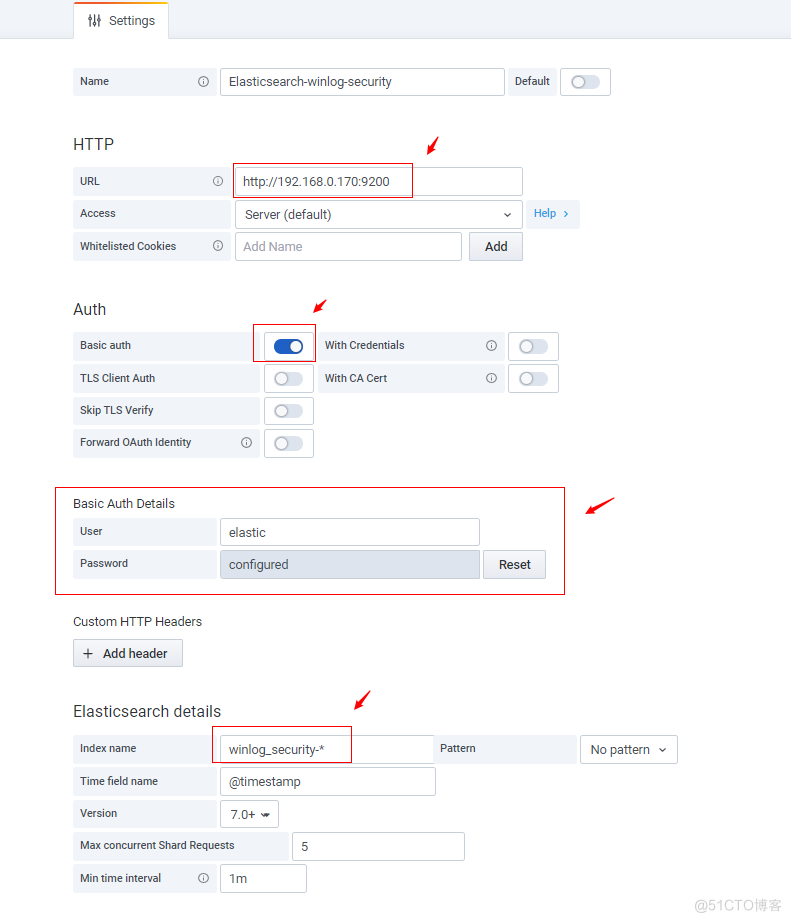
添加数据源

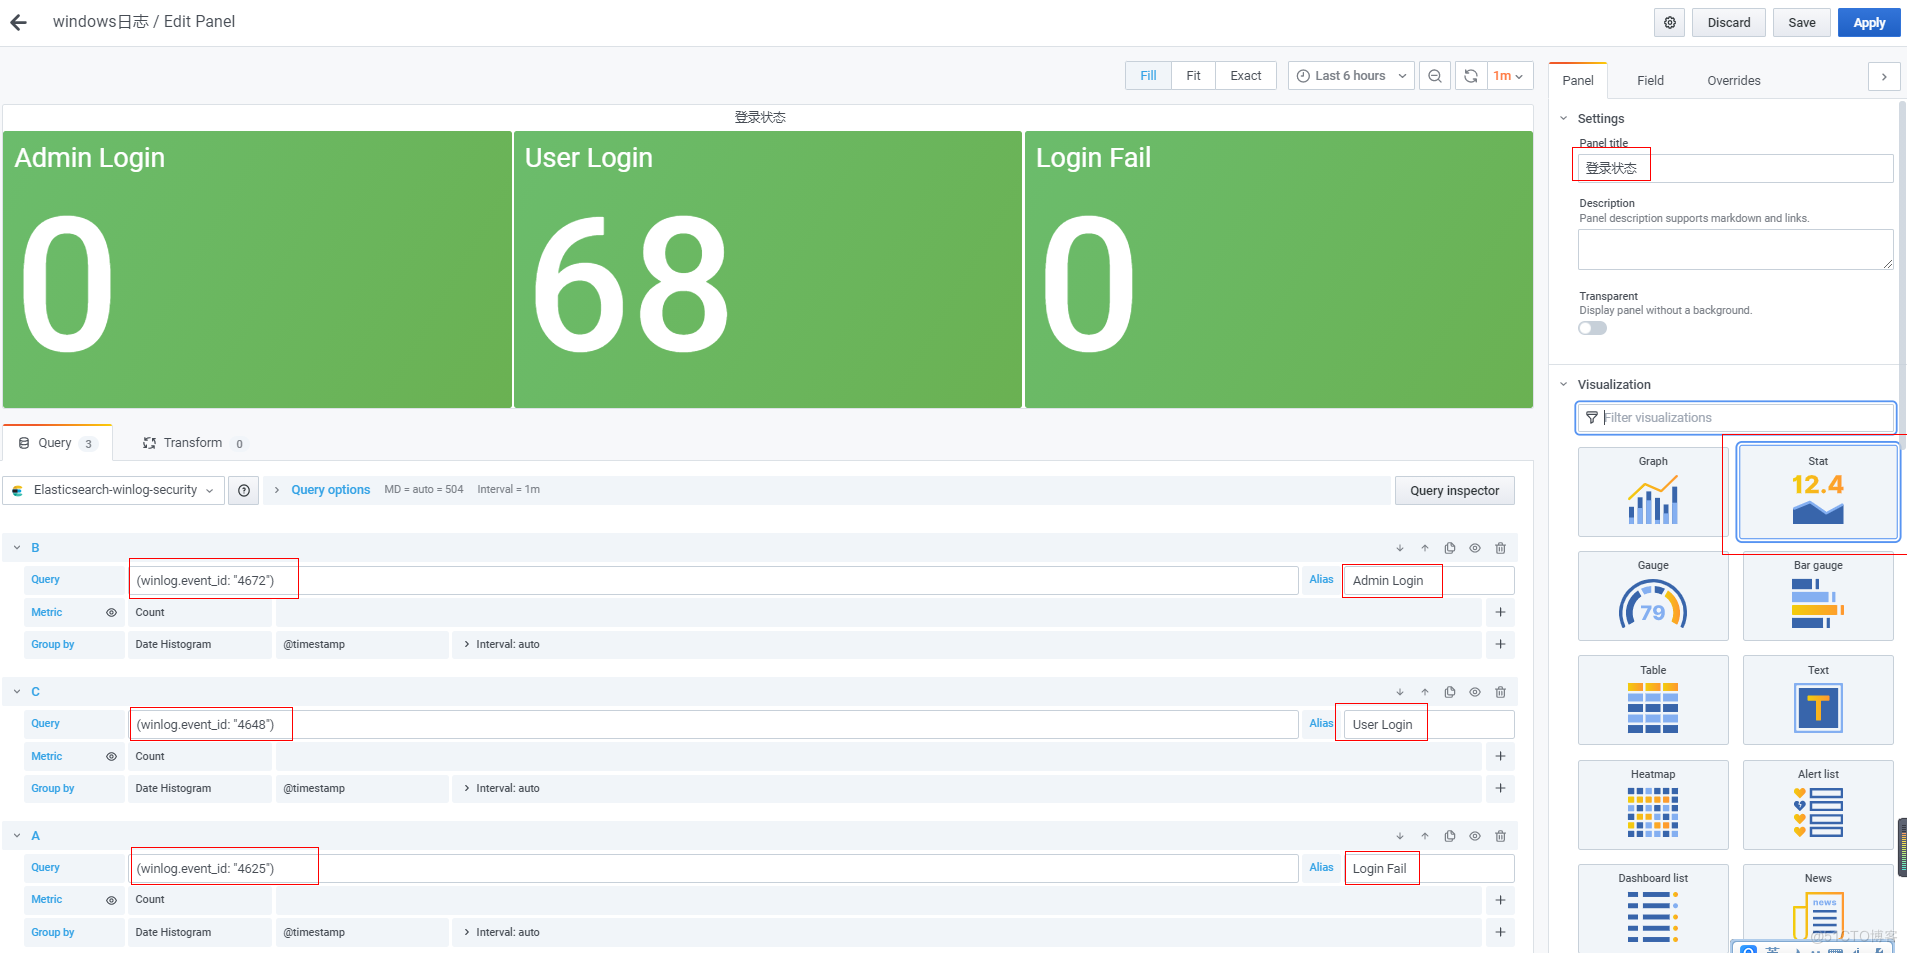
绘制图表-登录状态
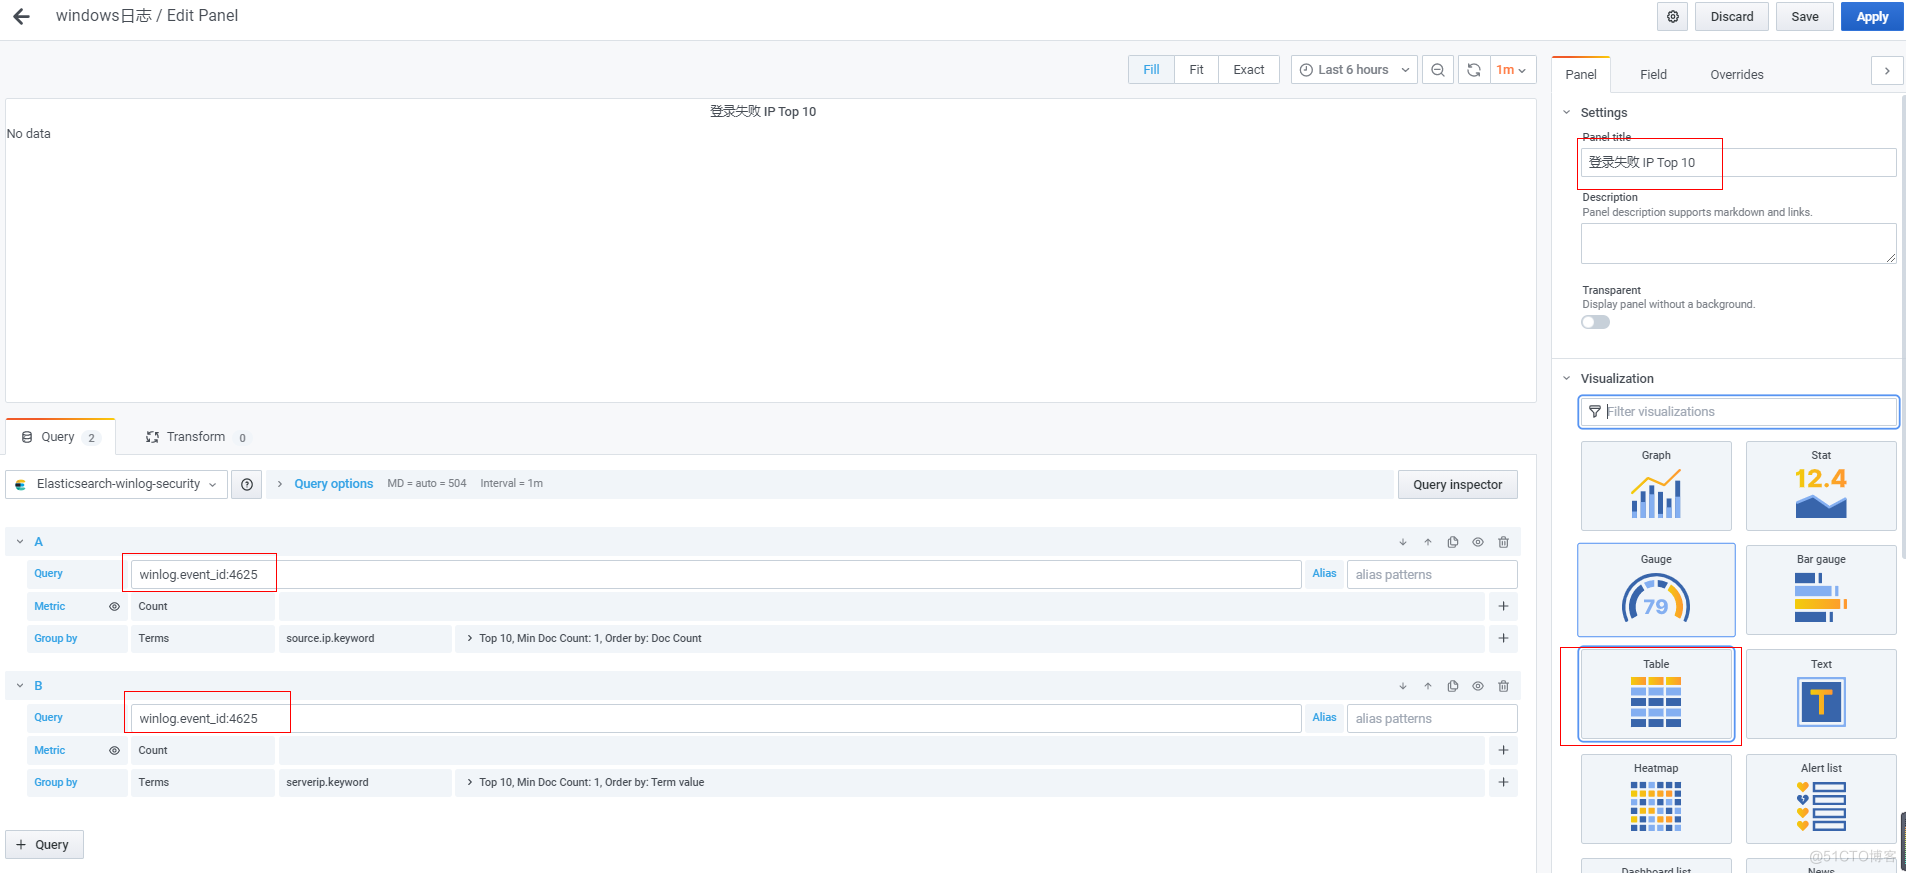
绘制图标-登录失败top10
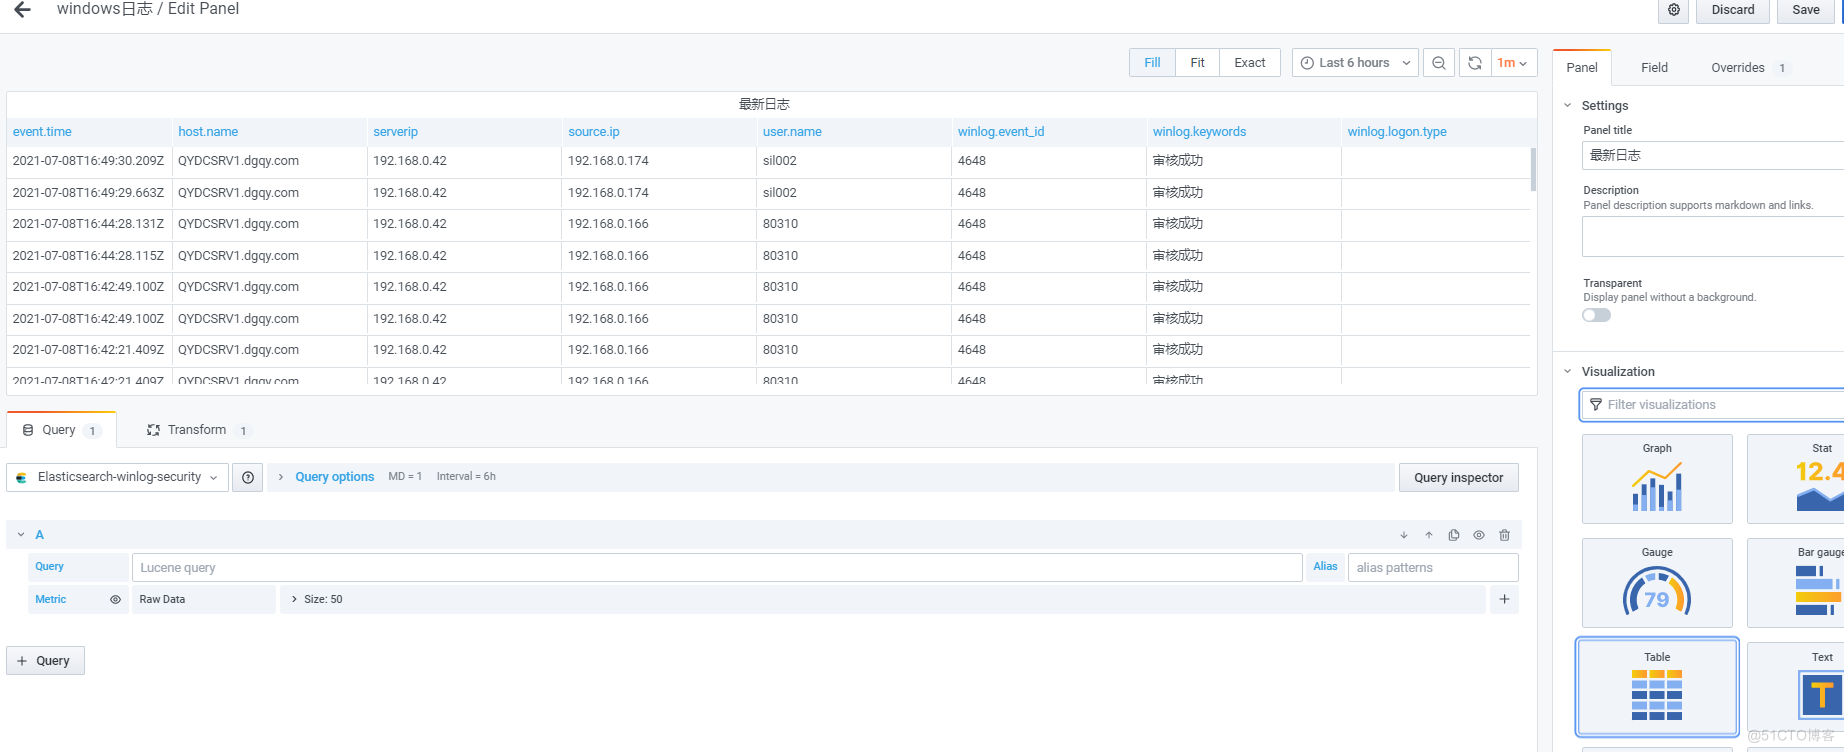
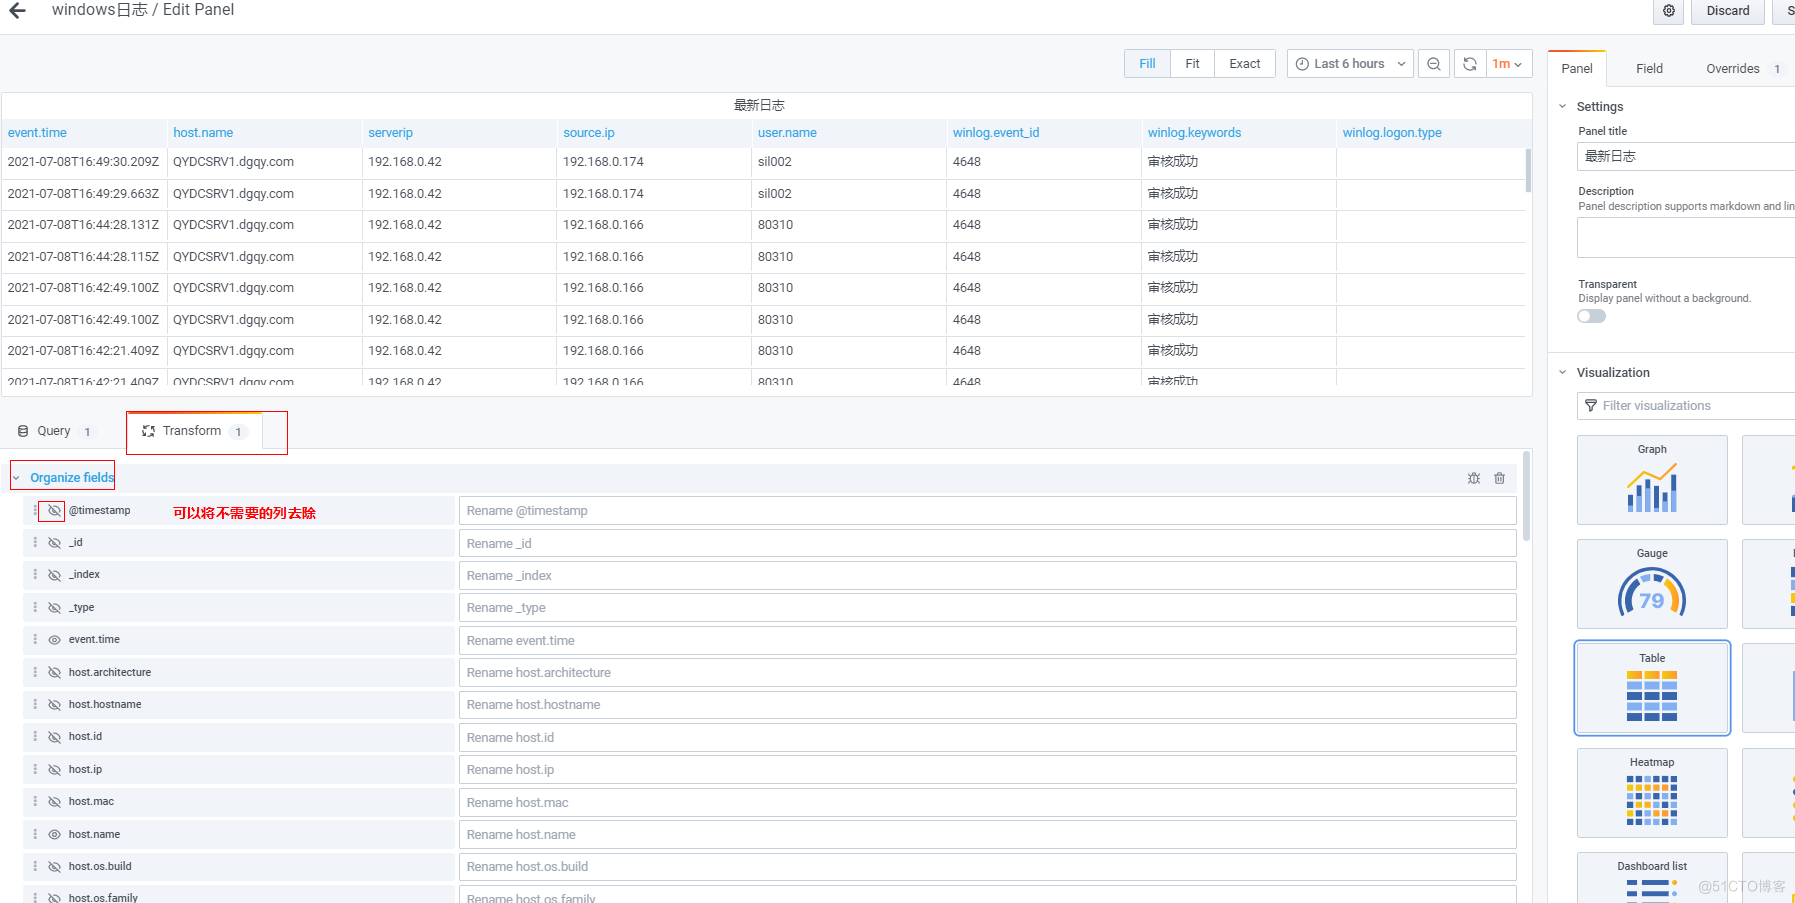
绘制图标-最新日志
其他图表类似,最后展示如下
