环境: CentOS 7Zabbix 4.0 配置数据库环境变量 postgres@allsql03-cat .pgpass 10.10.10.13:5432:postgres:postgres:Root@123456127.0.0.1:5432:postgres:postgres:Root@123456127.0.0.1:5432:postgres:zabbix:Root@123456 postgres@allsql03- c
环境:
CentOS 7Zabbix 4.0
配置数据库环境变量
postgres@allsql03->cat .pgpass
10.10.10.13:5432:postgres:postgres:Root@123456 127.0.0.1:5432:postgres:postgres:Root@123456 127.0.0.1:5432:postgres:zabbix:Root@123456postgres@allsql03->
cd 到postgres家目录 添加环境变量注意如果是root用户配置的zabbix-agent,则需要在root的环境变量配置postgres@allsql03-> cat .bash_profile
export PS1="$USER@`/bin/hostname -s`->" export PGPORT=5432 export PGHOME=/usr/pgsql export PGDATA=/data/pgdata/11/data export MANPATH=$PGHOME/share/man:$MANPATH export LANG=en_US.UTF-8 export DATE='date +"%Y%m%d%H%M"' export LD_LIBRARY_PATH=$PGHOME/lib:/lib64:/usr/lib64:/usr/local/lib64:/lib:/usr/lib:/usr/local/lib export PGHOST=127.0.0.1 export PGDATABASE=postgres export PGUSER=postgres export PATH=$PATH:$HOME/.local/bin:$HOME/bin:$PGHOME/bin执行source .bash_profile
这样我们采用psql就可以登陆
postgres@allsql03->psql psql (11.7) Type "help" for help. postgres=#配置pg_hba.conf
postgres@allsql03->egrep -v "^#|^$" pg_hba.conf local all all trust host all all 127.0.0.1/32 trust host all all 0.0.0.0/0 md5 host all all ::1/128 trust local replication all trust host replication all 127.0.0.1/32 trust host replication all ::1/128 trustzabbix-client部署
zabbix-client 事先需要安装zabbix-release-4.0-2.el7.noarch.rpm wget https://repo.zabbix.com/zabbix/4.0/rhel/7/x86_64/zabbix-release-4.0-2.el7.noarch.rpm rpm -ivh zabbix-release-4.0-2.el7.noarch.rpm yum -y install zabbix-agent编辑agent配置文件
vim /etc/zabbix/zabbix_agentd.conf Server=10.10.10.203 ServerActive=10.10.10.203 Hostname=10.10.10.13查看配置文件
[root@allsql03 ~]# egrep -v "^$|^#" /etc/zabbix/zabbix_agentd.conf PidFile=/var/run/zabbix/zabbix_agentd.pid LogFile=/var/log/zabbix/zabbix_agentd.log LogFileSize=0 Server=10.10.10.203 ServerActive=10.10.10.203 Hostname=10.10.10.13 Include=/etc/zabbix/zabbix_agentd.d/*.conf LoadModulePath=/usr/lib64/zabbix/modules #这个后边需要配置,这里只是先打印出来 LoadModule=libzbxpgsql.so #这个后边需要配置,这里只是先打印出来zabbix agent开机自启动,并现在启动
systemctl enable zabbix-agent.service systemctl restart zabbix-agent.service安装依赖
yum -y install postgresql-libs yum -y install libconfig安装
wget http://cdn.cavaliercoder.com/libzbxpgsql/yum/zabbix32/rhel/7/x86_64/libzbxpgsql-1.1.0-1.el7.x86_64.rpm rpm -ivh libzbxpgsql-1.1.0-1.el7.x86_64.rpm配置zabbix_agentd.conf,加入module信息
find / -name libzbxpgsql.so /usr/lib64/zabbix/modules/libzbxpgsql.so vim /etc/zabbix/zabbix_agentd.conf LoadModulePath=/usr/lib64/zabbix/modules LoadModule= libzbxpgsql.so查看配置文件
注意Server和ServerActive配置配置不正确,可能会导致出现nodata
[root@allsql03 ~]# egrep -v "^$|^#" /etc/zabbix/zabbix_agentd.conf PidFile=/var/run/zabbix/zabbix_agentd.pid LogFile=/var/log/zabbix/zabbix_agentd.log LogFileSize=0 Server=10.10.10.203 ServerActive=10.10.10.203 Hostname=10.10.10.13 Include=/etc/zabbix/zabbix_agentd.d/*.conf LoadModulePath=/usr/lib64/zabbix/modules LoadModule=libzbxpgsql.so查看zabbix agent插件是否生效
zabbix_agentd -t pg.modver systemctl restart zabbix-agent.service创建监控用户
create user zabbix superuser; alter user zabbix with password 'zabbix';下载模板到本地计算机
git clone https://github.com/cavaliercoder/libzbxpgsql.git 或者登陆到这里面下载 https://github.com/cavaliercoder/libzbxpgsql/tree/master/ 找到里边的 templates/Template_PostgreSQL_Server_3.0.xml导入模板
打开网页端的zabbix管理平台。 打开zabbix web 管理平台-〉Configuraction-〉Templates-〉Import 导入上一步找到的文件,templates/Template_PostgreSQL_Server_3.0.xml配置模板
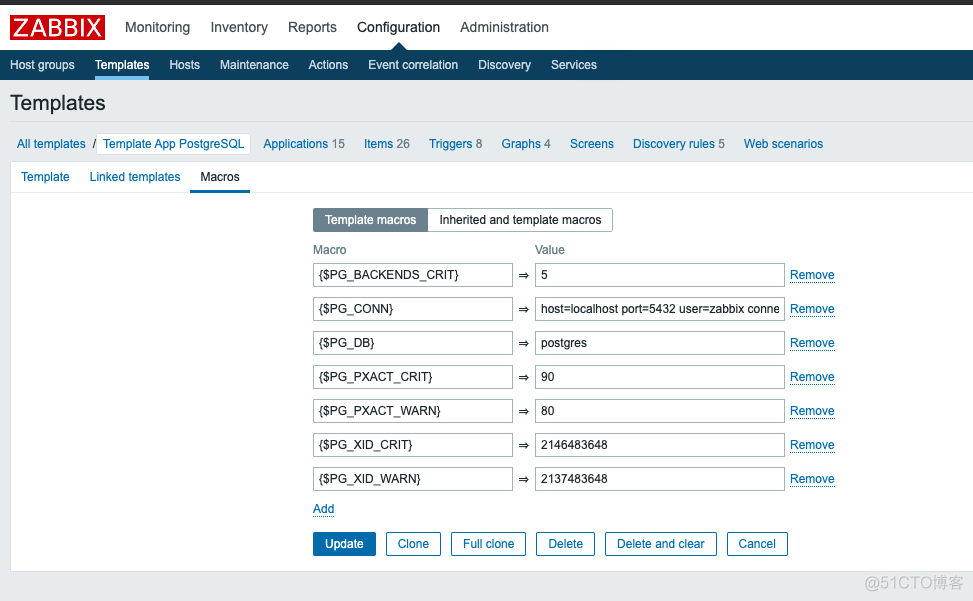
打开网页端的zabbix管理平台。 打开zabbix web 管理平台-〉Configuraction-〉Templates-〉Template App PostgreSQL-〉Macros -> PG_CONN 中的值填写 host=localhost port=5432 user=zabbix connect_timeout=10 connect_timeout 有可能因为延迟导致出现为定义item的情况,可以依据实际情况增加。 修改完成之后 Update
向主机中加入模板
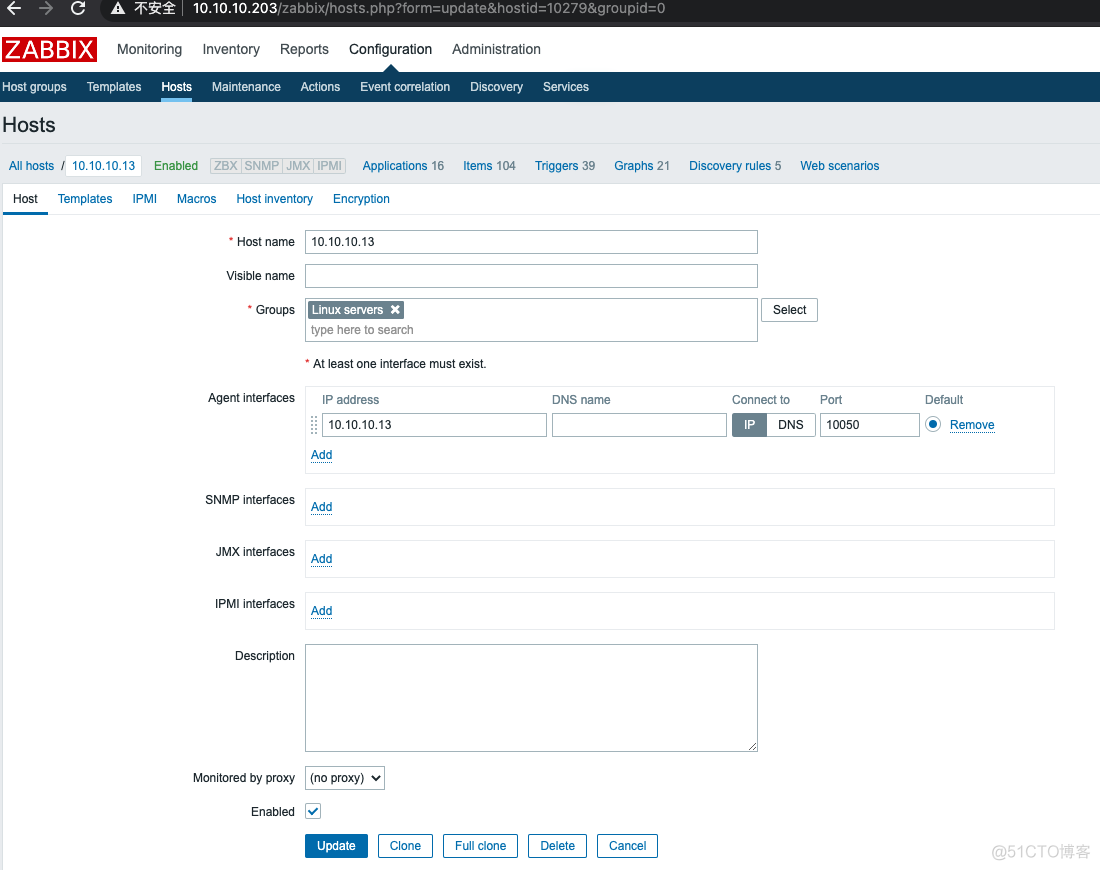
host -> 选择主机 -> templates -> add -> Template App PostgreSQL -> 修改完成之后 Update

在dashboard中查看
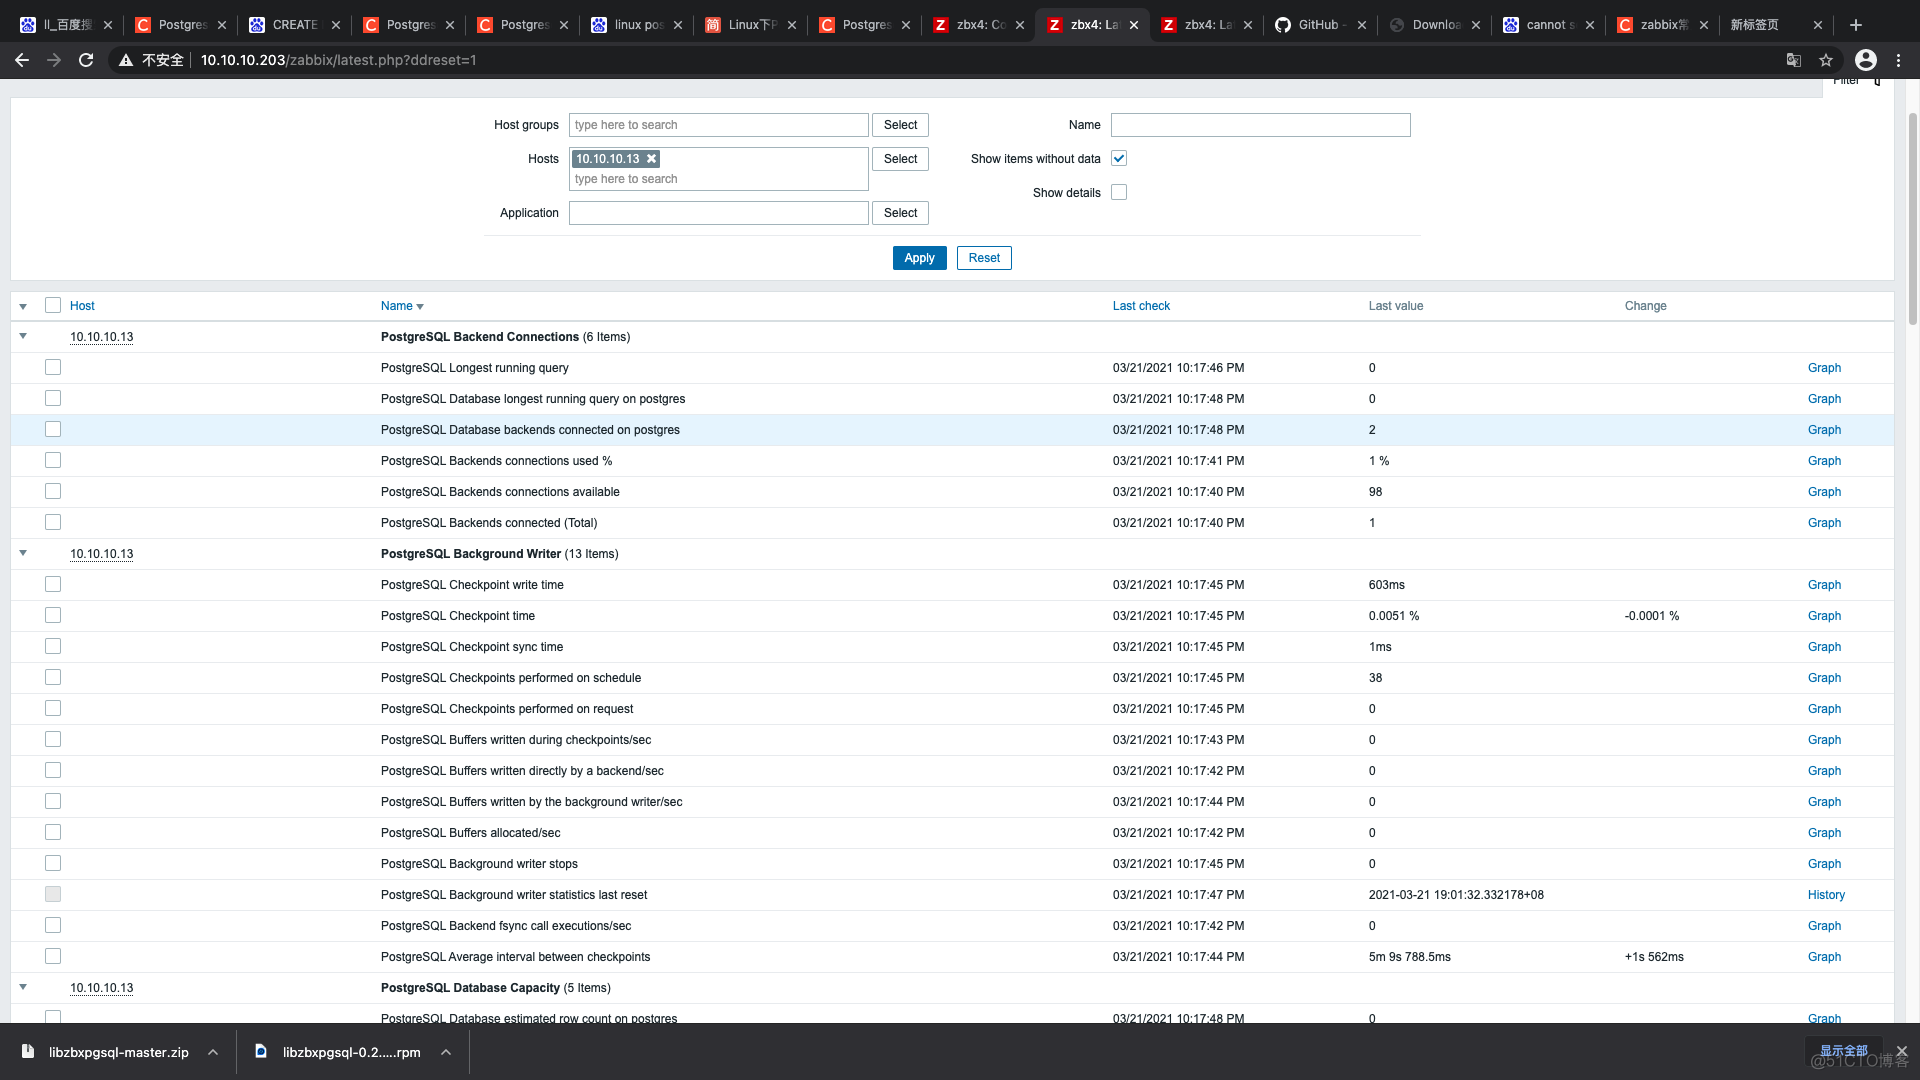
Monitor -> Lastest data -> 选择主机 -> 选择监控项查看
点开监控项,如果有数据说明成功。

查看zabbix的lastest监控页面

