一、规划 对外VIP:10.10.10.10对内VIP:192.168.10.10LVS_MASTER:10.10.10.28(eth0)192.168.10.128(eth1)LVS_BACKUP:10.10.10.29(eth0)192.168.10.129(eth1)WEB1:192.168.10.130WEB2:192.168.10.131 二、释义 LVS 是 Linux Virtual Server 的简写
一、规划
对外VIP:10.10.10.10 对内VIP:192.168.10.10 LVS_MASTER:10.10.10.28(eth0) 192.168.10.128(eth1) LVS_BACKUP:10.10.10.29(eth0) 192.168.10.129(eth1) WEB1:192.168.10.130 WEB2:192.168.10.131
二、释义
LVS是Linux Virtual Server的简写,意即Linux虚拟服务器,是一个虚拟的服务器集群系统。
三、安装
①安装
# yum install ipvsadm # yum install -y gcc openssl openssl-devel # wget http://www.keepalived.org/software/keepalived-1.2.19.tar.gz # tar -zxvf keepalived-1.2.19.tar.gz # cd keepalived-1.2.19 # ./configure --sysconf=/etc --prefix=/usr/local/keepalived # make # make install②开启路由转发
# cat /proc/sys/net/ipv4/ip_forward # echo 1 > /proc/sys/net/ipv4/ip_forward四、配置
①配置keepalived
# vi /etc/keepalived/keepalived.conf ! Configuration File for keepalived global_defs { notification_email { root@localhost abc@163.com ##设置邮件报警地址 } notification_email_from zhi@zhi.com smtp_server 127.0.0.1 smtp_connect_timeout 3 router_id LVS_DEVEL } vrrp_instance VI_1 { ##配置vrrp实例1 state MASTER ##BACKUP修改为BACKUP interface eth0 virtual_router_id 51 priority 101 ##BACKUP修改为100或更小 advert_int 1 garp_master_delay 5 authentication { auth_type PASS auth_pass 1111 } virtual_ipaddress { 10.10.10.10 } } vrrp_instance VI_2 { ##配置vrrp实例2 state MASTER ##BACKUP修改为BACKUP interface eth1 virtual_router_id 52 priority 101 ##BACKUP修改为100或更小 advert_int 1 garp_master_delay 5 authentication { auth_type PASS auth_pass 1111 } virtual_ipaddress { 192.168.10.10 } virtual_server 10.10.10.10 80 { delay_loop 6 lb_algo rr lb_kind NAT nat_mask 255.255.255.0 persistence_timeout 5 protocol TCP real_server 192.168.10.130 80 { weight 1 HTTP_GET { url { path / status_code 200 } connect_timeout 3 nb_get_retry 3 delay_before_retry 3 } } real_server 192.168.10.131 80 { weight 1 HTTP_GET { url { path / status_code 200 } connect_timeout 3 nb_get_retry 3 delay_before_retry 3 } } }②配置real_server,即后端WEB服务器
安装参见http://wangzhijian.blog.51cto.com/6427016/1697418下的编译安装Nginx,或者直接yum安装Nginx、Apache。
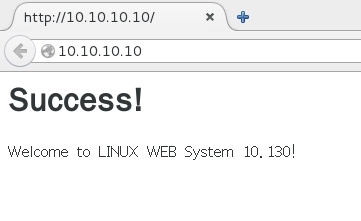
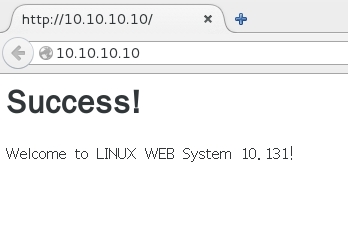
# vi /usr/html/index.html <h1>Success!</h1> <p>Welcome to LINUX WEB System 10.130!</p> ##在两台web服务器上加个简单网页
五、测试


浏览器输入10.10.10.10访问

默认访问的是192.168.10.130,我们将10.130的web服务断掉,看看会不会切换
10.130:
# nginx -s stop


10.130:
# nginx

节点恢复,已添加至系统中了。
