环境:Centos6.4 x86_64
所需应用程序:APR(http://apr.apache.org/)、APR-UTIL(http://apr.apache.org/)、 httpd(http://httpd.apache.org/)
在linux中软件安装有两大类,一类是软件包安装,一类是源代码安装。软件包安装就是指将编译好的二进制封装成rpm包,可以直接使用rpm工具和yum工具安装。源代码安装是指没有编译成二进制,需要通过手动编译的。使用源代码安装的原因有两个,一个就是想使用最新版的软件,另一类就是想自定义其功能的。
源代码安装的步骤:
1、展开压缩文件一般把文件都解压缩到/uer/local/src中
2、在解压缩文件目录中使用 ./configure 选项来检测编译环境,产生makefiel文件
3、使用make 进行编译
4、make install 安装
下面就介绍如何在centos中通过源代码安装httpd以及测试。
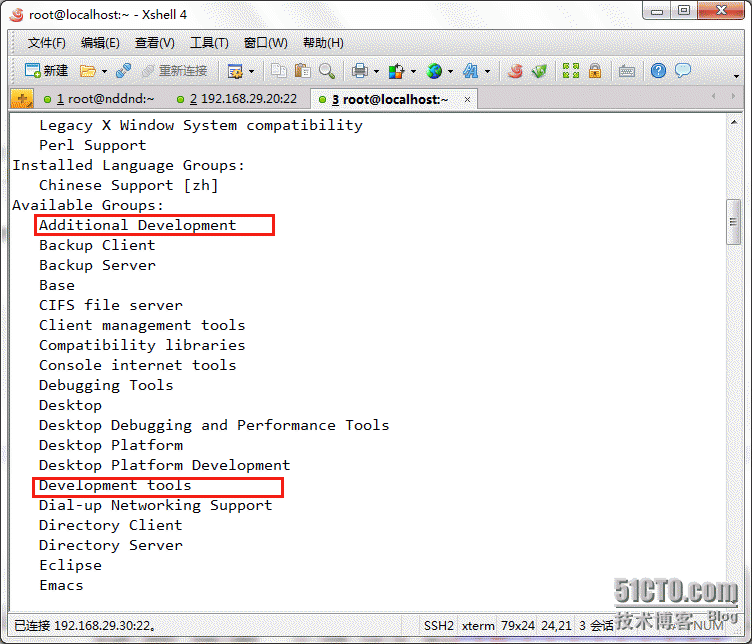
用源代码安装软件首先要在系统中安装相应的编译环境;在RedHat中搭建编译环境需要的工具有DevelopmentLibraries、Development Tools、Legacy Software Development、X Software Development,这些开发环境在RehdHat是不可缺少的。在centos中需要的开发工具主要有两个,AdditionalDevelopment、Development tools。所以在进行源代码安装时需要搭建编译环境。
那么首先我们要挂载我们的光盘,通过光盘查找我们要安装的软件包组,挂载光盘的命令是:mount /dev/cdrom /media/cdrom 光盘挂载成功后我们可以通过 yum --disablerepo=\* --enablerepo=c6-media grouplist 查询我们所需要的软件包组。通过查询我们发现如图中圈出来的必须的两个开发软件包组。那么就来安装这两个软件包组吧,使用命令 yum –disablerepo=\* --enablerepo=c6-media groupinstall “AdditionalDevelopment” “Development tools”
安装完成后,接下来就进行httpd的安装,在安装httpd前需要先安装apr和apr-util
在这里我们用apr-1.4.6.tar.gz、apr-util-1.5.1.tar.gz和httpd-2.4.4.tar.bz2为例;首先把这些压缩文件解压缩到/usr/local/src目录中,使用命令


对三个压缩文件解压缩
解压缩完成后进入/usr/local/src目录中就能发现我们刚刚解压缩的三个文件所形成的目录

先来安装apr,那么要先进入/usr/local/src/apr-1.4.6目录中

可以看到一个configure文件这个文件就是我们用来配置选项,检测编译环境。还有一个README或者是INSTALL这个文件是告诉我们一些使用的方法。现在我们就来执行configure,在执行时加入--prefix来指定安装目录,使用方法就是在该解压缩目录中输入./configure –prefix=/usr/local/apr(这个目录是自己指定的,如果以后想要卸载该软件可以直接删除该目录即可,默认是安装在/desired/path/of/apr中,如果使用默认的安装路径想要卸载那就比较麻烦了)在这个过程中如果没有提示错误那就说明可以进行下一步了。
然后就使用make来进行编译了

make是一个比较漫长的过程,耐心等待就是

到了这里就说明编译完成,接下来就使用make install进行安装了

完成后我们到/usr/local/目录中看看
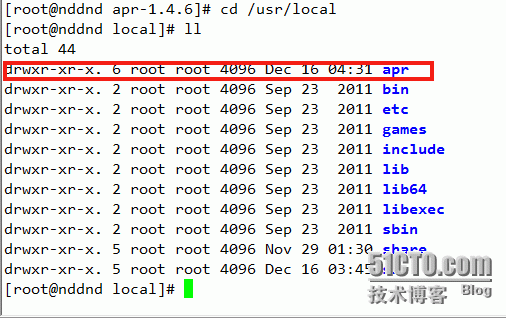
我们已经看到我们刚刚安装的apr了,再进到apr目录中看看

我们可以看一些bin目录,include目录还有lib目录
如果我们想让其他的软件使用apr的库,我们就需要在/etc/ld.so.conf.d/目录中创建一个.conf文件来指明它的库路径,那我们就来创建一个文件

创建完成后我们在该文件中写出路径

然后用ldconfig命令刷新缓存;

可以看到已经加载上了
如果想让程序调用apr的头文件,那我们就在/usr/include中创建一个链接指向/usr/local/apr/include/apr-1
切换到/usr/include目录下
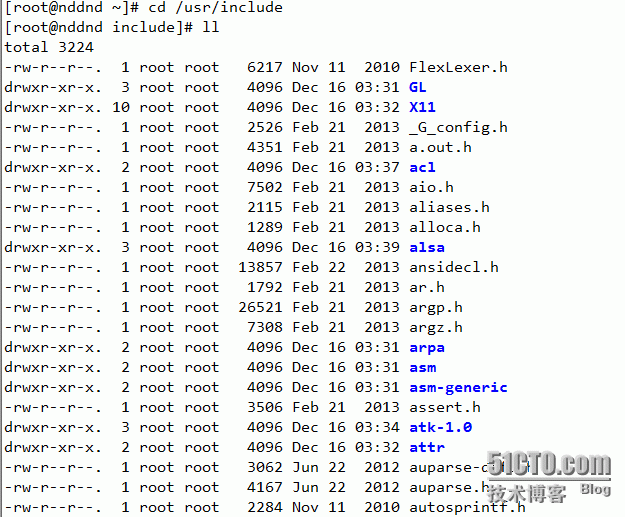
在该目录下可以看到很多头文件
然后创建链接

通过查询我们可以看到刚刚创建的链接

好了,到此apr就已经安装完成,接下来该安装apr-util
首先切换到/usr/local/src/apr-util-1.5.1目录中
同样在该目录中也看到有 configure、README文件

接下来就和前面apr的方法一样,执行 ./configure --prefix=/usr/local/apr-util当然这样是不行的,这样是会提示错误的,我们需要指出apr-config的全路径,apr-config的路径是在/usr/local/apr/bin目录下,所以应该写成./configure --prefix=/usr/local/apr-util --with-apr=/usr/local/apr/bin/apr-config

通过检测后,执行make ;

接下来进行安装

安装完成后,想前面的apr一样,指定库文件路径


同样刷新缓存

接下来指明头文件


创建成功,最后来安装 httpd
切换到/usr/local/src/httpd-2.4.4

通过查看可以看到有 configure INSTALL README,接下来就来执行./configure--prefix=/usr/local/httpd 当然这样肯定还是不行,这里需要指出apr-config的全路径和apu-config的全路径,那就应该写成./configure--prefix=/usr/local/apache --with-apr=/usr/local/apr/bin/apr-config --with-apr-util=/usr/local/apr-util/bin/apu-config

执行后如果我们看到这个错误

这是一个关于prce-config的错误;那就要排除错误,首先看看系统中有没有安装和prce相关的软件

这里安装了pcre-7.8-6.el6.x86_64,那就要看看这个软件里有没有关于pcre-config相关的文件

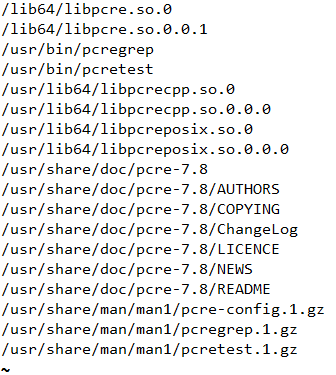
发现这里面没有关于pcre-config的文件,那就要安装pecr-devel

安装完成后,在安装httpd这样就顺利通过检测然后执行make

make完成后执行makeinstall

然后指明头文件

在/usr/local/apache/bin目录中都是一些可执行的文件,如果想要执行每次都要切换到该目录下,这样是很麻烦的。如果想要直接执行就要修改环境变量/etc/profile

在第55中指明了在系统中PATH搜索路径,我们就在这里指明现在的搜索路径

这样就可以了,使用 . /etc/profile 重新读取,再用echo输出PATH的值看看有没有加载上

从图中看到已经加载上了
然后还要指出httpd的man手册的位置,编辑/etc/man.config
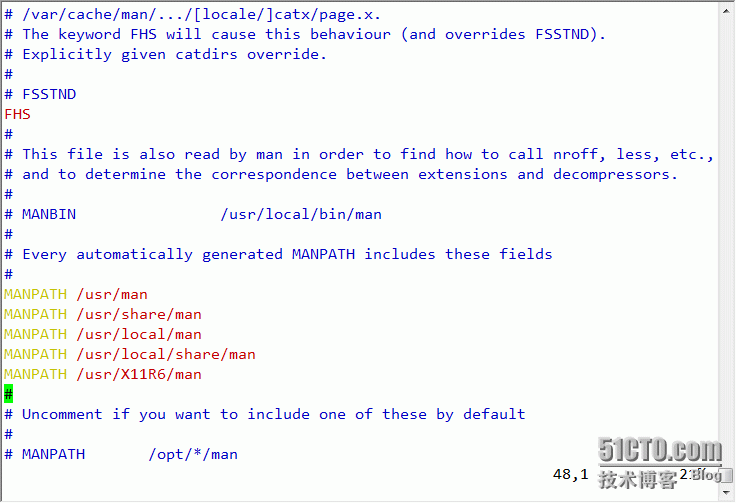
在里面添加MANPATH /usr/local/apache/man 即可。
到这里httpd已经安装完成了
接下来就该编写shell脚本,来控制httpd的启动和停止
脚本存放在/etc/init.d里面,那我们就在里面创建一个httpd的控制脚本来控制httpd服务的启动。
脚本的代码:
#!/bin/bash
[ -e /etc/init.d/functions] && . /etc/init.d/functions
prog=/usr/local/apache/bin/httpd
lockfile=/var/lock/subsys/httpd
start(){
if [ -e $lockfile ];then
echo "httpd server isstarted"
else echo -n "httpd server isstarting... "
sleep 1
$prog &>/dev/null && echo "[ ok ]" && touch $lockfile||echo "[ failer ]"
fi
}
stop(){
if [ ! -e $lockfile ];then
echo "httpd server is stoped"
else echo -n "httpd server isstoping... "
sleep 1
killproc httpd && echo "[ok ]" && rm -rf $lockfile ||echo "[ failer ]"
fi
}
status(){
if [ -e $lockfile ];then
echo "httpd server isstarted"
else echo "httpd server nofound"
fi
}
case $1 in
start)
start
;;
stop)
stop
;;
restart)
stop
start
;;
status)
status
;;
*)
echo"USAGE:start|stop|restart|status"
;;
esac
启动服务:

通过查看80端口发现httpd已经启动

由此可见我们的httpd通过源代码安装成功,并且测试没有出现错误。
